Scan Receipts into QuickBooks - How to Guide
How to Scan Receipts into QuickBooks Online
If you manage books for a business, receipts are always the same story. Someone hands you a stack at month-end. Another person forwards PDFs from email. A few more come in as blurry phone photos. Then you spend hours typing vendor names, dates, amounts, and guessing the right expense category.
QuickBooks Online can store receipt images, but the real pain is still the same: getting clean, reviewable expense data into QuickBooks without manual entry.
SaasAnt Transactions makes this a lot simpler. You upload receipt files (PDF, JPG, PNG), SaasAnt reads them, pulls the key details, lets you review and edit, then creates the transaction in QuickBooks Online as an Expense, Check, or Bill. You stay in control, but you stop doing the typing.
When this workflow helps most
This is a strong fit when:
Your client sends receipts as PDFs or photos and expects you to “just post it in QuickBooks.”
You have a pile of small expenses like meals, fuel, supplies, shipping, subscriptions.
You need line-level details for a long receipt, not just one total.
You want to review everything before it hits QuickBooks.
You are doing catch-up work and need to process many receipts fast.
Before you start
Have these ready:
Receipt files in PDF, JPG, PNG
SaasAnt Transactions connected to the correct QuickBooks Online company
A basic idea of how you want to record receipts in QuickBooks: Expense vs Check vs Bill
Tip: If you usually enter vendor receipts as Bills (to track payables), choose Bill. If they are already paid and you just want to record the spend, choose Expense. If the receipt was paid by check and you want check-number tracking, choose Check.
Step-by-step: Scan receipts into QuickBooks Online using SaasAnt
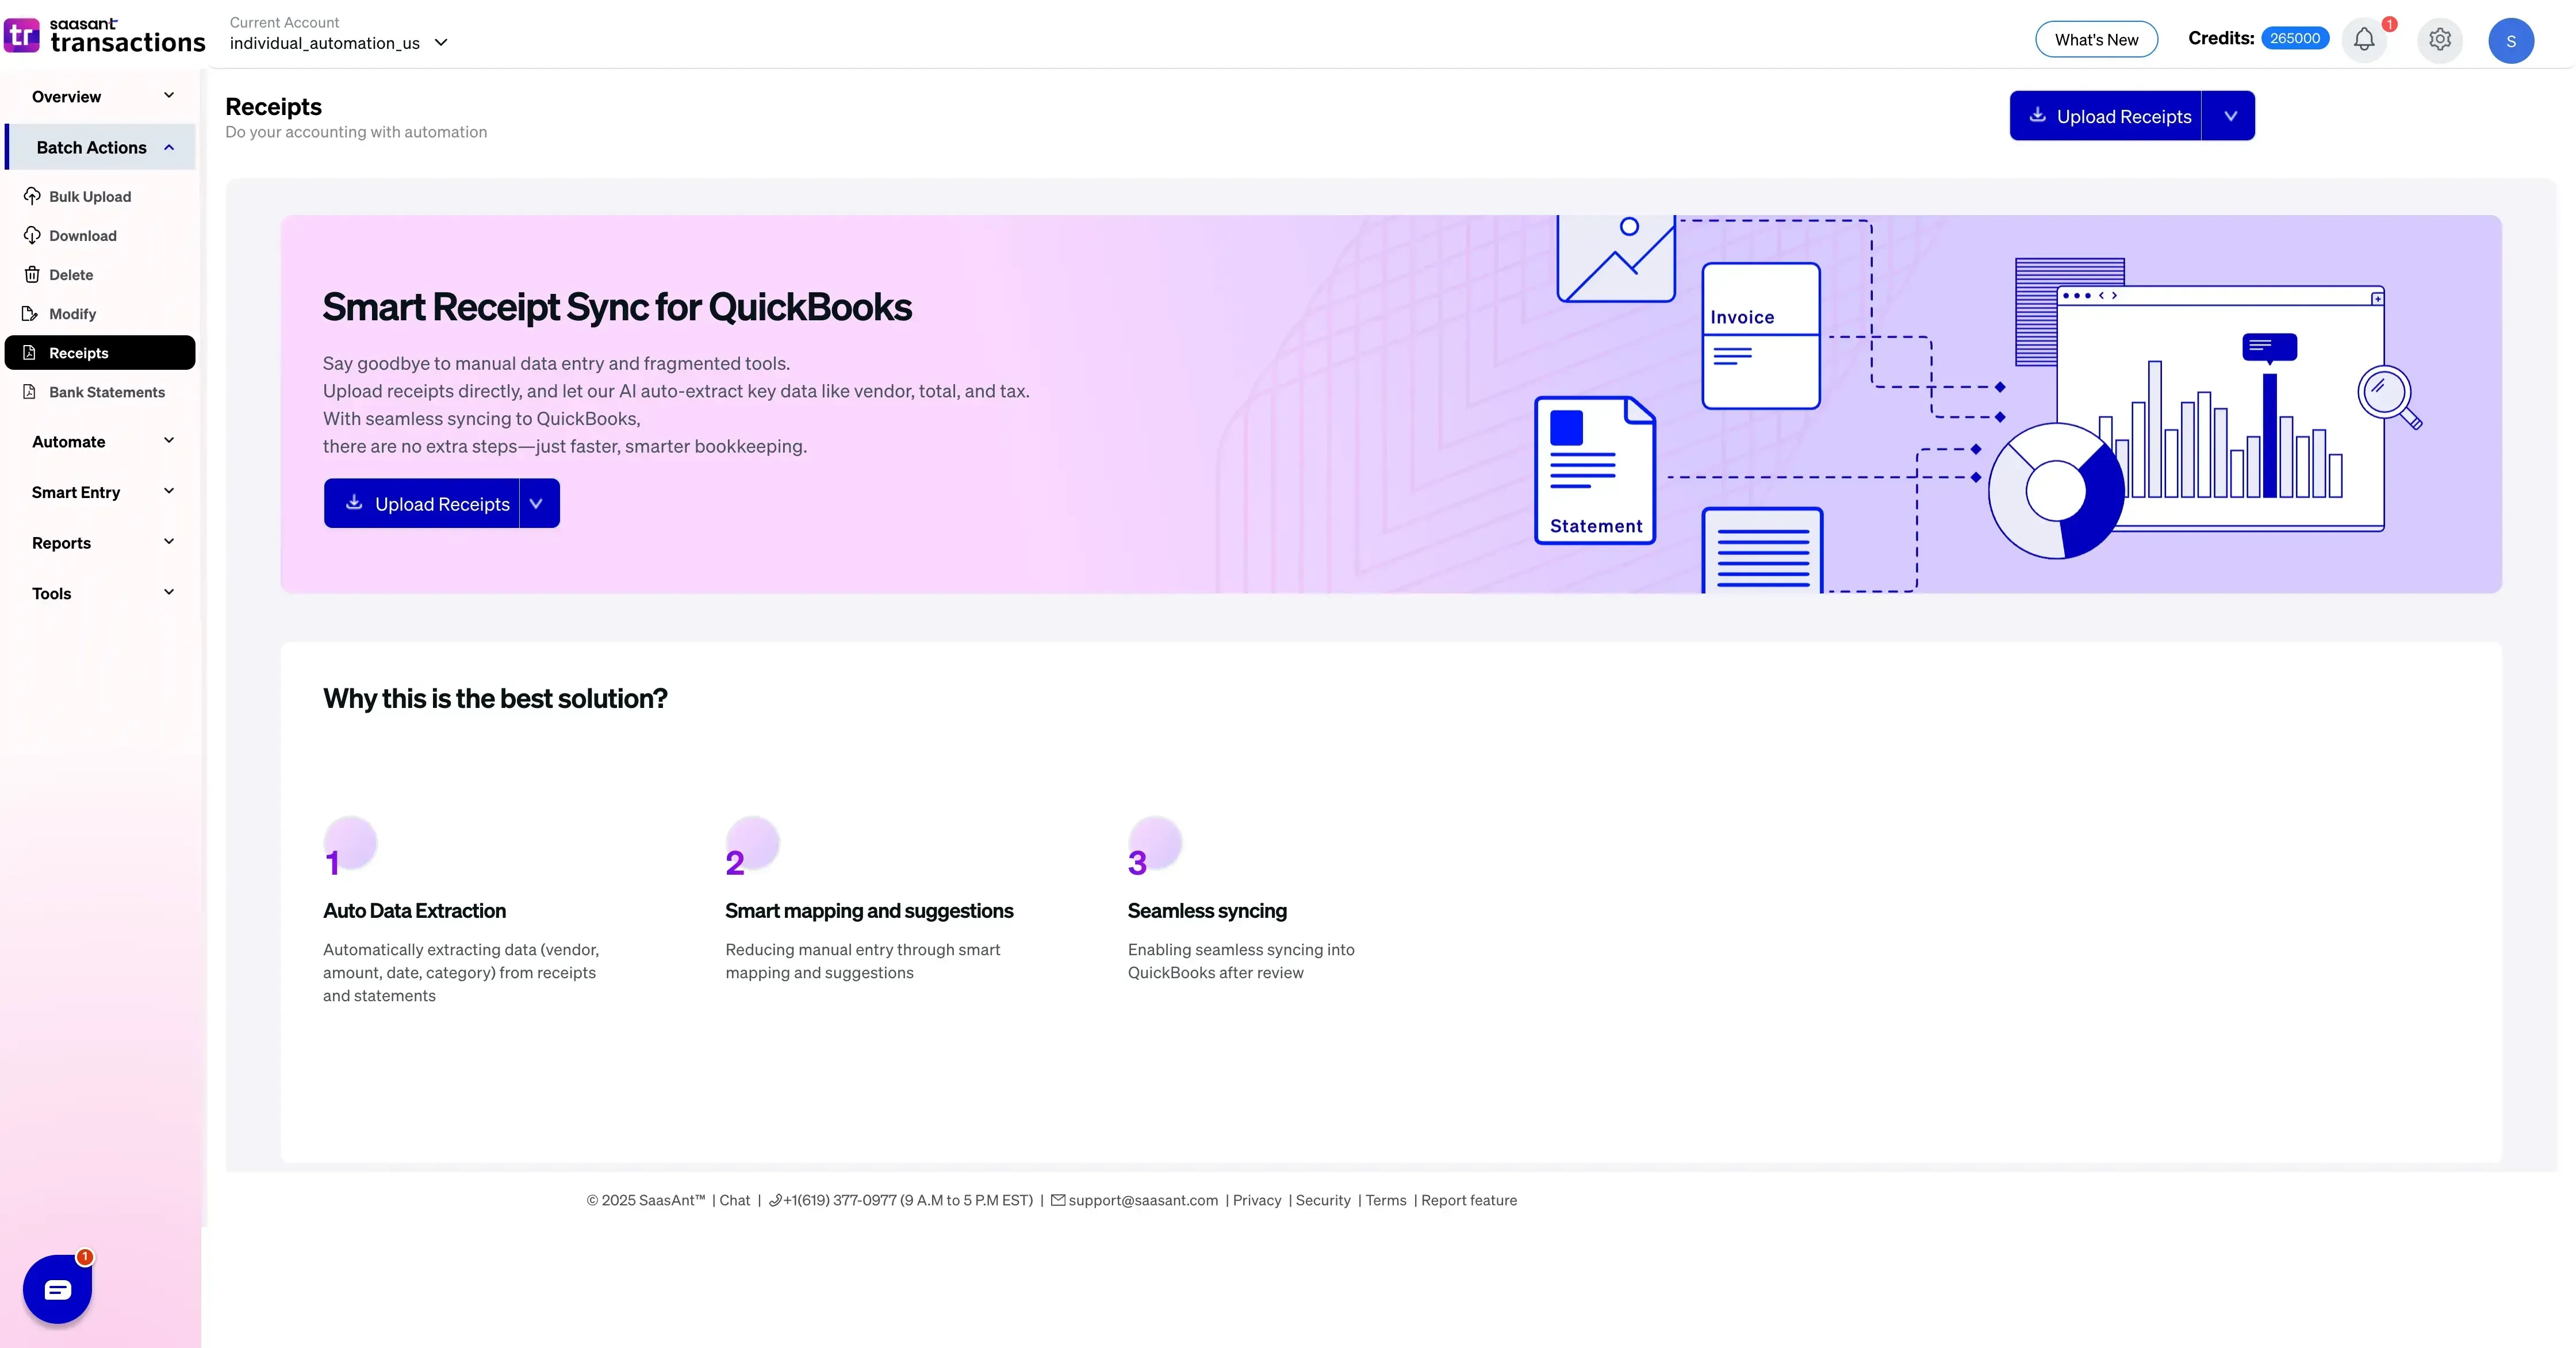
Step 1: Open Receipts in SaasAnt
In SaasAnt Transactions, go to Batch Actions and click Receipts. You will see the Receipts page with an Upload Receipts button.
Step 2: Upload receipt files (PDF or images)
Click Upload Receipts and select your files. You can upload one receipt or multiple receipts in a batch, depending on how you are processing the month.
Once uploaded, SaasAnt starts reading the files.
Step 3: Let SaasAnt extract the details
After upload, SaasAnt captures the key fields from the receipt, like:
Vendor name
Date
Total amount
Tax amount (when available)
Line items (when the receipt contains itemized lines)
In the receipt review screen, you will also see what SaasAnt is preparing to create in QuickBooks. For example, the file name appears at the top (like INV223.pdf), along with the selected transaction type (like Expense).
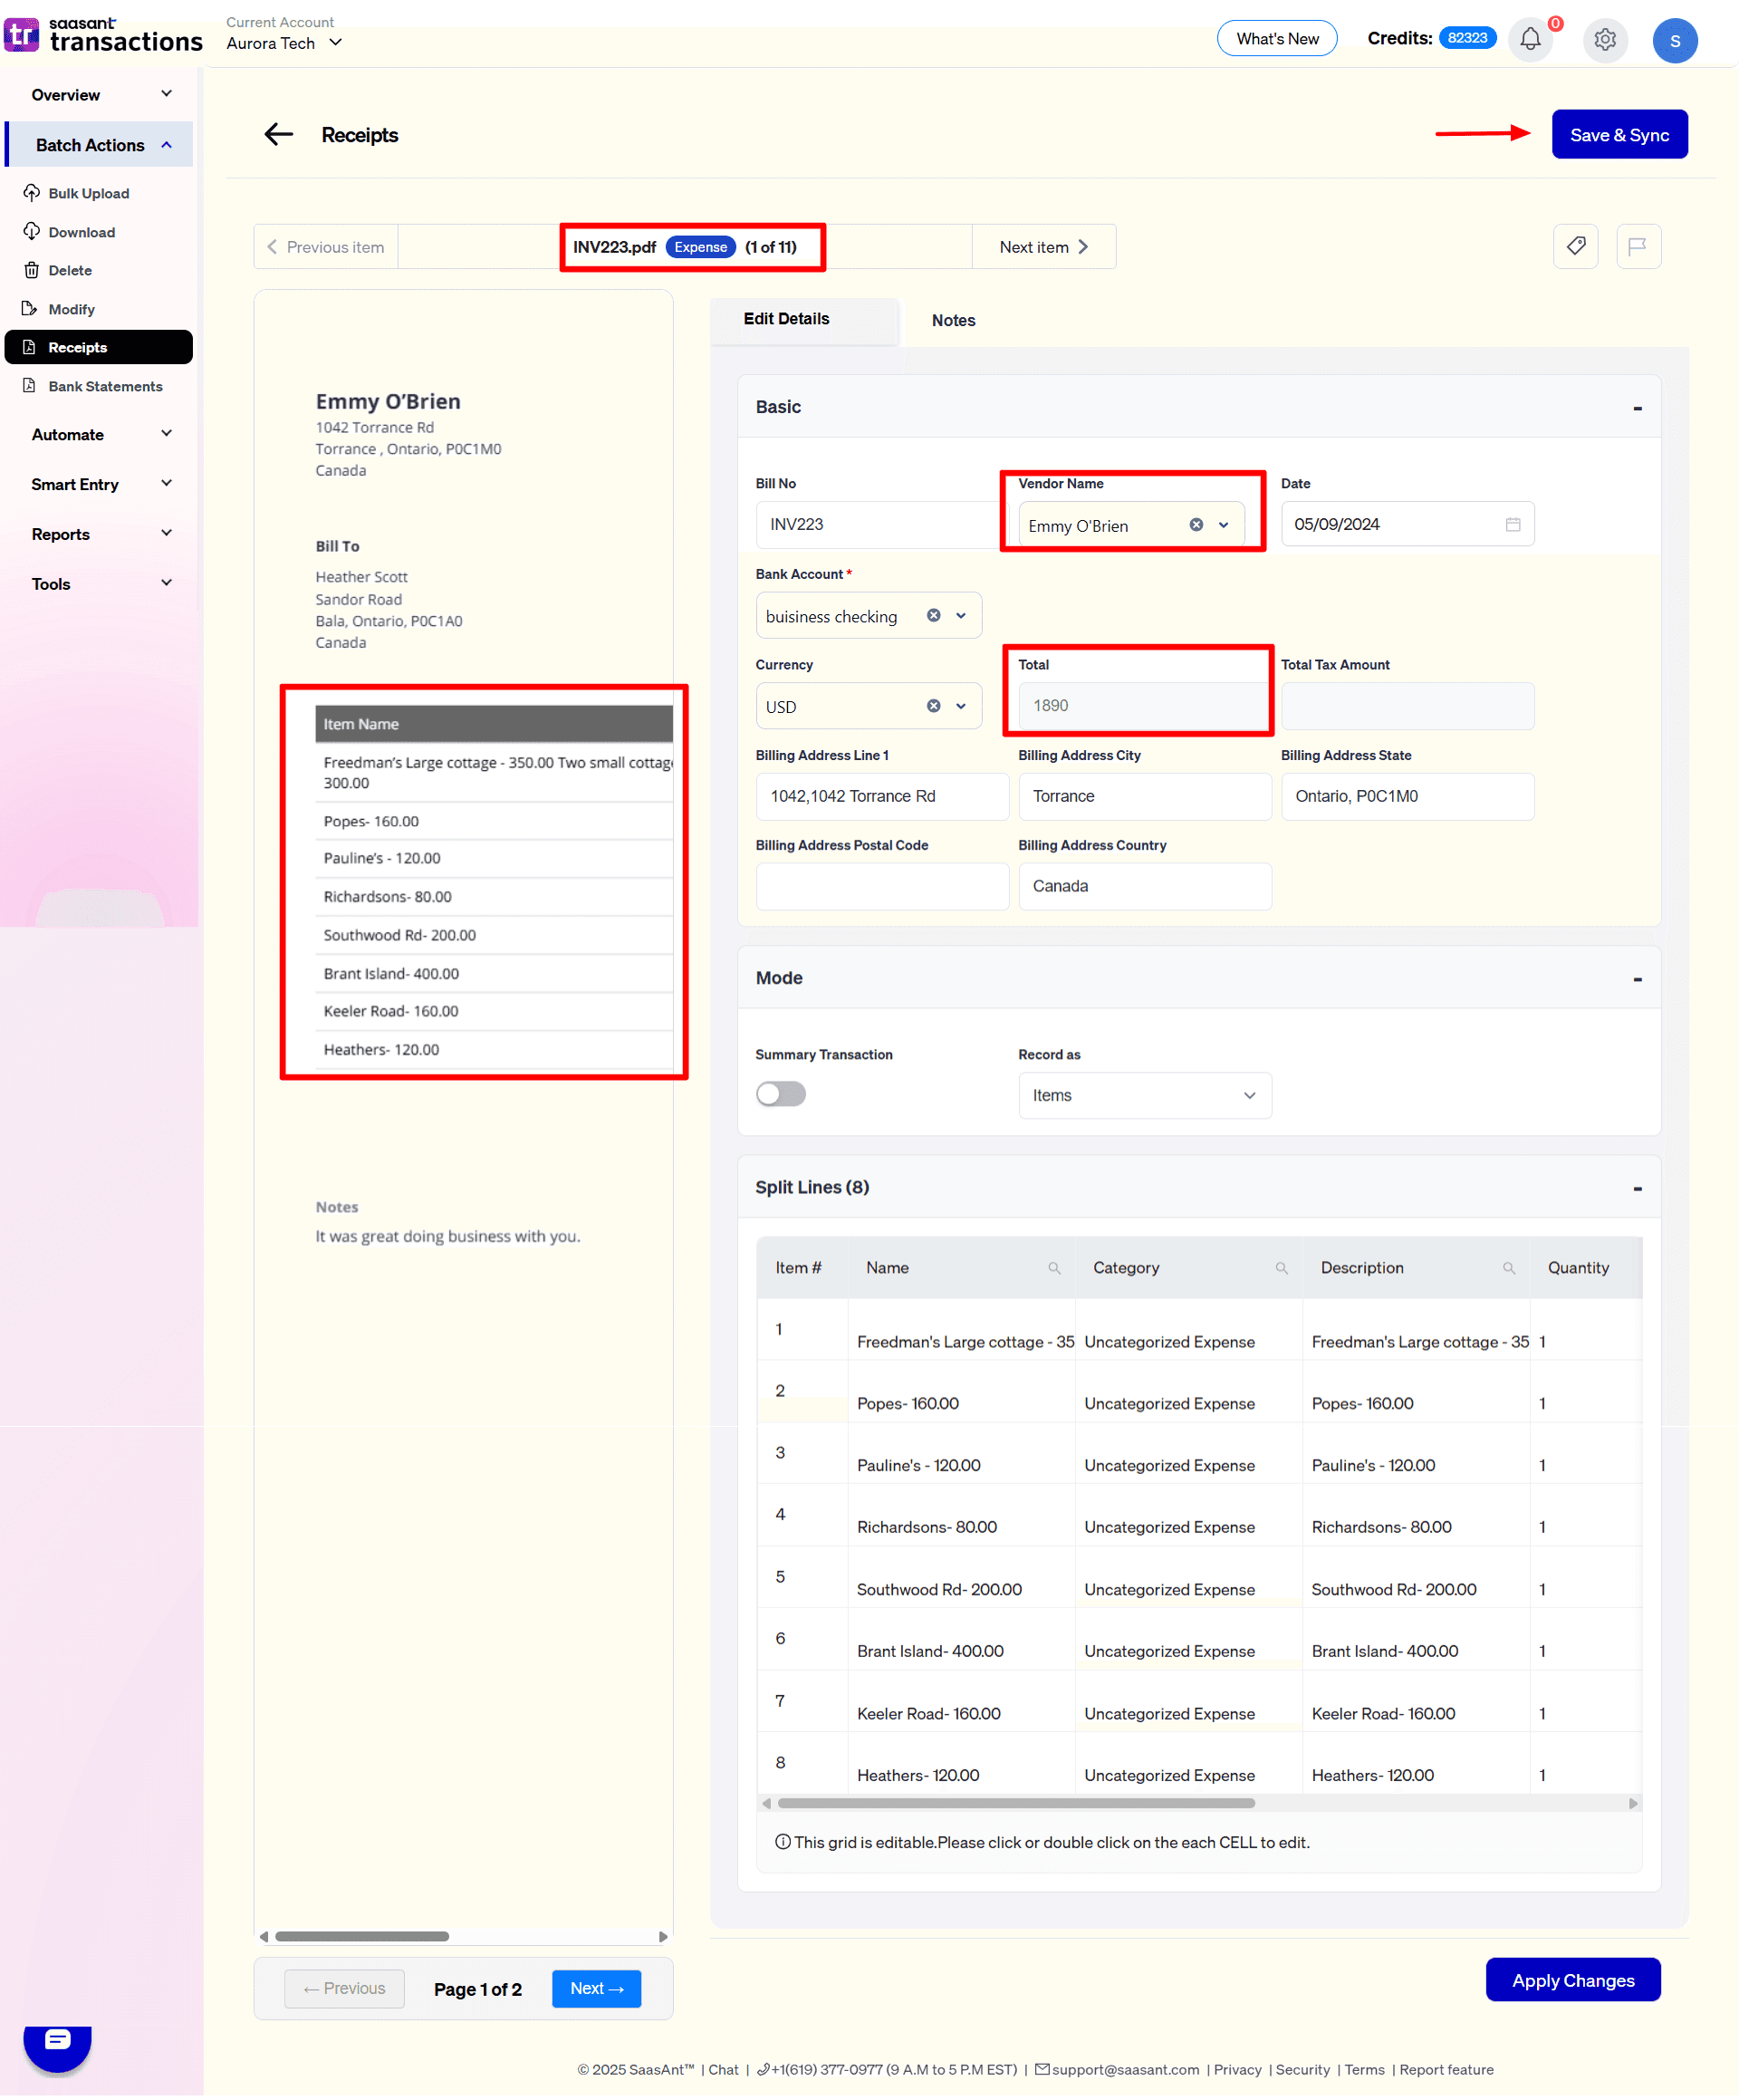
Step 4: Review the Basic details
Open the receipt and check the Basic section first. This is where you confirm the essentials before syncing:
Vendor Name
Date
Total
Bank Account
This step matters because the receipt text is not always perfect. A quick review here prevents messy payees and wrong dates in QuickBooks.
Step 5: Review and edit the split lines (if needed)
If the receipt has multiple lines, SaasAnt can list them in a grid so you can code them properly. This is useful for receipts like:
Retail stores where one receipt includes supplies + snacks + cleaning items
Restaurants where you want to separate meals and tips
Travel receipts with different categories on one receipt
You can adjust categories and descriptions line by line, instead of forcing everything into one expense category.
If you want a single summarized entry instead of line items, use the Summary Transaction option. That keeps the books clean when line-level detail is not required.
Step 6: Apply changes and Save and Sync
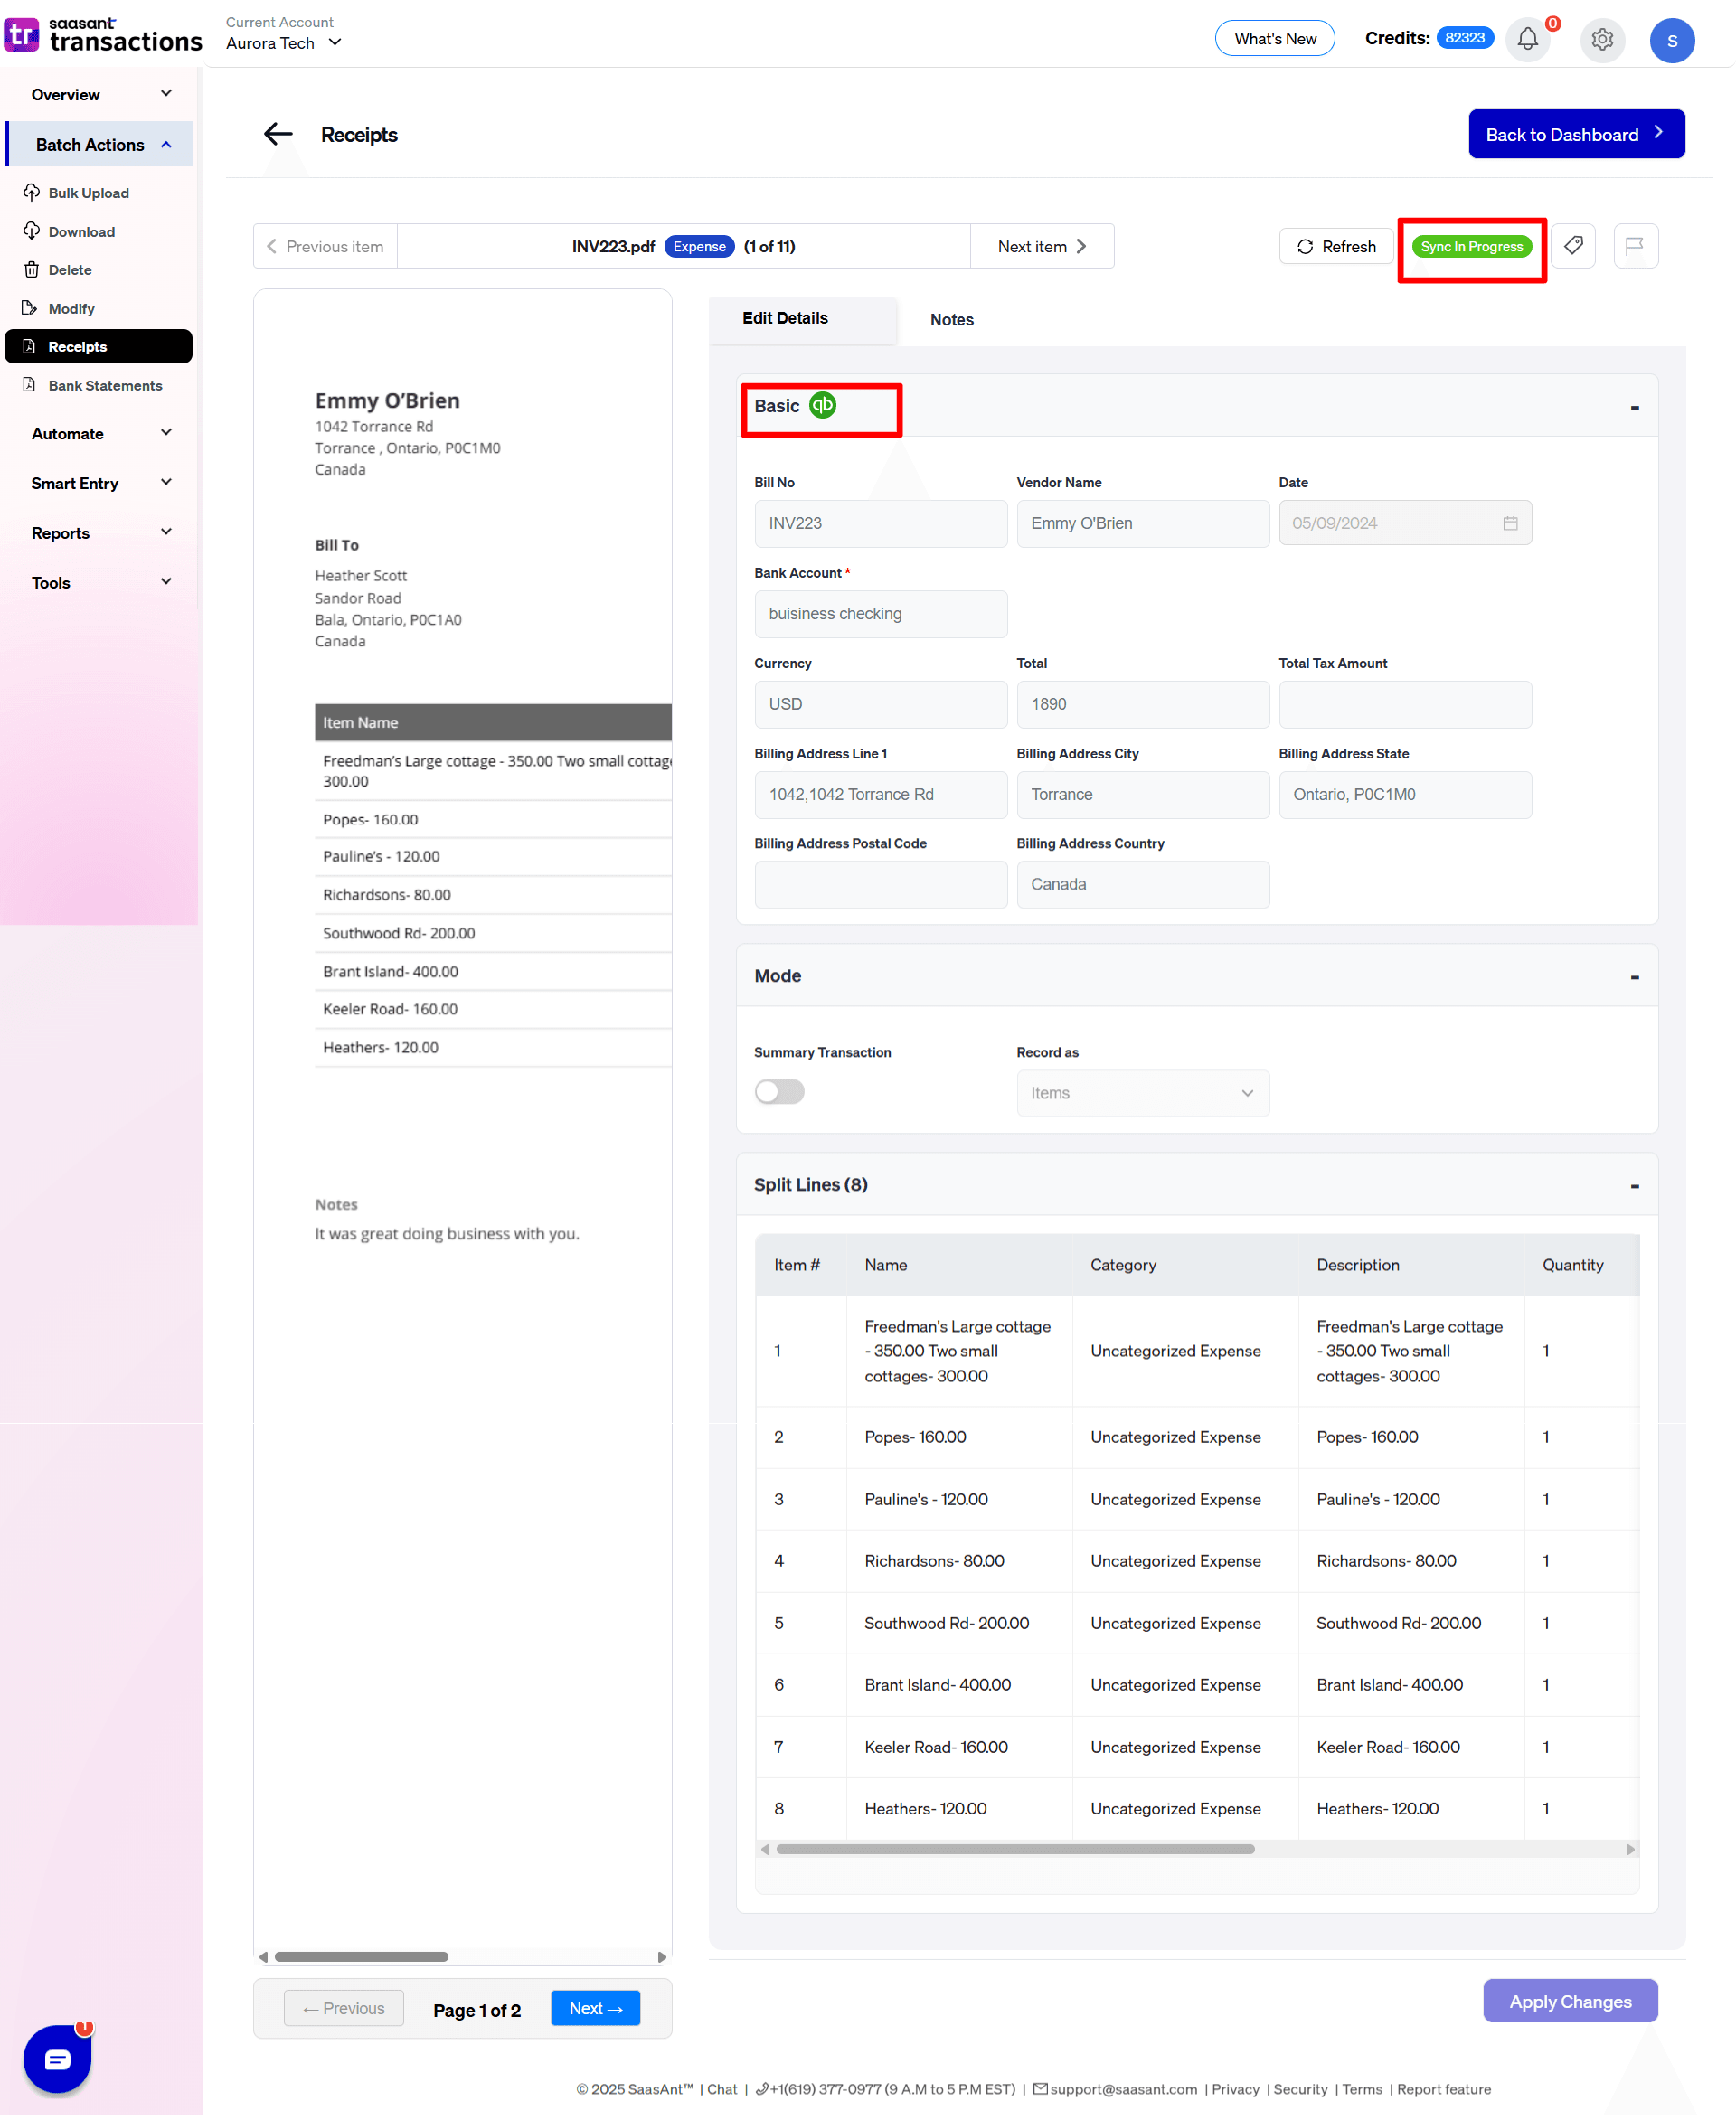
After review, click Apply Changes if you edited anything. Then click Save and Sync.
You will see a sync status indicator (like Sync in Progress) while SaasAnt sends the transaction to QuickBooks Online.
Step 7: Confirm it in QuickBooks Online
Once synced, the expense now exists as a real QuickBooks transaction. That means:
It shows up in your reports
It can be reconciled
It can be reviewed later like any other transaction
The receipt file stays tied to the transaction for backup
Why SaasAnt is useful for receipt entry in QuickBooks
You stop typing and start reviewing
Instead of manually entering vendor, date, and totals for every receipt, you review what the system extracted. That is a big time saver, especially for high-volume months.
Better accuracy on messy receipts
Receipts are rarely consistent. Some are cropped, some are faded, some have odd formatting. Even when extraction needs a quick fix, it is still faster and cleaner than starting from scratch.
Line items when you need them
Many receipt tools only capture totals. SaasAnt gives you a grid view for split lines so you can code properly when it matters.
QuickBooks-ready transactions, not just attachments
This is the key point. You are not uploading receipts “for storage.” You are creating real transactions in QuickBooks Online that support clean reports and easier reconciliation.
Common mistakes to avoid
Uploading a month that is already fully posted via bank feeds, without checking duplicates.
Leaving vendor names as “Unknown” and fixing later. It piles up fast.
Posting everything as one expense category. Use split lines or at least review the account.
Skipping review and syncing immediately. Receipts are not always clean.
FAQs
Can I scan receipts into QuickBooks Online?
Yes. You can store receipt images in QuickBooks and in many cases use its built-in receipt capture. If your goal is to create complete, reviewable transactions from PDFs and images, SaasAnt is built for that workflow.
What file types can I upload?
Most common receipt formats work well, including PDF, JPG, and PNG.
Can SaasAnt create an Expense, Check, or Bill from a receipt?
Yes. Based on how you want to record the spend in QuickBooks, you can choose the transaction type and sync it after review.
Can I handle itemized receipts?
Yes. If the receipt includes multiple lines, you can review the split lines and code them before syncing.
Read also
How to Scan Receipts into QuickBooks Desktop
Scan Receipts OCR: What it means, how it works, and a simple flow for QuickBooks
Scan Invoices into QuickBooks Online
Scan OCR Receipts into QuickBooks