Refund Sales Receipts in QuickBooks Online
You might refund sales receipts in QuickBooks Online to a customer to maintain good business relationships or for error corrections. QuickBooks Online has two methods to refund a sales receipt in QuickBooks Online. The first applies when you have used QuickBooks Payments, the second is for instances where a different payment method was utilized.
There is also another way that is designed for those who prefer to import multiple refund receipts at once rather than manually entering each one individually. You can use SaasAnt Transactions, a QuickBooks add-on with 4.9 rating in the QuickBooks app store, and is CPA recommended.
This blog will walk you through all three methods. Let's get started.
How to Refund Sales Receipts in QuickBooks? Step by Step Instructions
Let us begin with the first method:
Step 1: If you processed a payment from your customer using QuickBooks Payments, navigate to the sale you recorded using the search icon in the top right corner.
Step 2: Select the sales receipt and then click on the link to the payment. At the bottom of the screen, you will find a "More" option; click on it and then select "Refund."
Now, let’s move on to the second method, which is applicable when QuickBooks Payments was not used:
Step 1: Go to the QuickBooks dashboard, click on the "+ New" button, and select "Refund Receipt."
Step 2: From the drop-down menu, select the customer's name. Choose the payment method and specify the account from which you wish to issue the refund. The refund receipt date will default to today’s date, but you may adjust it if necessary.
Step 3: Enter the service details, the amount, any applicable discount percentage, and attach any relevant documents if needed. Once you have completed these steps, you can either save and close or save and create a new entry.
How to refund sales receipts in QuickBooks Online in bulk?
Step 1: Connect with SaasAnt Transactions
Find SaasAnt Transactions in the QuickBooks App Store and connect it to your QuickBooks account. This certified, secure app keeps your data safe and well-managed. You can get started with a 30-day free trial immediately.
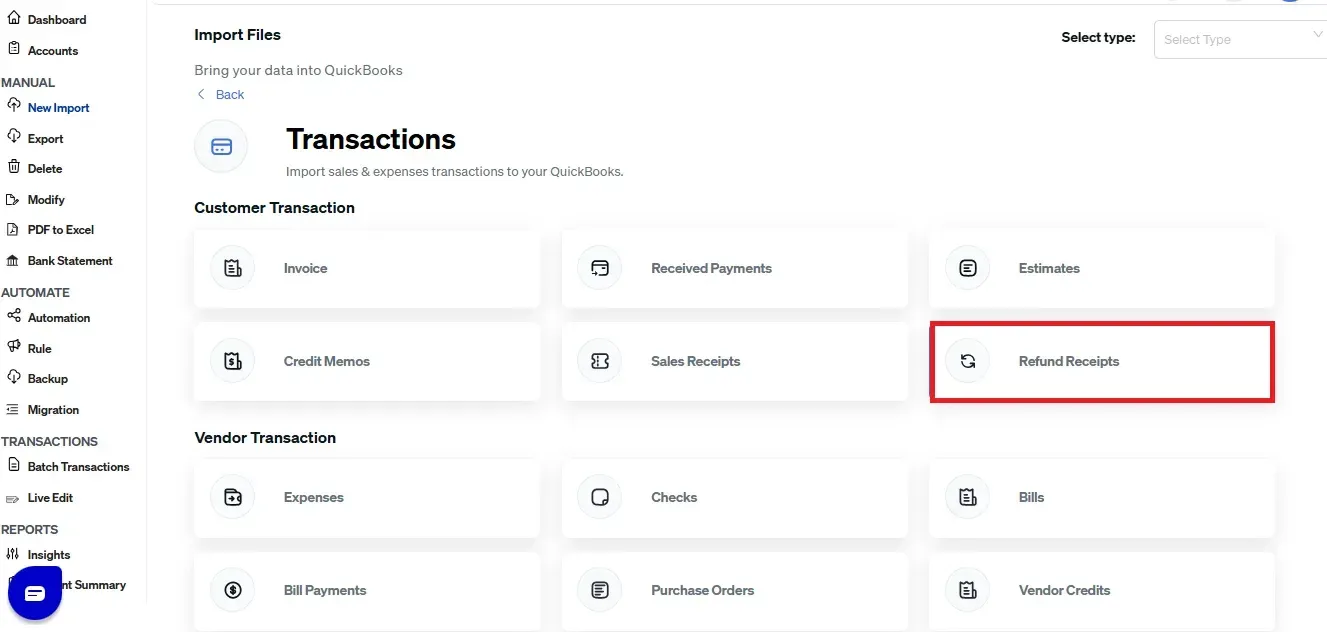
Step 2: Access the SaasAnt Transactions Dashboard
SaasAnt Transactions Dashboard -> “New Import” -> "Refund Receipts" under other transaction. This will direct you to the Upload Files page, where you can download the sample file template.
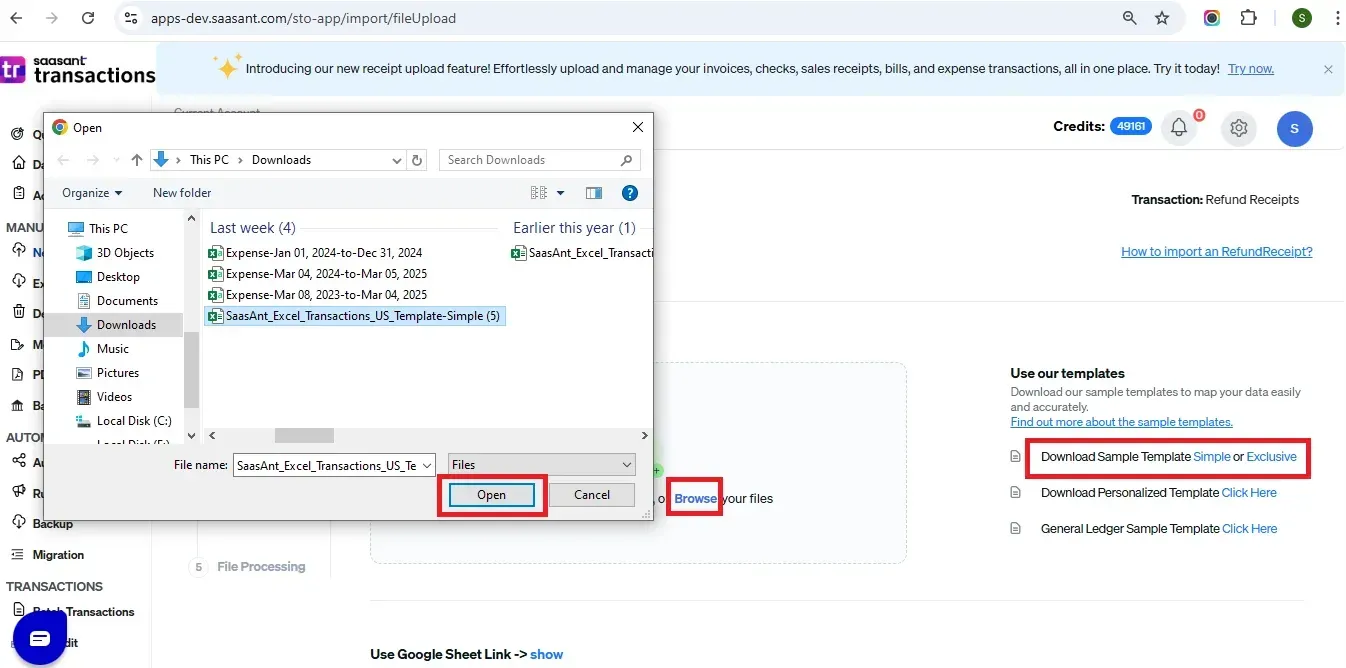
Step 3: Upload the File
Upload the trial balance file. You can upload any file format, such as XLS, XLSX, CSV, IIF or PDF. You can also enter the Google Sheet link.
Note: To make this step more manageable, you can download the SaasAnt Transactions template from the right side of the screen.
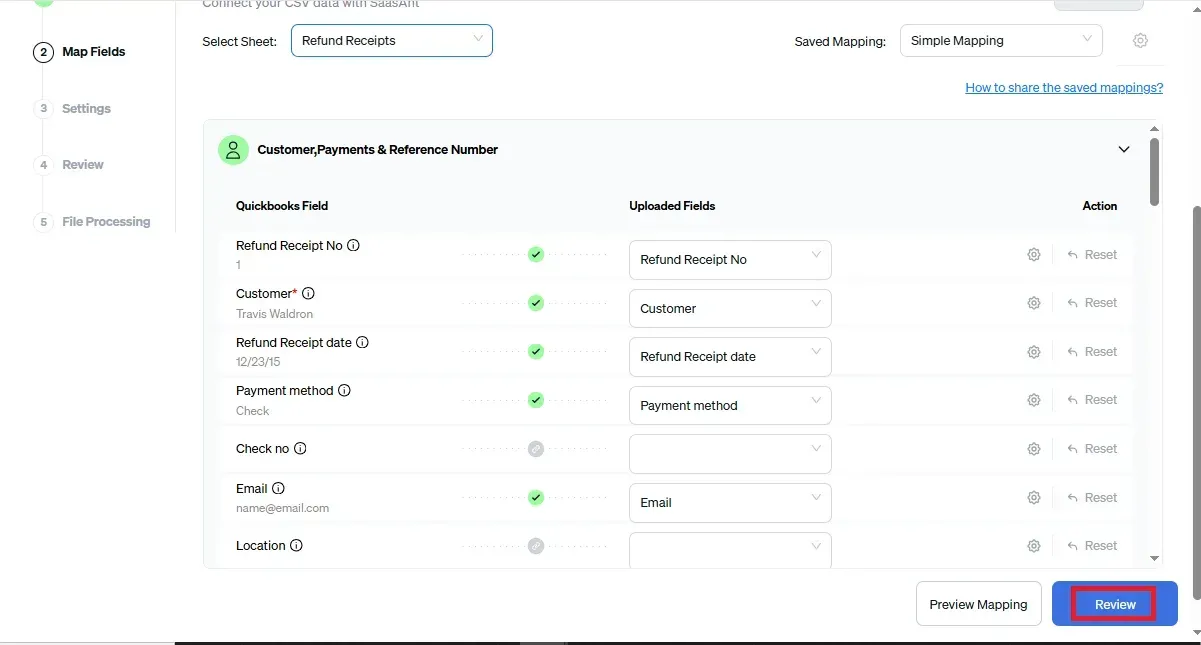
Step 4: Mapping
Mapping matches the file headers to the QuickBooks fields. SaasAnt does the mapping automatically. Just ensure the mapping aligns with your file headers.
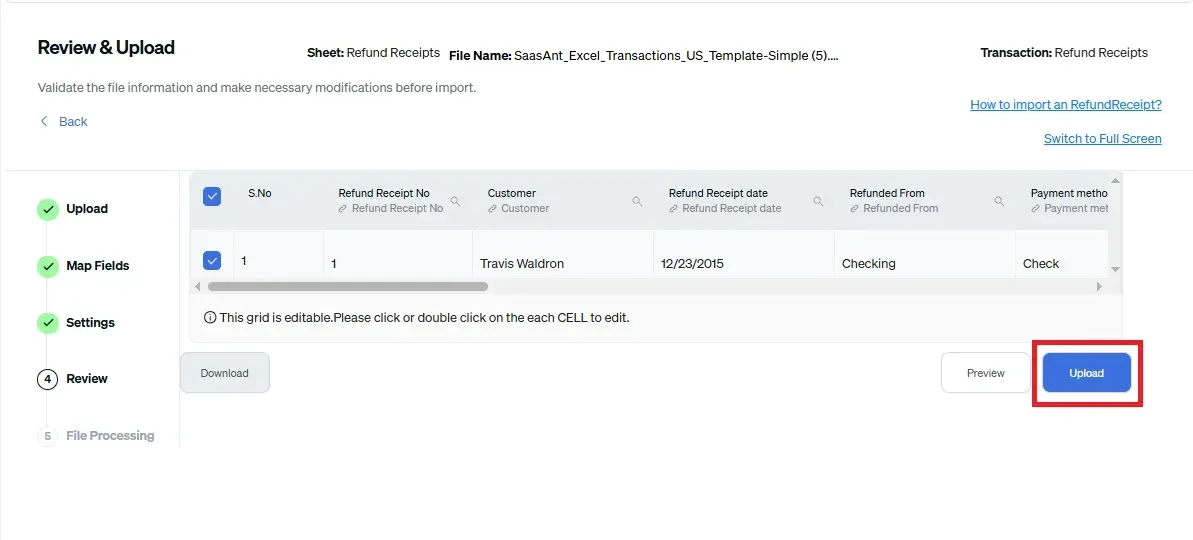
Step 5: Reviewing Your Data Before Final Import
Review the data mapped to avoid mistakes and ensure the accurate alignment of all details. SaasAnt Transactions facilitates data review and corrections, helping you identify and resolve errors. Upon confirming the data accuracy, click ‘Upload’ to import your file into QuickBooks Online.
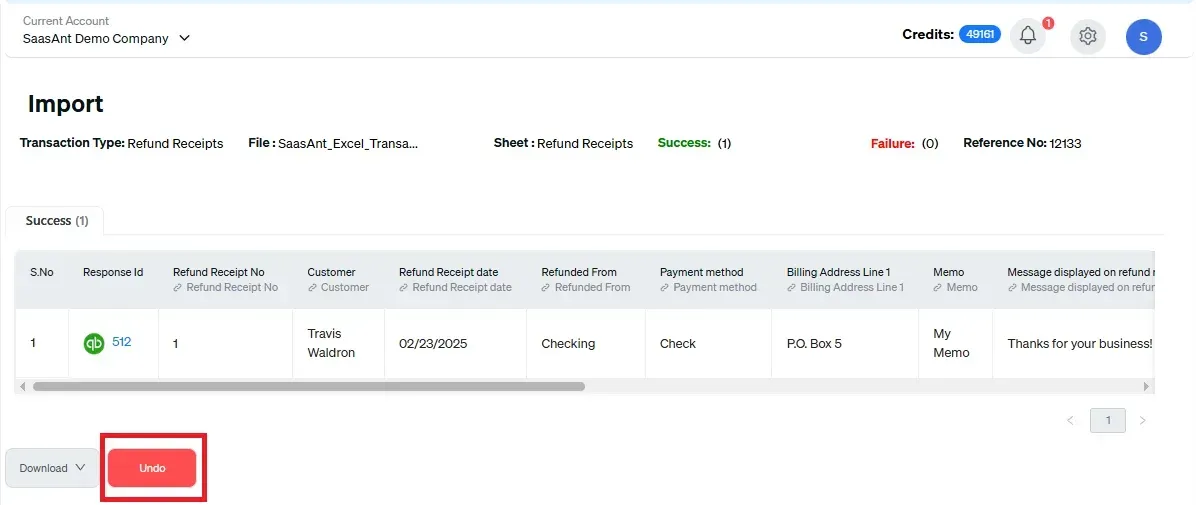
 Step 6: Verifying the Imported Transactions
Upon successful import, the uploaded trial balance will appear with their reference number. Click on the reference number to verify whether that transaction has been uploaded into QuickBooks. You can also roll back (undo) the imported data if needed.
SaasAnt Transactions comes with innovative error resolution tools that help you if you encounter any issues. If there are errors, it’ll suggest ways to fix them, making the whole process effortless.
Make It Even Easier with Automation
If you want to simplify the import process even further, consider automating the bulk upload of your financial statements. With SaasAnt Transactions, you can automate this task using Email, FTP/SFTP, or Zapier. This approach can save time and reduce manual effort, making your workflow more efficient.
Related Reading: Here’s a detailed article on Email, FTP/SFTP, or Zapier automation.
Refund sales receipts in QuickBooks Online easily
We've discussed all the essentials on how to refund sales receipts in QuickBooks Online. The bulk upload method using SaasAnt overcomes QuickBooks' challenges, providing a quick, error-free, and time-saving solution. Plus, you can start immediately with a 30-day free trial, and there's no need to enter credit card information. If you are facing any trouble, you can always drop an email at support@saasant.com.
FAQ
How to refund a sales receipt in QuickBooks Online?
To refund a sales receipt in QuickBooks Online, follow these steps:
For QuickBooks Payments: Search for the sale, select the sales receipt, click the payment link, then choose "More" and select "Refund." For Other Payments: Go to the dashboard, click "+ New," select "Refund Receipt," choose the customer, enter details, and save.
How do I record a refund on QuickBooks Online?
To record a refund in QuickBooks Online, go to "+ New" and select "Refund Receipt" for customer refunds or "Supplier Credit" for vendor refunds. You can also use SaasAnt Transactions to bulk upload refunds into QuickBooks.
How do I correct a sales receipt in QuickBooks?
To correct a sales receipt in QuickBooks Online, use the search bar to locate it. Click to open the receipt, make necessary changes like updating amounts or customer details, and save. If the error is significant, you can delete the receipt and create a new one instead.
Is a refund an expense or income?
A refund is typically classified as a reduction of income, not an expense. When a business issues a refund, it decreases the revenue previously recorded from that sale. In accounting, it is recorded as a negative revenue entry, offsetting the original income rather than being categorized as an expense.
Read also
How to Import Sales Receipts into QuickBooks Desktop
Import Sales Receipts into QuickBooks Online
How to Edit Sales Receipts in QuickBooks Online: Step-by-Step Guide
How to Delete a Sales Receipt in QuickBooks Online