Import Estimates into QuickBooks Desktop
This guide will walk you through importing estimates into QuickBooks Desktop.
Import Estimates into QuickBooks Desktop: Quick Instructions
Download & Install SaasAnt Transactions Desktop.
Access the 'Import' section from the dashboard.
Kick off the process by clicking 'Let's Import.'
Select ‘Estimates’ as your 'QuickBooks Transaction Type.'
Map the fields in your file correctly with QuickBooks fields in the mapping screen.
Customize data mapping conditions to tailor your expense management.
Review the mapping and initiate upload to QuickBooks.
Handle errors seamlessly with the 'Error Log' and the convenient 'Fix' feature.
Streamline Your Estimate Management in QuickBooks Desktop
Whether dealing with bulk imports, migrating from another accounting system, or handling custom fields, SaasAnt Transactions offers seamless solutions to streamline your estimate management process. Let's explore how SaasAnt Transactions can resolve specific challenges:
Bulk Estimate Import from a Spreadsheet
If your business receives estimates from multiple vendors in spreadsheet format, manually entering each estimate into QuickBooks Desktop is time-consuming and error-prone. SaasAnt Transactions Desktop allows you to import estimates from a spreadsheet into QuickBooks Desktop seamlessly. By mapping spreadsheet columns to QuickBooks fields, you can quickly and accurately import multiple estimates in one go, saving time and reducing the risk of errors.
Migrating Estimates from Another Accounting System
For instance, if your company switches from another accounting software to QuickBooks Desktop, you must migrate existing open estimates. SaasAnt Transactions simplifies the migration process. You can export your estimates from the old system and quickly import them into QuickBooks Desktop. It ensures a smooth transition without the need for manual data entry.
Managing Multiple Estimates for a Large Project
Large projects often involve numerous estimates that need to be tracked and managed in QuickBooks Desktop. SaasAnt Transactions helps you manage multiple estimates efficiently. You can import all estimates related to a project at once, maintain a clear record, and quickly track project expenses and revenue within QuickBooks Desktop.
How to Import Estimates into QuickBooks Desktop: Step-by-Step Guide
Step 1: Begin the Import Process
To install and activate the free trial of SaasAnt Transactions Desktop, first download the latest version by clicking on the free trial. Run the "SaasAntTransactions-Setup.exe" file with administrative privileges, accept the license agreement, choose your installation path, and complete the setup.
After installation, launch the application, navigate to Subscription > Register, and enter the license key provided in your confirmation email to activate the software. Ensure your computer has an active internet connection during this process.
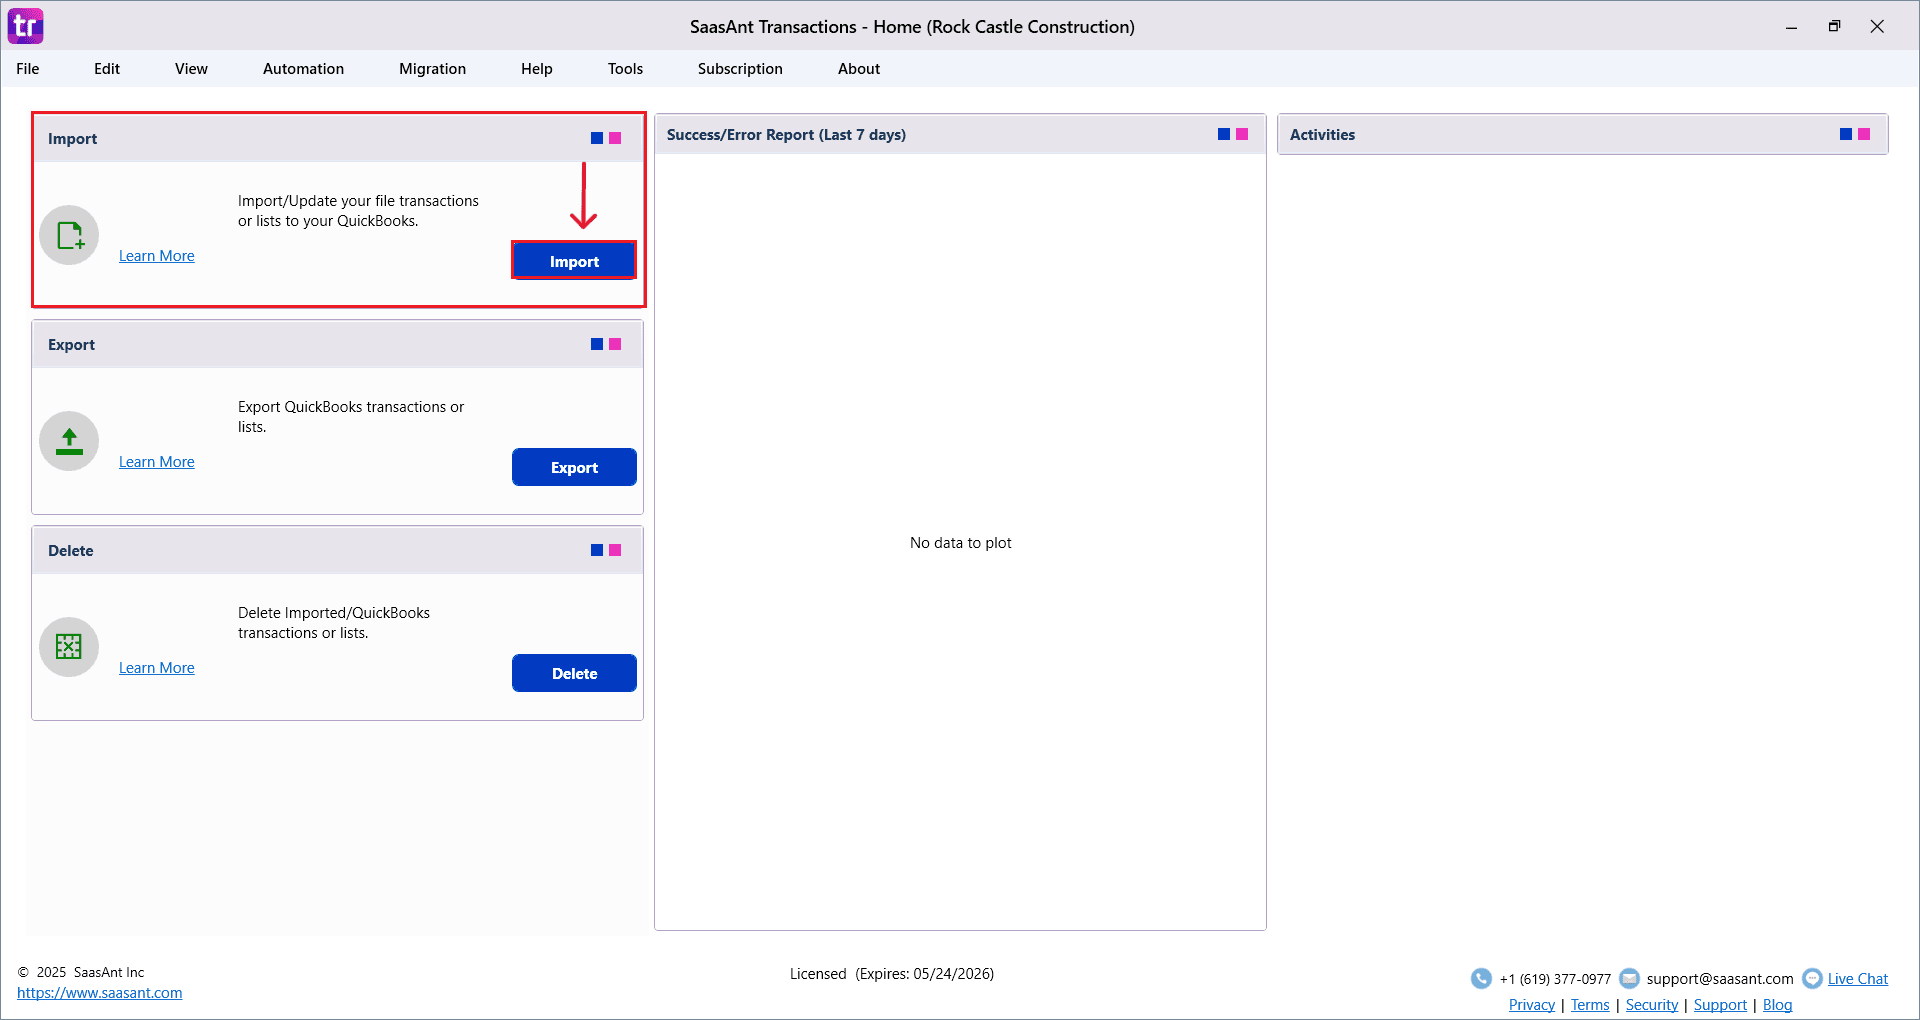
After launching SaasAnt Transactions Desktop, click the prominent 'Import' button on the homepage to get started.
Step 2: Select QuickBooks Transaction Type
Within the 'Import' window, navigate to the 'QuickBooks Transaction Type' section. Enhance categorization by choosing 'Estimates' from the dropdown menu that matches your financial transactions best.
Step 3: Upload Your Estimates
Click the 'Browse File' button to upload your ‘Estimates.’ Your selected file will seamlessly integrate into the system.
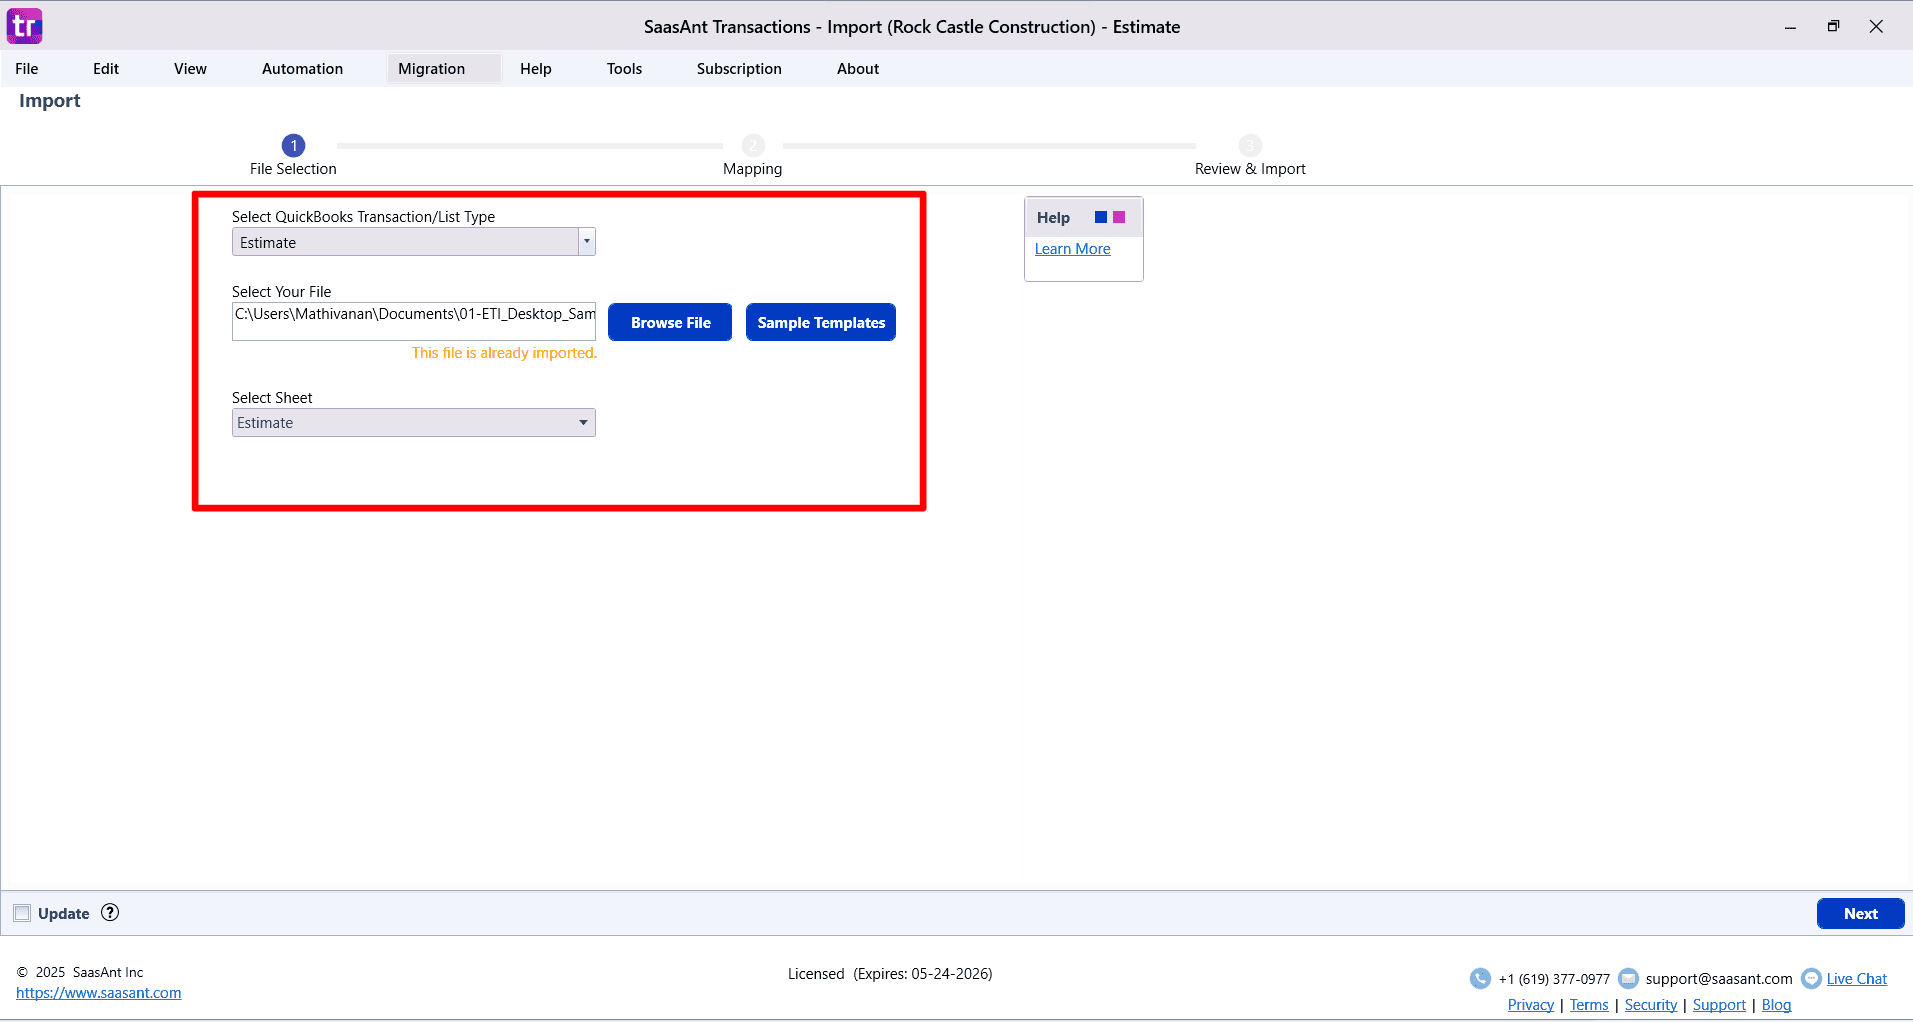
Step 4: Choose the Appropriate Sheet
Use the 'Select Sheet' option for CSV files with multiple sheets. Select the sheet from the dropdown menu containing the data you intend to import.
Step 5: Map QuickBooks Fields
Click 'Next' to move to the 'Data Mapping' window. Here, effortlessly configure vital data mapping for essential QuickBooks fields such as 'Date,' 'Customer Name,' 'Item,' 'Description,' 'Amount,' and 'Tax.'
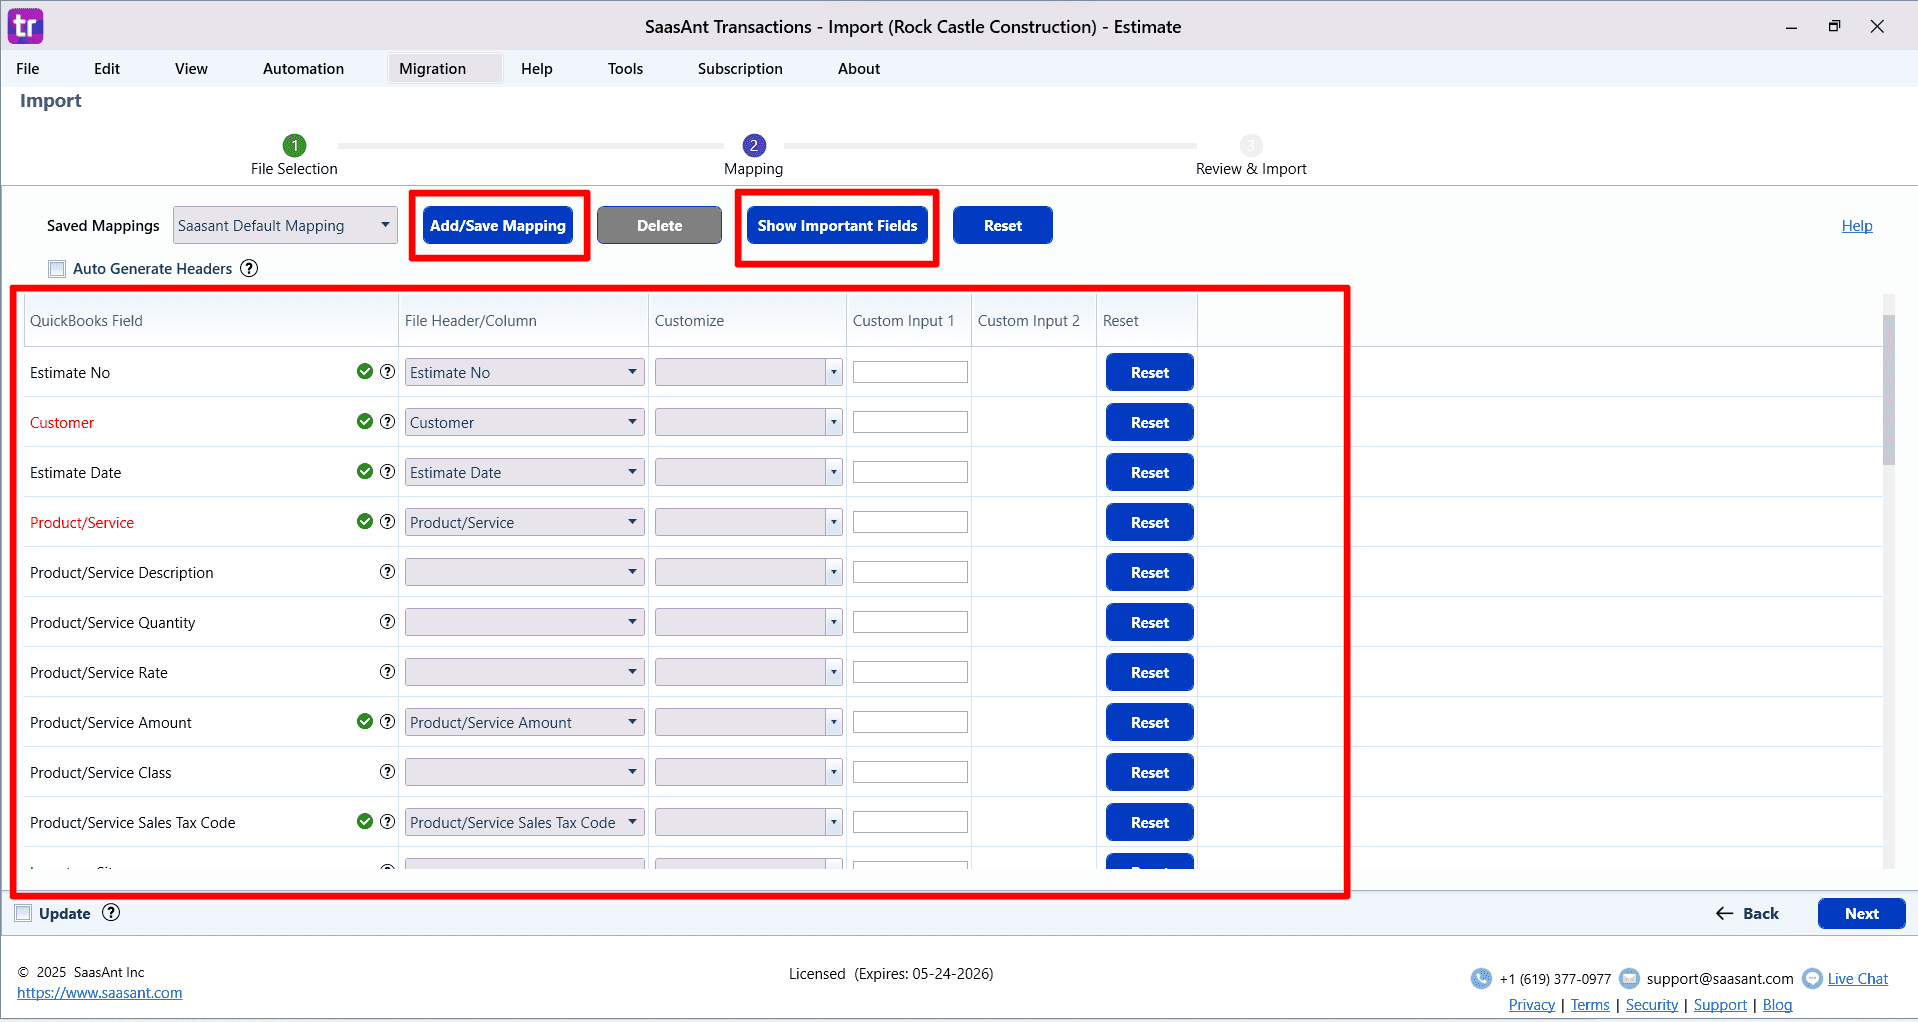
Step 6: Simplify Data Mapping
In the 'Data Mapping' window, streamline the process of handling files without headers using the 'Auto Generate Headers' feature. Fine-tune specific fields for personalized adjustments with the 'Customize' option.
Step 7 (Optional): Tailor Fields for Advanced Needs
Optimize advanced data customization flexibility using the 'Customize' option. Customize conditions to align with your specific requirements, whether 'Set value if empty,' 'Override,' or 'Replace if matches.'
Step 8: Start the Import
With data mapping perfectly configured, confidently proceed by clicking 'Next,' smoothly transitioning to the 'Review & Import' phase.
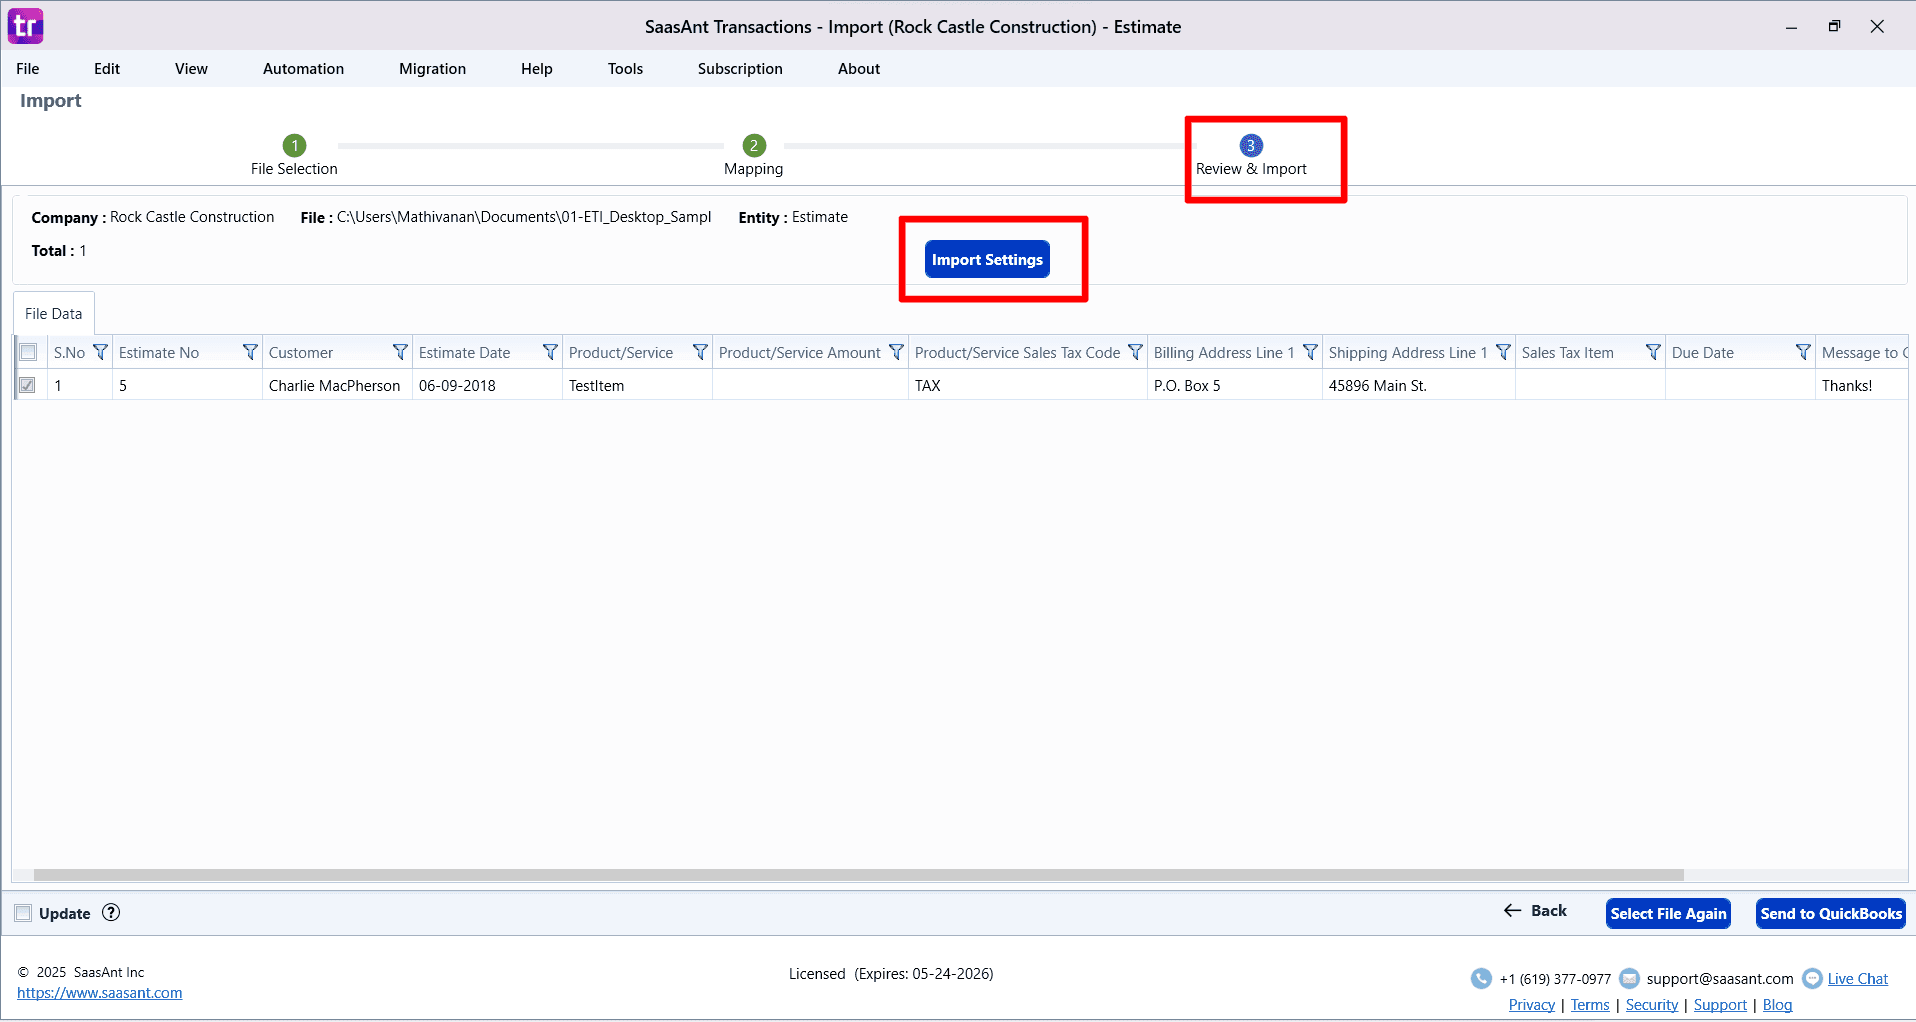
Step 9: Confirm Preferences and Accuracy
Configure your preferences and meticulously review the preview. When ready, advance your estimate management process by clicking the 'Send to QuickBooks' button at the bottom.
Step 10: Resolve Errors (If Applicable)
Encounter errors? No problem. Access the 'Error Log' section, review the displayed errors, and commence the resolution process by clicking the integrated 'Fix' button.
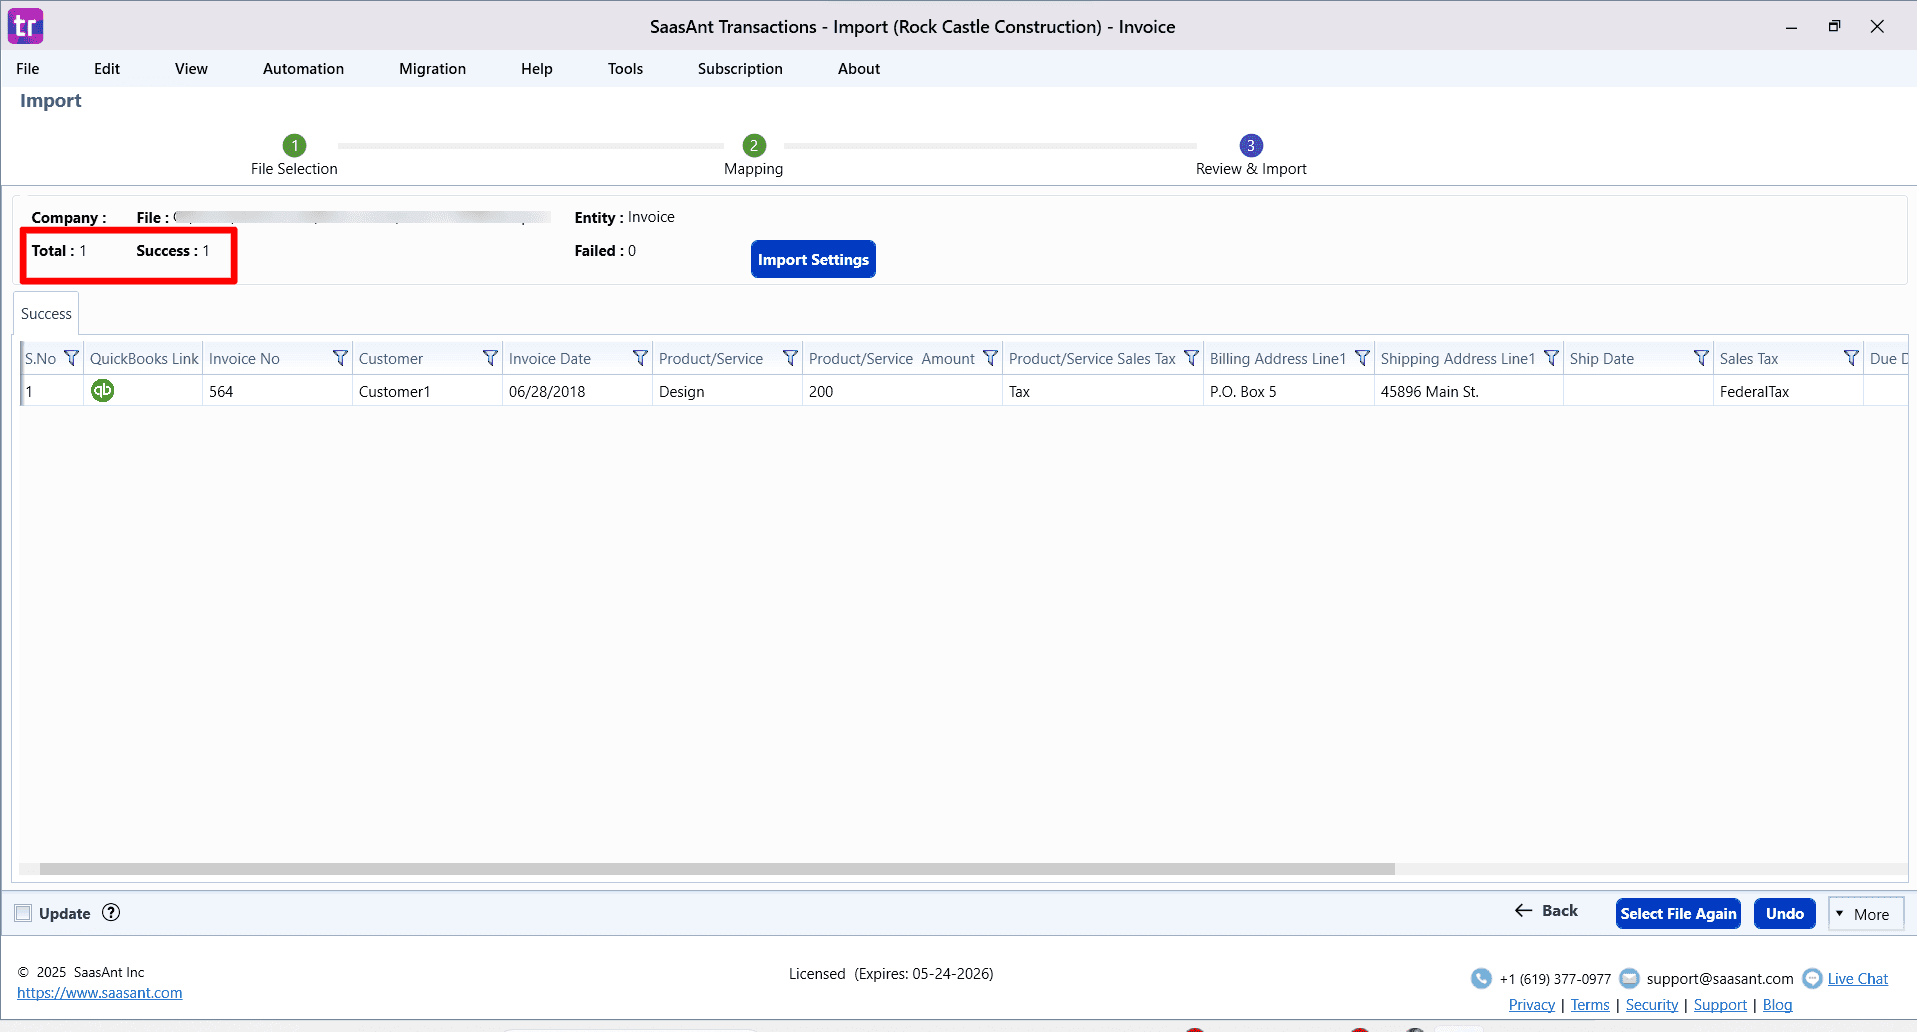
Step 11: Complete the Import
With errors resolved and data accurately aligned, conclude your import journey by clicking 'Send to QuickBooks.' Enjoy a seamless and error-free estimate management process with SaasAnt.
Video Tutorial For How to Bulk Import Estimates into QuickBooks Desktop:
To learn more, check out this article - Importing Estimates into QuickBooks Online
Wrap-Up
Efficiently managing estimates in QuickBooks Desktop is crucial for financial accuracy. SaasAnt Transactions Desktop simplifies this process, offering a user-friendly solution for businesses. Whether you're a business owner or a finance professional, SaasAnt Transactions Desktop streamlines your estimate management. From bulk imports to migrating from other systems, regular imports from e-commerce platforms, handling custom fields, and managing significant project estimates, SaasAnt Transactions offers tailored solutions.
FAQs
What Are the Steps to Import Estimates into QuickBooks Desktop Using SaasAnt Transactions Desktop?
Import estimates into QuickBooks Desktop using SaasAnt Transactions in simple steps:
Launch the SaasAnt Transactions Desktop application.
Click the 'Import' button on the home screen.
Select 'Estimates' as the QuickBooks transaction type.
Upload your estimates in an Excel/CSV file.
Map QuickBooks fields.
Review and confirm your import preferences.
Click the 'Send to QuickBooks' button to import the estimates.
How Can I Map QuickBooks Fields When Importing Estimates Using SaasAnt Transactions Desktop?
While importing estimates using SaasAnt Transactions Desktop, you can map QuickBooks fields such as 'Date,' 'Customer Name,' 'Item,' 'Description,' 'Amount,' and 'Tax' to the corresponding columns in your estimate file. It ensures the accurate alignment of data with your QuickBooks records.
Can I Customize Data Mapping When Importing Estimates Using SaasAnt Transactions Desktop?
Yes, you can customize data mapping while importing estimates using SaasAnt Transactions Desktop. You can use the 'Customize' option to fine-tune specific fields for personalized adjustments, such as setting a ‘value if empty,’ ‘overriding a value,’ or ‘replacing a value if it matches a certain condition,’ and much more.
How Can I Resolve Errors When Importing Estimates Using SaasAnt Transactions Desktop?
Suppose you encounter errors when importing estimates using SaasAnt Transactions Desktop. In that case, you can access the 'Error Log' section, review the displayed errors, and commence the resolution process by clicking the integrated 'Fix' button. It ensures that your 'Estimate' data is error-free and accurately aligned with your QuickBooks records.
Read also
How to Import Invoices into QuickBooks Desktop
How to Import CSV file into QuickBooks Desktop
How to Import Transactions into QuickBooks Desktop
Importing Journal Entries into QuickBooks Desktop from Excel