Importing Journal Entries into QuickBooks Desktop from Excel
Manually entering journal entries into QuickBooks Desktop can be tedious and susceptible to errors, particularly when working with extensive data. If you are an accountant, bookkeeper, or small business owner, automating this process can significantly enhance your efficiency and accuracy. This is where SaasAnt Transactions Desktop is useful.
In this step-by-step guide, you will learn how to import journal entries into QuickBooks Desktop smoothly, thereby saving time, minimizing errors, and optimizing your entire bookkeeping process.
Every month, the finance manager of a startup exports payroll data to Excel, performs a single mapping in SaasAnt Transactions Desktop, and swiftly imports hundreds of journal entries into QuickBooks Desktop, thereby eliminating the need for manual re-keying, reducing posting errors, and allowing for more time to focus on analysis.
This blog is ideal for accountants, bookkeepers, small business owners, and QuickBooks Desktop users who want to automate the import of Journal Entries, reduce manual errors, enhance workflows, and maintain accurate and up-to-date financial records.
Contents
How to Import Journal Entries into QuickBooks Desktop: Step-By-Step Guide
Wrap Up
Frequently Asked Questions
How to Import Journal Entries into QuickBooks Desktop: Step-By-Step Guide
Follow the steps below to import the Journal Entries in QuickBooks Desktop using SaasAnt Transactions Desktop.
Step 1: Install and Connect SaasAnt Transactions
Download the latest SaasAnt Transactions Desktop version.
Run SaasAntTransactions-Setup.exe as an administrator.
Accept the license agreement and complete the installation.
Open the app, go to Subscription > Register.
Enter the license key from your confirmation email.
Keep your internet connection active.
Step 2: Launch SaasAnt Transactions Desktop
Start by opening the SaasAnt Transactions Desktop app on your system.
Ensure that QuickBooks Desktop is open and connected to your company file before proceeding.
Step 3: Connect to QuickBooks Desktop
To access Journal Entries, you need to connect the SaasAnt Transactions Desktop with QuickBooks Desktop. Here's how:
Go to the ‘File’ menu in the top-left corner of SaasAnt Transactions Desktop.
Click ‘Connect to QuickBooks’ from the dropdown.
Step 4: Open SaasAnt Transactions
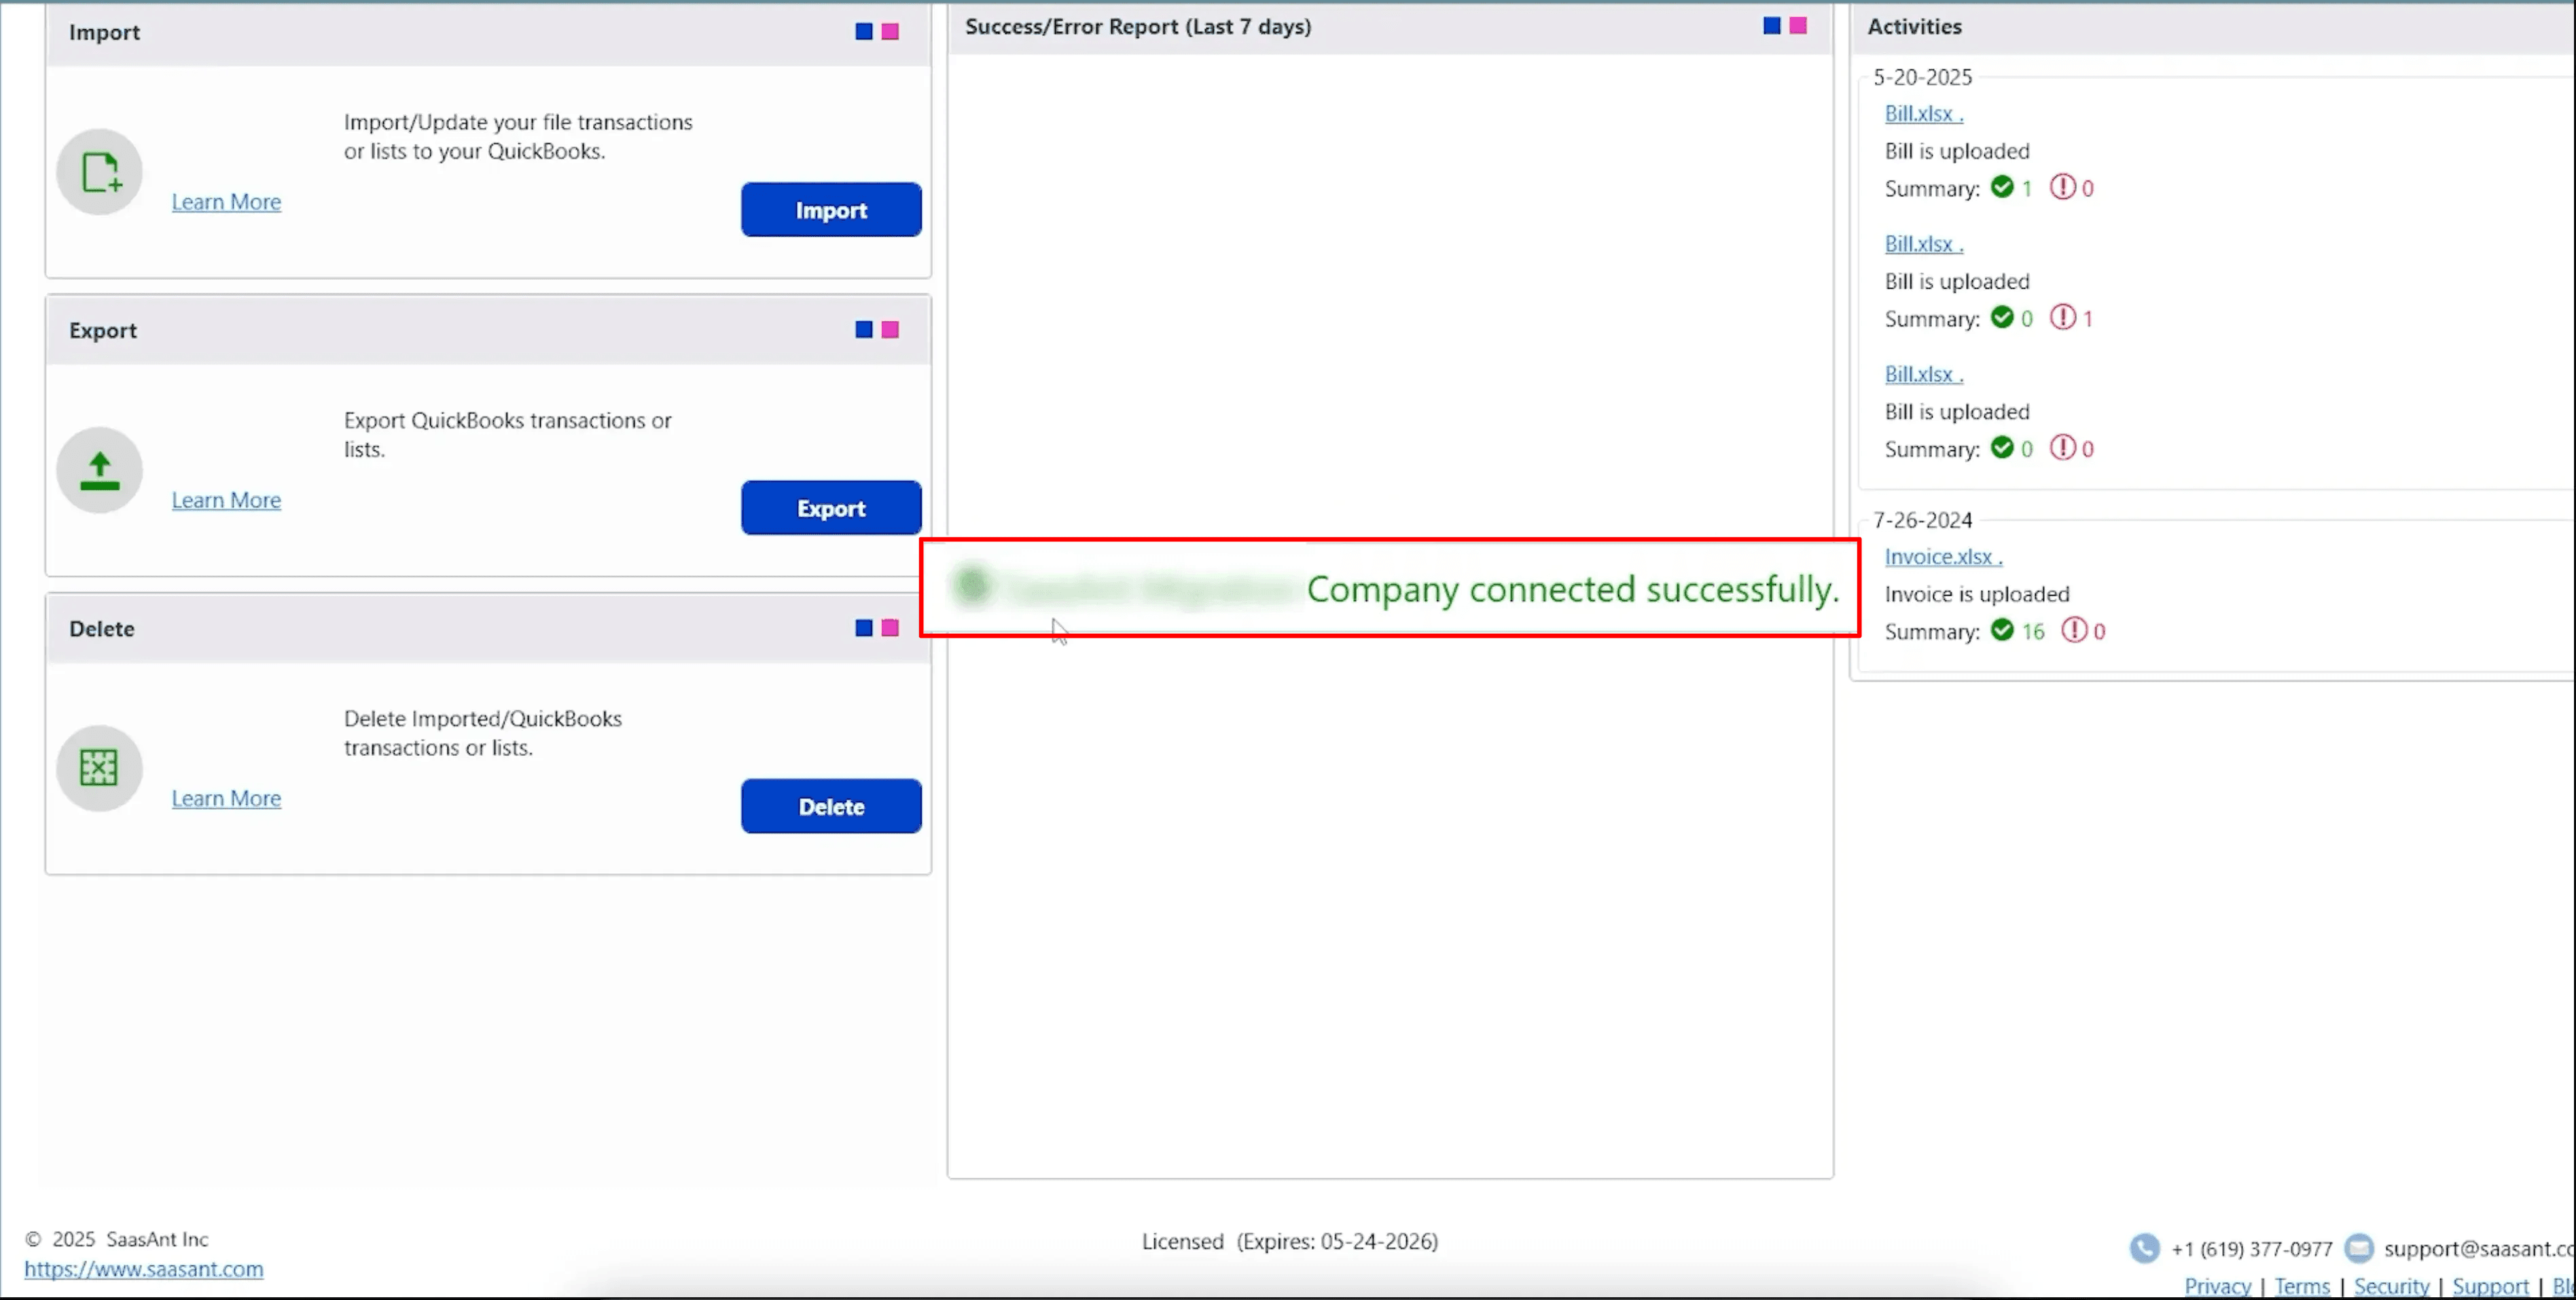
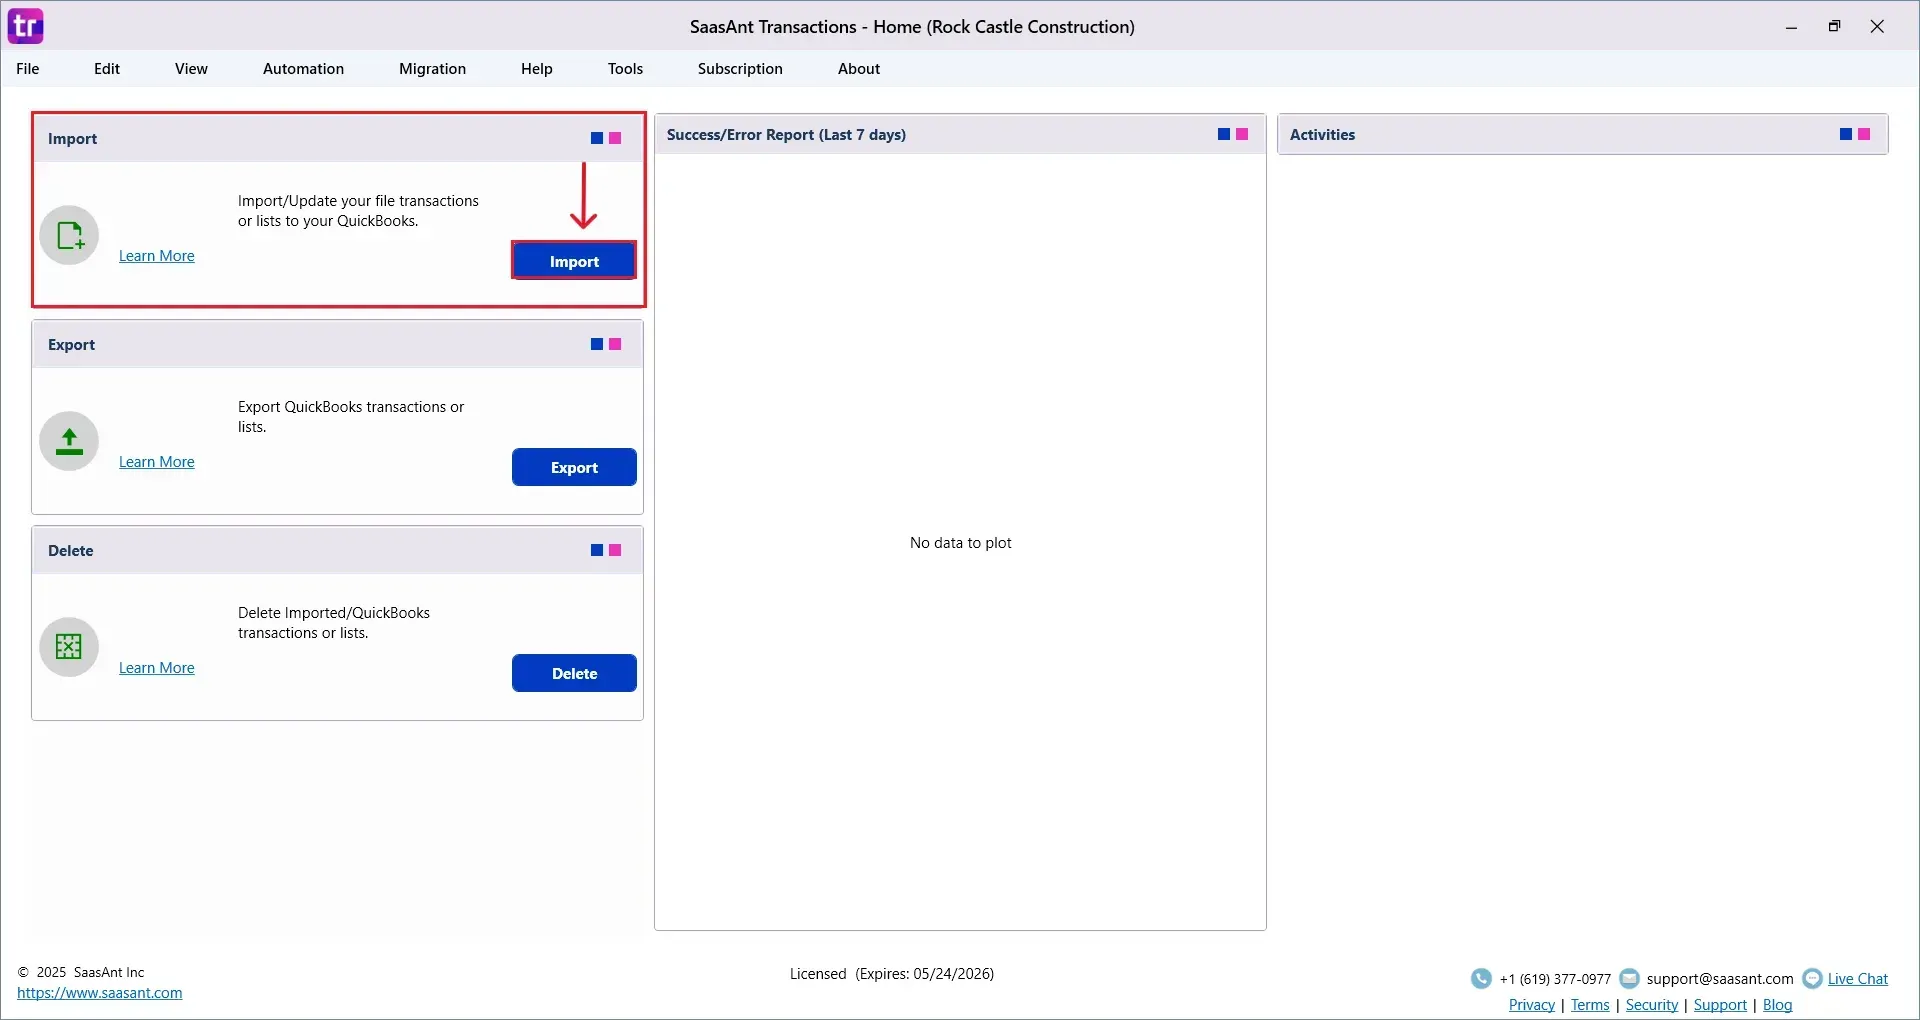
On the SaasAnt dashboard:
On the top left side of the SaasAnt Transactions dashboard, you can see the menu bar with various options.
Select “Import” in the dashboard.
The Dashboard appears as shown in the image below.
Select “Journal Entries” from the SaasAnt Transaction Type dropdown and upload your Excel or CSV file.
Select “SaasAnt Default Mapping” under the Saved Mapping dropdown.
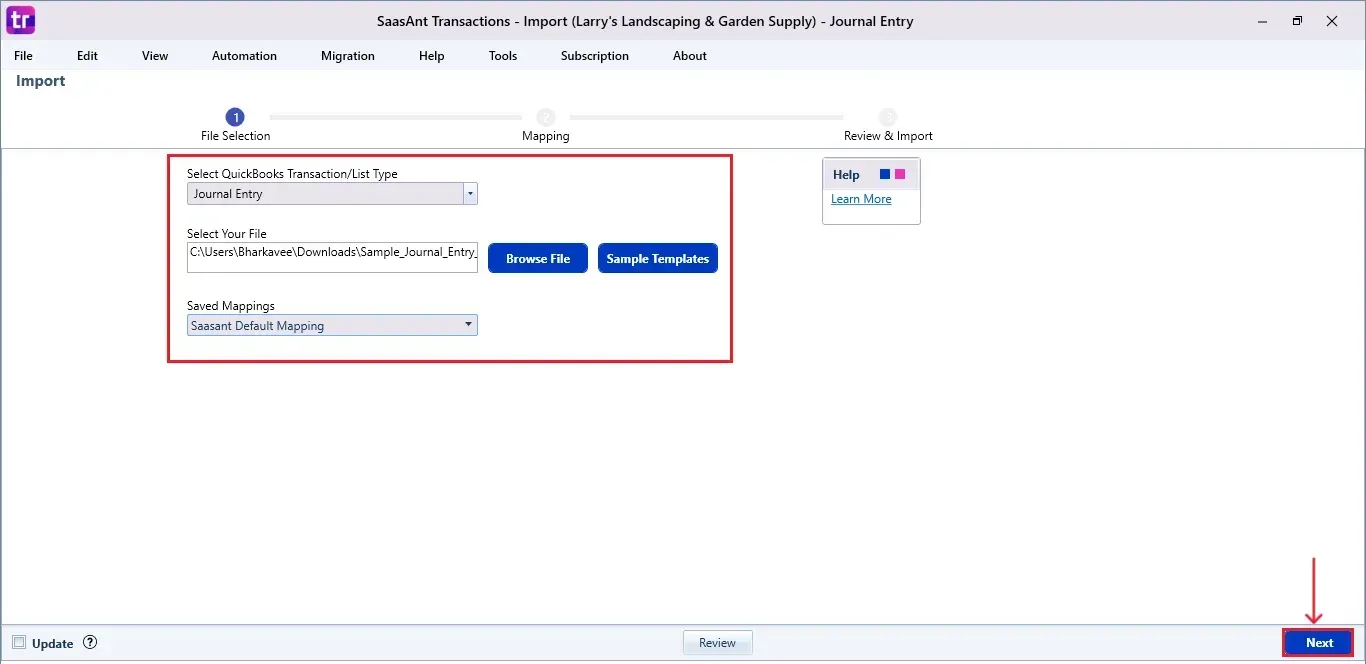
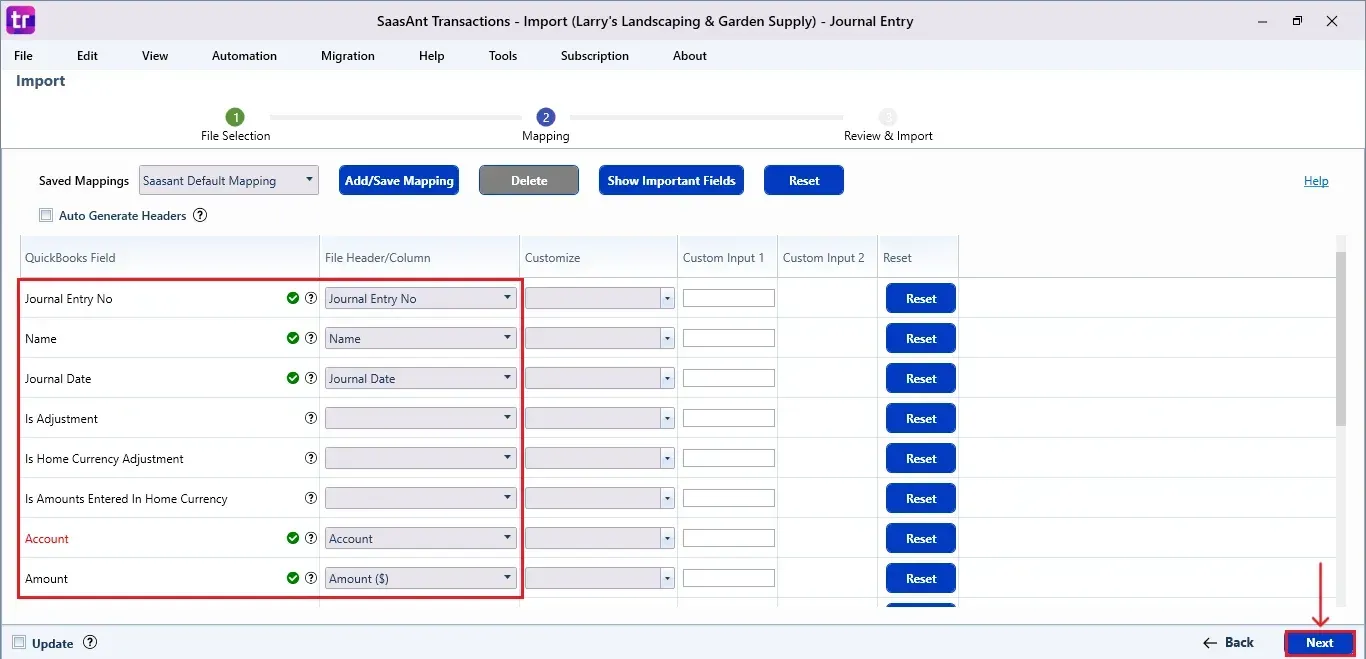
Step 5: Mapping Fields
Ensures the mapping of essential fields, including Journal Entries number, customer name, Journal Entries date, etc.
Select “Next” at the bottom right of the dashboard.
Step 6: Review and Import the Data
Click the “Send to QuickBooks” option at the bottom right of the dashboard, as shown in the image below.
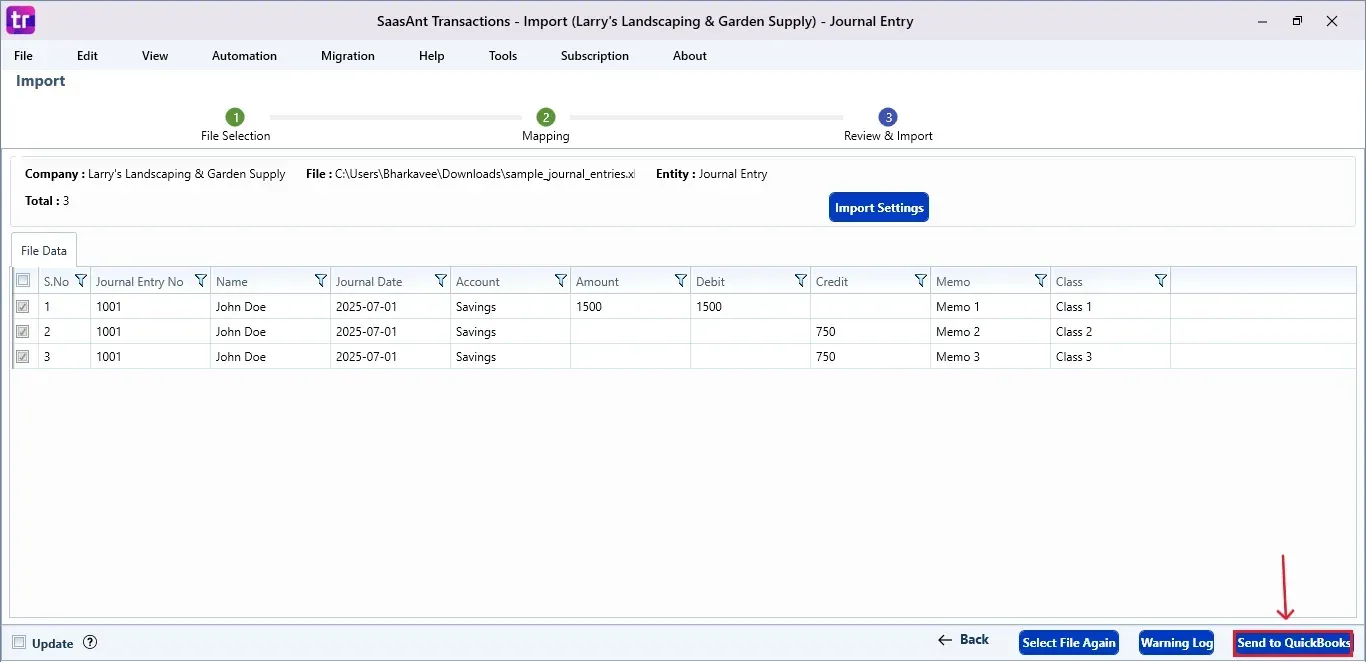
SaasAnt will now push the Journal Entries into your connected QuickBooks Desktop account.
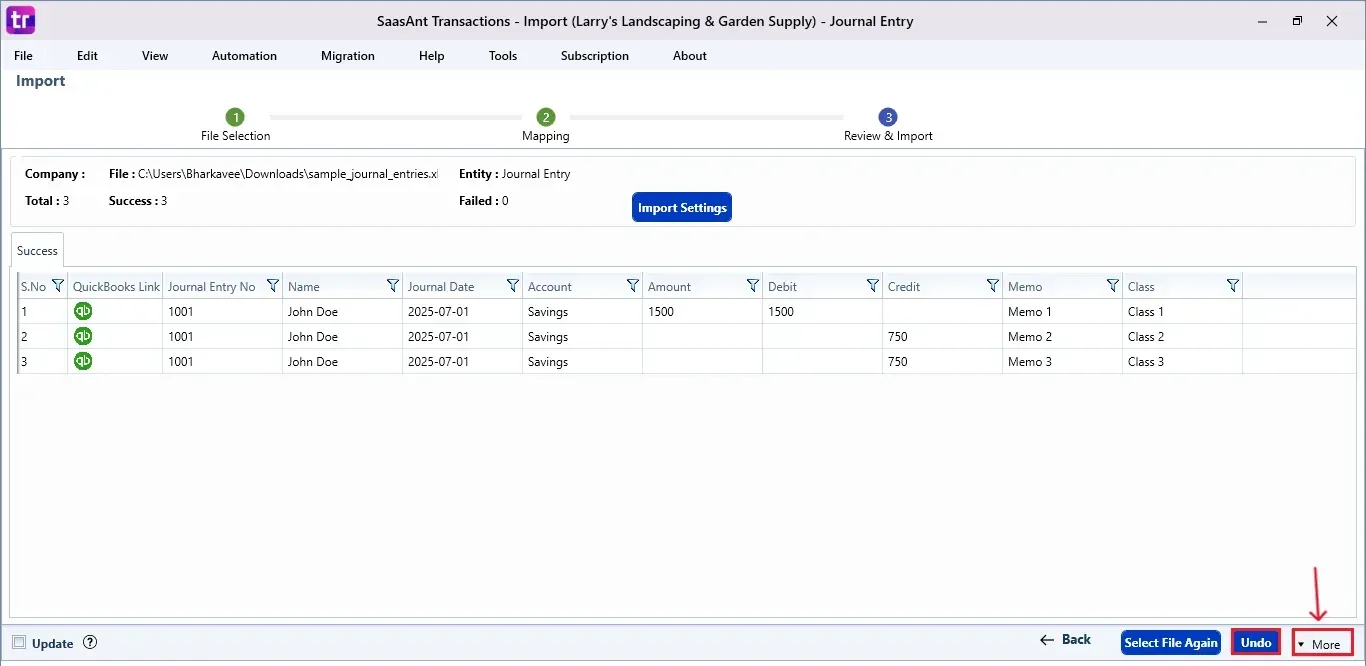
The Journal Entries are reflected in the dashboard.
At the bottom right, click the “More” dropdown and select the option to download your Journal Entries for reference.
Additionally, next to the download option, you can see “Undo”, which allows you to roll back your “Journal Entries”.
Step 7: Verify in QuickBooks Desktop
Open QuickBooks Desktop, go to the “Customers” menu, and select “Customer Centre”.
Search for the customer name you imported.
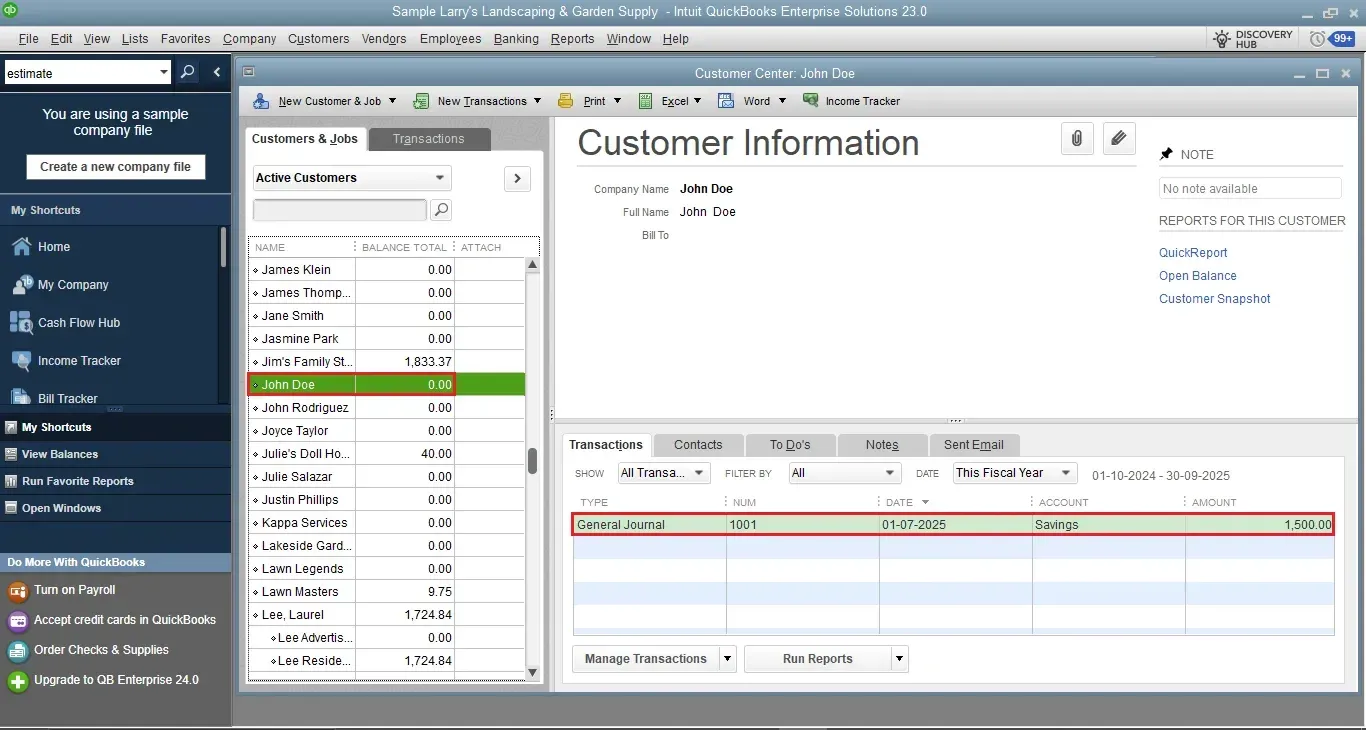
This final step ensures that your data is accurate and appropriately reconciled within QuickBooks.
Wrap Up
Importing journal entries into QuickBooks Desktop from CSV or Excel can be quick, dependable, and accurate, as long as you have the right tools. SaasAnt Transactions Desktop removes the manual grind and helps you automate bulk imports that integrate smoothly into your existing accounting workflow.
By leveraging trustworthy platforms like QuickBooks for your accounting processes and SaasAnt for transaction management and automation, you can enhance the overall workflow, minimize errors, save time, and acquire greater financial insight.
If you have inquiries regarding our products, features, trial, or pricing, or if you require a personalized demo, contact our team today. We are ready to help you find the ideal solution for your QuickBooks workflow.
Frequently Asked Questions
1) Do I need to map the fields every time I import?
You can save your field mappings as a template and apply them to future imports by using the "Saved Mapping" feature.
2) What if I import incorrect journal entries?
You can simply undo imported entries through the "Undo" option available in the SaasAnt dashboard.
3) Can I import journal entries into QuickBooks Desktop with different currencies?
Yes, multi-currency support is available. Just ensure your QuickBooks Desktop file has multi-currency enabled.
4) Do I need QuickBooks open during the import process?
Yes, you need to have QuickBooks Desktop open and linked to the right company file when importing entries.
5) How to import Journal Entries into QuickBooks Desktop?
Use SaasAnt Transactions applications. After connecting with QuickBooks Desktop, you can import journal entries from Excel.
Tags
Read also
How to Delete Journal Entries in QuickBooks Desktop
How to Export Journal Entries from QuickBooks Desktop
How to Edit a Journal Entry in QuickBooks Desktop
How to Import Transactions into QuickBooks Desktop