How to Import Checks into QuickBooks Desktop
How to Import Checks into QuickBooks Desktop
Managing check transactions in QuickBooks Desktop is essential for maintaining accurate payment records. However, manually entering checks can be tedious, especially when processing a large volume of transactions.
Using SaasAnt Transactions Desktop, you can easily import checks into QuickBooks Desktop in bulk, reducing manual effort and minimizing errors. This guide will walk you through each step of the process from preparing your data to verifying successful imports.
Why Import Checks into QuickBooks Desktop?
Importing checks can streamline many critical bookkeeping tasks, including:
Bulk recording of vendor payments
Updating historical check records
Cleaning up backlog entries during system migrations
Reducing data entry errors by using standardized import templates
With SaasAnt Transactions Desktop, you can upload hundreds of check transactions directly into QuickBooks Desktop with just a few clicks.
Supported File Formats for Check Import
SaasAnt Transactions Desktop supports the following file formats for importing checks into QuickBooks Desktop:
Excel Files (XLS, XLSX)
Comma-Separated Values (CSV)
Text Files (TXT)
This flexibility allows you to prepare your data in commonly used spreadsheet formats.
Contents
How to Import Checks into QuickBooks Desktop
Why Import Checks into QuickBooks Desktop?
Supported File Formats for Check Import
Import Checks into QuickBooks Desktop: Step-by-Step Guide
Why Use SaasAnt Transactions Desktop for Importing Checks?
Conclusion
Common Questions About Importing Checks
How to Prepare Your Check Data for Import
Before importing, ensure your check data is formatted correctly. Here are the key columns typically required for a successful import:
Field Name | Description | Example |
Payee Name | Vendor or recipient name | John Supplies |
Bank Account | Bank account used for payment | Checking Account |
Check Number | Reference number of the check | 1010 |
Check Date | Date of the check | 07/15/2025 |
Amount | Total amount of the check | 1500.00 |
Memo | Optional memo for the transaction | Office Supplies |
Address | Payee address | 123 Main St |
You can download the sample templates directly from the SaasAnt Transactions Desktop application for quick reference.
Import Checks into QuickBooks Desktop: Step-by-Step Guide
Step 1: Install SaasAnt Transactions Desktop
If you have not installed SaasAnt Transactions Desktop, download and install it from the official SaasAnt website.
Follow these simple steps:
Download the installation file from the website.
Run the installer and follow the on-screen instructions.
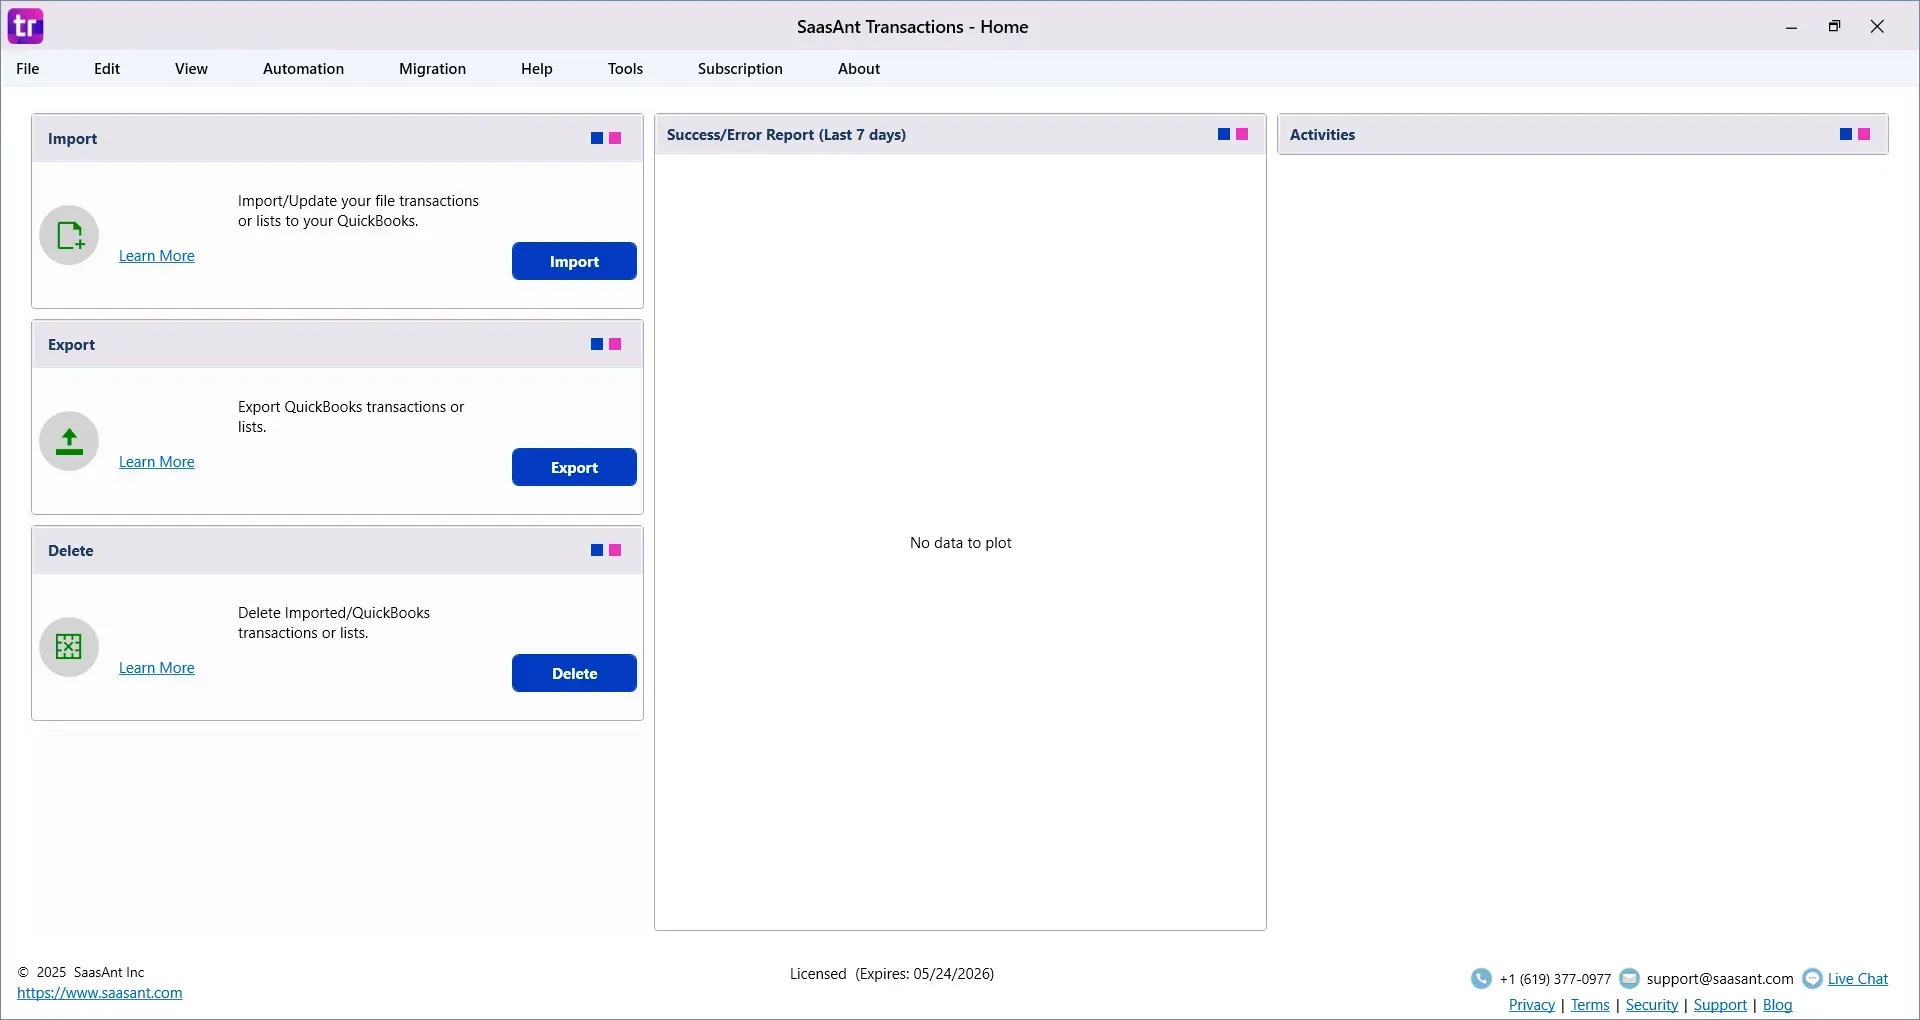
Launch the SaasAnt Transactions Desktop application.
Connect it with your QuickBooks Desktop company file.
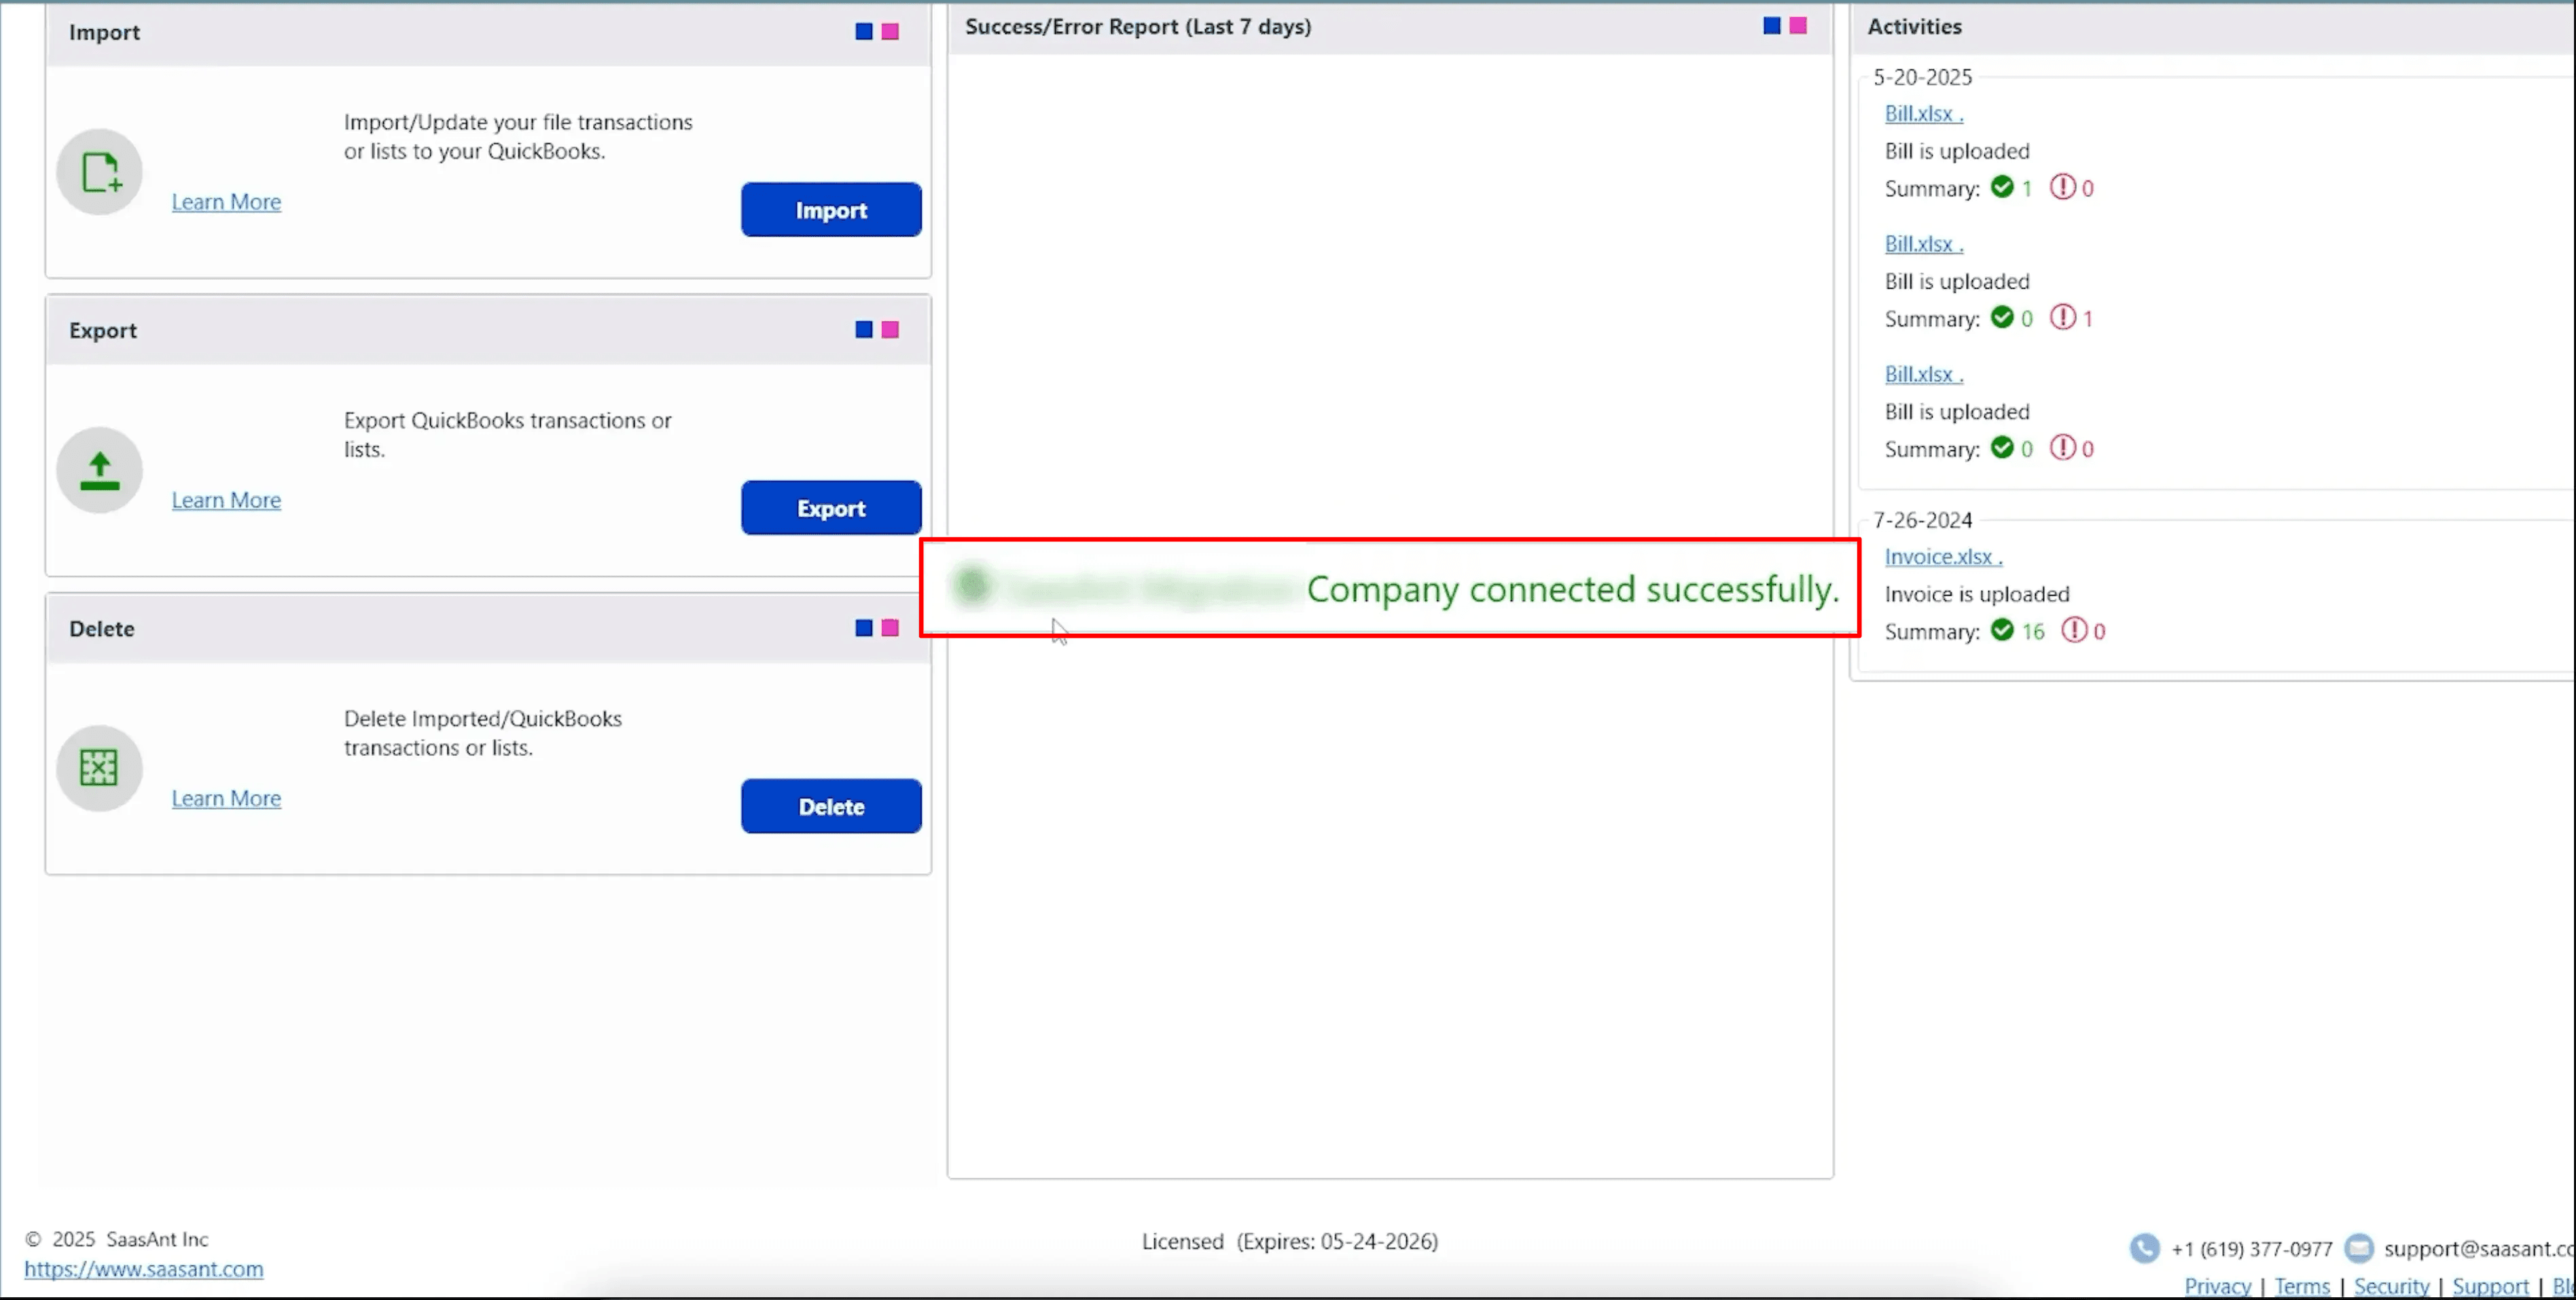
Step 2: Connect QuickBooks Desktop with SaasAnt
Open QuickBooks Desktop.
Launch SaasAnt Transactions Desktop.
Click on the "Connect" link to link with your QuickBooks Company file.
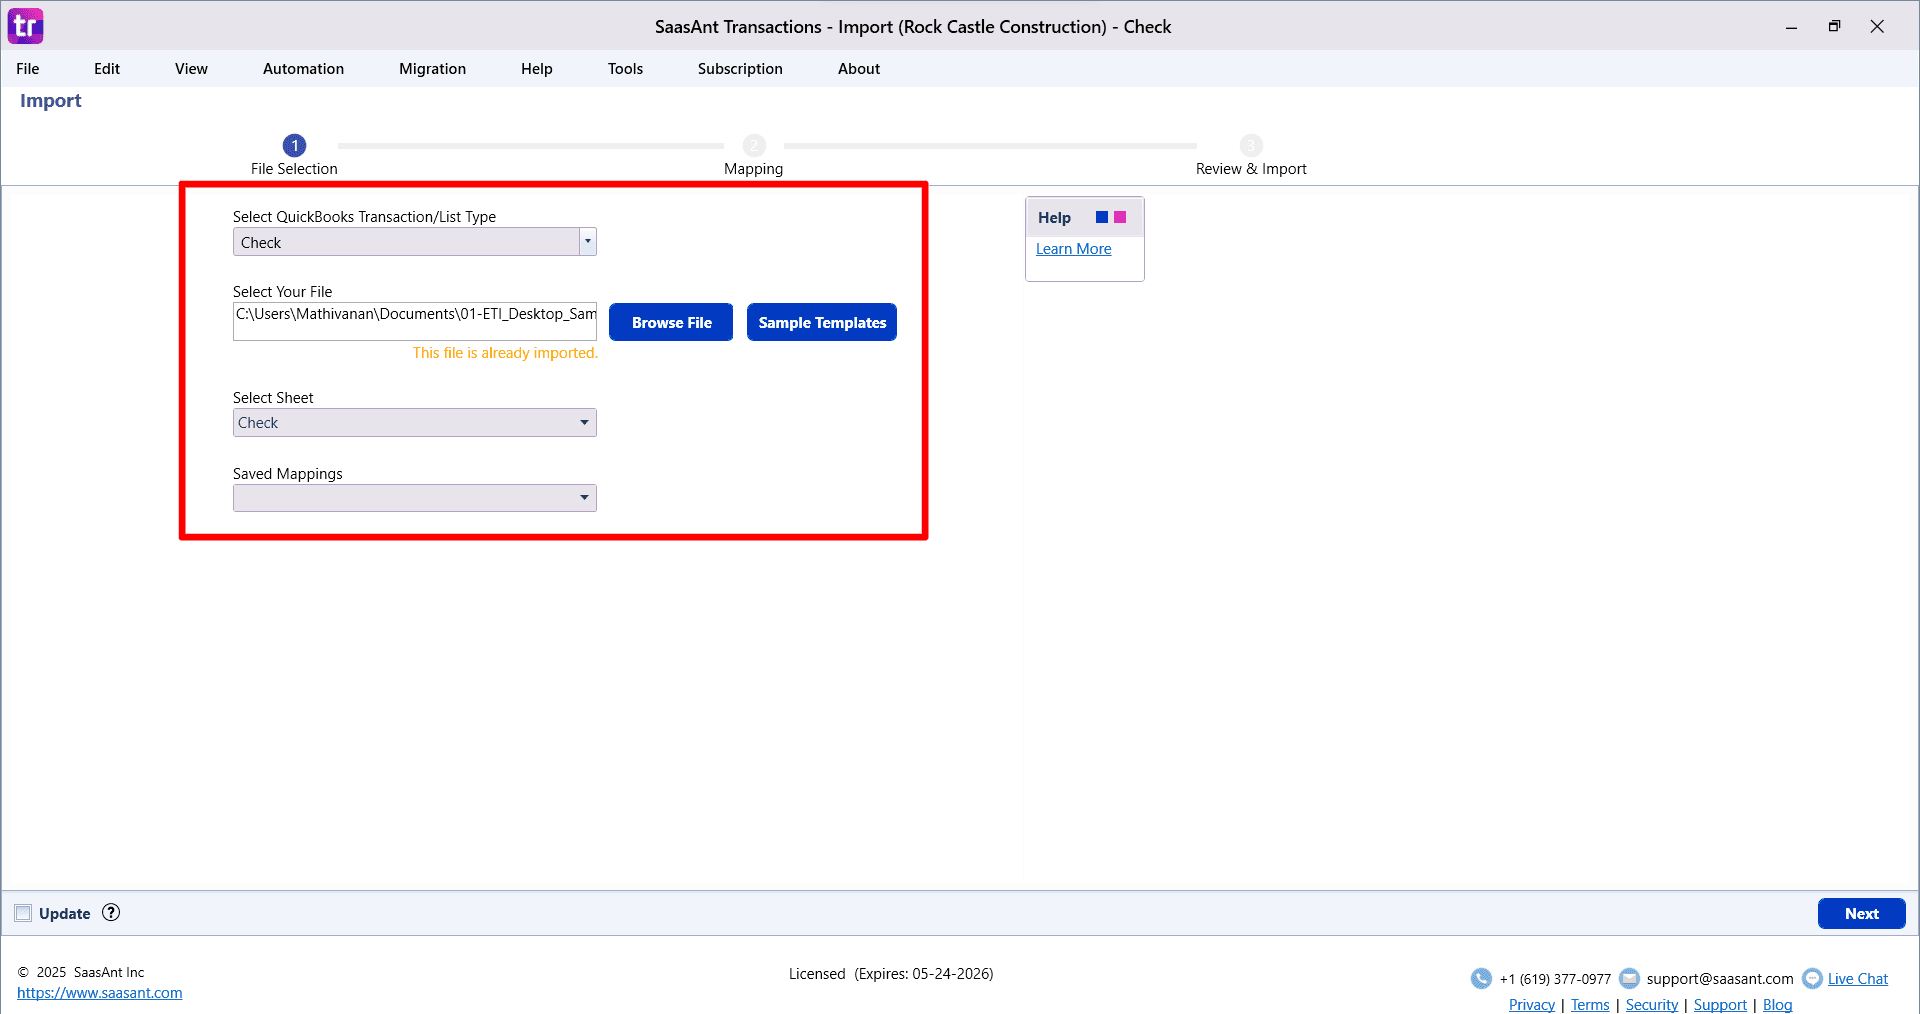
Step 3: Upload Your Check Data File
In SaasAnt Transactions Desktop, click Import.
Select Check as the transaction type.
Choose your file (CSV, Excel, or TXT) from your local drive.
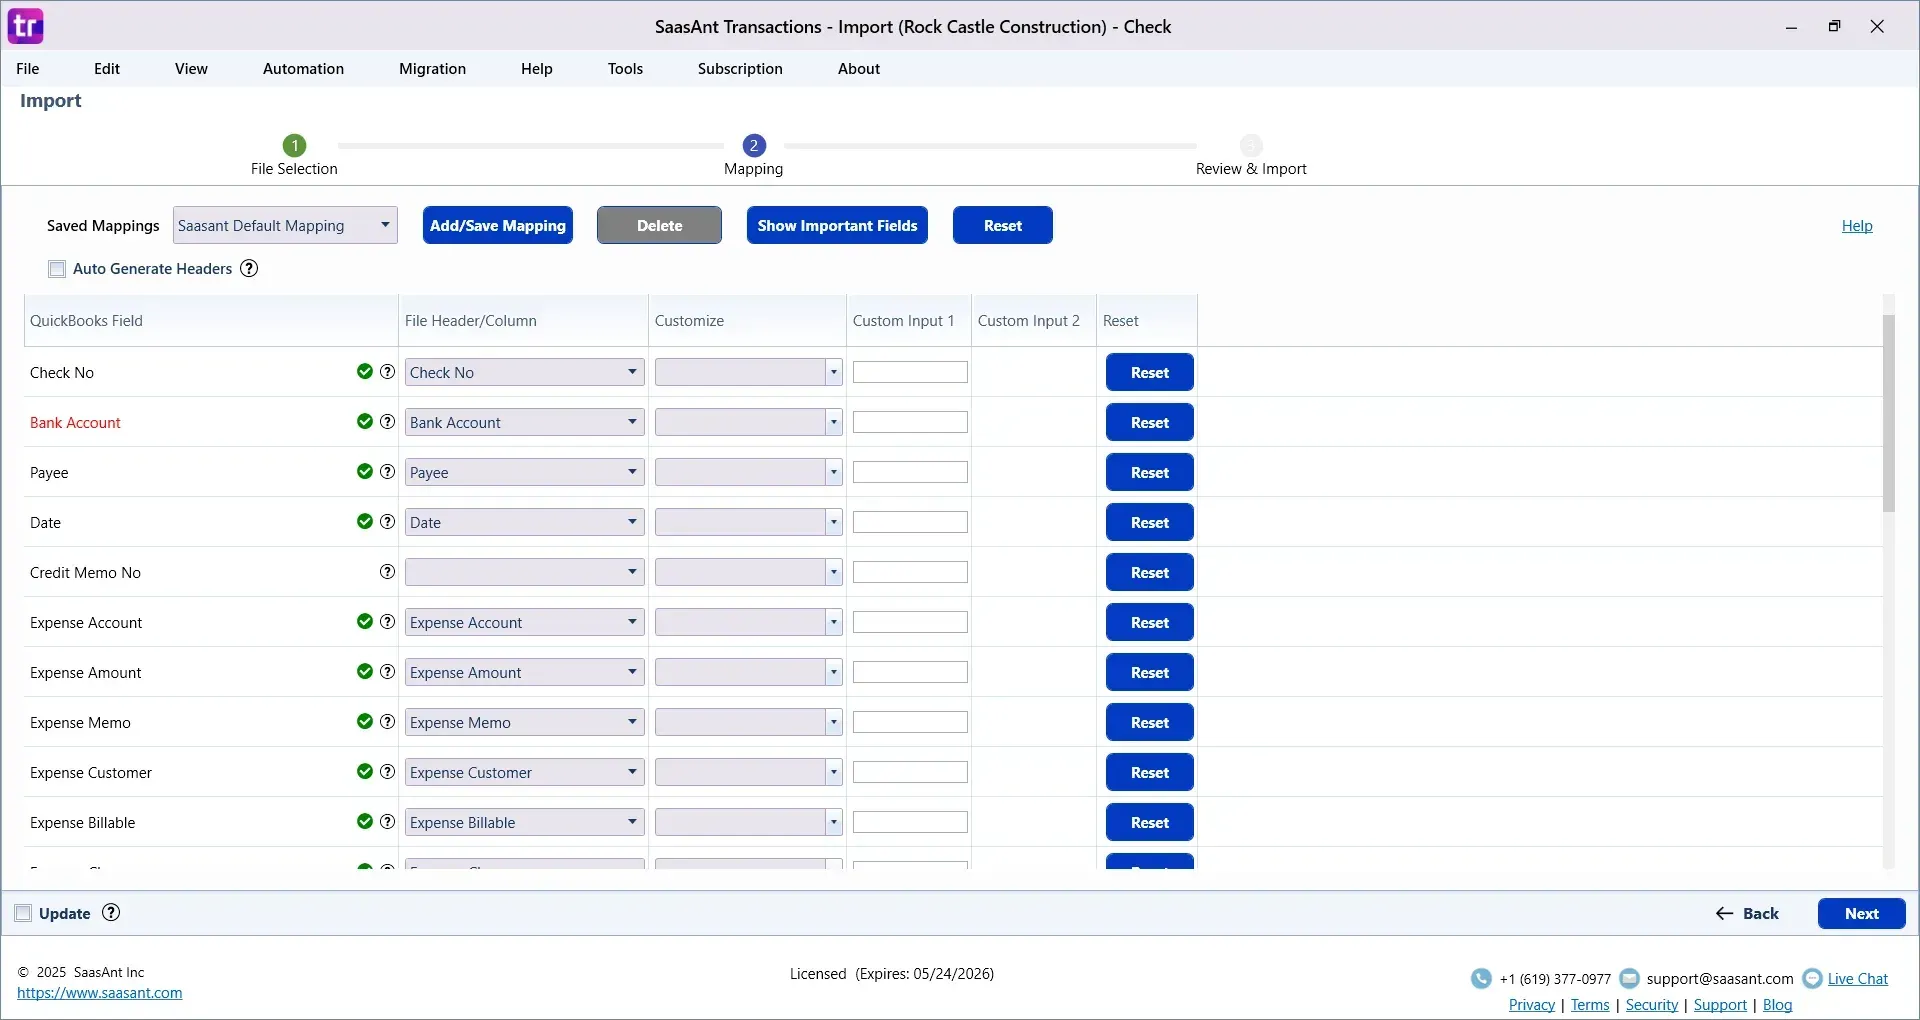
Step 4: Map Your Fields
SaasAnt will display a field mapping screen.
Match your file columns with QuickBooks check fields.
Save the mapping template for future use if needed.
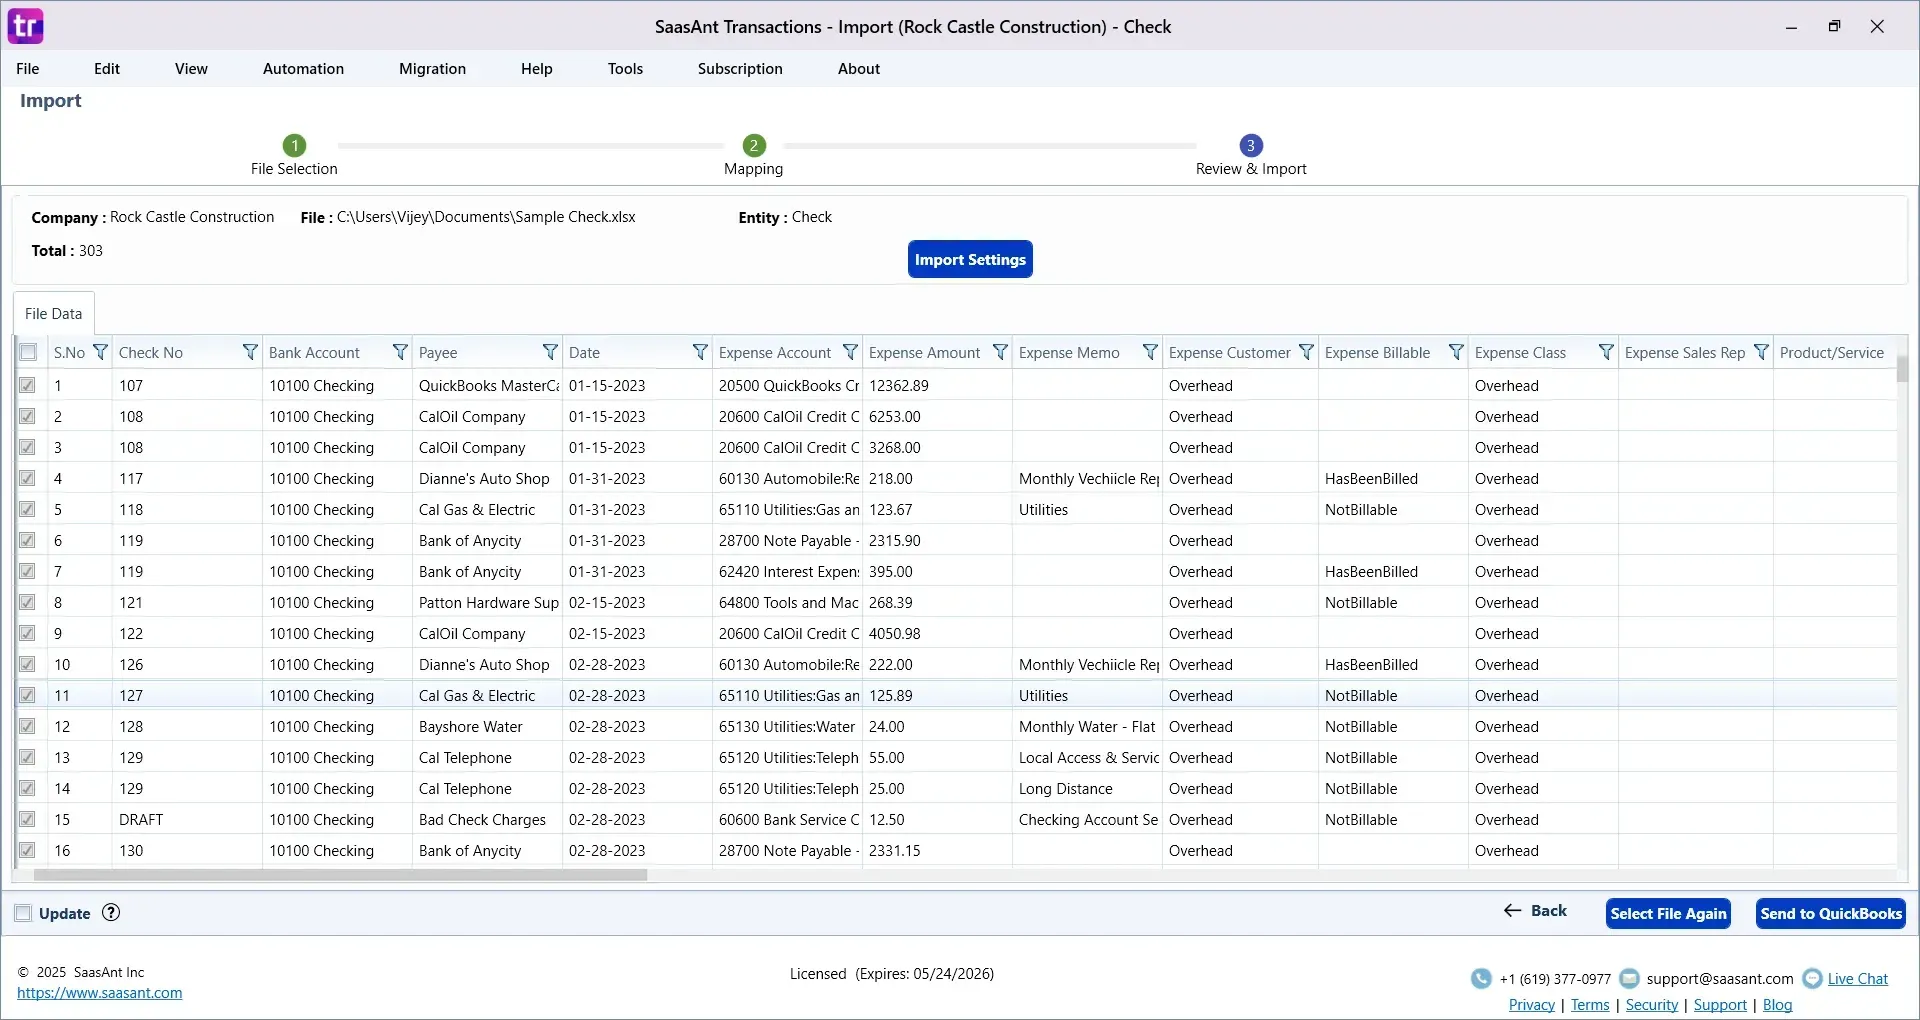
Step 5: Review and Import
Review the mapped data to ensure accuracy.
Click Send to QuickBooks to transfer your check transactions into QuickBooks Desktop.
After import, verify the transactions in QuickBooks.
Why Use SaasAnt Transactions Desktop for Importing Checks?
Here are some key benefits of using SaasAnt Transactions Desktop:
No manual data entry for bulk checks
Quick and easy field mapping with reusable templates
Supports complex transactions, including splits and multiple lines
Detailed import summary and error logs
Option to undo imports when necessary
Conclusion
Importing checks into QuickBooks Desktop with SaasAnt Transactions Desktop saves time and minimizes the risk of manual entry errors. Whether you are handling historical data, backlogs, or ongoing check payments, this process helps streamline your bookkeeping workflow.
If you are looking for a simple and efficient way to import checks, start with SaasAnt Transactions Desktop and experience hassle-free data management today.
Common Questions About Importing Checks
1. Can I import checks with split lines or multiple expense accounts?
Yes, SaasAnt Transactions Desktop supports split lines. You can include multiple expense accounts in the same check using the 'divided' feature on the mapping screen.
2. Will importing checks overwrite existing data?
No, SaasAnt only imports new records. It does not modify or overwrite existing check transactions in QuickBooks Desktop.
3. Can I undo an import if something goes wrong?
Yes, SaasAnt provides an Undo option to roll back imported transactions easily.
4. Does this process work with QuickBooks Online?
No, this guide is specifically for QuickBooks Desktop. For QuickBooks Online, you can use SaasAnt Transactions Online.
Tags
Read also
How to Import Bills into QuickBooks Desktop
How to Import CSV file into QuickBooks Desktop
How to Import Transactions into QuickBooks Desktop
How to Import Invoices into QuickBooks Desktop