How to Make Changes to the Chart of Accounts in QuickBooks for Better Financial Reporting

May 15, 2023

blog_images1703128285899_FI-Banners-11-min-min.webp

Do you struggle to generate accurate financial reports because of an outdated or disorganized Chart of Accounts? Are you unsure of how to make changes to the Chart of Accounts in QuickBooks without negatively impacting past transactions? You're not alone. 

Finding the time and resources to keep their Chart of Accounts up to date can be overwhelming, leaving you frustrated and unsure of where to start.

Maintaining an accurate and updated Chart of Accounts is crucial for efficient and effective financial reporting. However, many businesses and accountants struggle to make changes without causing errors or confusion. 

In this article, we'll explore the importance of maintaining an accurate Chart of Accounts and provide step-by-step guidance on how to make changes in QuickBooks Desktop and Online. Whether you're new to QuickBooks or looking to improve your accounting processes, this article will help you maximize efficiency and accuracy in financial reporting.

Contents

Making Changes to the Chart of Accounts

How to make changes to the Chart of Accounts in QuickBooks Desktop

How to make changes to the Chart of Accounts in QuickBooks Online
Will changes to the Chart of Accounts affect past transactions?

Editing the Chart of Accounts

How to edit the Chart of Accounts in QuickBooks Desktop

How to edit the Chart of Accounts in QuickBooks Online

Adding new accounts and deleting accounts

How to change the account type in QuickBooks Desktop

Customizing the Chart of Accounts

QuickBooks Chart of Accounts templates

QuickBooks Online Chart of Accounts detail type list

Two ways to update the Chart of Accounts to suit the needs of your client

In which 3 ways can you customize a client's Chart of Accounts in QuickBooks?

How to create a new detail type in QuickBooks Online

Changing Chart of Accounts in Other Systems

How to change Chart of Accounts in SAP

How to change Chart of Accounts in company code

How to change Chart of Accounts in controlling area

Final Thoughts

FAQs

How to change account type in QuickBooks desktop

What is the best way to maintain accounting accuracy?

What is the best practice for setting up a Chart of Accounts?

Why should you customize the Chart of Accounts?

Why is it very important to make sure your Chart of Accounts is tidy and efficient?

What systems do accountants use to create and modify a Chart of Accounts?

Making Changes to the Chart of Accounts

How to make changes to the Chart of Accounts in QuickBooks Desktop

Making changes to the Chart of Accounts in QuickBooks Desktop is a straightforward process that allows you to modify and customize your account list to better suit your business needs. Here are the steps to follow to make changes to the Chart of Accounts:

1. Open QuickBooks Desktop and navigate to the Lists menu.

2. Select Chart of Accounts from the drop-down menu.

3. Choose the account you want to modify and right-click on it.

4. Select Edit Account from the drop-down menu.

5. In the Edit Account window, you can change the account name, description, and account number.

6. If you want to change the account type, click the drop-down menu next to Account Type and select the new type.

7. To change the account's detail type, select the drop-down menu next to Detail Type and choose the new type.

8. If you want to change the account's normal balance, select the drop-down menu next to Normal Balance and choose the new balance.

9. Click Save & Close when you are finished making changes.

How to make changes to the Chart of Accounts in QuickBooks Online

Making changes to the Chart of Accounts in QuickBooks Online is a simple process that can help improve your financial reporting. Whether you need to add new accounts, edit existing ones, or delete unused accounts, QuickBooks Online makes it easy to make changes to your Chart of Accounts.

Here is a step-by-step guide on how to make changes to the Chart of Accounts in QuickBooks Online:

  • Log in to your QuickBooks Online account and click on the "Accounting" tab from the left navigation bar.

  • Click on the "Chart of Accounts" tab to view your current Chart of Accounts.

  • To add a new account, click on the "New" button in the upper-right corner of the screen. Select the account type and detail type that you want to create and enter the account name and description.

  • To edit an existing account, find the account you want to edit and click on the drop-down arrow on the right side of the account name. Select "Edit" to make changes to the account details.

  • To delete an account, find the account you want to delete and click on the drop-down arrow on the right side of the account name. Select "Delete" and confirm that you want to delete the account.

You should note that if the account you want to edit or delete has transactions associated with it, you will not be able to make changes to it. You will need to either edit or delete the transactions first before making changes to the account.

The key difference between QuickBooks Online and QuickBooks Desktop is the ability to assign account numbers to accounts. In QuickBooks Online, account numbers are optional and can be turned on or off in the settings. If you choose to use account numbers, they can be assigned to accounts when you create or edit them.

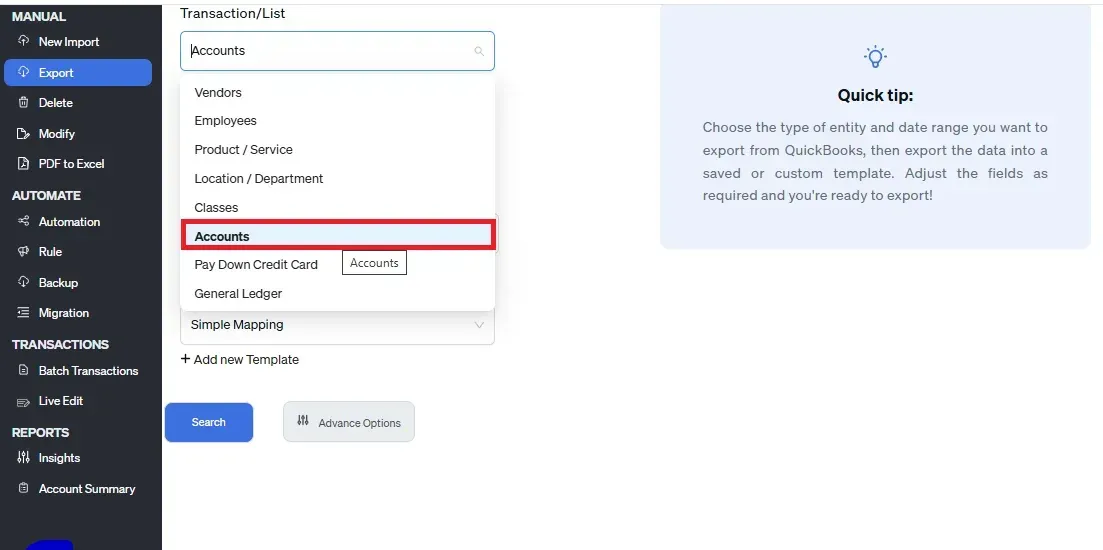
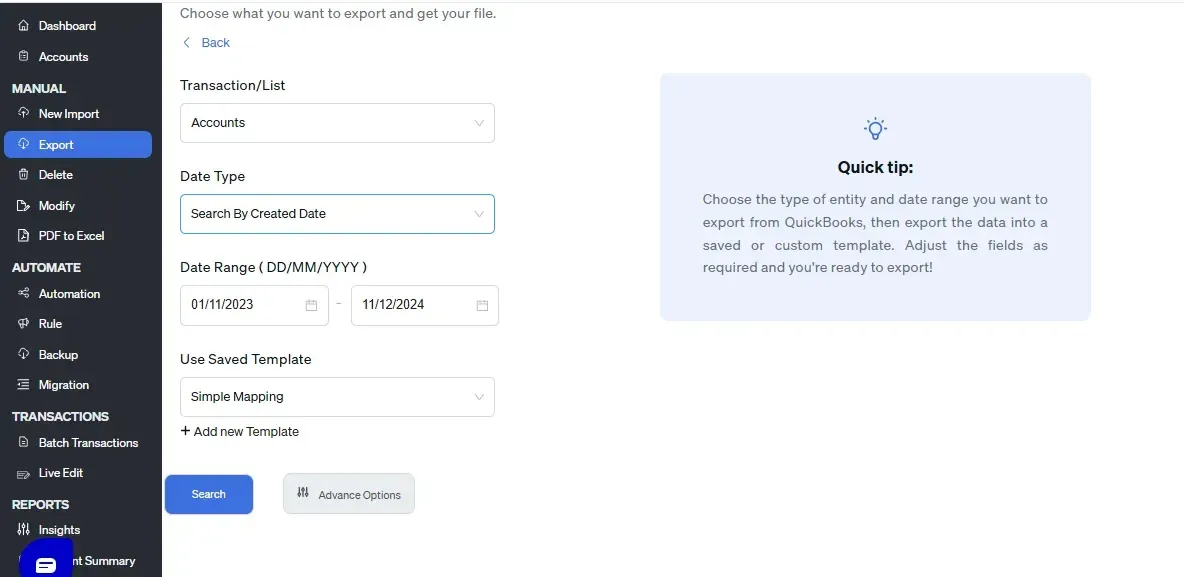
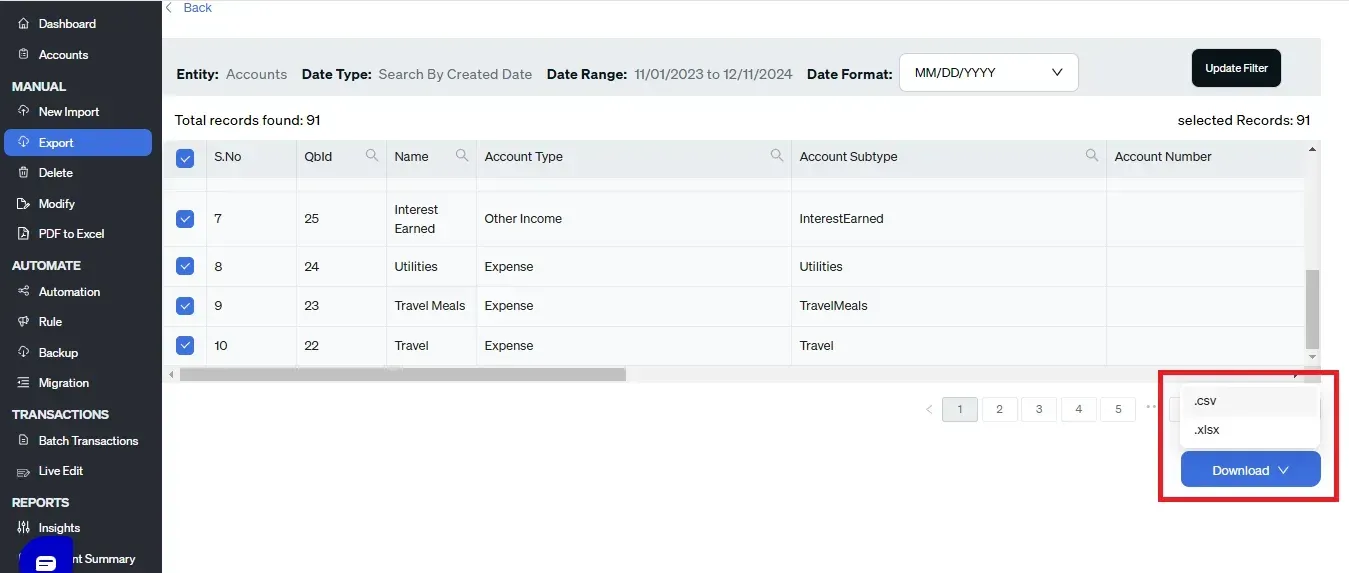
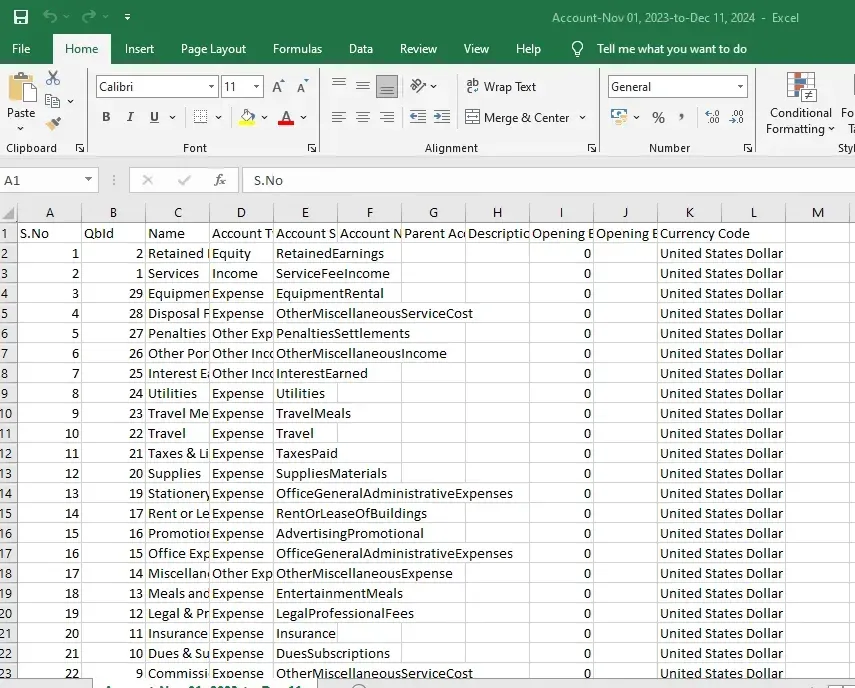
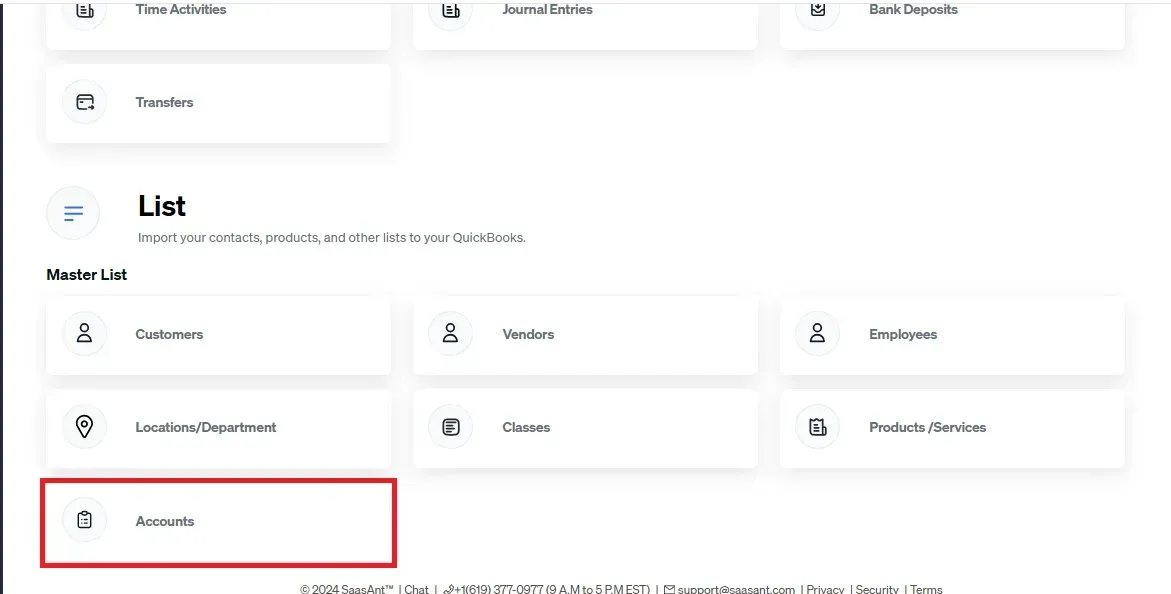
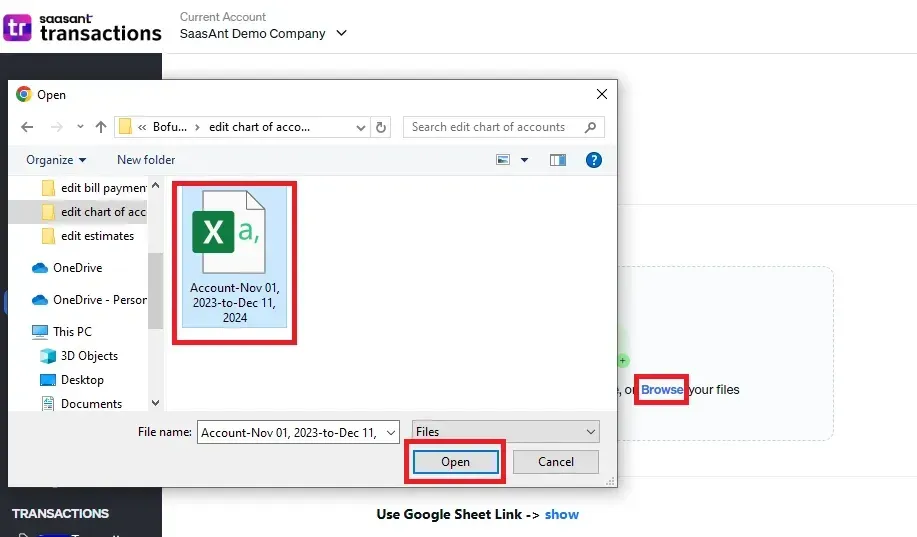
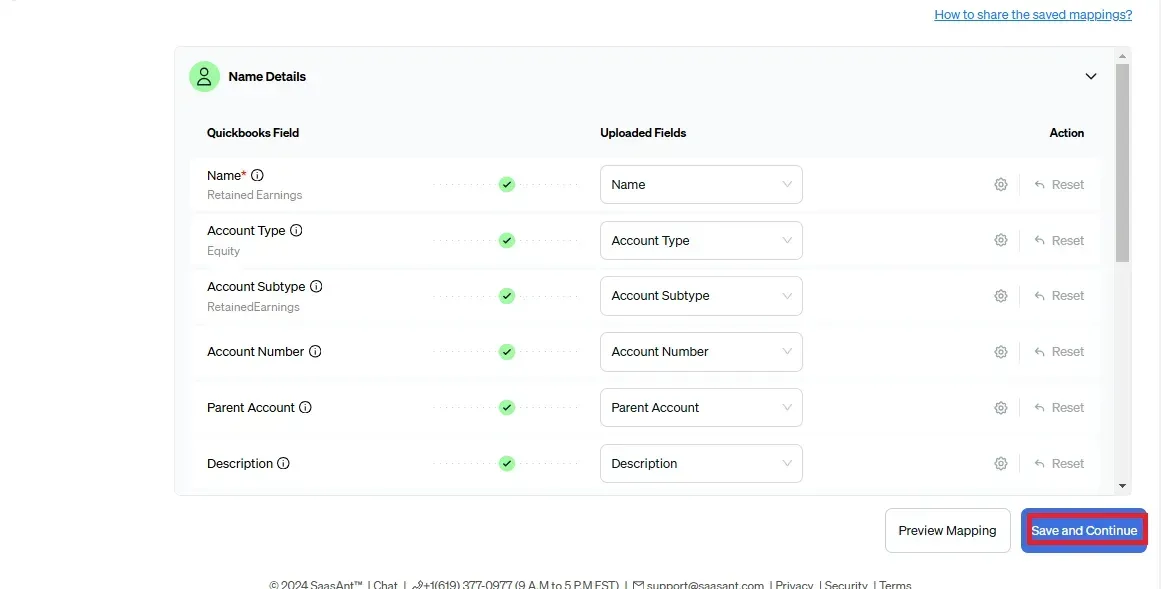
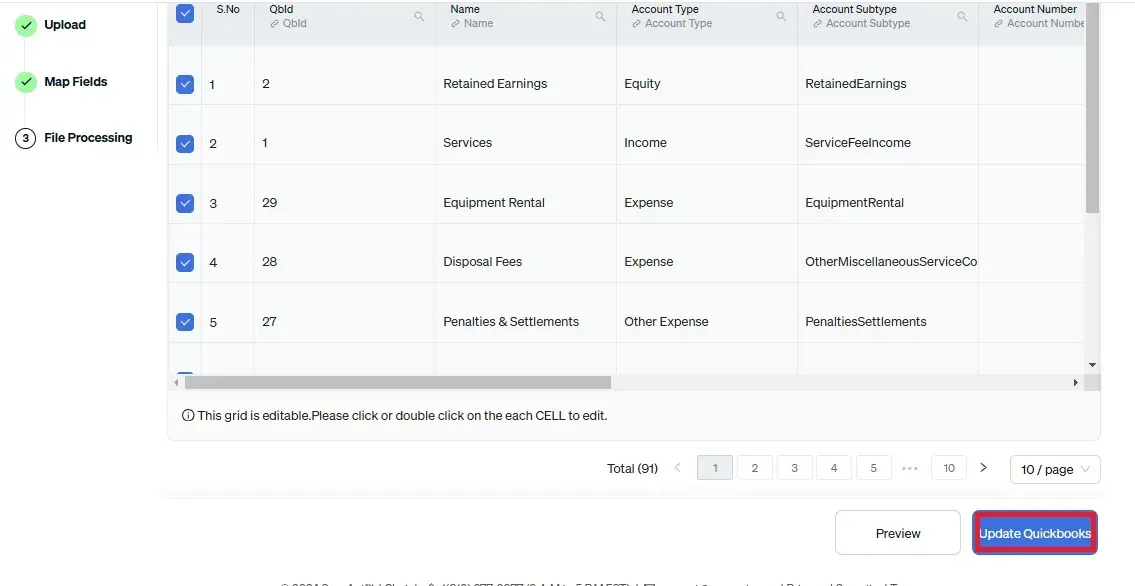
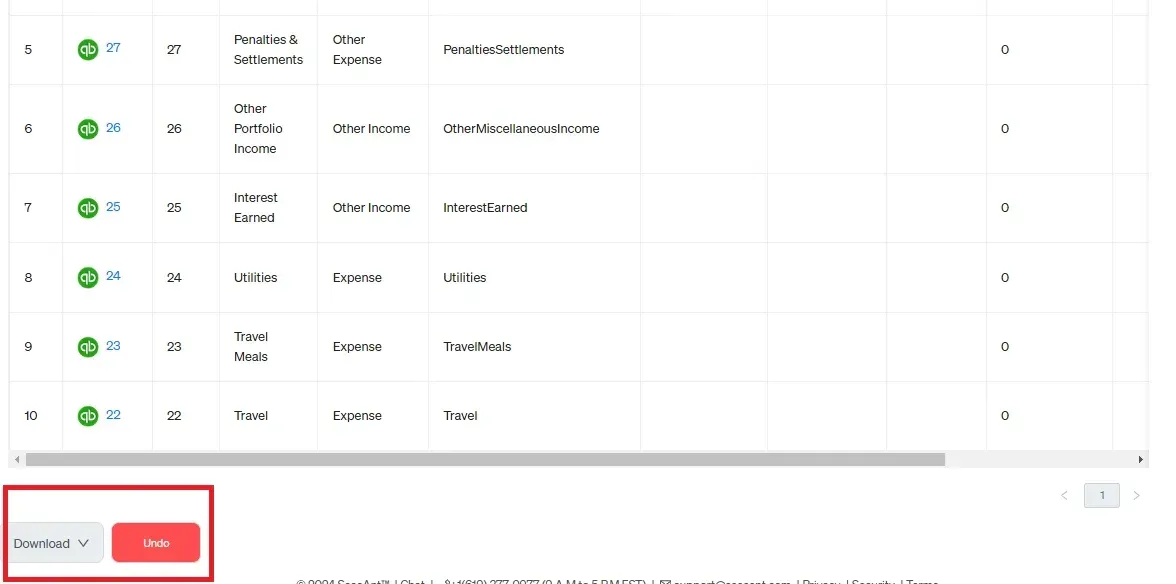
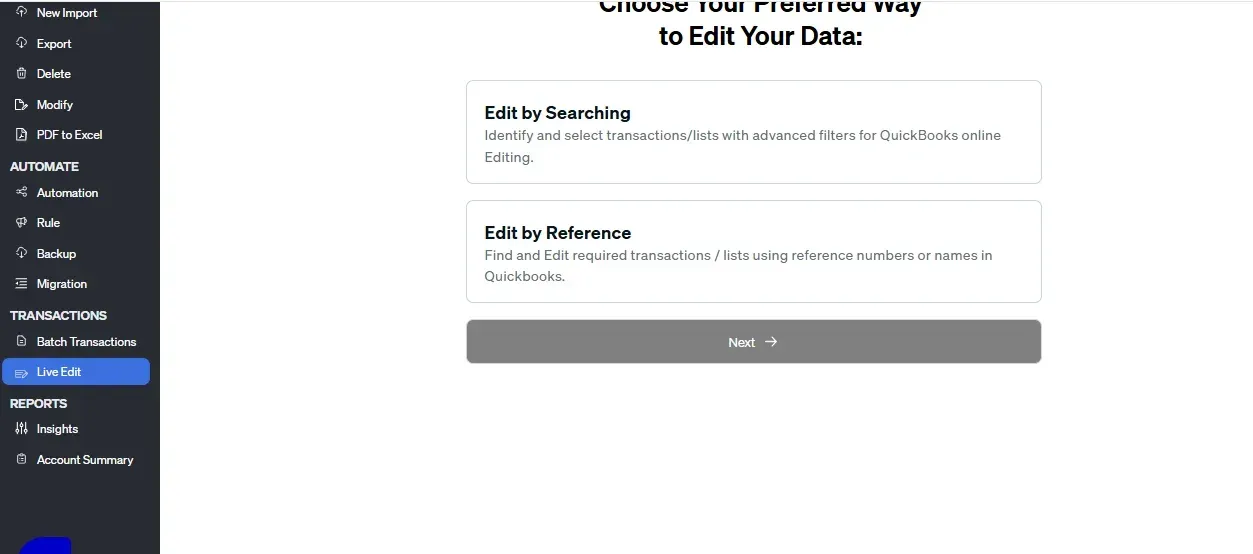
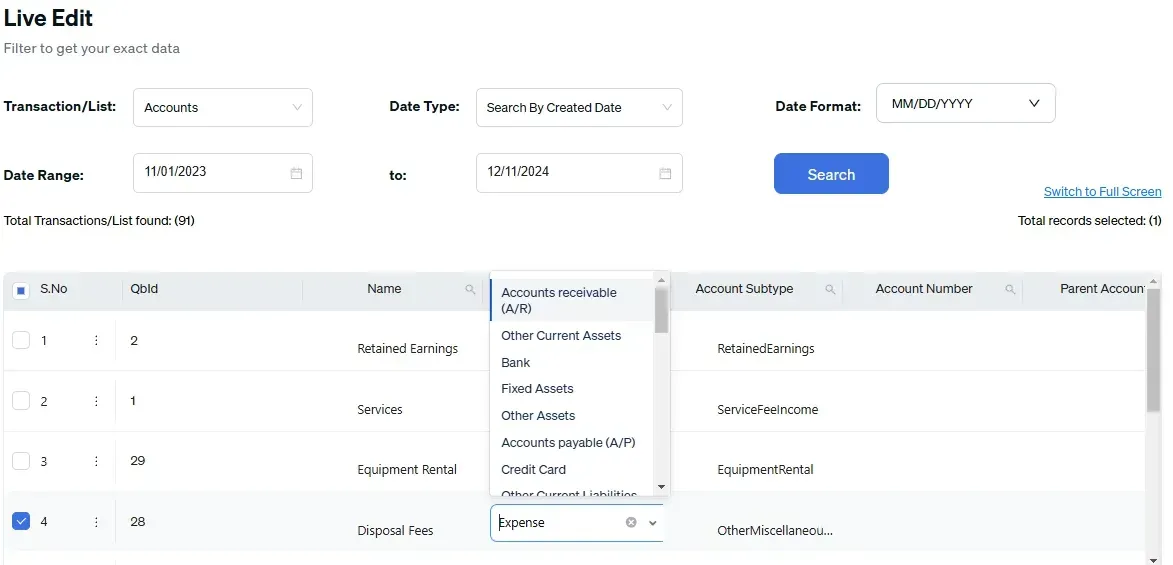
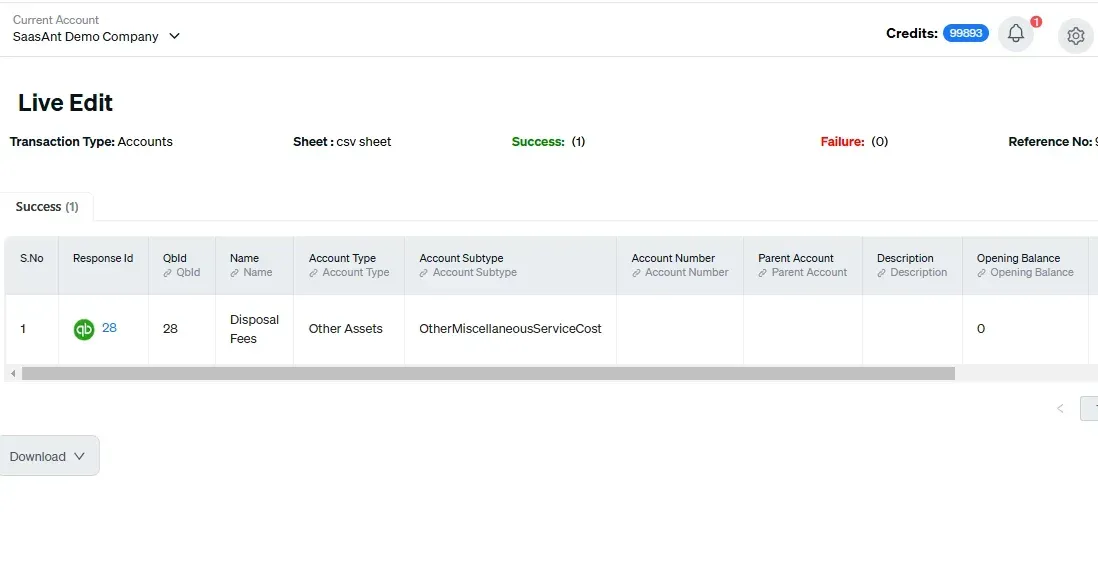
Worried about updating multiple accounts? SaasAnt Transactions lets you edit your chart of accounts in minutes. Save time and streamline your process.

Will changes to the Chart of Accounts affect past transactions?

When you make changes to the Chart of Accounts in QuickBooks, it is natural to wonder how these changes might affect past transactions. The good news is that most changes made to the Chart of Accounts will not affect past transactions. However, there are a few exceptions to keep in mind.

Here are some changes you can make to your Chart of Accounts that will not affect past transactions:

Making Changes to the Chart of Accounts

1. Renaming an account: If you rename an account, it will not affect any past transactions. The transaction history for that account will remain intact.

2. Changing the account description: Similar to renaming an account, changing the account description will not affect any past transactions. It will only change the description going forward.

3. Changing the sort order of accounts: Changing the sort order of accounts in the Chart of Accounts will not have any effect on past transactions.

4. Creating a new account: When you create a new account, it will not affect any past transactions. It will only be used going forward.

However, there are some changes you can make to the Chart of Accounts that will affect past transactions. Here are a few examples:

1. Deleting an account: If you delete an account, it will affect past transactions that were associated with that account. QuickBooks will automatically move those transactions to the new account you assign.

2. Changing the account type: Changing the account type of an account can affect past transactions. For example, if you change an expense account to a revenue account, the past transactions will be affected and could cause inaccuracies in your financial reports.

3. Merging two accounts: If you merge two accounts, it will affect past transactions. QuickBooks will automatically move the transactions from the account being merged to the account you are merging it with.

Once you make changes to the Chart of Accounts, it is difficult to undo them. Therefore, it is recommended that you review your changes carefully before making them.

Editing the Chart of Accounts

How to edit the Chart of Accounts in QuickBooks Desktop

Editing the Chart of Accounts in QuickBooks Desktop is a simple process. The steps are as follows:

1. Open the Chart of Accounts in QuickBooks Desktop. You can do this by clicking on "Lists" in the top menu bar, then selecting "Chart of Accounts".

2. Locate the account that you want to edit and select it by clicking on it. This will highlight the account.

3. Click on "Account" in the top menu bar, then select "Edit Account".

4. Make the necessary changes to the account information, such as the account name or account number.

5. Click "Save & Close" to save your changes and close the window. If you want to save your changes and keep the window open, click "Save & New" instead.

If you want to delete an account, select it from the Chart of Accounts and click on "Account" in the top menu bar. Then select "Delete Account" and confirm the deletion.

When you make changes to an account in the Chart of Accounts, the changes will be reflected in all transactions associated with that account. Therefore, it is recommended to make changes with caution and to double-check that all past transactions have been updated accordingly.

How to edit the Chart of Accounts in QuickBooks Online

Editing the Chart of Accounts in QuickBooks Online is a straightforward process. Here are the steps:

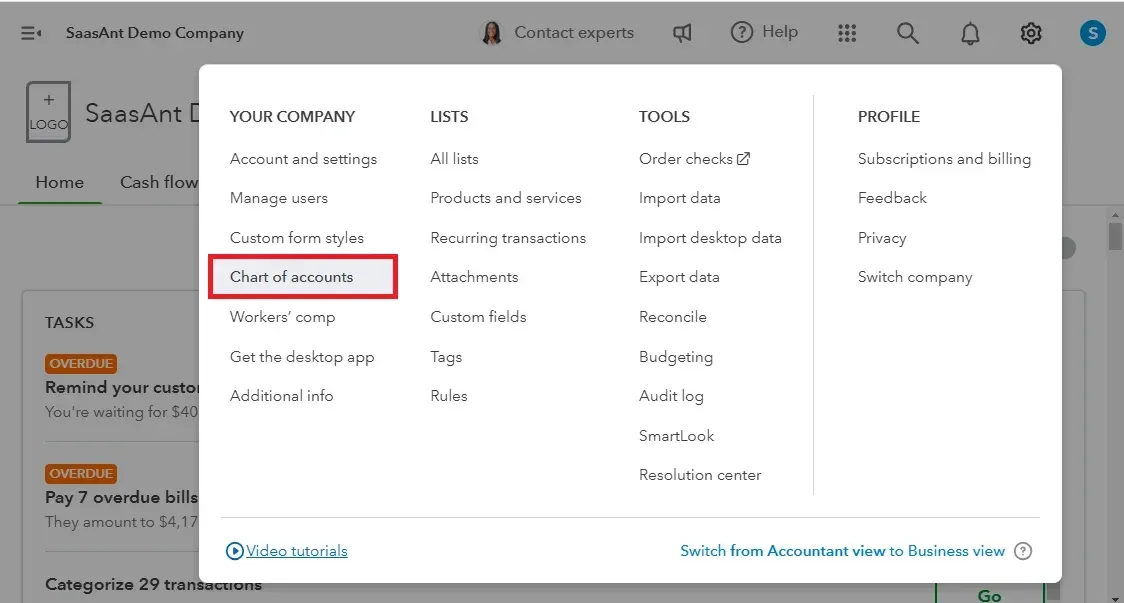
1. Login to QuickBooks Online and go to the Gear icon on the top right-hand corner of the screen.

2. Select "Chart of Accounts" under "Your Company."

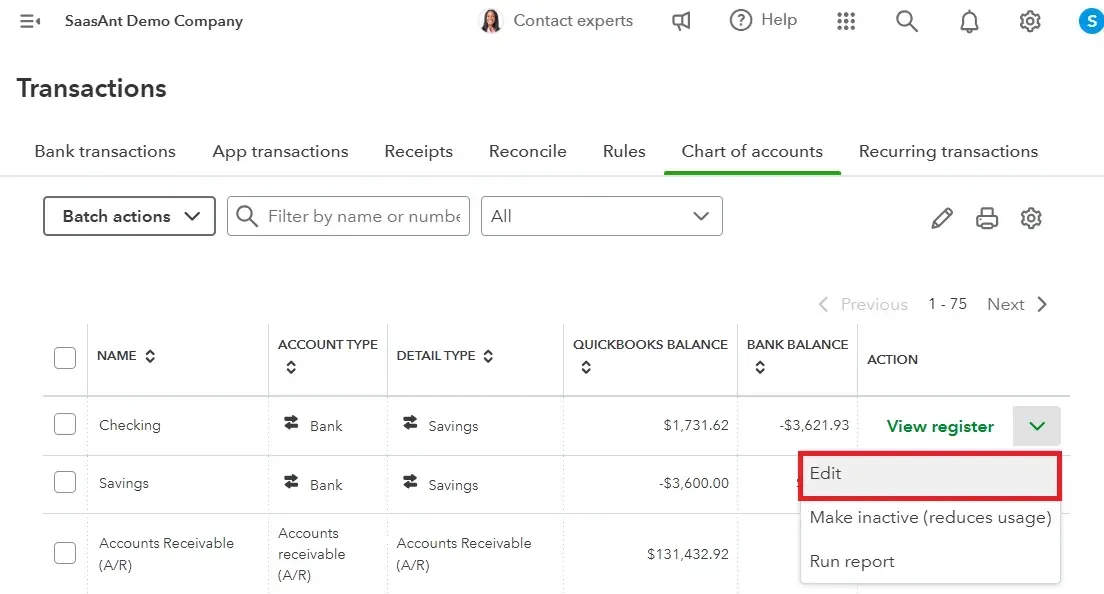
3. Locate the account you want to edit and select the drop-down arrow on the far right side.

4. Select "Edit."

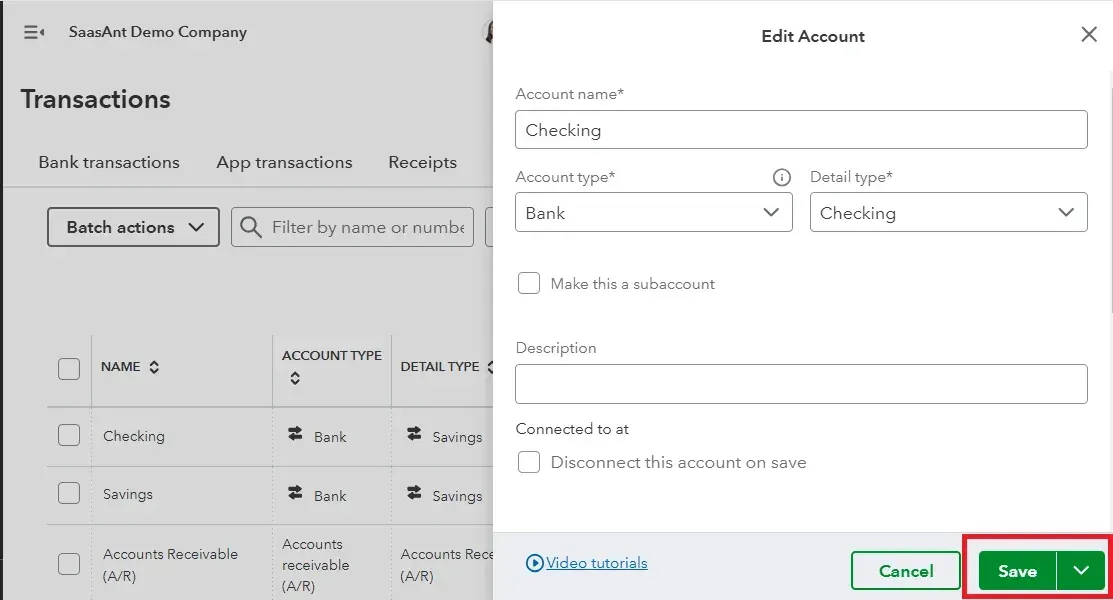
5. You can now make changes to the account name, account type, or description.

6. If you want to change the account number, you need to create a new account with the desired account number and merge the old account into the new one.

7. Click "Save and Close" when you're done.

It's important to note that changes made to the Chart of Accounts will affect future transactions in QuickBooks Online. However, unlike QuickBooks Desktop, changes made to the Chart of Accounts in QuickBooks Online will not affect past transactions.

Additionally, unlike QuickBooks Desktop, QuickBooks Online does not allow you to set up sub-accounts. Instead, you can use the "Category" field to group accounts together. For example, if you want to group all expenses related to rent, you can add "Rent" as a category to each expense account.

Adding new accounts and deleting accounts

Adding new accounts and deleting accounts is an essential aspect of maintaining an accurate and updated Chart of Accounts in QuickBooks. Adding new accounts enables you to keep track of new transactions that were not previously recorded, while deleting accounts removes unused or unnecessary accounts.

Here's how to add new accounts and delete accounts in QuickBooks Desktop:

Adding New Accounts:

  • Open QuickBooks Desktop and go to the Lists menu.

  • Click Chart of Accounts.

  • Click the Account drop-down arrow and select New.

  • Choose the Account Type and detail type.

  • Enter the account name and description.

  • Click Save and Close.

Deleting Accounts:

  • Open QuickBooks Desktop and go to the Lists menu.

  • Click Chart of Accounts.

  • Right-click the account you want to delete and select Delete Account (or select Make Inactive).

  • In the pop-up window, select Yes to confirm the deletion.

Here's how to add new accounts and delete accounts in QuickBooks Online:

Adding New Accounts:

  • Log in to QuickBooks Online and go to the Accounting menu.

  • Click Chart of Accounts.

  • Click New in the upper right corner.

  • Choose the Account Type and detail type.

  • Enter the account name and description.

  • Click Save and Close.

Deleting Accounts:

  • Log in to QuickBooks Online and go to the Accounting menu.

  • Click Chart of Accounts.

  • Select the account you want to delete by checking the box next to it.

  • Click the drop-down arrow in the Action column and select Make Inactive.

  • In the pop-up window, select Yes to confirm the deletion.

Deleting an account in QuickBooks does not delete any transactions associated with that account. The transactions will still be listed in the account history, but will be listed as "unassigned" in the Chart of Accounts.

How to change the account type in QuickBooks Desktop

To change the account type in QuickBooks Desktop, follow these steps:

1. Open QuickBooks Desktop and select the "Lists" menu.

2. Choose "Chart of Accounts" from the drop-down list.

3. Find the account you want to change the type for and select it.

4. Click the "Account" button at the bottom of the window and select "Edit Account" from the menu that appears.

5. In the "Edit Account" window, select the desired account type from the "Account Type" drop-down menu.

6. Depending on the account type you select, additional fields may appear that you need to fill out.

7. Make any necessary changes to the account's name and description.

8. Click "Save & Close" to save your changes.

Customizing the Chart of Accounts

QuickBooks Chart of Accounts templates

Customizing the Chart of Accounts is an important part of maintaining accurate financial records in QuickBooks. QuickBooks offers several Chart of Accounts templates that can be used as a starting point for customization. 

These templates cover a range of industries and business types, including retail, service, and manufacturing. By selecting a template that matches your business type, you can ensure that the Chart of Accounts is structured in a way that makes sense for your business.

To access the Chart of Accounts templates in QuickBooks Desktop, follow these steps:

1. Open QuickBooks and select "Lists" from the main menu.

2. Select "Chart of Accounts."

3. Click the "Activities" drop-down menu and select "New" > "New from Template."

4. Choose the template that matches your business type and click "OK."

5. Once you have selected a template, you can customize it to suit your specific needs. This may involve adding or deleting accounts, changing account names, or reorganizing the structure of the Chart of Accounts.

While the templates can be a helpful starting point, they may not perfectly match your business's unique needs. Customizing the Chart of Accounts is a crucial step in ensuring that your financial records accurately reflect your business's operations and financial status.

In QuickBooks Online, there are also Chart of Accounts templates available that you can choose from. To access these templates, follow these steps:

1. Go to "Settings" and select "Chart of Accounts."

2. Click the "New" button and select "Import from Spreadsheet."

3. Select "Browse" and choose a template file from your computer.

4. Click "Next" and map the accounts in the template to the accounts in QuickBooks.

Review the import and click "Import" to add the accounts to your Chart of Accounts.

QuickBooks Online Chart of Accounts detail type list

QuickBooks Online provides a list of detail types that can be assigned to each account in the Chart of Accounts. These detail types provide more information about the account and help with financial reporting. Here are some of the detail types available in QuickBooks Online:

1. Bank: This is used for bank accounts, including checking, savings, and money market accounts.

2. Accounts Receivable: mainly for tracking money owed to the company by customers or clients.

3. Other Current Assets: tracking assets that will be converted into cash within the next 12 months, such as prepaid expenses and security deposits.

4. Fixed Assets: used for assets that have a useful life of more than one year, such as equipment and buildings.

5. Accounts Payable: assigned to money owed by the company to vendors or suppliers.

6. Credit Card: for tracking credit card accounts and charges.

7. Other Current Liabilities: monitoring liabilities that are due within the next 12 months, such as payroll taxes and customer deposits.

8. Long Term Liabilities: for managing liabilities that will be due more than one year in the future, such as loans and mortgages.

9. Equity: mainly for tracking the company's equity accounts, including owner's equity and retained earnings.

10. Income: for monitoring revenue and sales accounts.

11. Cost of Goods Sold: assigned to expenses directly related to producing or purchasing goods sold by the company.

12. Expense: other expenses not included in Cost of Goods Sold.

13. Other Income: tracking non-operating income, such as interest earned and investment income.

14. Other Expense: non-operating expenses, such as interest paid and bank fees.

Customizing the Chart of Accounts detail types in QuickBooks Online can help ensure accurate financial reporting and analysis. It is important to choose the most appropriate detail type for each account to help with budgeting, forecasting, and decision-making.

Two ways to update the Chart of Accounts to suit the needs of your client

There are two main ways to update the Chart of Accounts in QuickBooks to suit the needs of your client:

1. Add or edit accounts: You can add new accounts to the Chart of Accounts or edit existing accounts to meet the specific needs of your client. This allows you to track transactions in a way that makes sense for your client's business. 

For example, if your client has a retail store, you can create separate accounts for each type of merchandise they sell, such as clothing, shoes, and accessories.

2. Customize account types: QuickBooks provides different account types, such as income, expense, asset, liability, and equity. You can customize these account types to suit the needs of your client's business. For example, you can rename an income account to "sales revenue" or change an asset account to "inventory."

Updating the Chart of Accounts is important to ensure that the financial data entered in QuickBooks is accurate and useful for making informed business decisions. When customizing the Chart of Accounts, it is important to keep in mind the specific needs of your client's business and to maintain consistency and organization within the Chart of Accounts.

In which 3 ways can you customize a client's Chart of Accounts in QuickBooks?

In QuickBooks, there are several ways to customize a client's Chart of Accounts to meet their specific needs. Here are three ways you can do this:

3 ways can you customize a client's Chart of Accounts

1. Edit existing accounts: You can edit an existing account by changing its name, description, or account type. This can be done in both QuickBooks Desktop and QuickBooks Online.

2. Add new accounts: If your client requires additional accounts that are not already in their Chart of Accounts, you can add new accounts. This can also be done in both QuickBooks Desktop and QuickBooks Online.

3. Create custom account types: QuickBooks Online allows you to create custom account types. This allows you to categorize accounts according to your client's specific business needs. For example, if your client is a law firm, you may want to create a custom account type for "legal fees."

By customizing a client's Chart of Accounts, you can make sure that their financial reports provide the information they need to make informed business decisions.

How to create a new detail type in QuickBooks Online

To create a new detail type in QuickBooks Online, follow these steps:

1. Log in to your QuickBooks Online account and go to the Accounting menu.

2. Select the Chart of Accounts tab and click on the New Account button.

3. Select the account type that you want to create a detail type for and enter the name of the new detail type in the Name field.

4. Click on the Detail Type dropdown and select the option to Add New.

5. Enter the name of the new detail type in the field provided and click Save.

6. You can then add additional custom fields for the detail type by clicking on the Add New button next to the Custom Fields section.

7. Once you have finished customizing the detail type, click on the Save and Close button to add it to the Chart of Accounts.

By creating a new detail type, you can further customize your Chart of Accounts to better suit the specific needs of your business or clients. This can help to improve the accuracy and efficiency of your financial reporting and analysis.

Changing Chart of Accounts in Other Systems

How to change Chart of Accounts in SAP

Changing the Chart of Accounts in SAP can be a complex process that requires careful planning and execution to ensure that financial reporting remains accurate and consistent. Here are the general steps to change the Chart of Accounts in SAP:

How to change Chart of Accounts in SAP

1. Backup the current Chart of Accounts: Before making any changes, it's important to create a backup of the current Chart of Accounts to ensure that you can restore it in case something goes wrong.

2. Define the new Chart of Accounts: The new Chart of Accounts should be defined in SAP. You can create a new Chart of Accounts from scratch or use an existing template and modify it to suit your needs.

3. Map the old and new Chart of Accounts: You need to map the old and new Chart of Accounts to ensure that the data from the old Chart of Accounts can be transferred to the new one. This involves defining a mapping table that links the old and new account numbers.

4. Define a conversion method: You need to define a conversion method to convert the data from the old Chart of Accounts to the new one. There are various methods available, such as batch input, LSMW, and BAPI.

5. Test the conversion: Before implementing the new Chart of Accounts, it's important to test the conversion process to ensure that it works correctly. You can do this by creating a test environment and running the conversion process on a sample dataset.

6. Implement the new Chart of Accounts: Once you're satisfied with the testing, you can implement the new Chart of Accounts in SAP. This involves running the conversion process on the live dataset and updating the relevant modules, such as FI and CO.

7. Verify the results: After implementing the new Chart of Accounts, you need to verify the results to ensure that the financial reporting is accurate and consistent. This involves running various reports and comparing the data with the old Chart of Accounts.

It's worth noting that changing the Chart of Accounts in SAP can have a significant impact on your business processes and reporting. Therefore, it's important to consult with an experienced SAP consultant and plan the changes carefully to ensure a smooth transition.

How to change Chart of Accounts in company code

To change the Chart of Accounts in a company code in SAP, follow these steps:

1. Log in to SAP and go to the SAP Easy Access screen.

2. From the menu bar, select Accounting > Financial Accounting > General Ledger > Master Records > G/L Accounts > Preparations > Edit Chart of Accounts List.

3. On the Edit Chart of Accounts List screen, select the company code for which you want to change the Chart of Accounts.

4. Click on the Change button.

5. On the next screen, select the new Chart of Accounts that you want to use for the company code.

6. Click on the Save button to save the changes.

Changing the Chart of Accounts in SAP can have a significant impact on financial reporting. It is important to carefully review the changes and ensure that they are properly communicated to all stakeholders. Additionally, any changes to the Chart of Accounts should be made in consultation with an experienced SAP consultant or accounting professional.

How to change Chart of Accounts in controlling area

Changing the Chart of Accounts in SAP's controlling area involves the following steps:

1. Launch the transaction code KEA0 or navigate to SPRO → SAP Reference IMG → Controlling → General Controlling → Organization → Maintain Controlling Area.

2. In the "Change Controlling Area" window, click on the "Details" tab.

3. Click on the "Chart of Accounts" field and select the new Chart of Accounts from the list.

4. The system will display a message stating that the Chart of Accounts has changed and that the change will only take effect after you have regenerated all transaction figures. Click "Yes" to continue.

5. Next, you will need to regenerate the transaction figures for all your controlling areas. To do this, go to SPRO → SAP Reference IMG → Controlling → General Controlling → Organization → Maintain Controlling Area and select "Regenerate Transaction Figures" from the "Controlling Area" menu.

6. In the "Regenerate Transaction Figures" window, select "Controlling Area" and click on the "Execute" button.

7. The system will display a message stating that all transaction figures have been regenerated. Click "OK" to confirm the message.

8. Finally, you will need to assign the new Chart of Accounts to all relevant controlling areas. To do this, navigate to SPRO → SAP Reference IMG → Controlling → General Controlling → Organization → Maintain Controlling Area and select "Assign Company Code to Controlling Area" from the "Controlling Area" menu.

9. In the "Assign Company Code to Controlling Area" window, select the relevant company code from the list and assign it to the controlling area.

By following these steps, you can successfully change the Chart of Accounts in SAP's controlling area.

Final Thoughts

Regularly reviewing and updating the Chart of Accounts is crucial for better financial reporting in QuickBooks. It can help businesses accurately track their financial transactions, analyze data, and make informed decisions. 

To simplify the process, tools like PayTraQer and SaasAnt Transactions can be used. PayTraQer offers features like automated bookkeeping, bank reconciliation, and financial reporting, while SaasAnt Transactions allows users to import transactions from various sources into QuickBooks. 

Both tools can help businesses streamline their accounting processes, save time, and improve financial reporting accuracy. In today's fast-paced business world, time is essential, and utilizing the right tools can help businesses focus on growing their business.

FAQs

How to change account type in QuickBooks desktop

To change the account type in QuickBooks Desktop, go to the Chart of Accounts and select the account you want to edit. Right-click on the account and select Edit Account. In the Edit Account window, you can change the account type by selecting a new one from the drop-down menu. 

If the account you want to change is already associated with transactions, QuickBooks will prompt you to make sure you want to proceed with the change. Once you've made the changes, click Save and Close to update the account. It's important to ensure that the account type is set correctly to accurately reflect the financial information in your business.

What is the best way to maintain accounting accuracy?

The best way to maintain accounting accuracy is by establishing a system of internal controls and regularly reviewing financial records. This involves properly categorizing transactions, reconciling accounts, and monitoring for any discrepancies or errors. 

It's also important to have a clear and up-to-date Chart of Accounts and to ensure that all transactions are accurately recorded and classified. 

Regularly reviewing financial statements and conducting audits can also help to identify any issues and ensure that the accounting records are accurate. Finally, staying current on accounting regulations and best practices can also help to maintain accuracy and compliance.

What is the best practice for setting up a Chart of Accounts?

The best practice for setting up a Chart of Accounts involves identifying and organizing the financial transactions specific to your business. The Chart of Accounts should be simple, clear, and specific to your company's needs. 

The accounts should be structured in a logical sequence and organized into categories that make sense for your business. It's important to keep the Chart of Accounts up to date and reviewed on a regular basis to ensure its accuracy. 

The Chart of Accounts should be flexible enough to accommodate changes in the business structure and keep up with the growth and development of the business. It's also essential to keep the Chart of Accounts free from duplication and unnecessary accounts.

Why should you customize the Chart of Accounts?

Customizing the Chart of Accounts is important to accurately reflect a company's unique financial situation and operations. A generic Chart of Accounts may not capture all the specific accounts needed for a particular business, resulting in inaccuracies or difficulties in reporting. 

By customizing the Chart of Accounts, businesses can more accurately track their financial transactions, make informed decisions, and better understand their financial performance. It also ensures that all financial data is organized in a way that is meaningful and easy to interpret, making it easier for stakeholders to understand the company's financial standing and make informed decisions.

Why is it very important to make sure your Chart of Accounts is tidy and efficient?

It is essential to ensure that your Chart of Accounts is tidy and efficient as it affects the accuracy and efficiency of your financial reporting. A well-organized Chart of Accounts allows you to easily classify transactions and provides a clear picture of the financial health of your business. 

This, in turn, helps you make informed business decisions and improves your ability to identify and correct errors in your accounting records. On the other hand, a cluttered and disorganized Chart of Accounts can make it difficult to analyze financial data, leading to errors in financial reporting and potentially serious consequences for your business. 

Therefore, regularly reviewing and optimizing your Chart of Accounts can help maintain financial accuracy and make your accounting processes more efficient.

What systems do accountants use to create and modify a Chart of Accounts?

Accountants use a variety of systems to create and modify a Chart of Accounts. The most popular software for this purpose is QuickBooks, both in the desktop and online versions. Other popular accounting software options include Xero, FreshBooks, and Wave. 

Additionally, some accountants may use Excel spreadsheets or other custom-built software to manage their clients' Chart of Accounts. Some larger companies may also use enterprise resource planning (ERP) software like SAP or Oracle to manage their Chart of Accounts. Ultimately, the choice of software depends on the specific needs of the business and the accountant's preferences and expertise.