How to Import Customer List in QuickBooks Desktop
Effective management of customer data is important for keeping accurate records and efficient billing in QuickBooks Desktop. However, the manual task of creating or updating customer records can be time-consuming and error-prone, particularly for businesses with high transaction volumes.
This guide details how to import a customer list into QuickBooks Desktop using SaasAnt Transactions Desktop. By automating the import process, you can easily upload customer data from Excel or CSV files, ensure correct field mapping, and maintain consistency in your accounting records, all while saving time and lessening manual effort.

This guide is perfect for accountants, bookkeepers, and small to medium-sized businesses using QuickBooks Desktop who require a quick and precise method to import or update extensive customer lists without manual data entry.
How to Import Customer Lists into QuickBooks Desktop: Step-By-Step Guide
Follow the steps below to import the Customer List in QuickBooks Desktop using the SaasAnt Transactions Desktop.
Step 1: Install and Connect SaasAnt Transactions
Download the latest SaaSAnt Transactions Desktop version.
Run SaasAntTransactions-Setup.exe as an administrator.
Accept the license agreement and complete the installation.
Open the app, go to Subscription > Register.
Enter the license key from your confirmation email.
Keep your internet connection active.
Step 2: Launch SaasAnt Transactions Desktop
Start by opening the SaasAnt Transactions Desktop app on your system.
Ensure that QuickBooks Desktop is open and connected to your company file before proceeding.
Step 3: Connect to QuickBooks Desktop
Now you need to connect the SaasAnt Transactions Desktop with QuickBooks Desktop. Here's how:
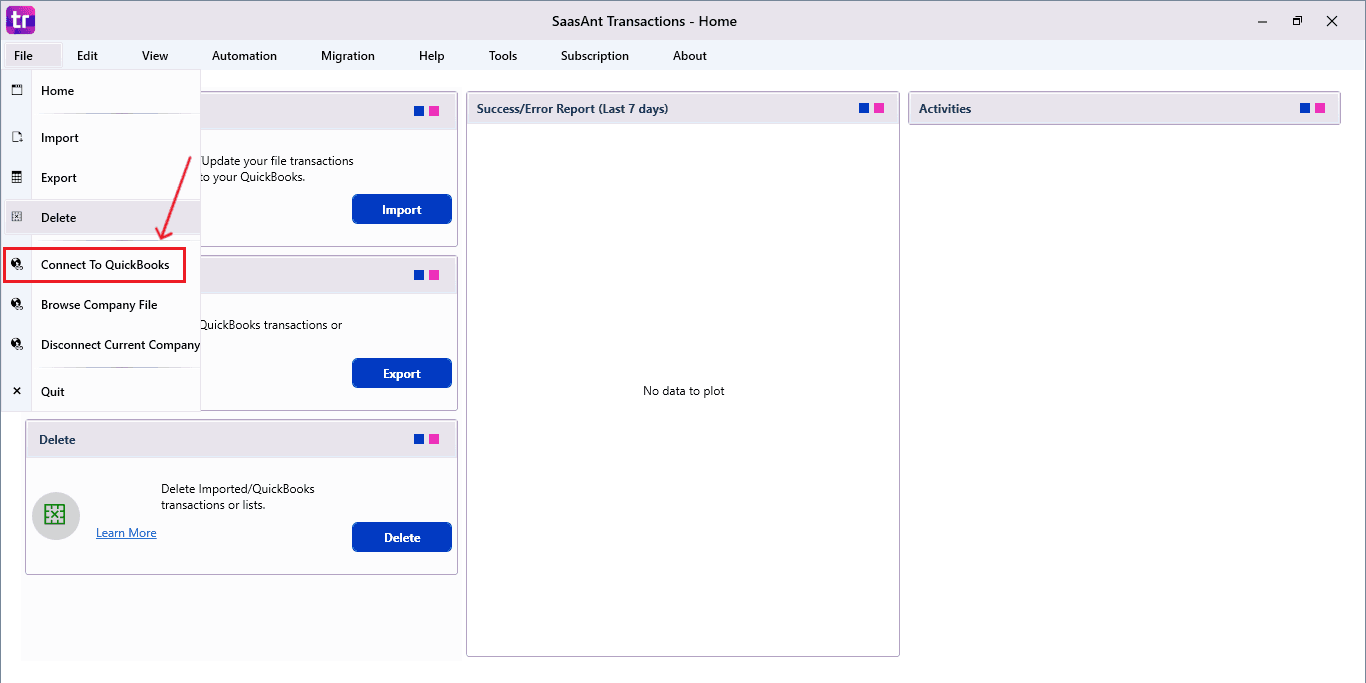
Go to the ‘File’ menu in the top-left corner of SaasAnt Transactions Desktop.
Click ‘Connect to QuickBooks’ from the dropdown.
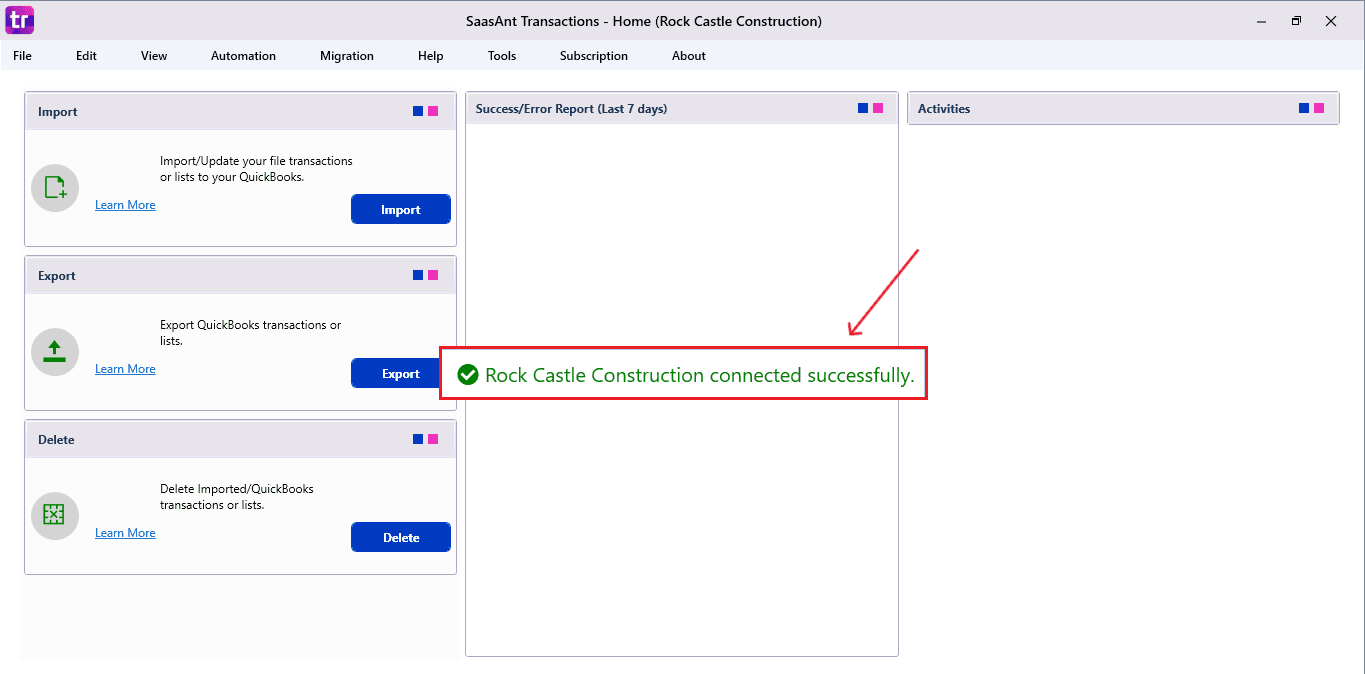
The company is now successfully connected to QuickBooks.
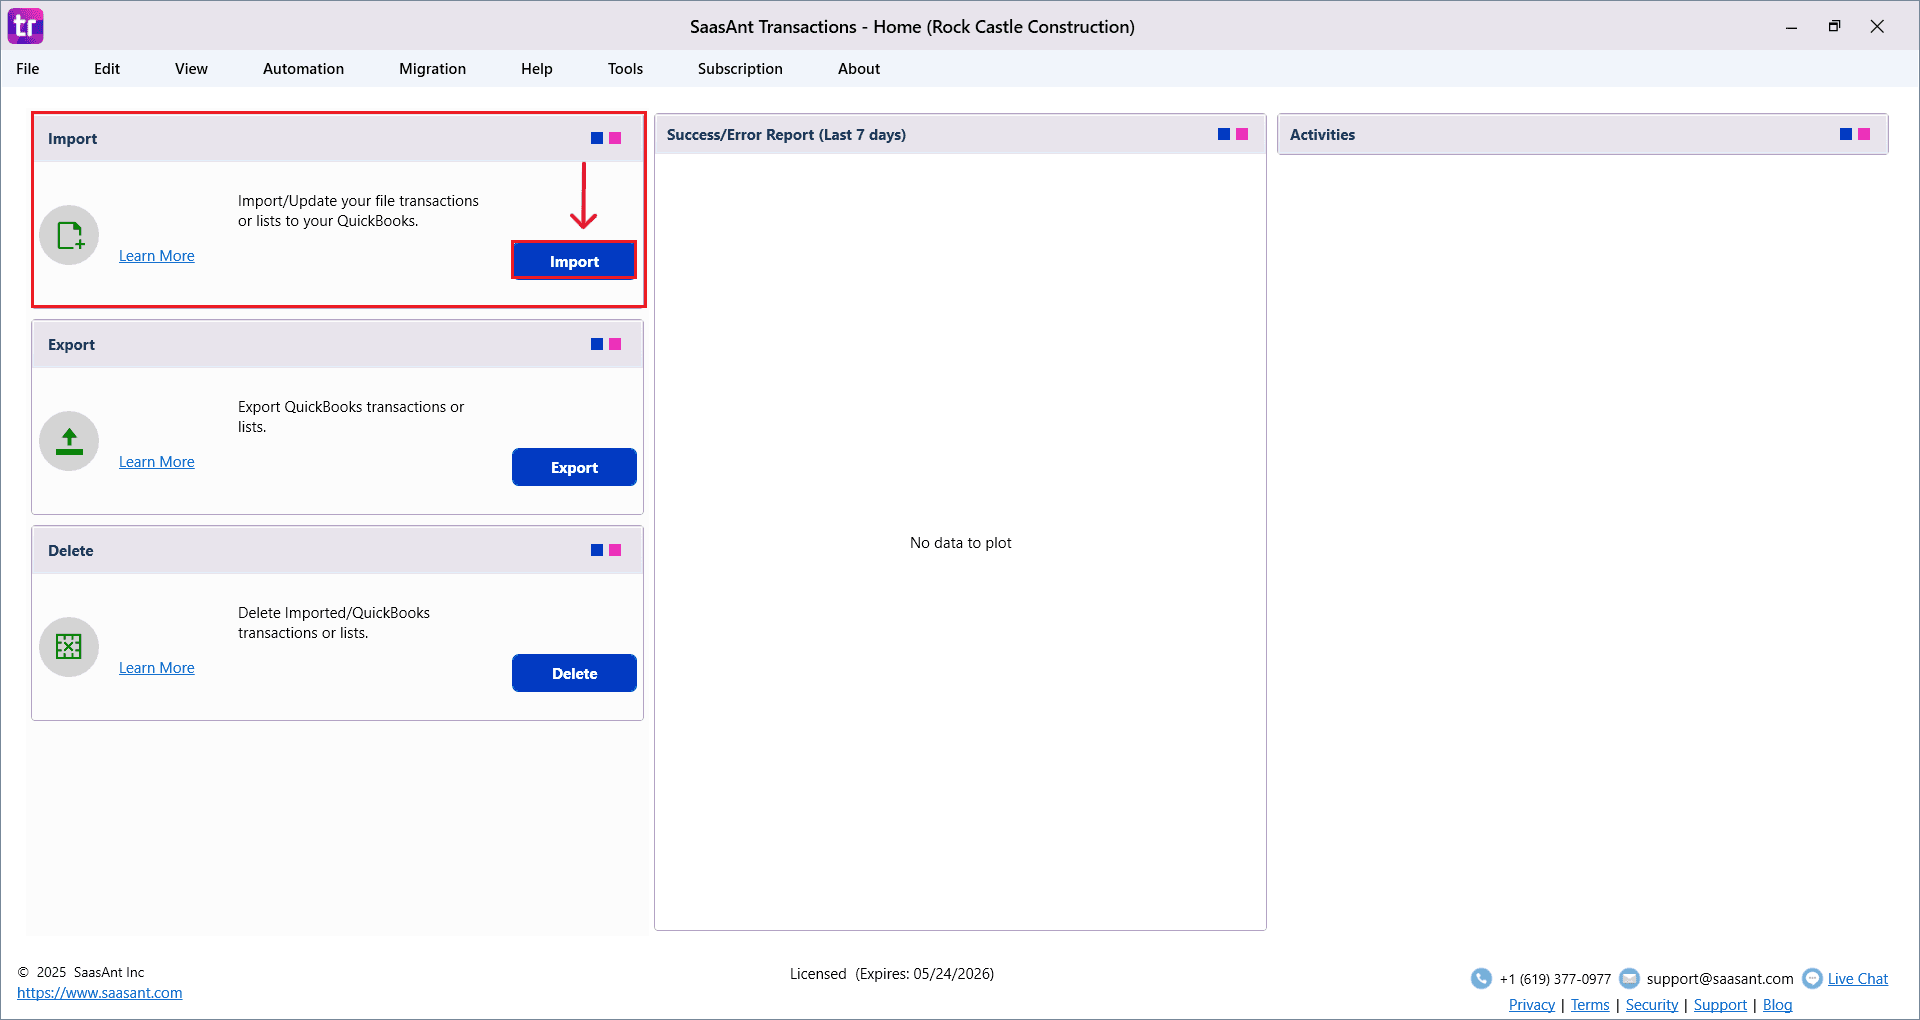
Step 4: Open SaasAnt Transactions
On the SaasAnt dashboard:
On the top left side of the SaasAnt Transactions dashboard, select “Import”.
The Dashboard appears as shown in the image below.
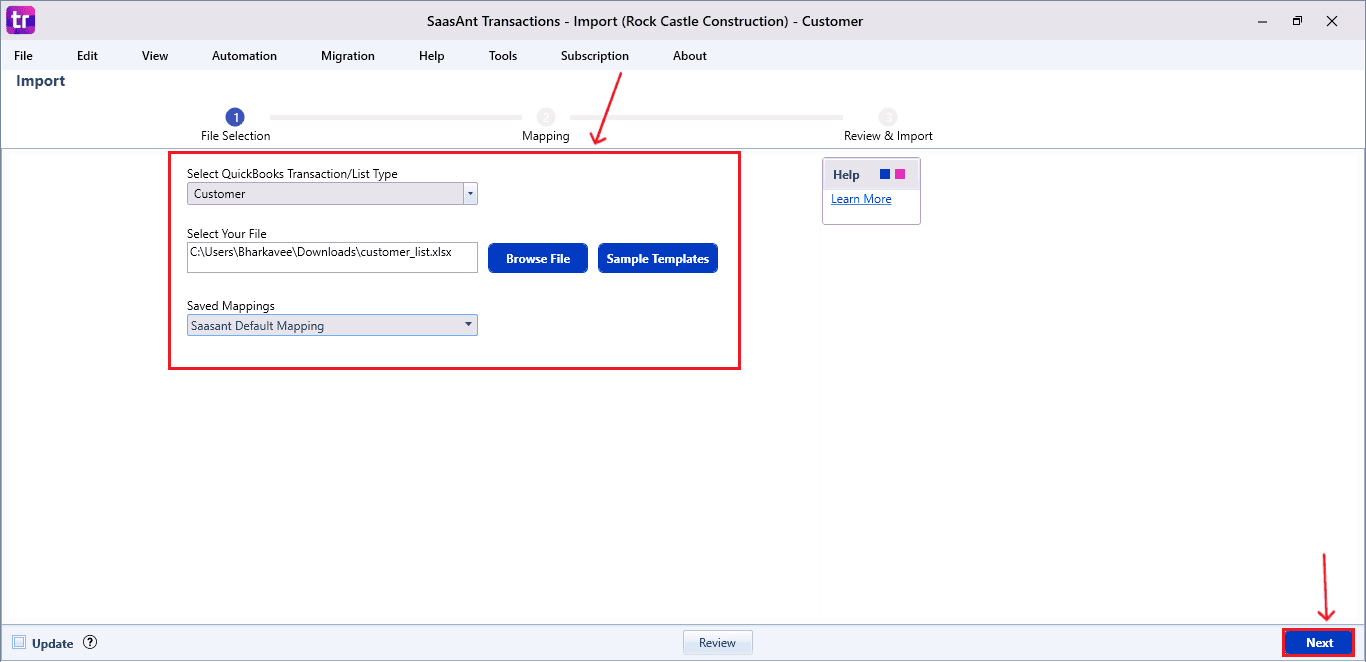
Now select “Customers” from the SaasAnt Transaction Type dropdown and upload your Excel or CSV file.
Select “SaasAnt Default Mapping” under the Saved Mapping dropdown.
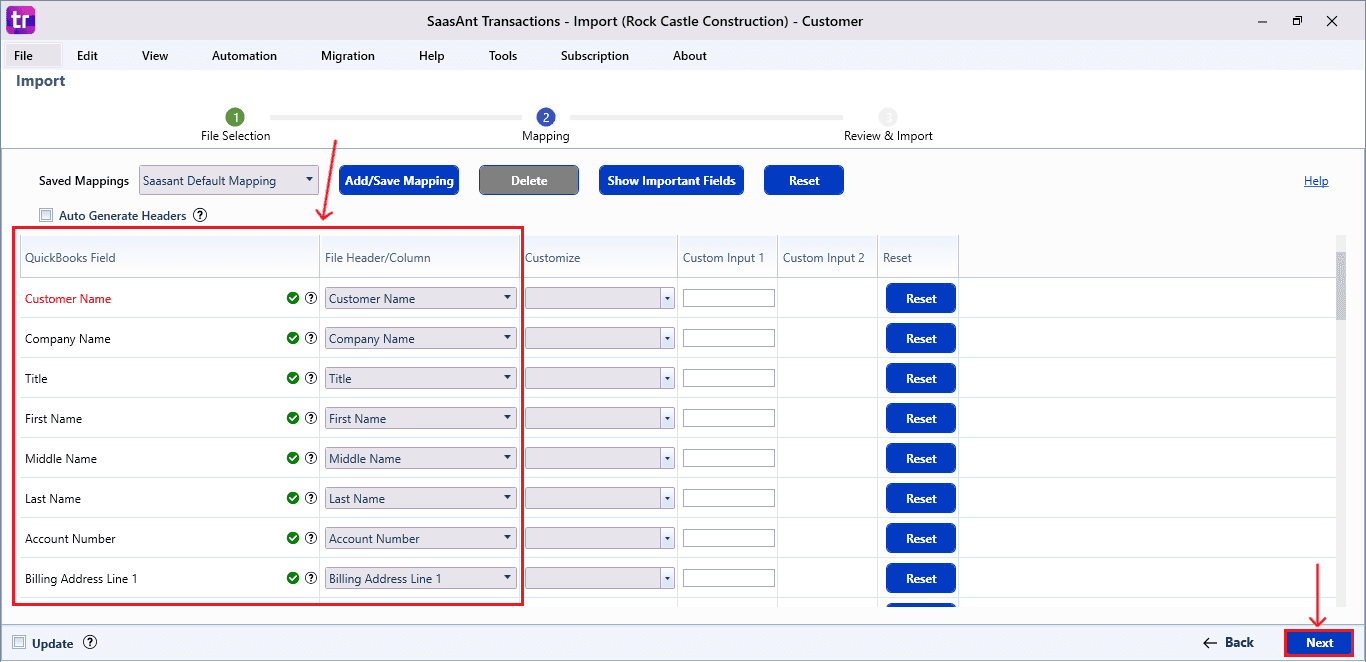
Step 5: Mapping Fields
Ensures the mapping of essential fields, including customer name, company name, account number, etc.
Select “Next” at the bottom right of the dashboard.
Step 6: Review and Import the Customer List
Click the “Send to QuickBooks” option at the bottom right of the dashboard, as shown in the image below.
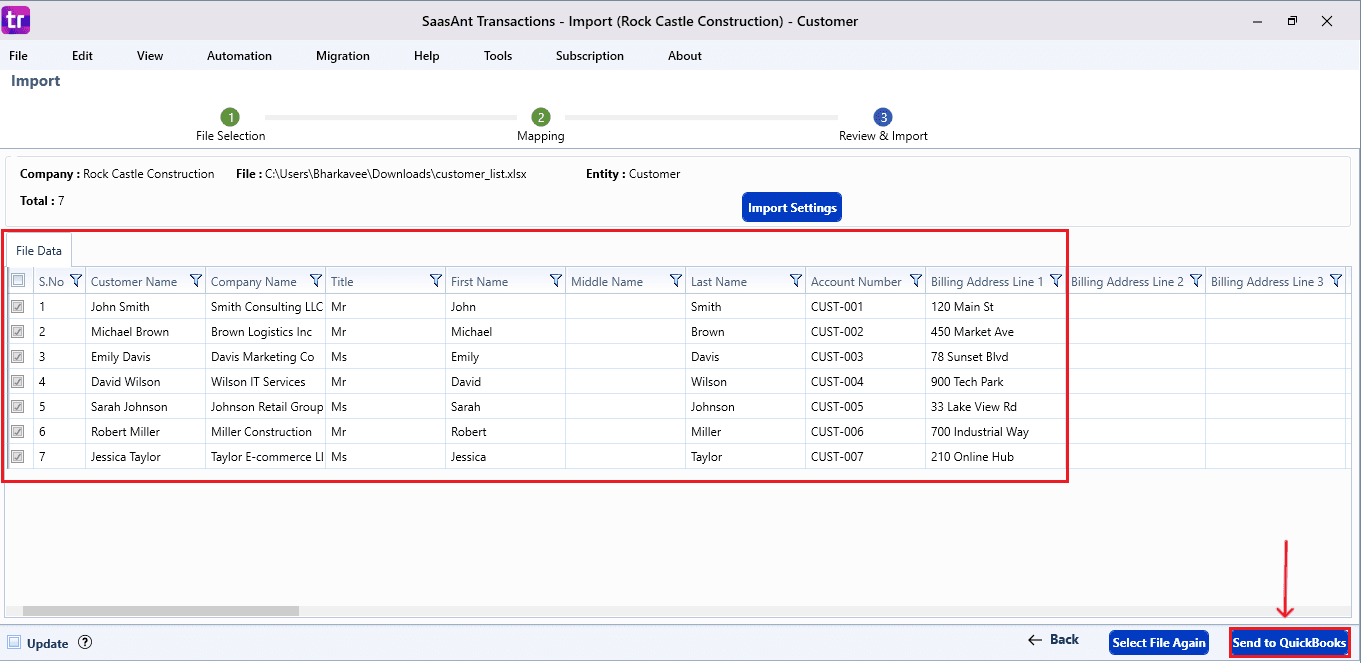
SaasAnt will now push the Customer List into your connected QuickBooks Desktop account.
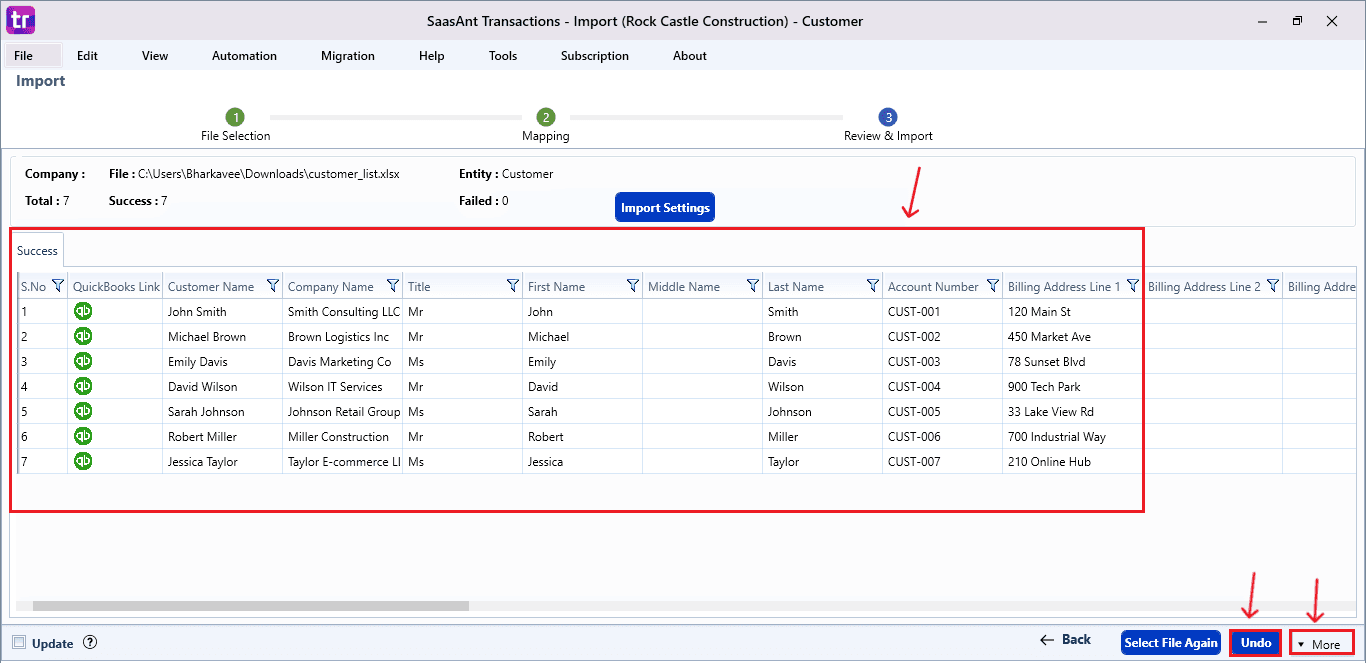
The Customer List is reflected in the dashboard.
At the bottom right, click the “More” dropdown and select the option to download your Customer List for reference.
Additionally, next to the download option, you can see “Undo”, which allows you to roll back your “Customer List”.
Step 7: Verify in QuickBooks Desktop
Go back to your QuickBooks Dashboard, select “Customer Centre” from the “Customers” in the menu bar on top.
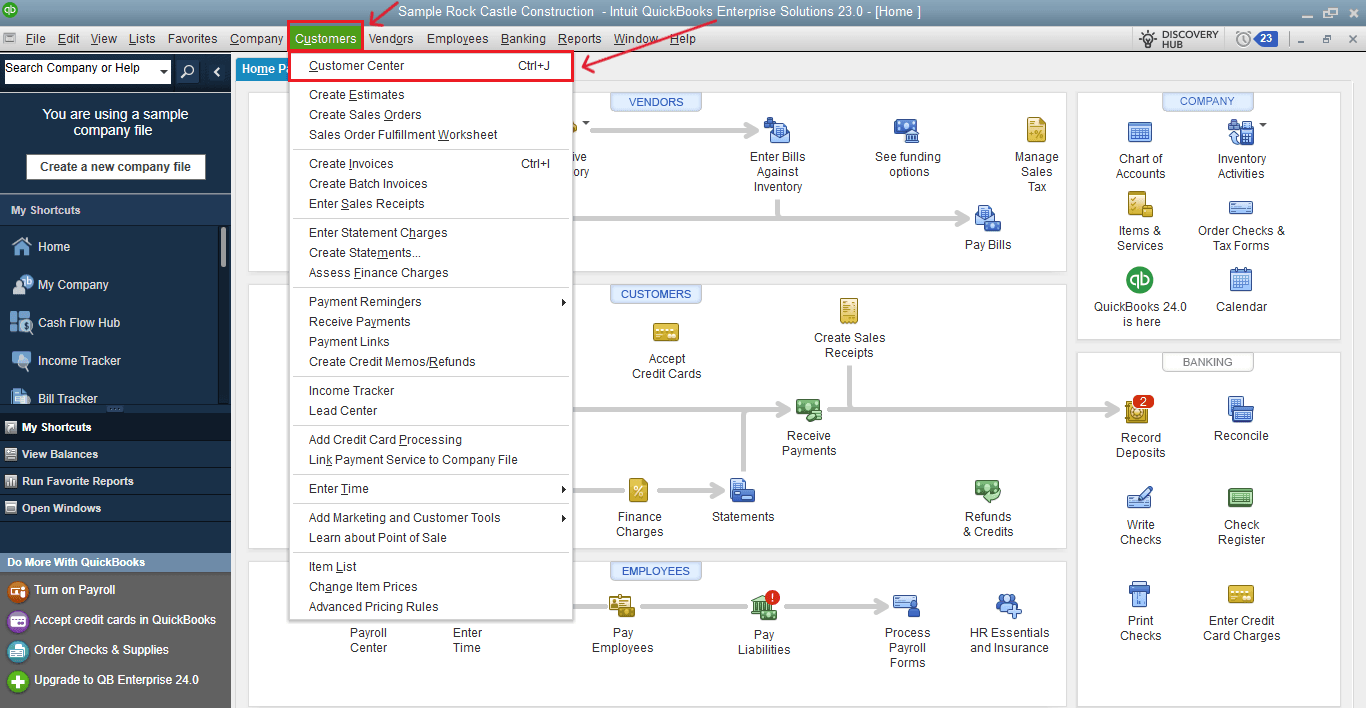
The imported customer list will be reflected in your QuickBooks Desktop as shown in the image below.
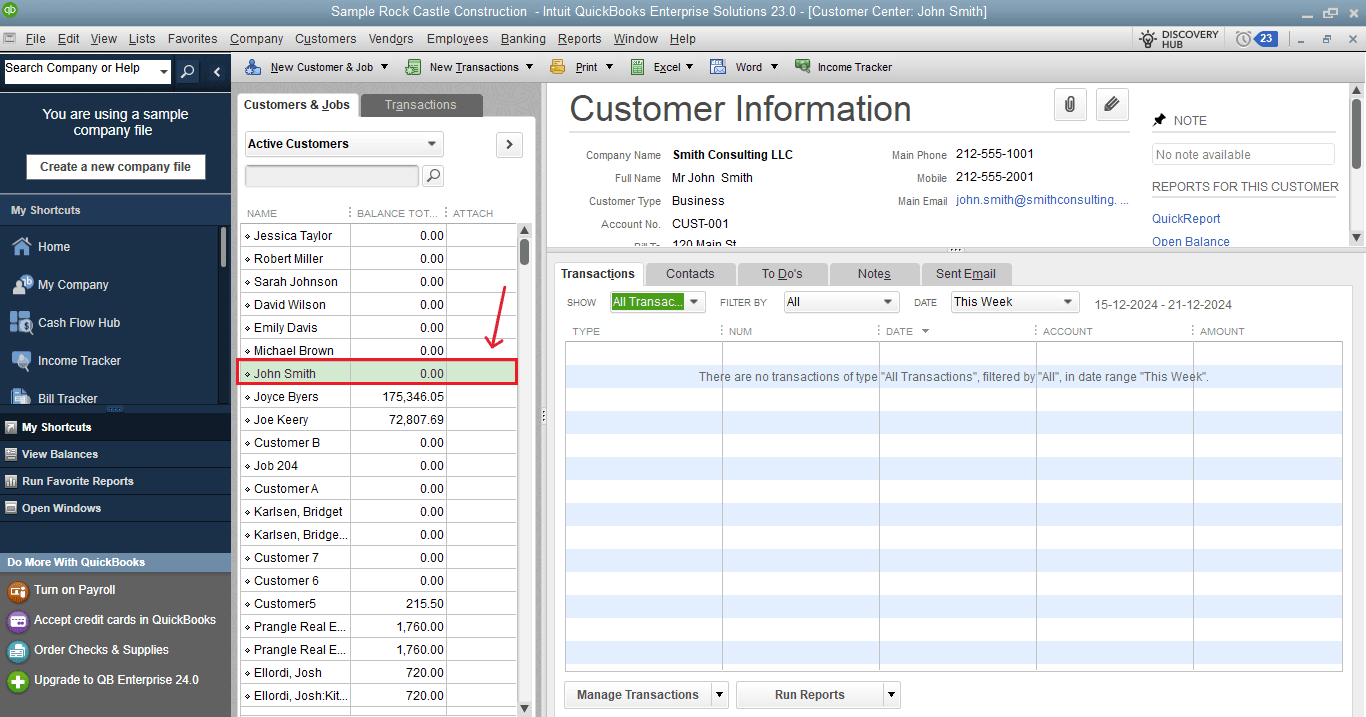
This final step ensures that your customer list is accurate and appropriately reconciled within QuickBooks.
Wrap Up
Importing customer lists into QuickBooks Desktop can be simple. With SaasAnt Transactions Desktop, you can simplify the whole process, from uploading files and mapping fields to reviewing and rolling back, while keeping complete control over your data.
Whether you are bringing on new clients, changing systems, or organizing existing records, SaasAnt ensures precision, efficiency, and scalability in your customer management workflow. Automating customer imports not only saves time but also streamlines invoicing, reporting, and reconciliation in QuickBooks Desktop.
If you have inquiries regarding our products, features, trial, or pricing, or if you require a personalized demo, contact our team today. We are ready to help you find the ideal solution for your QuickBooks workflow.
Frequently Asked Questions
1) Can I import customers into QuickBooks Desktop from Excel?
Certainly, QuickBooks Desktop supports importing customers from Excel or CSV files through applications like SaasAnt Transactions Desktop, ensuring accurate bulk uploads and proper field mapping.
2) What file formats does SaasAnt support for customer imports?
SaasAnt Transactions Desktop supports Excel (.XLS, .XLSX) and CSV file formats for importing customer lists into QuickBooks Desktop.
3) Can I undo a customer import in QuickBooks Desktop?
QuickBooks Desktop doesn't have a built-in feature to undo bulk imports. SaasAnt offers an 'Undo' option to safely revert imported customer records.
4) What customer fields can I import into QuickBooks Desktop?
You can upload customer name, company name, account number, billing and shipping addresses, contact info, and other related customer fields.
Read Also
Bulk Import, Export, Edit, Delete in QuickBooks Desktop using SaasAnt Transactions Desktop
How to Import CSV file into QuickBooks Desktop
How to Import Invoices into QuickBooks Desktop
Importing Journal Entries into QuickBooks Desktop from Excel