How to Import Customers into QuickBooks Online
Loading customers into QuickBooks Online has never been easier. Whether you’re migrating thousands of records from QuickBooks Desktop, Xero, a CRM, or Excel, SaasAnt Transactions, an Accountant's Favorite and User's choice award-winning app offers a seamless import process that saves bookkeepers hours of manual entry.
In this guide you’ll learn how to import customers into QuickBooks Online step by step, see real-world use cases, and discover how SaasAnt’s Customer Lookup, import settings, and rules keep your data clean and reliable.
Why Use SaasAnt for Customer Imports
Unlimited Volume – Bring in any number of customer rows at once without worrying about QuickBooks Online limits
Cross-System Migrations – Move records from QuickBooks Desktop, Xero, FreshBooks, or a CRM in one go
Built-In Error Correction – Catch invalid emails, duplicate names, and unsupported characters before they hit your books
Hierarchical Support – Create sub-customers (jobs or locations) on the fly with Parent:Child naming
Automations & Rules – Auto-create missing payment terms, custom fields, or classes; apply conversion rules; schedule recurring imports
Import Customers into QuickBooks Online: Step-by-step Guide
1. Connect Your QuickBooks Online Account
In QuickBooks Online, go to Apps → SaasAnt Transactions and click Get App Now.
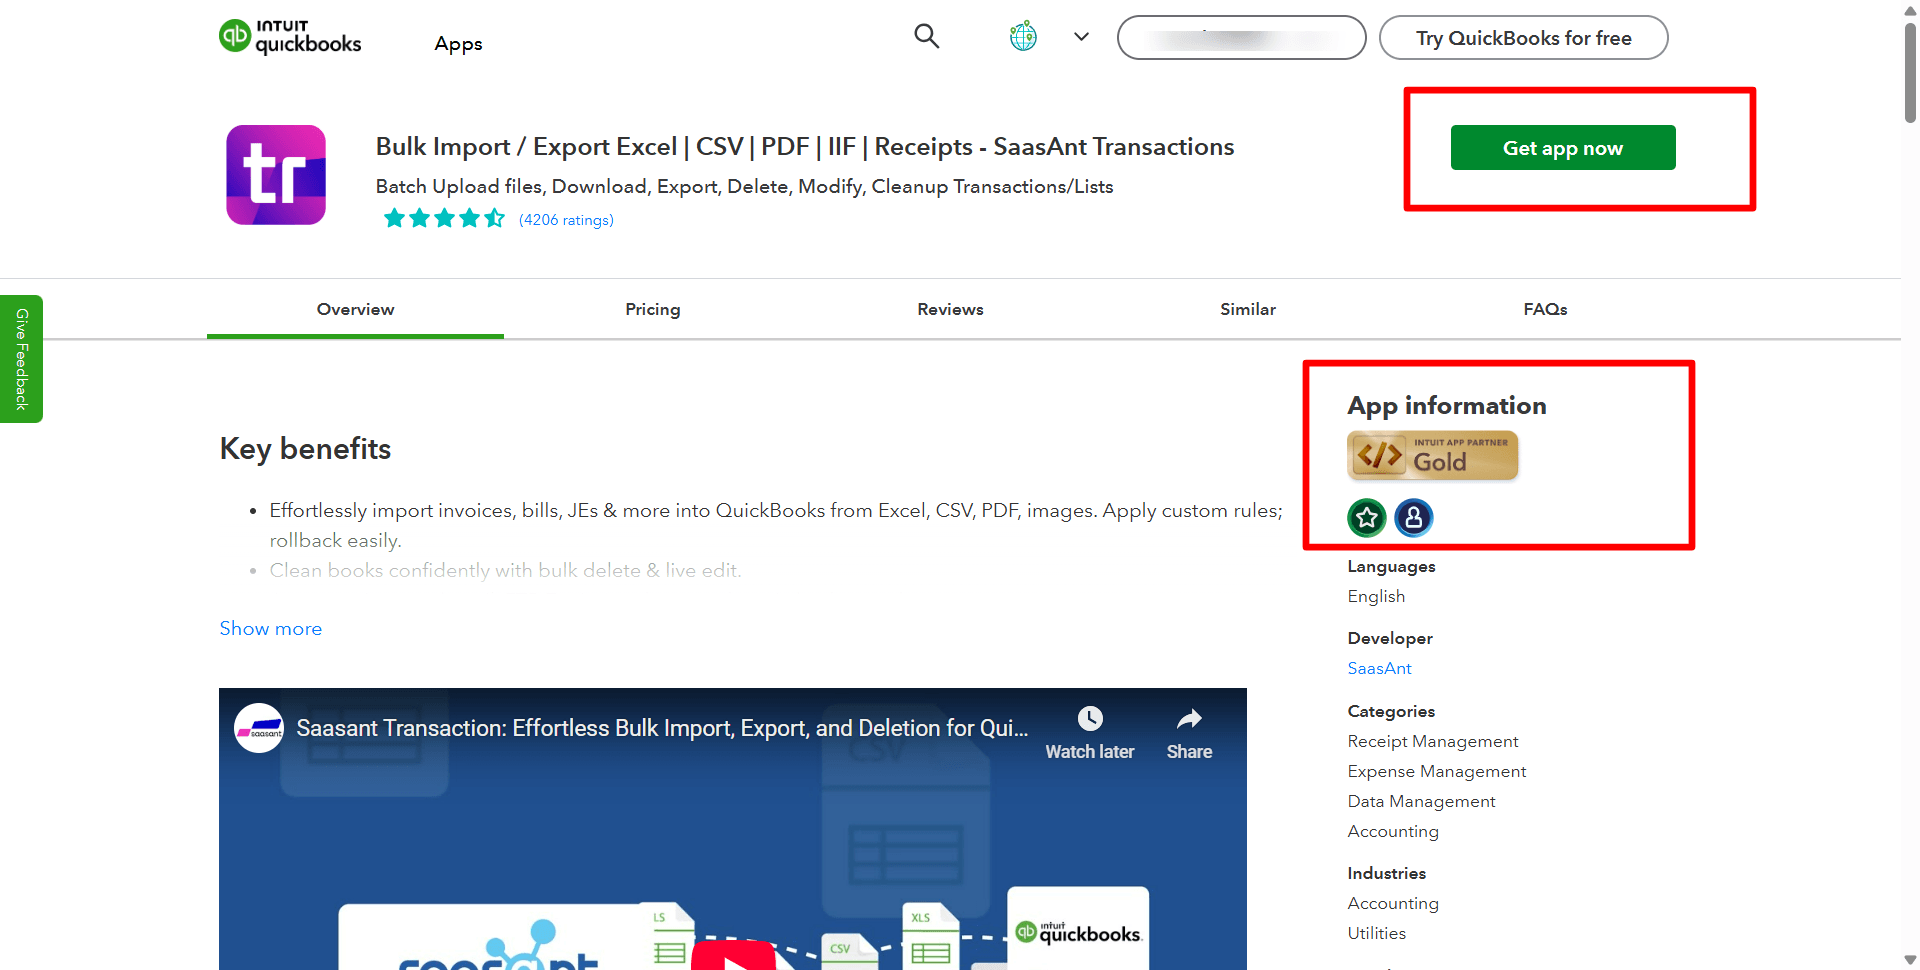
Authorize SaasAnt to access your company—this unlocks a 30-day free trial instantly.
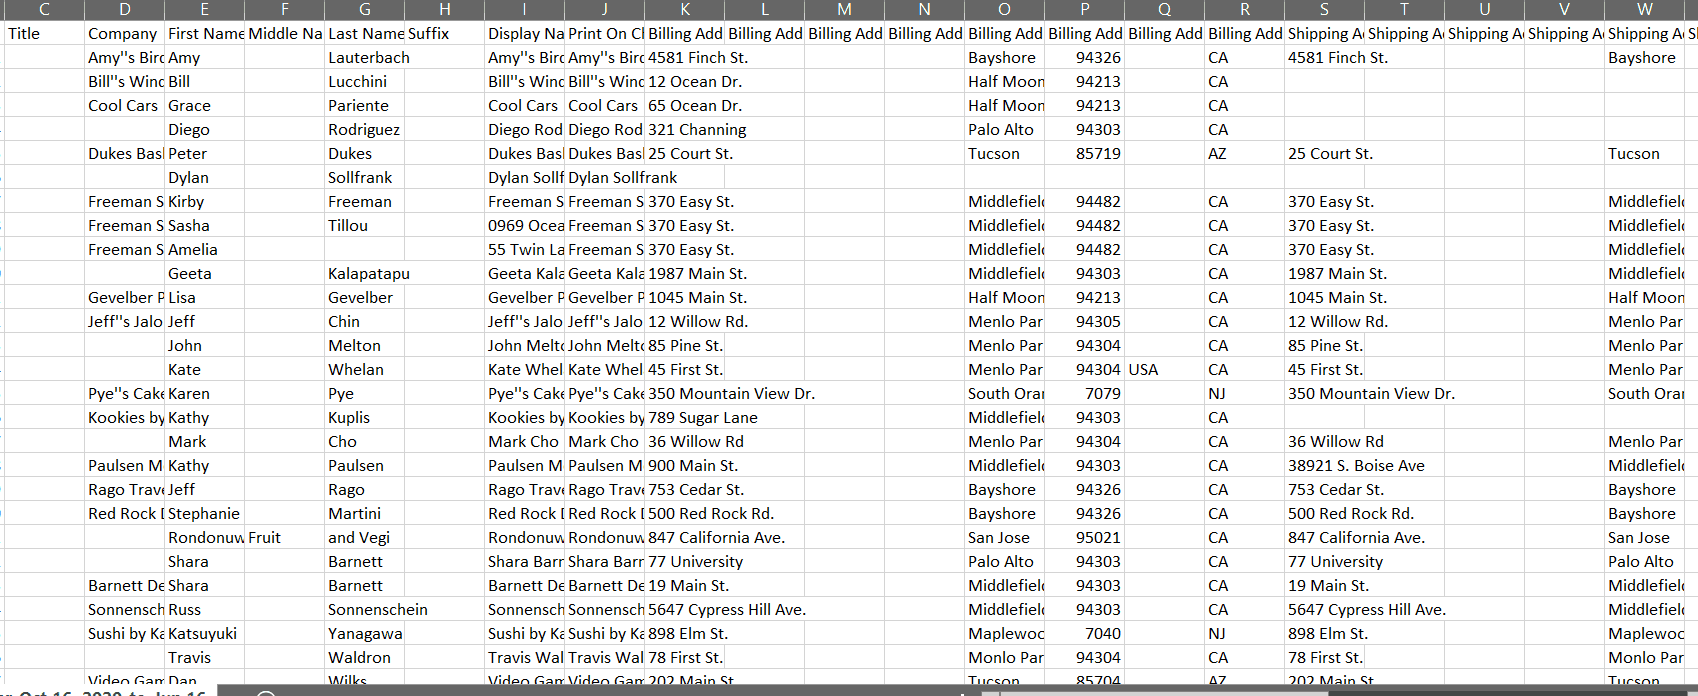
2. Prepare the Excel File
Use XLSX or CSV with row 1 as headers (e.g., Display Name, Email, Phone, Custom Field 1) and your customer data below.
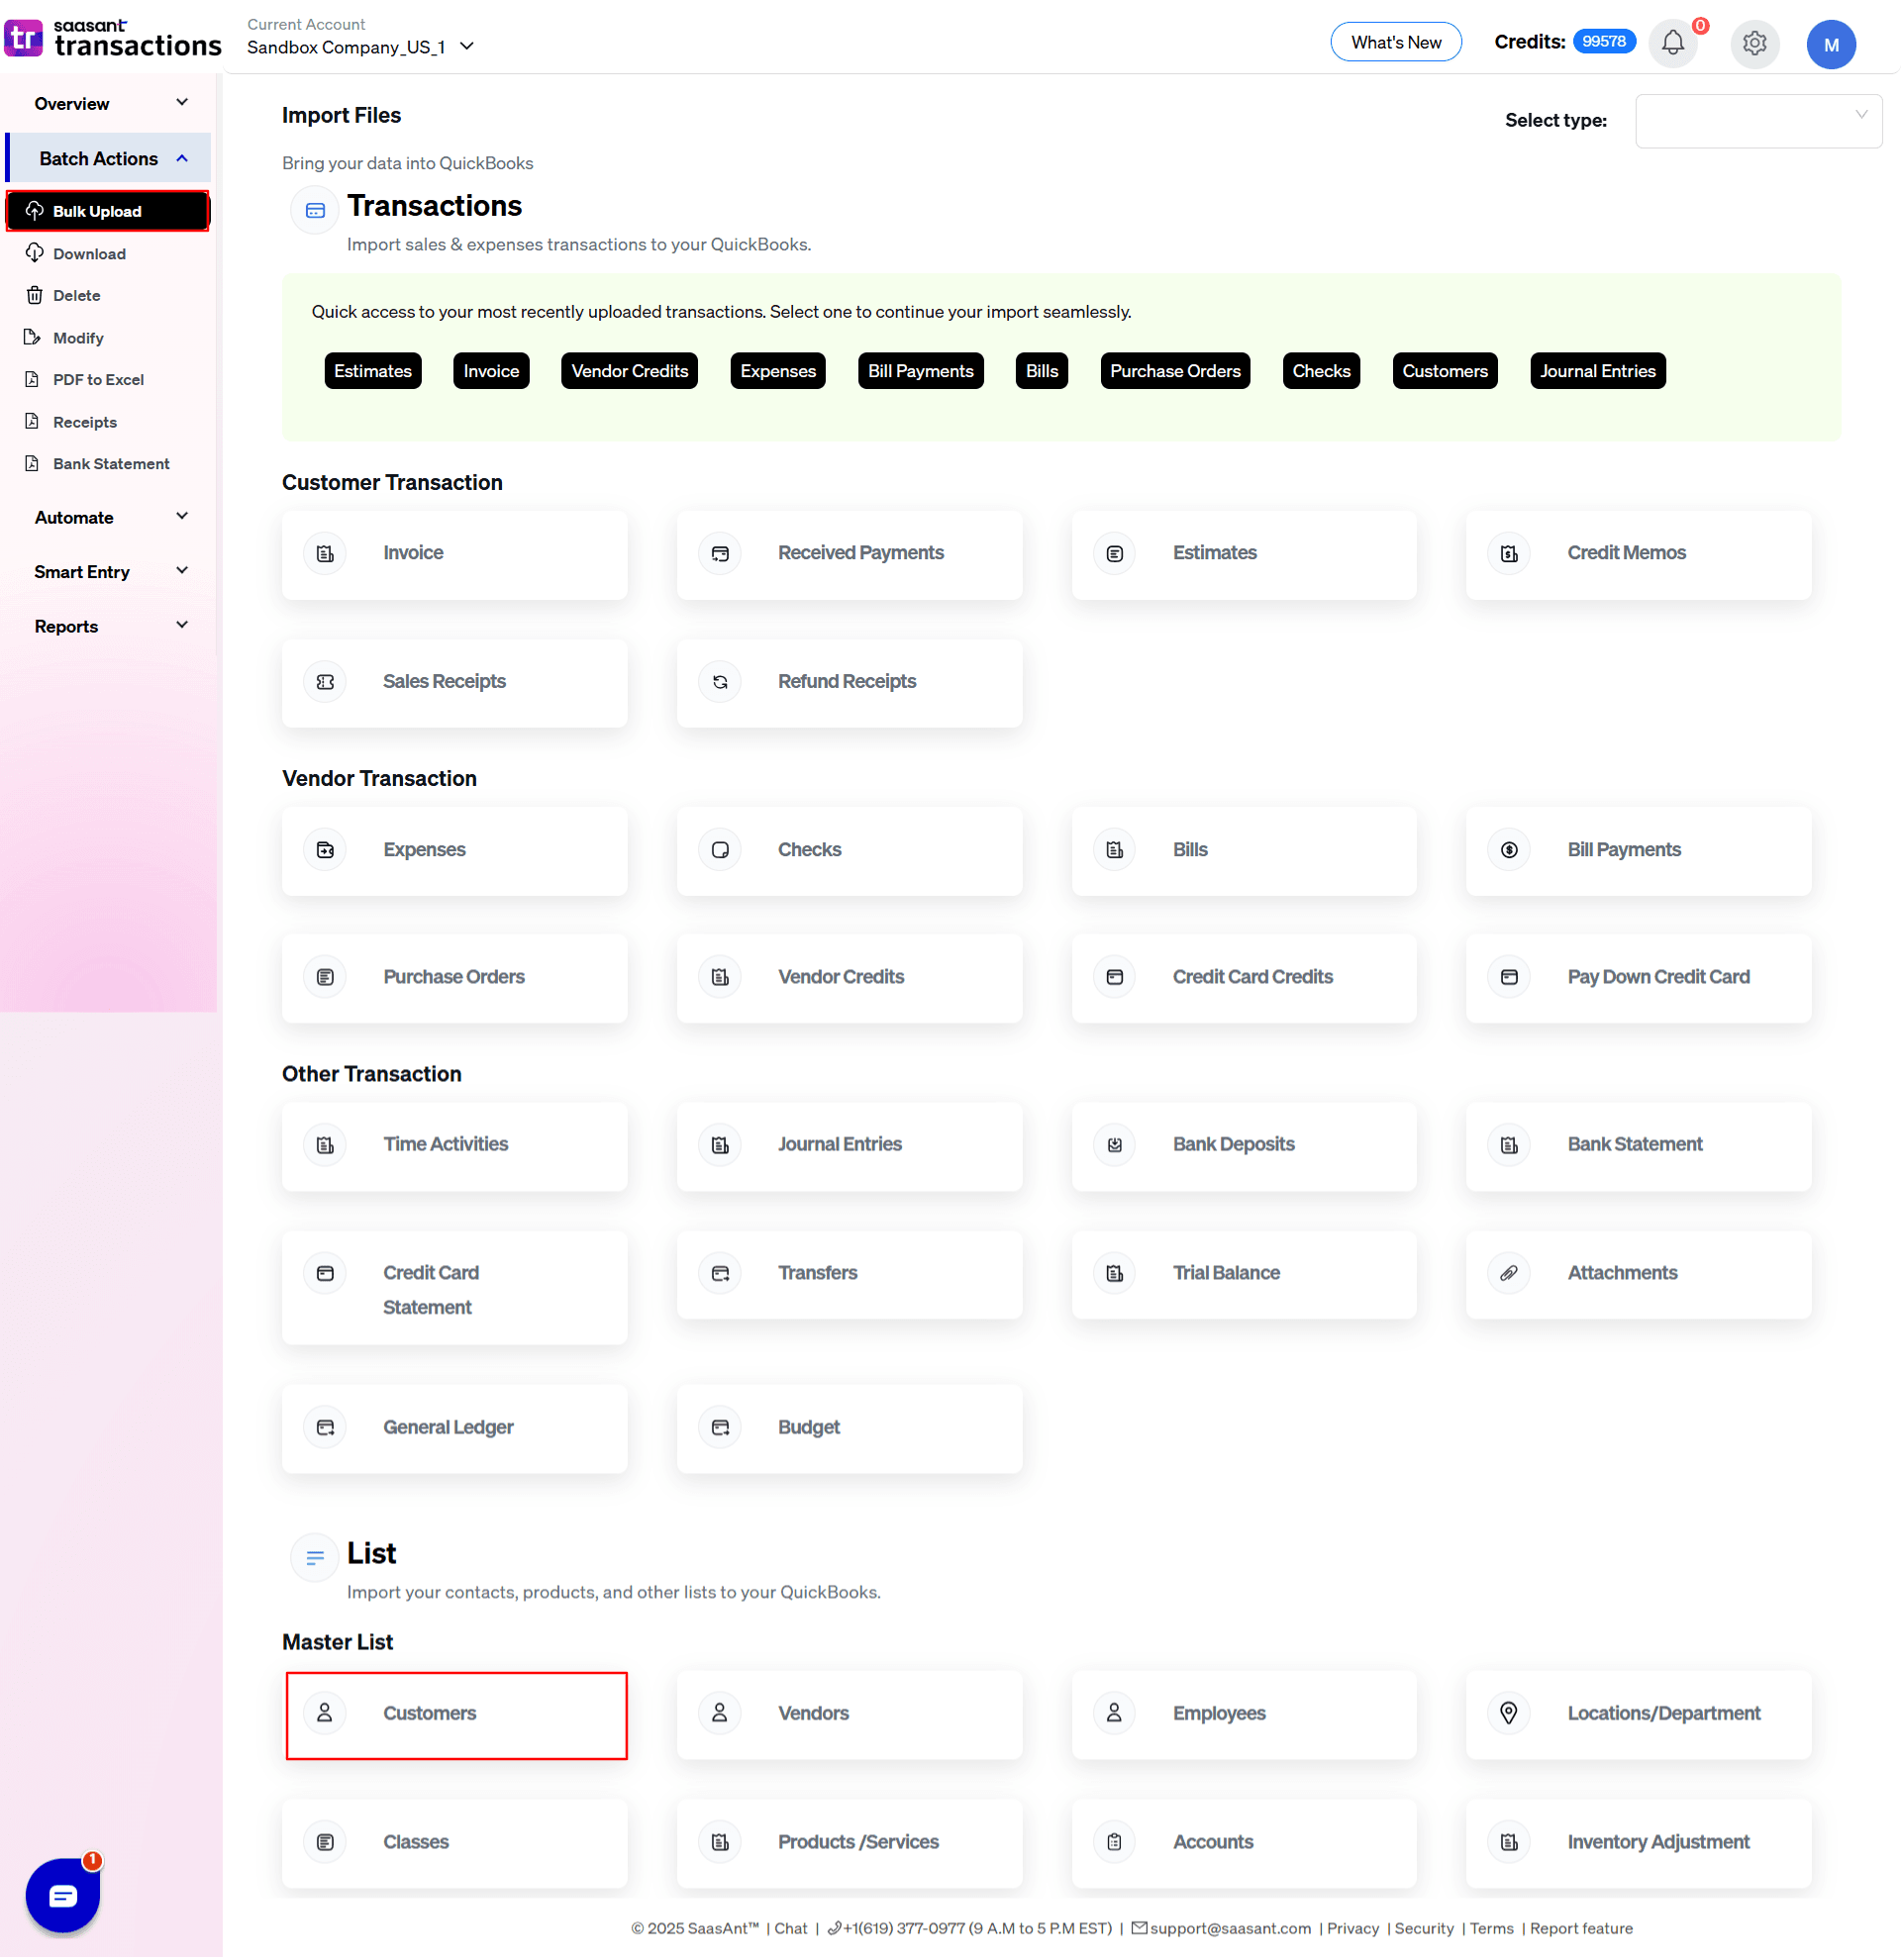
3. Start a New Import
Sign in with your QuickBooks credentials.
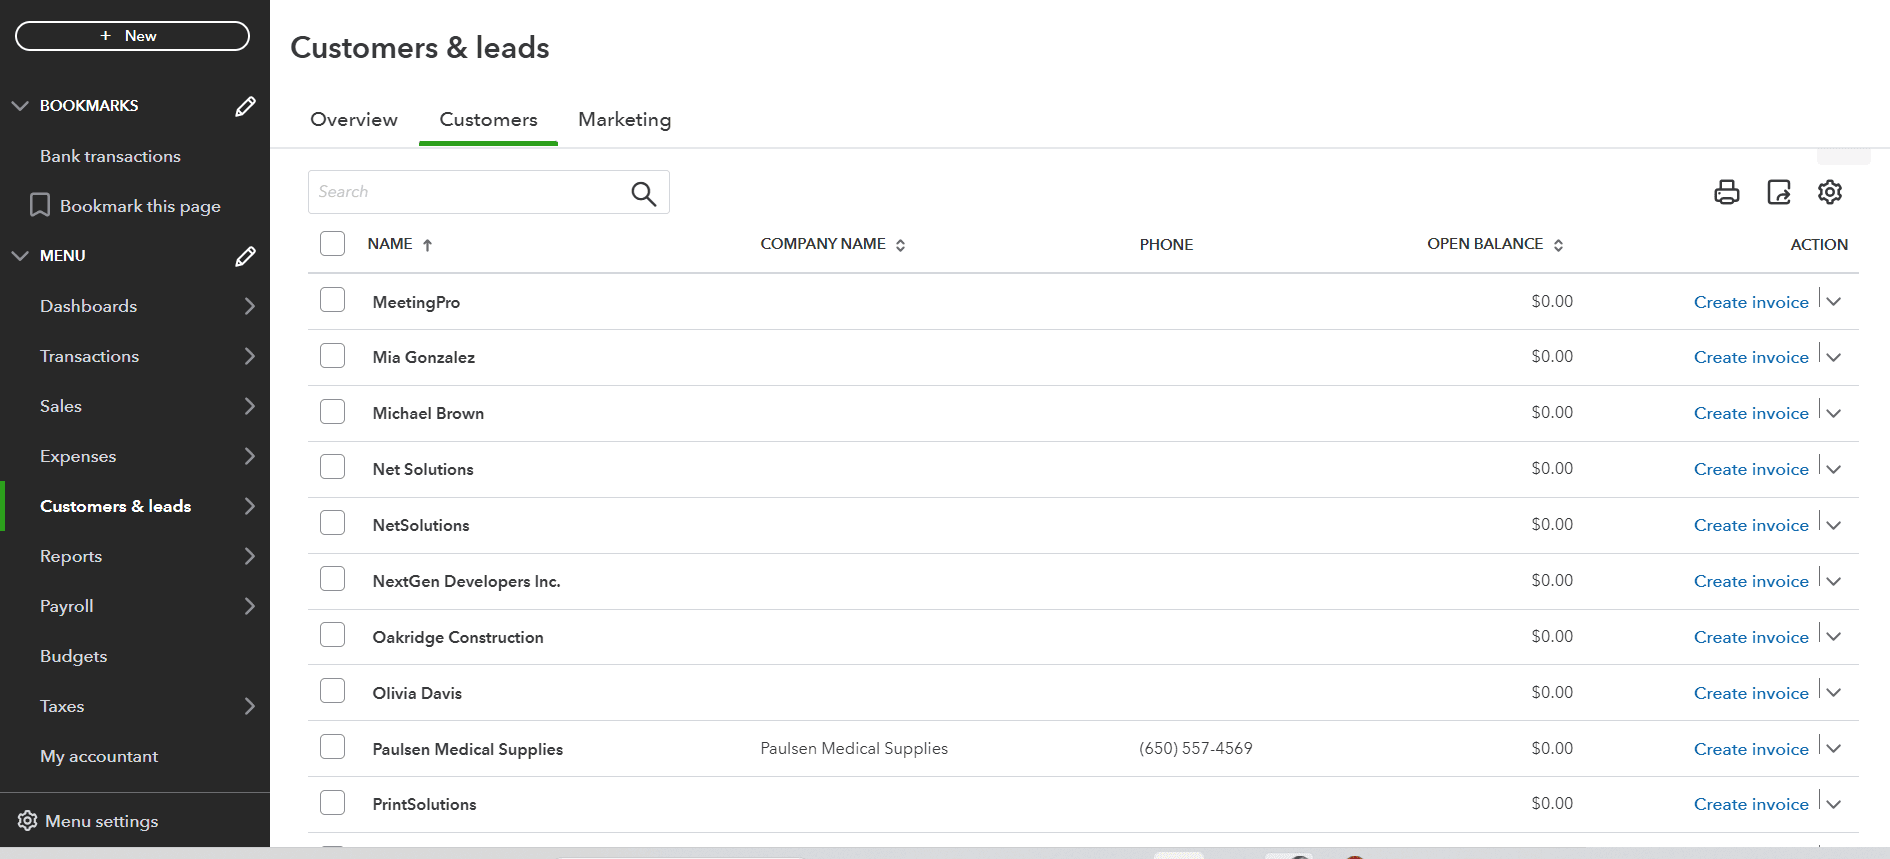
Click Bulk Upload in the left navigation and select Customers from the list.
4. Upload Your File
Click Browse and select your Excel (XLSX) or CSV [export from desktop QuickBooks, Xero, Salesforce, or your own spreadsheet].
Instantly see a preview of your header row (Display Name, Email, Phone, Address, Payment Terms, etc.) and sample records.
5. Preview and Execute the Import
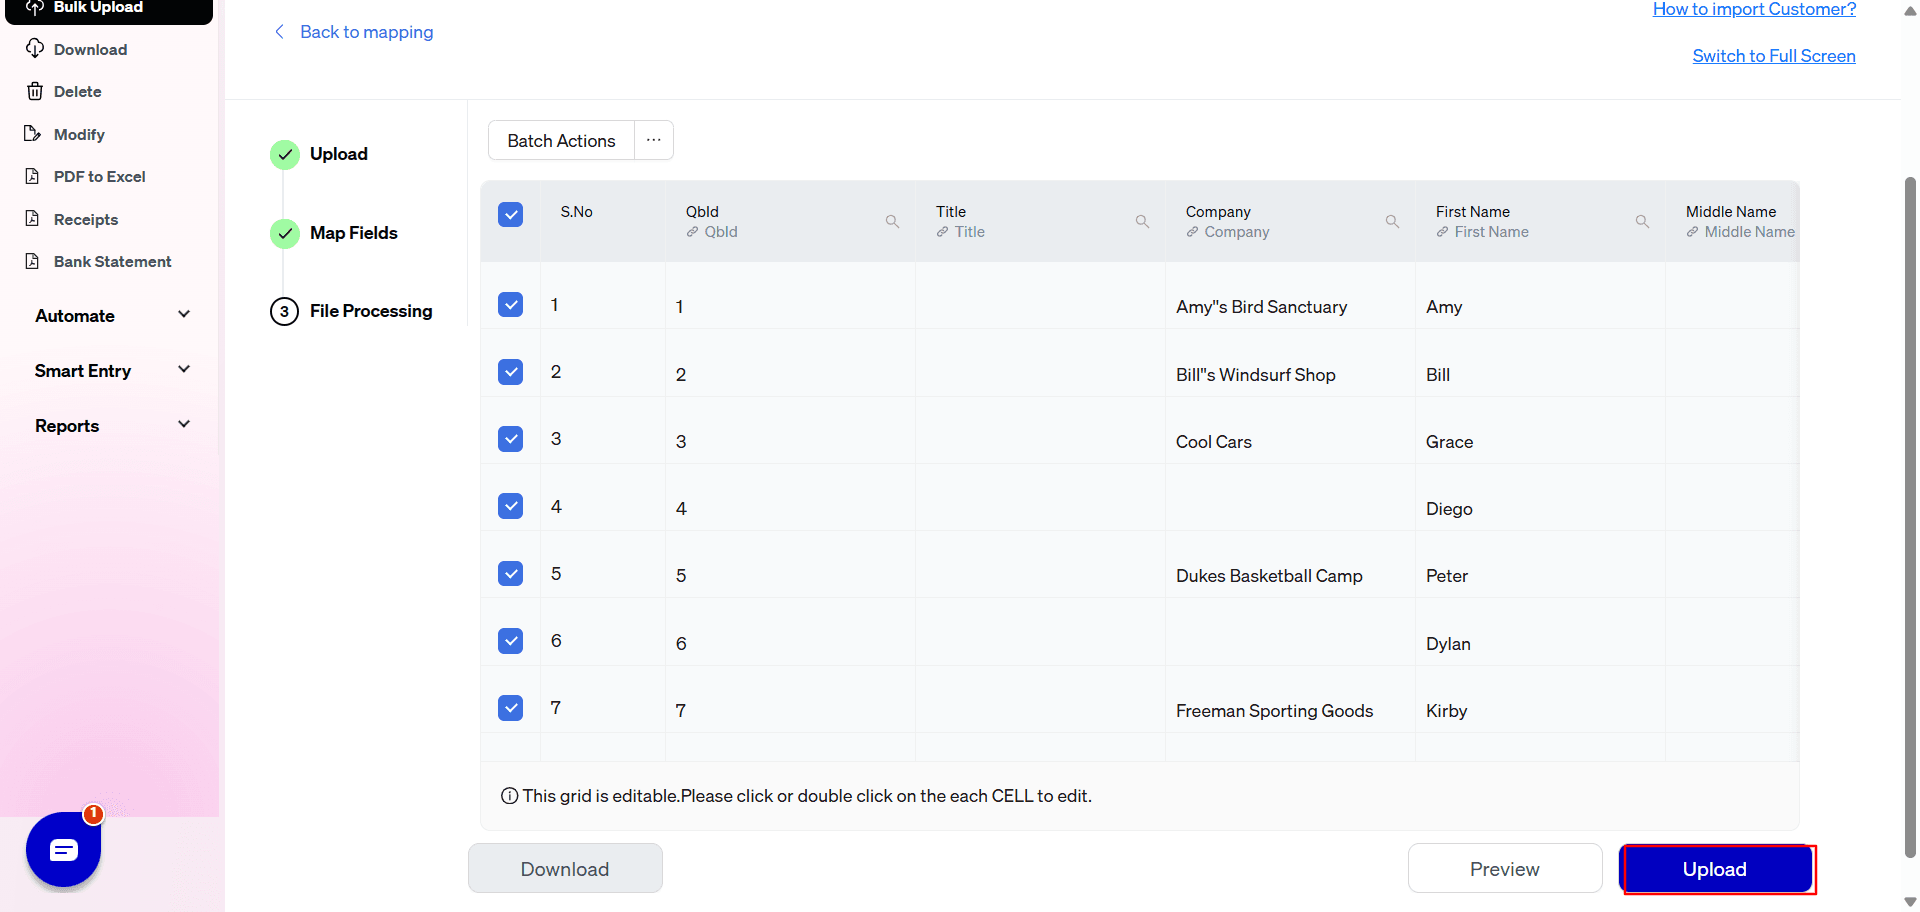
Confirm the total record count and deselect any rows to skip.
Click Upload. Watch the real-time progress bar as SaasAnt streams customers into QuickBooks Online.
6. Review Summary and Fix Errors
When done, click View Results to see successes and failures.
Download the failure report, correct issues (duplicate names, invalid emails), and re-import only those rows.
Verify in QuickBooks that all customer profiles are correct and complete.
Video tutorial for How to Import Customers into QuickBooks From Excel:
Use Customer Lookup for Exact Matches
If your import file uses names or codes that don’t exactly match QuickBooks:
In SaasAnt, go to Settings → Import Settings.
Select Customer, then click the Lookup tab.
Download the sample lookup template, fill in two columns—File Reference (your name/code) and QuickBooks Reference (the exact Display Name in QuickBooks).
Upload your completed lookup file. SaasAnt will first attempt to match on QuickBooks names, then on your lookup entries, ensuring imports update the correct customer records.
Create and Apply Rules to Clean Data
Rules let you correct or categorize fields automatically before they hit QuickBooks.
In SaasAnt, click Rules in the left menu, then Create New Rule.
Enter a rule name and select Transaction Type (e.g., Invoice, Sales Receipt).
Define Conditions (Match Any or All):
Choose an attribute (e.g., Product Name, Customer), operation (Equals, Contains, Does Not Contain, Empty), and value.
Add multiple conditions with Add New Condition.
Define Actions to override fields when conditions match:
Change Customer Name to “Retail Customer”
Update Class to “Services”
Set Product Name to “Phone”
Adjust Invoice Date or Amount
Add multiple actions with Add New Action.
Save the rule. Rules run in import sequence, transforming your data automatically.
General Settings
Auto Create List Entities: Auto-add missing Vendors, Customers, Classes, Locations.
QuickBooks Date Format: Specify your file’s date format for correct conversion.
Email Import Summary: Send an email of successes and failures after each import.
Transactions Settings
Assign Reference Numbers: Use your file’s invoice, expense, or payment numbers.
Global Tax Calculation: (Non-US only) Choose how tax is applied.
Find by QuickBooks ID: Match updates by internal QBO Transaction ID.
Allow Duplicate Numbers: Import multiple records with the same reference number.
Process Each Line Individually: Treat each row as its own transaction.
Convert Negative to Positive: Auto-correct negative expense/check amounts.
Auto-Truncate Long Text: Trim fields exceeding QBO length limits (addresses, memos).
Validation Settings
Notify Amount Mismatches: Flag if Payment vs. Invoice or Bill vs. Bill Payment amounts differ.
Customer Settings
Find by Tax Resale No: Match customers using resale/exemption numbers (US only).
Email Invoices After Import: Send invoices to customers automatically.
Update Addresses: Override QuickBooks addresses with your file’s data.
Vendor, Account, Product/Service, Journal Entry, Bank Deposit Settings
Similar lookup and auto-create options exist for Vendors (by Account No), Accounts (by Account No), Products (by SKU), Journal Entries (auto-create missing entities), and Deposits.
Real-World Use Cases
Desktop → Online Migration
Preserve inactive statuses when moving from QuickBooks Desktop.CRM Sync
Nightly FTP/Gmail imports from Salesforce or HubSpot, with lookup rules to update existing records.Sub-Customer Hierarchies
UseParent:Childsyntax to auto-build project or location structures in one upload.
With SaasAnt Transactions, importing customers into QuickBooks Online becomes a friction-free part of your bookkeeping workflow. From Customer Lookup and advanced Rules to comprehensive import settings and automations, every feature is designed to keep your data accurate and up to date.
Ready to transform your customer import process? Start your free 30-day trial of SaasAnt Transactions today and load customers into QuickBooks Online in minutes.
Frequently Asked Questions
Where can you go to import a customer list into QuickBooks Online?
To import a customer list:
Sign in to QuickBooks Online.
Click on the Settings (gear icon).
Under the Tools section, select Import Data.
Choose Customers to start the import process.
Can I import a customer list with sub-customers into QuickBooks Online?
QuickBooks Online's native import feature doesn't support importing sub-customers directly. However, with tools like SaasAnt Transactions (Online), you can import customers with sub-customers by structuring your data in a "Parent:Child" format.
What should I do if my customer list exceeds QuickBooks Online's import limitations?
If your customer list exceeds the 2MB or 1,000-row limit, consider using SaasAnt Transactions (Online), which can handle larger datasets without requiring you to split your files.
How can I avoid duplicate customer entries during import?
Before importing, ensure that your data doesn't contain duplicates. QuickBooks Online doesn't automatically detect duplicates during import, so it's essential to clean your data beforehand. Using tools like SaasAnt can provide more control, allowing you to set preferences for handling duplicates.
Can I import additional customer details such as payment terms and shipping addresses?
QuickBooks Online's native import feature supports a limited number of fields. To import additional details like payment terms and shipping addresses, consider using SaasAnt Transactions (Online), which offer more comprehensive field mapping and support for additional data.
Is it possible to update existing customer information through import?
Yes, you can update existing customer information by importing a file with the updated details. Ensure that the customer names in your file match exactly with those in QuickBooks Online to overwrite the existing data. Using SaasAnt can provide more advanced options for updating existing records.
How do I load customers from Excel?
Save as CSV or XLSX, then follow Steps 4–9 above—no native QuickBooks tool needed.
Can I update existing customers via import?
Yes—use Customer Lookup to map your codes to QuickBooks names so SaasAnt updates rather than duplicates.
What if my file has more than 1,000 rows?
SaasAnt handles unlimited rows and streams data, bypassing QuickBooks Online’s soft limits.
How are rules prioritized?
Rules run top to bottom in your list. Use drag-and-drop to reorder if needed.
Can I schedule imports?
Yes—set up FTP/SFTP, Gmail, or Zapier triggers under Settings → Automations for hands-off syncs.
Recommended reading: