How to Import the Chart of Accounts into QuickBooks Desktop
Managing a growing business requires more than just tracking income and expenses; it demands a well-structured Chart of Accounts to categorize every financial transaction. Whether you're migrating from another system, starting fresh, or restructuring your accounting framework, importing your Chart of Accounts into QuickBooks Desktop can save hours of manual entry.
That’s where SaasAnt Transactions Desktop comes in. This powerful tool allows you to bulk import your account lists from Excel or CSV files directly into QuickBooks Desktop. It’s beneficial for accountants, bookkeepers, and business owners who deal with large datasets or need to transfer account structures across multiple company files.
In this guide, you’ll learn how to:
Format your account data
Map fields accurately
Handle sub-accounts and opening balances.
Avoid common errors during import.
Whether you're setting up a new company file or refining an existing one, this step-by-step process ensures a smooth and error-free import of your Chart of Accounts into QuickBooks Desktop.
Contents
Import Chart of Accounts into QuickBooks Desktop: Step-by-Step Guide
Frequently Asked Questions

Import Chart of Accounts into QuickBooks Desktop: Step-by-Step Guide
Step 1: Install and Connect SaasAnt Transactions
Download the latest SaasAnt Transactions (Desktop) installer.
Run the setup file as administrator and follow the prompts.
Launch the app, go to Subscription > Register, and enter your license key.
Keep your internet connection active to register successfully.
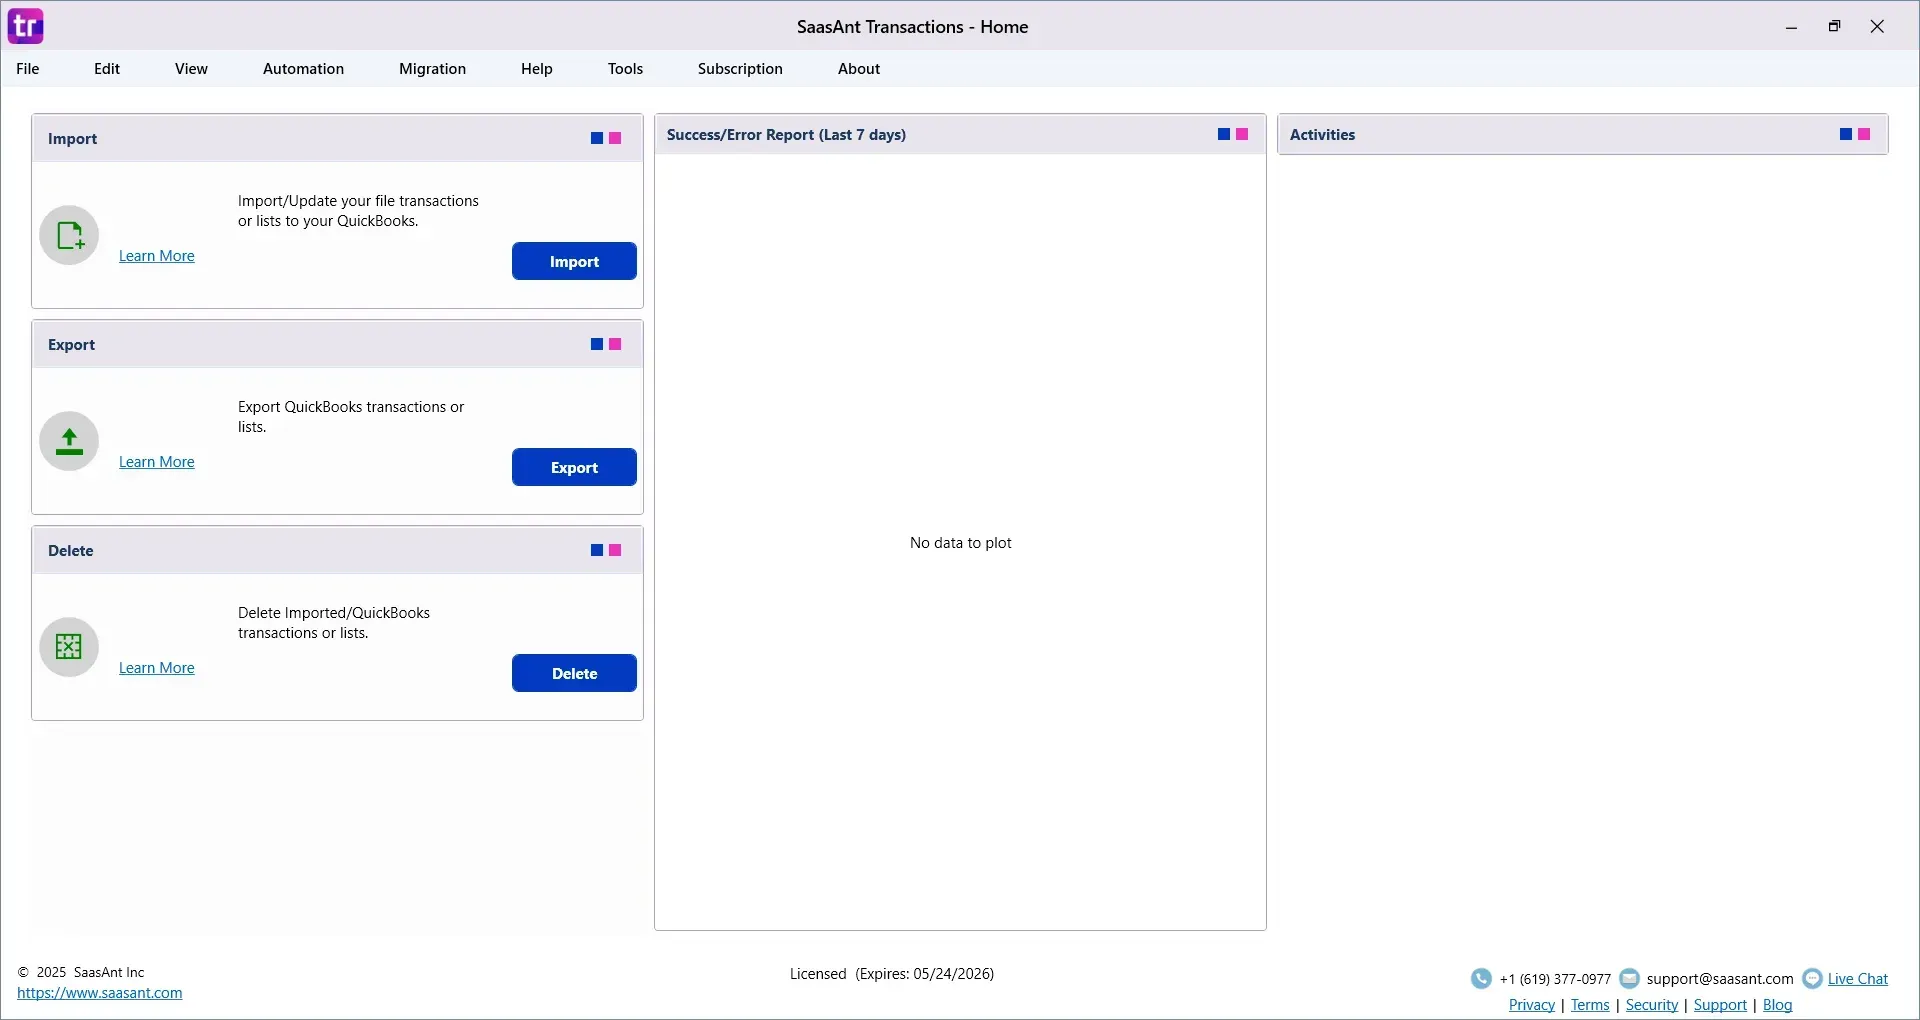
Step 2: Launch and Open Import Screen
Open SaasAnt Transactions (Desktop).
Confirm that QuickBooks Desktop is open and connected to the correct company file.
Click the Import button on the dashboard or select File > Import from the menu.
Step 3: Select Account Import and Upload File
In the import wizard, choose Account as the QuickBooks Transaction Type.
Click "Browse File" and select your Excel or CSV file, which has been prepared with COA data headers.
If using SaasAnt’s template, importing becomes nearly automatic.
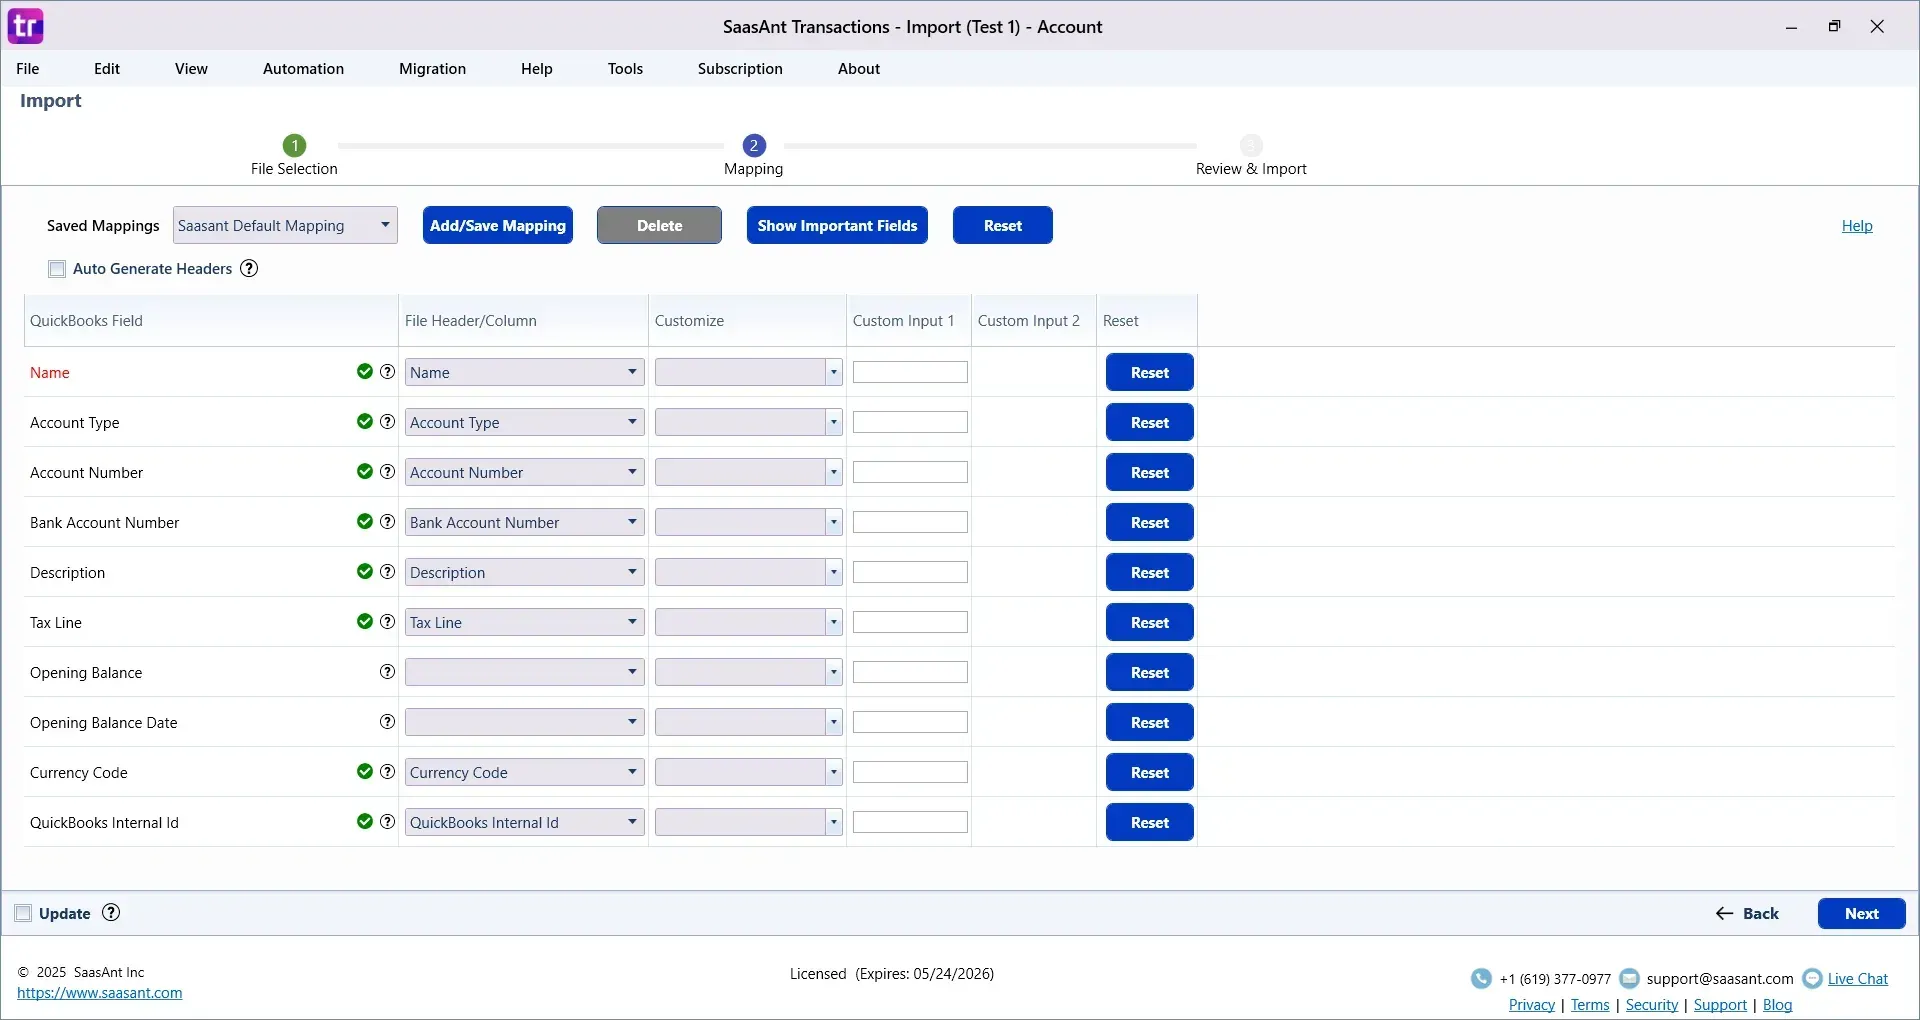
Step 4: Map Your Fields
Mandatory fields include Account Name and Account Type.
Optional fields can include Account Number, Description, Opening Balance, Opening Balance Date, Bank Account Number, and Currency Code.
SaasAnt supports auto-mapping with the template or manual mapping via dropdown menus. Save your mapping for future use.
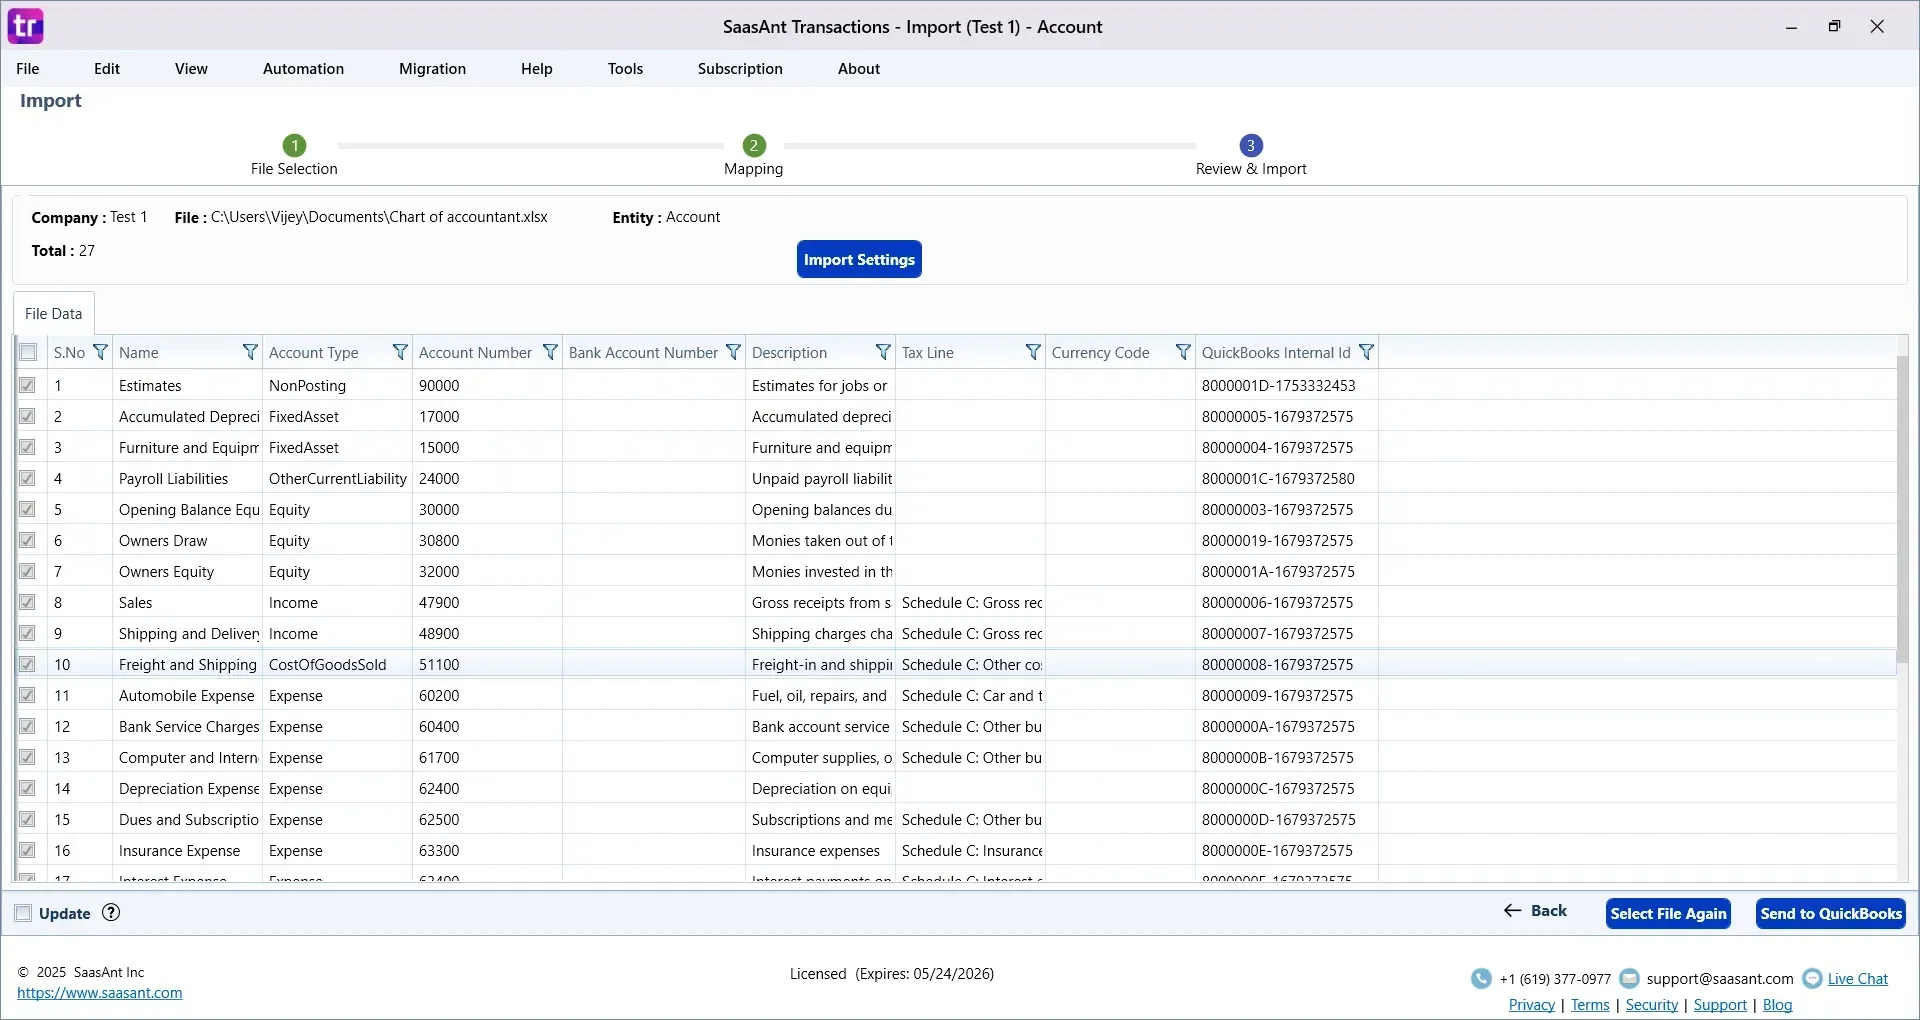
Step 5: Review and Configure Import Settings
Verify your data in SaasAnt’s grid view and edit any fields directly.
Access import settings: choose how to handle existing accounts—update or skip duplicates.
Enable pre-import validation to catch errors before the transaction occurs.
Set date format and enable multi‑currency if needed.
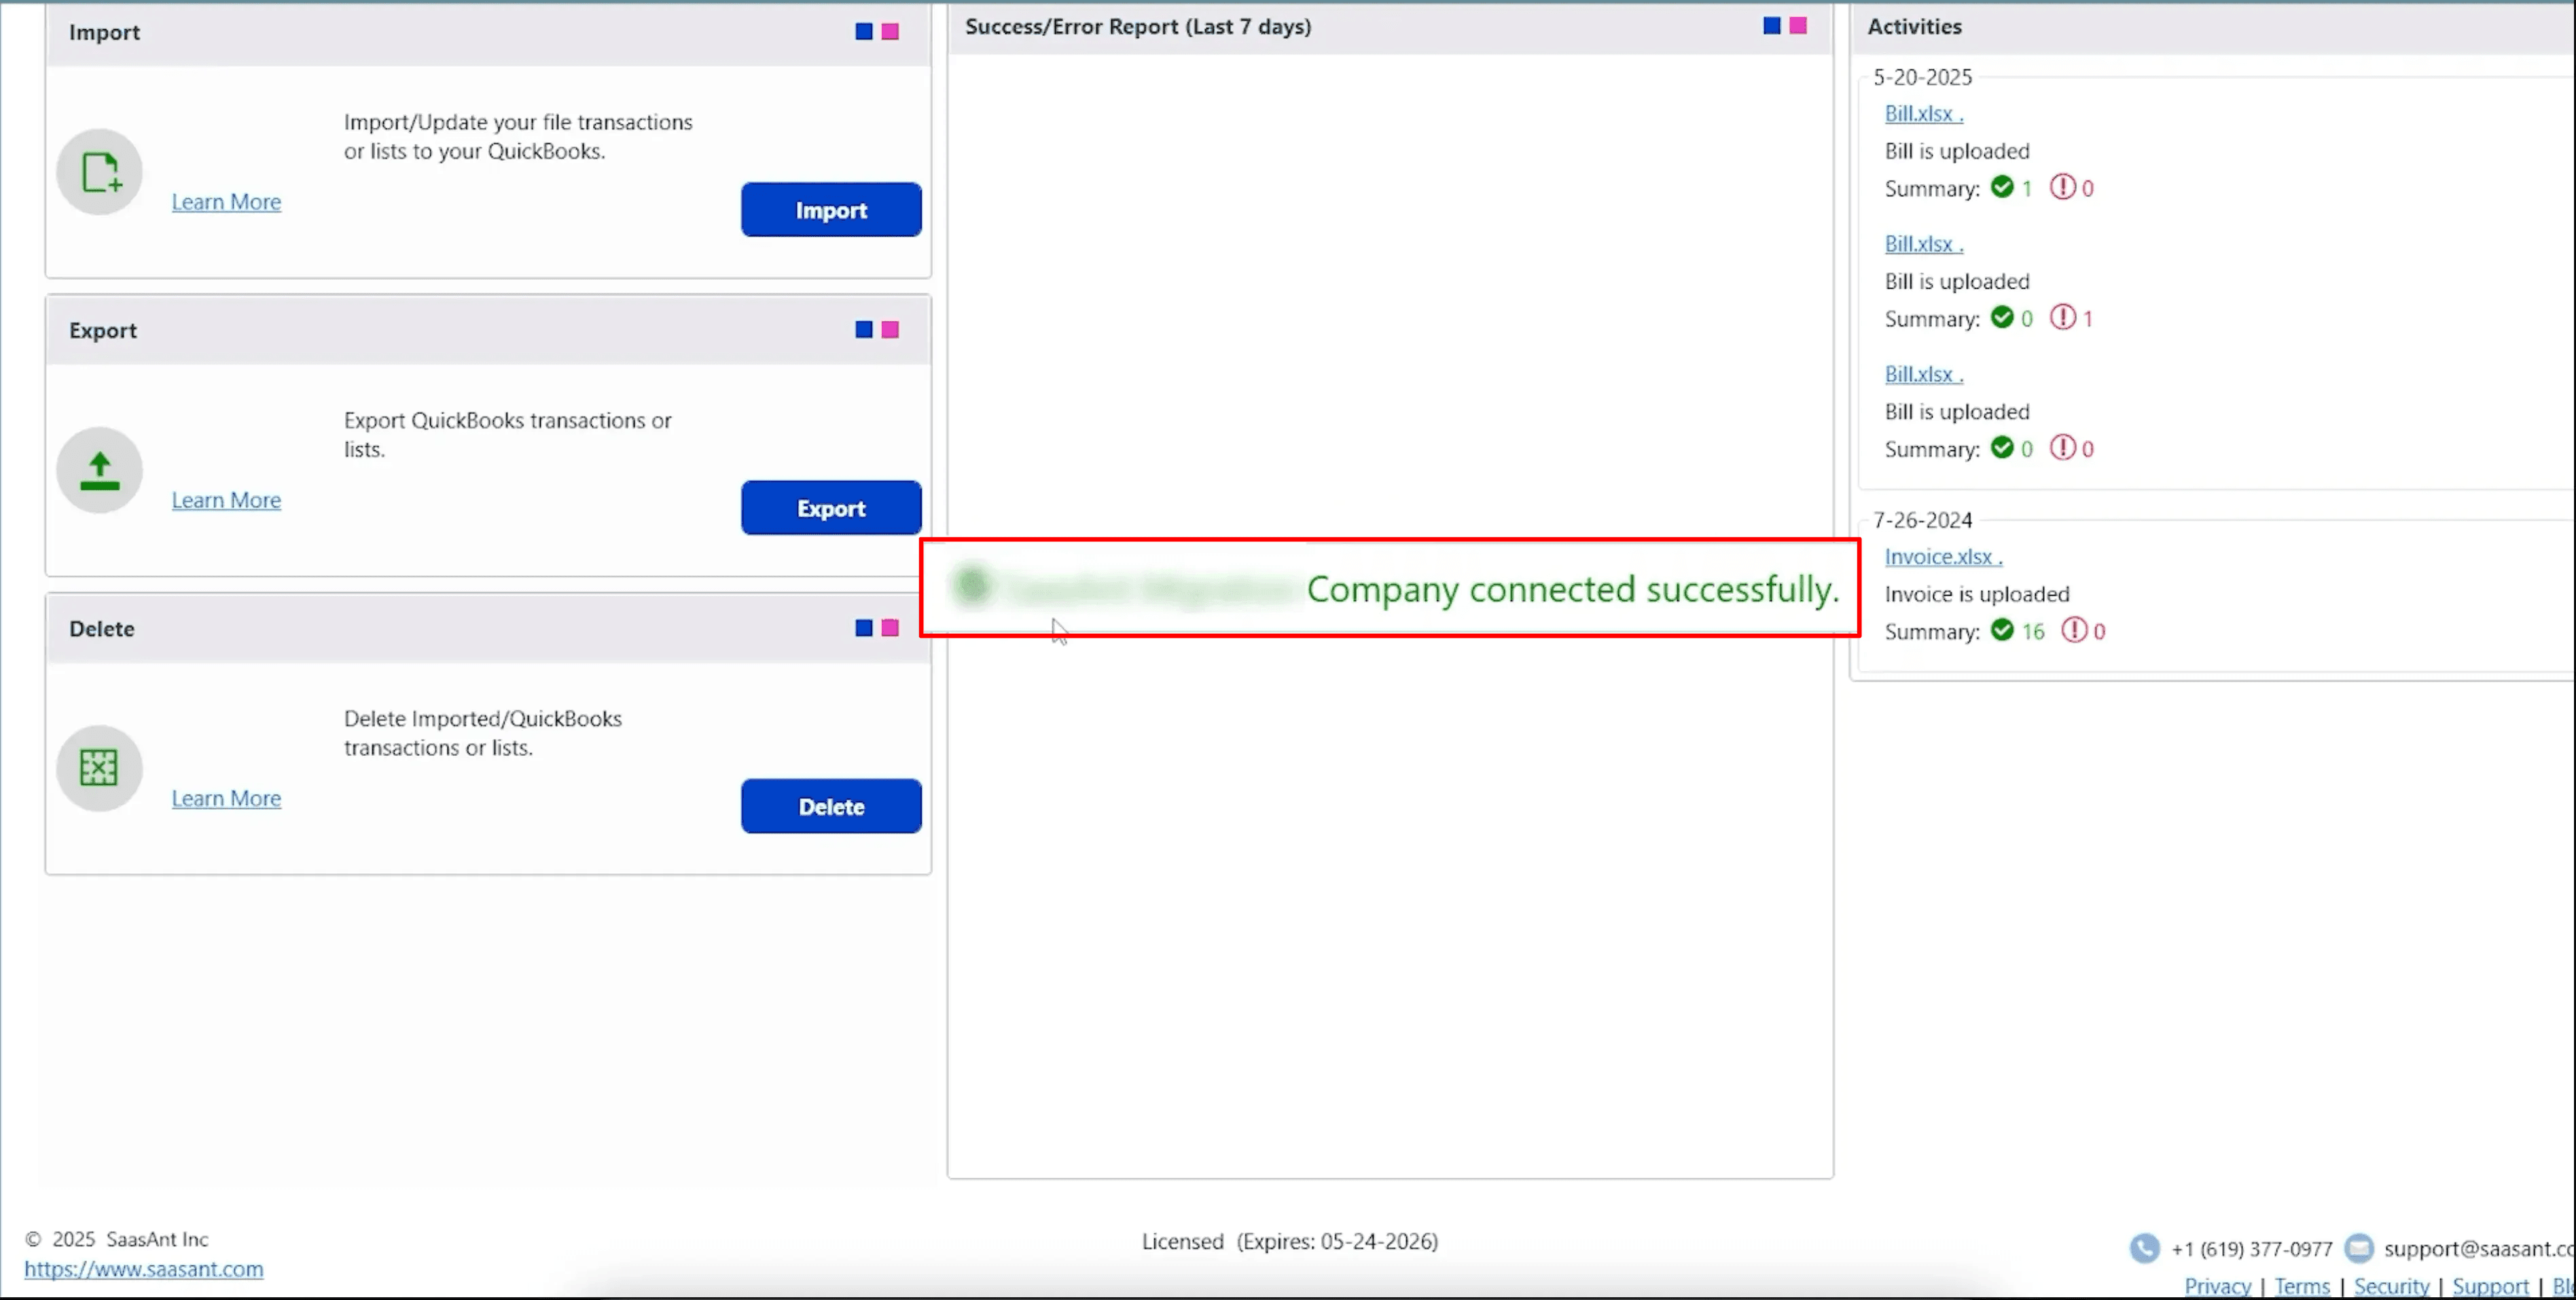
Step 6: Send to QuickBooks and Validate
Click "Send to QuickBooks" to begin the import.
SaasAnt will display the progress and a summary of imported and skipped rows.
Confirm results in QuickBooks: go to Lists > Chart of Accounts and verify all accounts appear correctly.
Run a trial balance or financial report if opening balances were included.
Your data is successfully imported into QuickBooks
Troubleshooting and Undo Options
Use the Undo or Delete import option to roll back any unwanted data.
If errors appear, consult the activity log or error summary. Support is available at support@saasant.com.
 CTA-Banner-1
Conclusion
Importing your Chart of Accounts into QuickBooks Desktop doesn’t have to be a manual or time-consuming task. With SaasAnt Transactions Desktop, you can quickly upload, map, and validate all your account data using Excel or CSV files. Whether you're setting up a new company file or restructuring your current accounts, SaasAnt ensures accuracy and efficiency at every step.
If you’re looking for a faster and more reliable way to manage your financial setup in QuickBooks Desktop, give SaasAnt Transactions a try today. It's the most innovative way to automate your bookkeeping workflows.
Frequently Asked Questions
1. What is a Chart of Accounts in QuickBooks Desktop?
A Chart of Accounts is a complete listing of every account in your company’s general ledger. It includes assets, liabilities, income, and expenses, which are used to organize financial data.
2. Can I import a Chart of Accounts into QuickBooks Desktop?
Yes, QuickBooks Desktop supports importing a Chart of Accounts using third-party tools, such as SaasAnt Transactions (Desktop), for bulk uploads from Excel or CSV files.
3. What are the required fields for importing a Chart of Accounts?
The mandatory fields are Account Name and Account Type. Optional fields include Account Number, Description, and Opening Balance.
4. Does QuickBooks Desktop allow importing sub-accounts?
Yes, you can define sub-accounts using a colon “:” format in the Account Name field, like “Expenses:Utilities: Electricity”.
5. What if I import incorrect account data?
You can use the Undo or Delete feature in SaasAnt Transactions to reverse the imported accounts without affecting other entries.
Read Also
How to Import Invoices into QuickBooks Desktop
How to Import PDF Invoices into QuickBooks Desktop
How to Import Payments in QuickBooks Desktop
How to Import Item List into QuickBooks Desktop