How to Pay a Vendor in QuickBooks Online: Complete Guide
 As a small business owner, paying vendors promptly strengthens your business relationships and keeps your financial records organized. QuickBooks Online offers a simplified process for managing these payments effectively. To maintain effective vendor payments, you need to have accurate records of bills. This could be tedious, if you enter bills one by one manually.
This guide will walk you through the detailed steps of paying a vendor using QuickBooks Online as well as how to create bills manually and how to bulk import bills from XlS, XLSX, CSV, IIF, and PDF using SaasAnt Transactions, a QuickBooks addon with a 4.9-star rating from 4000 users in QuickBooks app store.
Contents
How to Pay a Vendor in QuickBooks Online: Step-by-Step Guide
How to Create Vendor Bills in QuickBooks Online: Step-by-Step Guide
How to Bulk Import Bills into QuickBooks?
FAQ
How to Pay a Vendor in QuickBooks Online: Step-by-Step Guide
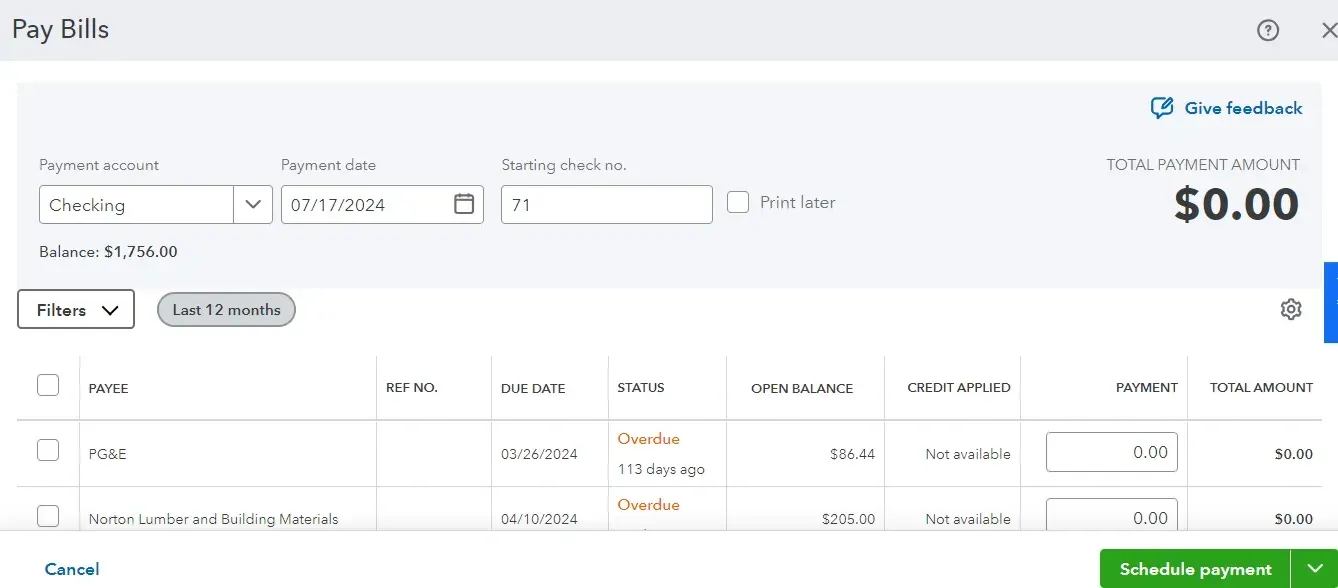
Step 1: Go to QuickBooks Dashboard -> +New -> Vendors -> Pay Bills.

Step 2: Select a payment account and enter the starting check number if you have selected a checking account.
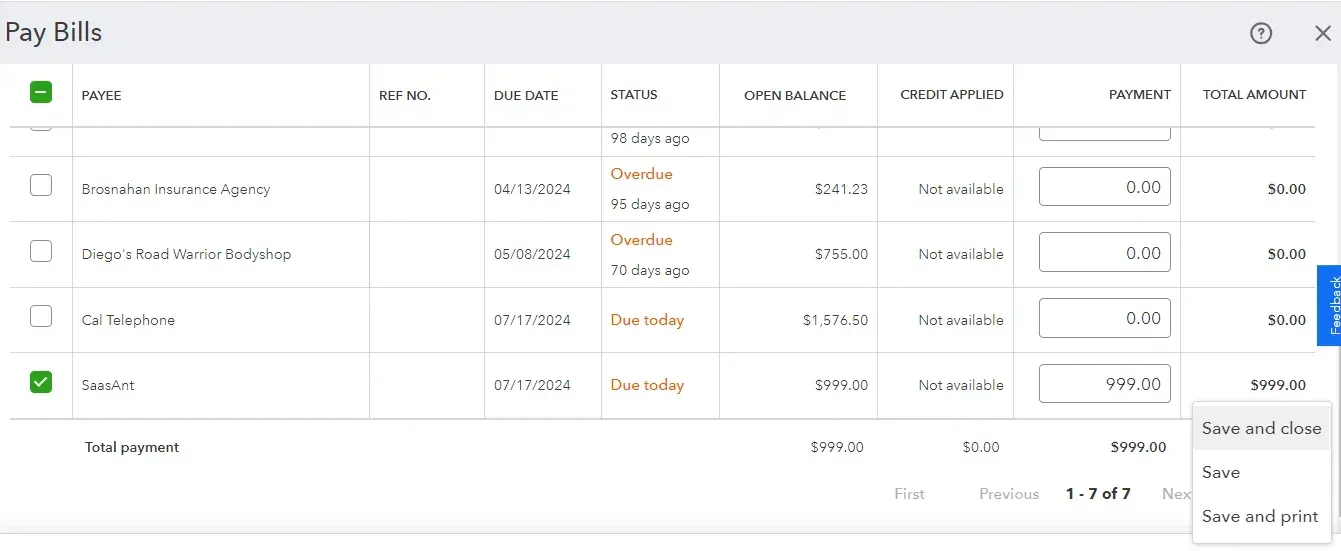
Step 3: Select the bill you wish to pay. You can save and continue to pay other bills or save and close. You can always select multiple or all bills to pay at once.
How to Create Vendor Bills in QuickBooks Online: Step-by-Step Guide
Here are the steps to create vendor bills individually. You can also skip to the next section on how to import bills in bulk.
Step 1: Navigate to QuickBooks Dashboard -> +New -> Vendors -> Bills.

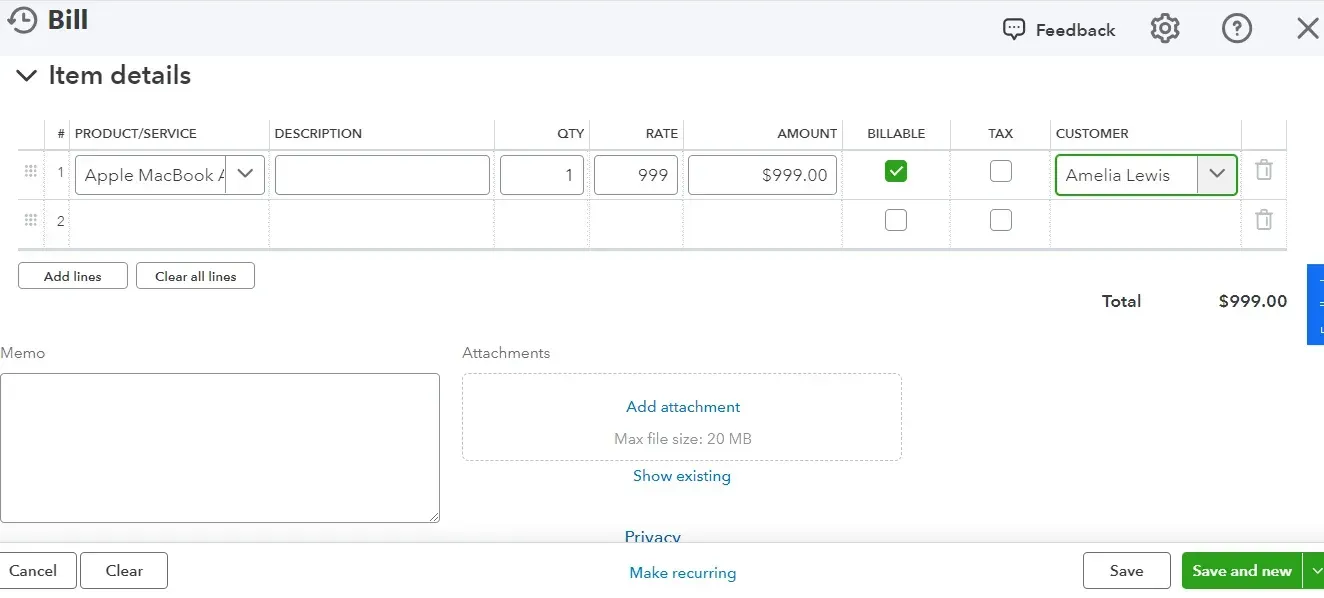
Step 2: Select an existing vendor or add a new one.
 Step 3: Choose a category, write a description, and check the billable box if applicable. If billable, select the customer's name and save and close. Creating or entering a bill manually is highly susceptible to errors and time-consuming. Consider exploring bulk import or automation of vendor bills into QuickBooks using SaasAnt Transactions.
How to Bulk Import Bills into QuickBooks?
Connect your QuickBooks account with SaasAnt Transactions via the QuickBooks Apps Store by searching for ‘SaasAnt’ and clicking ‘Get the App Now.’ Get started with a 30-day free trial.
Go to dashboard -> New Import -> Bills.
Browse to choose your file or drag and drop it. Supported formats include XLS, XLSX, CSV, and IIF. There’s an inbuilt feature to convert PDF to Excel before uploading.
Map the fields in QuickBooks to those in the imported file, selecting the appropriate sheet if necessary.
Click Upload to import your file into QuickBooks Online, then click Show Results after uploading.
Verify uploaded data by clicking the reference number. You can also roll back the imported data if needed.
Wrapping Up
We get it; it’s not easy to maintain vendor payments. You don’t have to make it even more complicated by entering bills manually. Just make use of SaasAnt Transactions' 30-day free trial and get started immediately to import bills and maintain data accuracy.
FAQ
How do I record a payment to a vendor in QuickBooks?
To record a payment to a vendor in QuickBooks, go to QuickBooks Dashboard -> +New -> Vendors -> Pay Bills. Choose a payment account and enter the starting check number if using a checking account. Select the bill to pay. You can save and continue to pay more bills or save and close. You can also select multiple or all bills to pay at once.
What is vendor payment entry?
Vendor payment entry records the payment made to a supplier or vendor for goods or services purchased on credit. It's a crucial step in the accounts payable (AP) process and involves updating financial records to reflect the reduced amount owed to the vendor.
How do you process a vendor payment?
Vendor payment processing involves verifying invoices, entering payment details, matching invoices to payments, updating accounts payable, generating payment documents, and reconciling bank statements.
Is vendors payable debit or credit?
Vendors payable, or accounts payable, is a credit. When you owe money to a vendor, it's recorded as a credit. When you pay the vendor, it becomes a debit, reducing the amount you owe.
How to Find Vendor List in QuickBooks Online?
To find the vendor list in QuickBooks online, go to QuickBooks Dashboard -> Expenses -> Vendors.