How to Import Expenses into QuickBooks Online
Let's be honest. You’re likely here because you're staring at a mountain of transactions. It might be a year-end credit card statement, months of backlogged receipts, or a client’s messy spreadsheet. You know every single line needs to be in QuickBooks, and the thought of typing them in one by one is overwhelming.
The good news? Your search for a better way ends here. Importing expenses is more than a technical task; it's about reclaiming your time, eliminating costly errors, and gaining real control over your financial data.
This guide is for you. We'll show you how SaasAnt Transactions, an Accountant's Favorite and User's choice award-winning app, transforms importing expenses into QuickBooks from Excel into a simple, streamlined process.
Contents
How to Upload Expenses in QuickBooks Online: Quick Instructions
How to Import Expenses from Excel into QuickBooks Online: A Step-by-Step Guide
Conclusion
Frequently Asked Questions (FAQs)
How to Upload Expenses in QuickBooks Online: Quick Instructions
For those looking for a quick start, here are straightforward steps to import expenses into QuickBooks Online using SaasAnt Transactions.
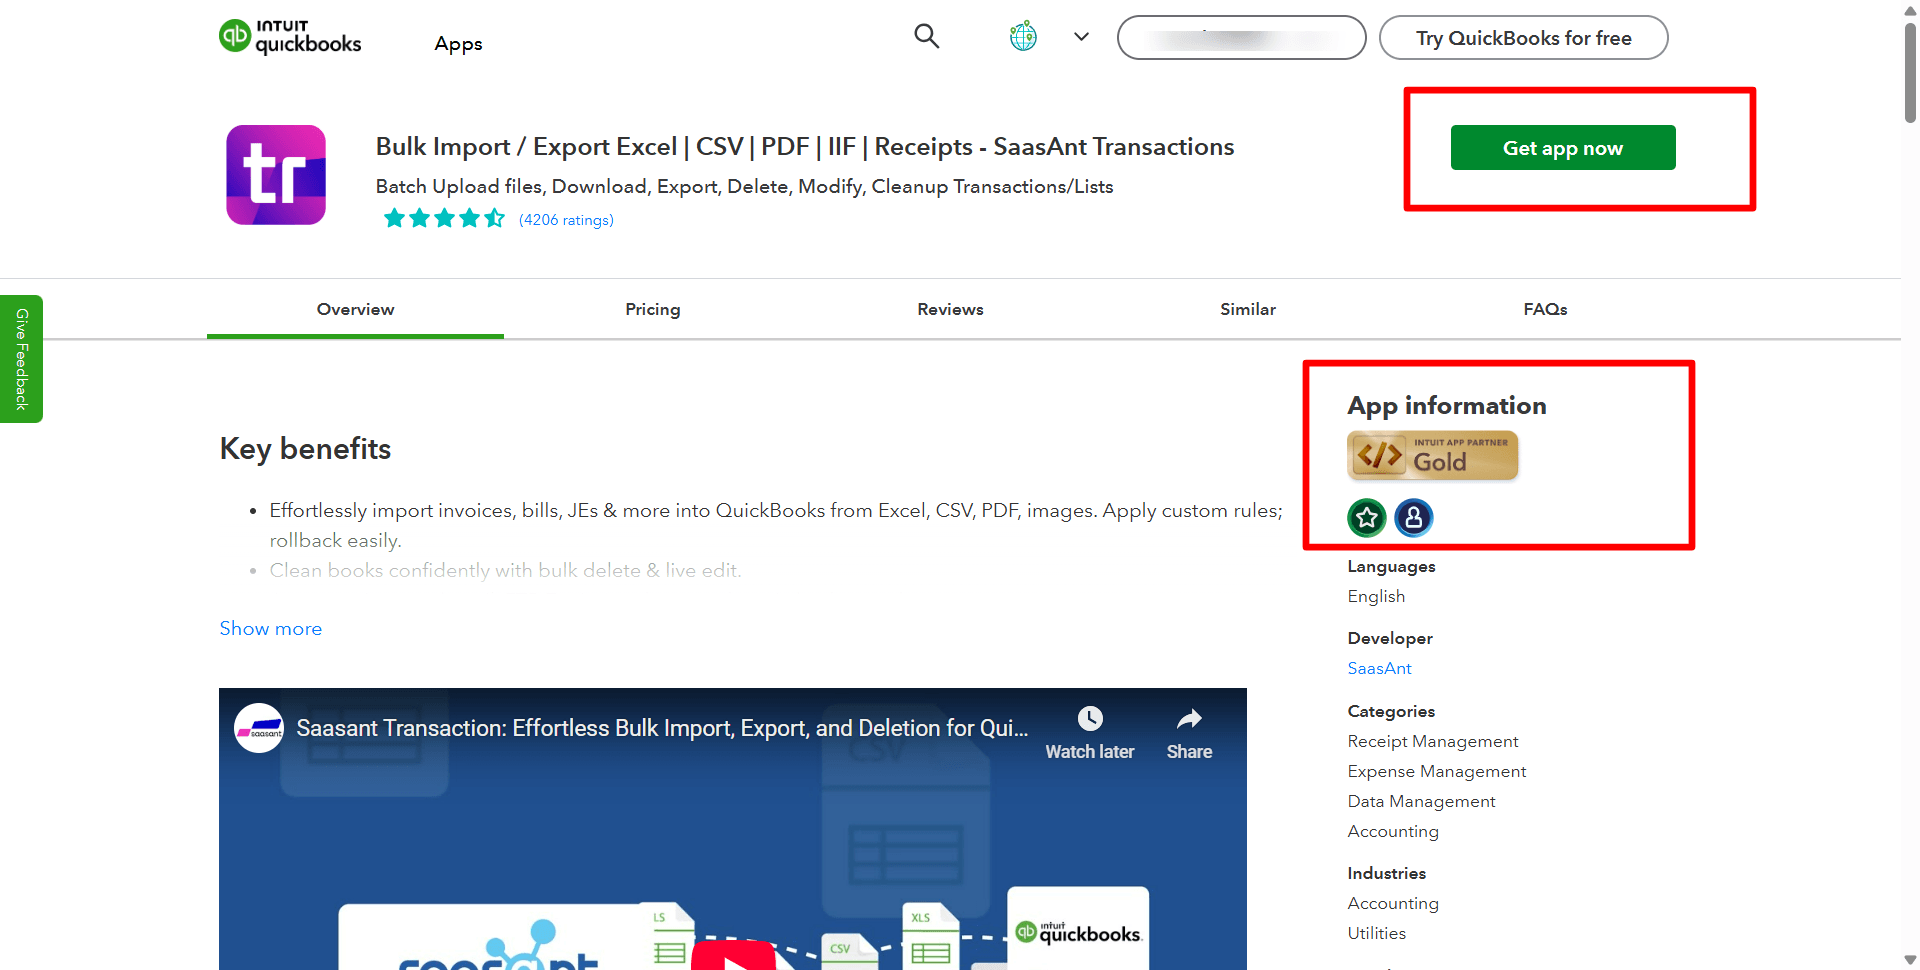
Connect SaasAnt Transactions from the QuickBooks app store
Upload your Expense file (All formats supported: PDF, Images, IIF, CSV, Excel) containing the transactions into SaasAnt Transactions.
Click on import to start importing your transactions into QuickBooks
Click on rollback/ undo if needed.
Who is This Guide For? (And Why It Matters)
Your reason for importing expenses isn't generic, and your solution shouldn't be either. See if you recognize yourself in one of these scenarios:
For the Business Owner Playing Catch-Up: You've been so busy running your business that bookkeeping fell behind. Now, tax season is looming, and you need to get months of expenses from bank statements into QuickBooks fast. Your biggest challenge is separating business from personal and making sense of cryptic transaction descriptions.
For the Accountant Migrating a New Client: You're a pro onboarding a client from another system. You have years of historical expense data that must be migrated perfectly to provide continuity and accurate year-over-year reporting. Your biggest challenge is mapping the old chart of accounts to QuickBooks and ensuring every job-costing detail is preserved.
For the Manager Handling Team Reimbursements: You collect expense reports from your team for travel, supplies, and other costs. You need an efficient way to enter these expenses, tag them to the correct project or client, and ensure everyone gets paid back accurately and on time. Your biggest challenge is standardizing formats and tracking what's been billed back to clients.
In every case, manual entry is not a scalable solution. SaasAnt Transactions is built to solve these specific, high-stakes problems.
How to Import Expenses from Excel into QuickBooks Online: A Step-by-Step Guide
Let’s look into the detailed step-by-step process of importing expenses from Excel into QuickBooks Online using SaasAnt Transactions. SaasAnt offers a user-friendly interface and makes the process straightforward.
Step 1: Log in to QuickBooks Online & Connect SaasAnt Transactions
Access QuickBooks Online by visiting the login page and entering your credentials. Click 'Apps' from the left navigation pane in QuickBooks Online. Search for and select 'SaasAnt Transactions.'
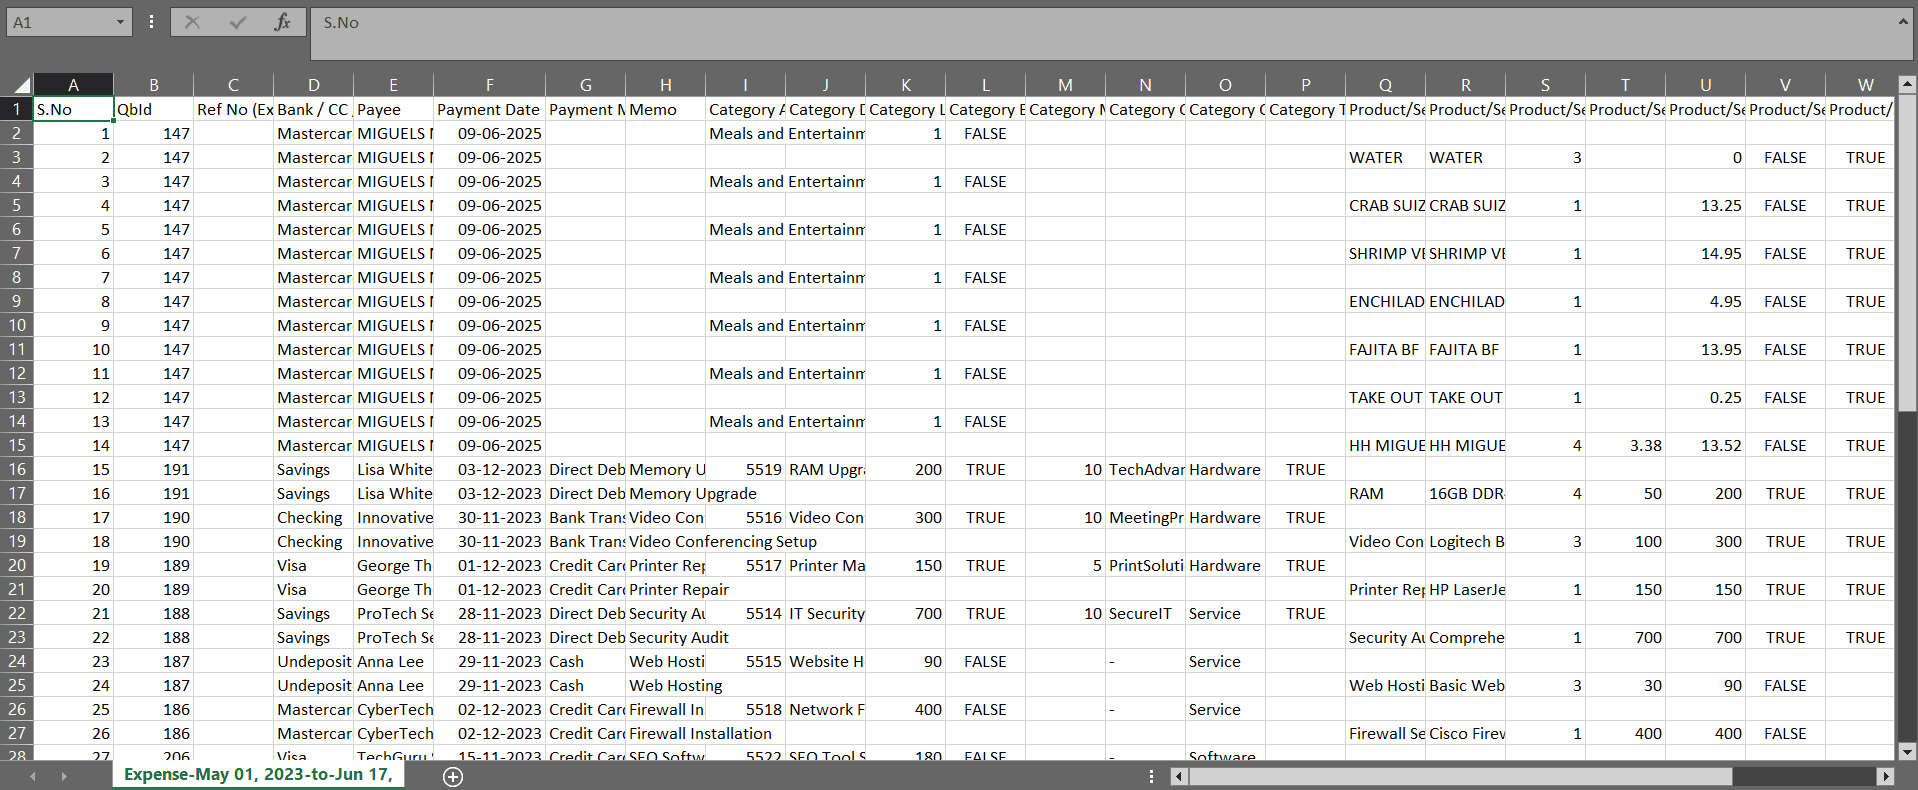
Step 2: Prepare Your Excel Sheet
Before you begin the import process, it's crucial to have your expense data well-organized and ready in a supported format. Organize your Excel sheet with clear column headers like Date, Vendor, Amount, Description, and Account.
Step 3: Initiate the Import Process
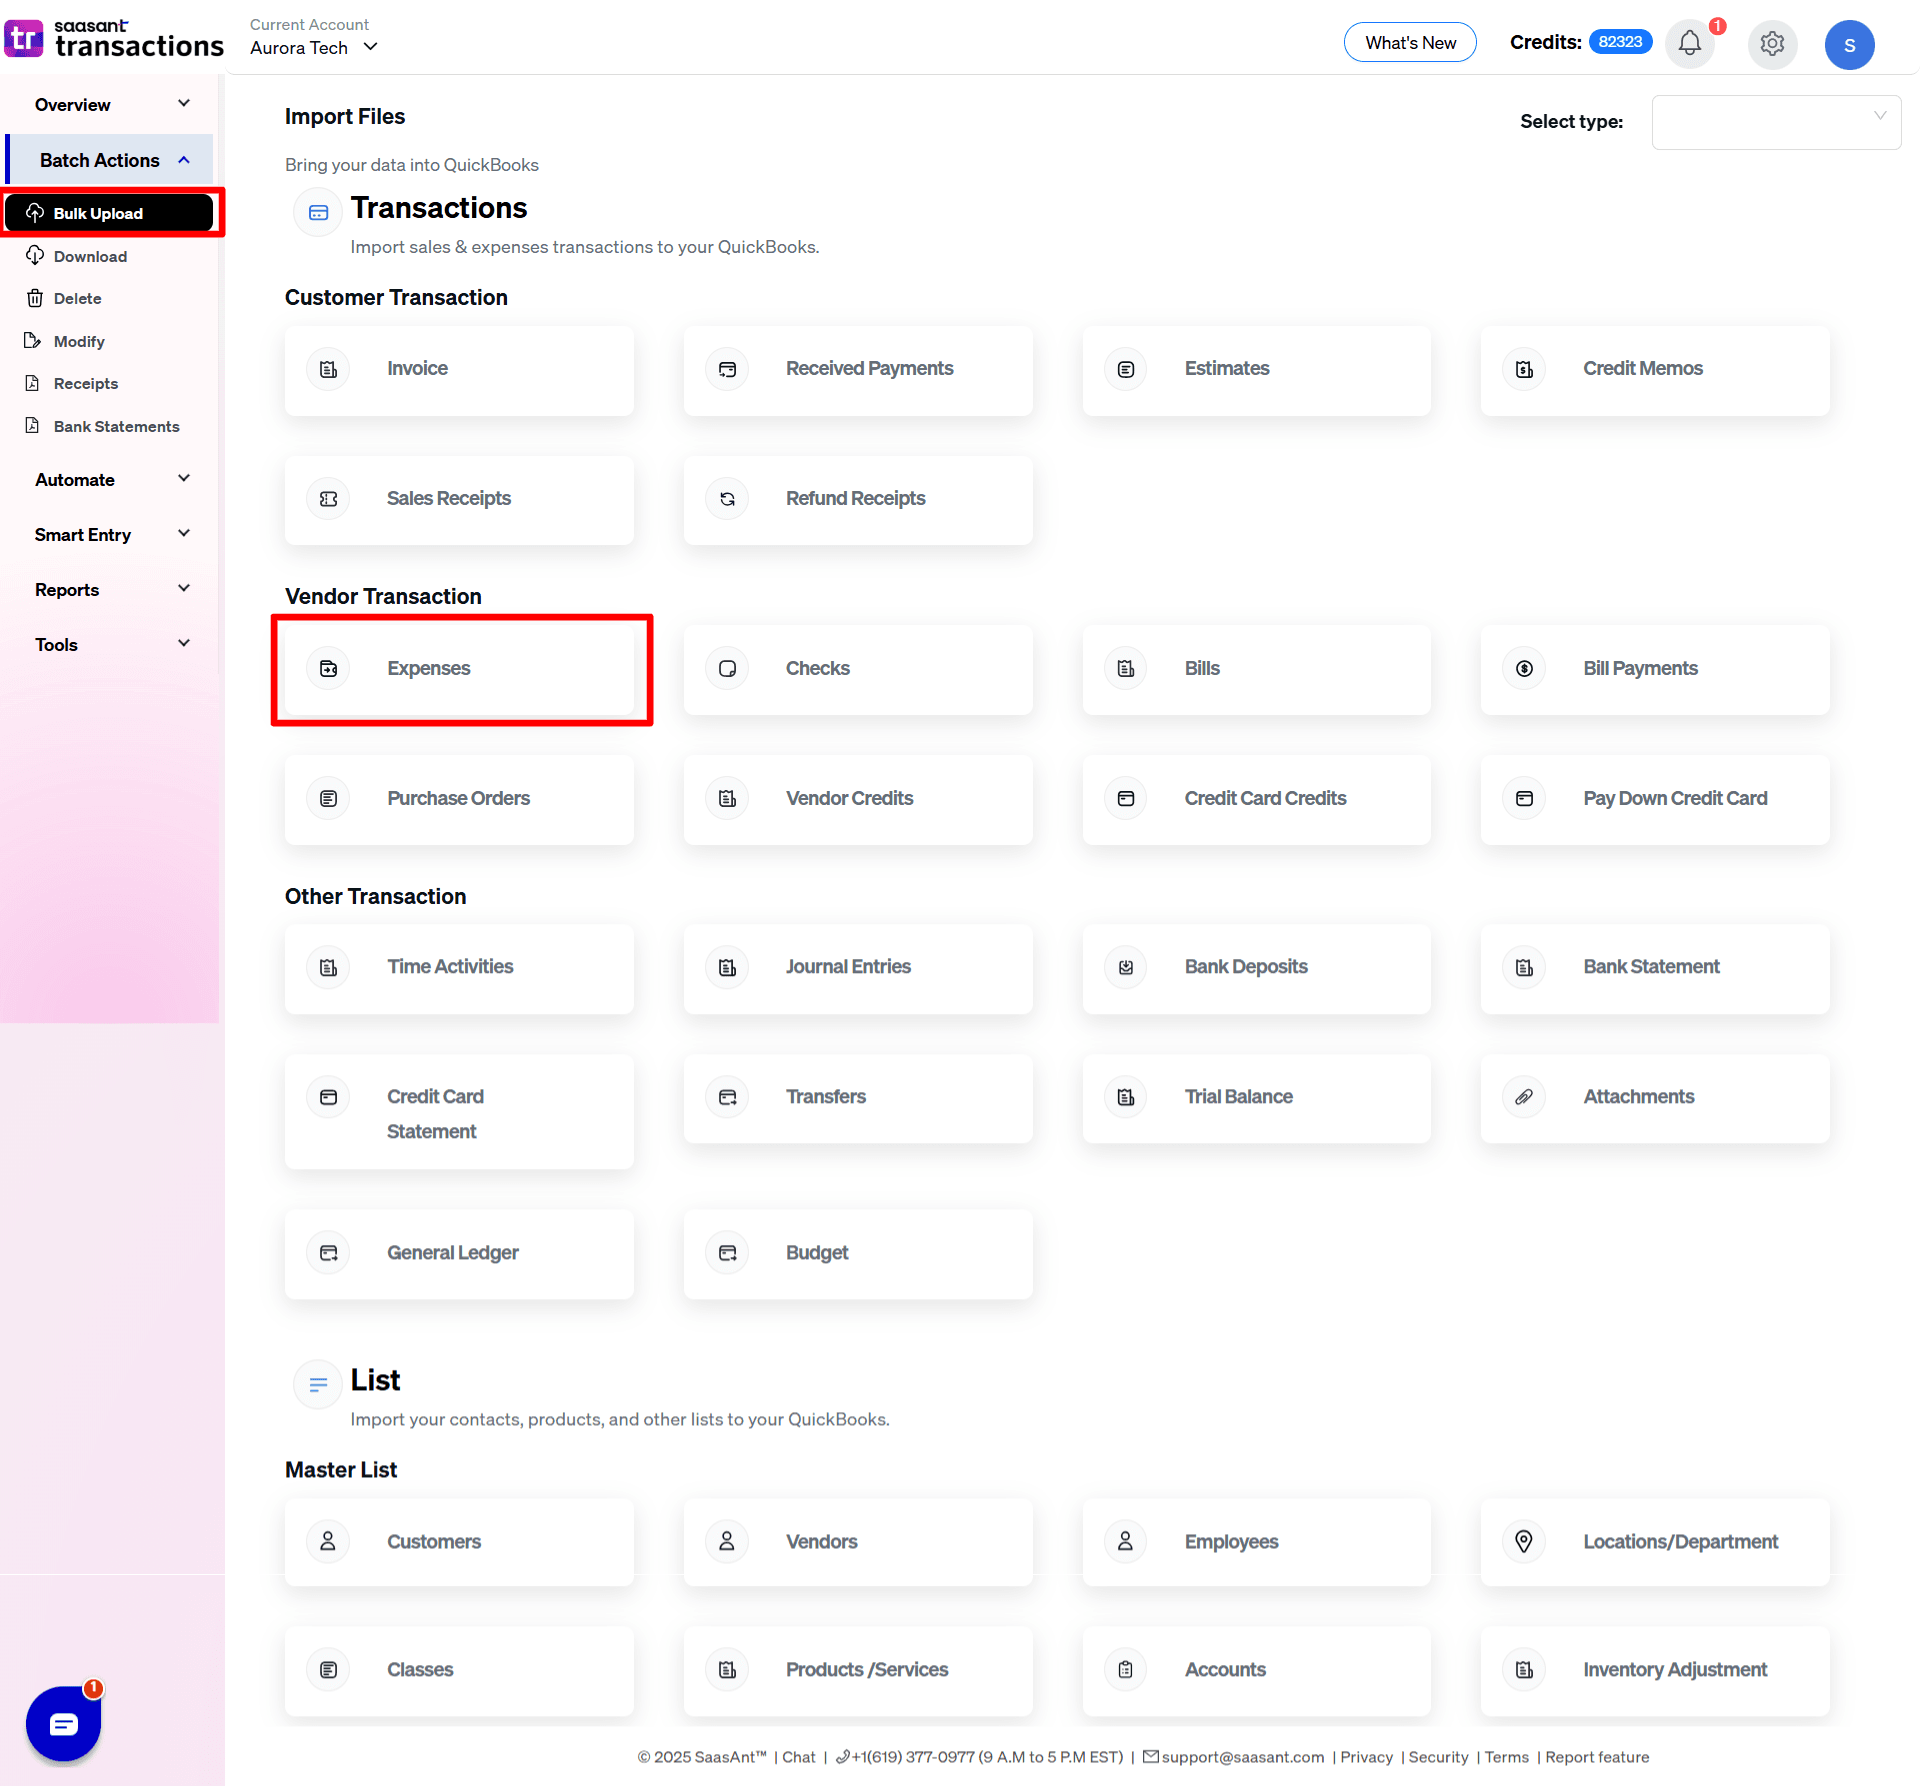
Click 'Bulk Upload' within SaasAnt Transactions.
In ‘Transactions,’ choose 'Expenses' from the list of available options.
Step 4: Start the Upload Process
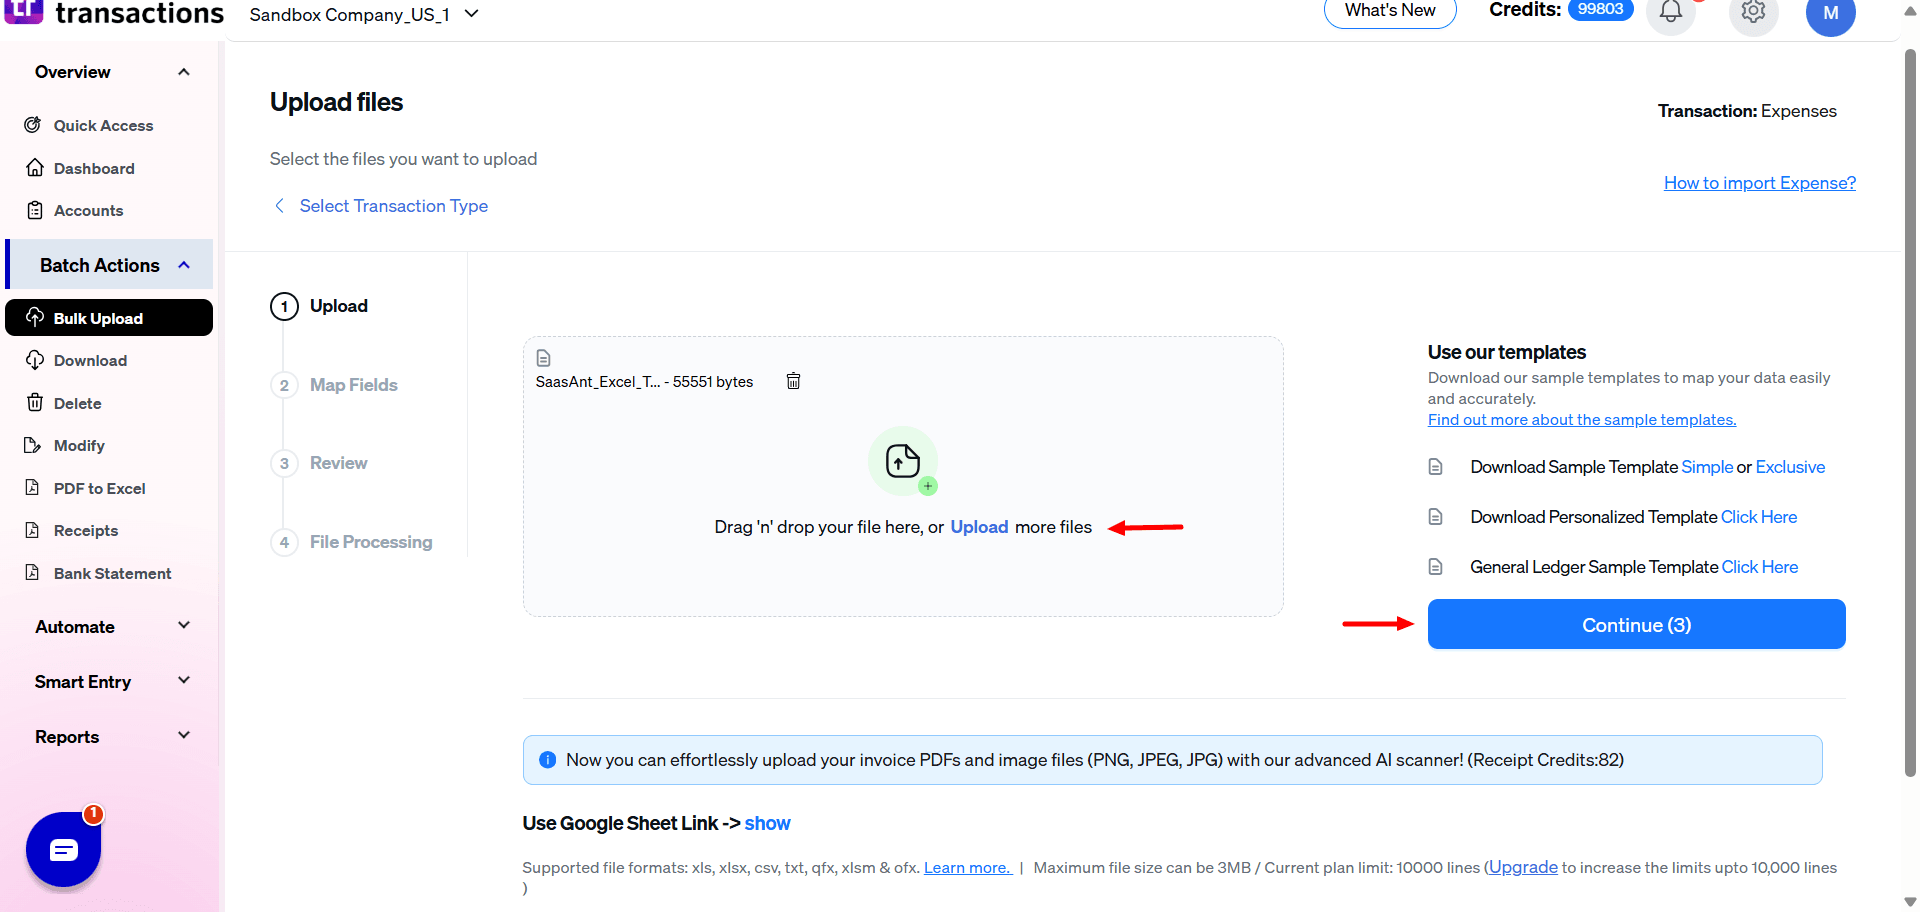
In SaasAnt Transactions, choose the 'Upload File' option. Browse your computer and select the file containing your expense data. The file can be in any format: XLS, XLSX, CSV, IIF, PDF, or images.
Note: If you have a PDF file, you can also convert it using SaasAnt Transactions to a supported format.
Step 5: Map Fields Using SaasAnt
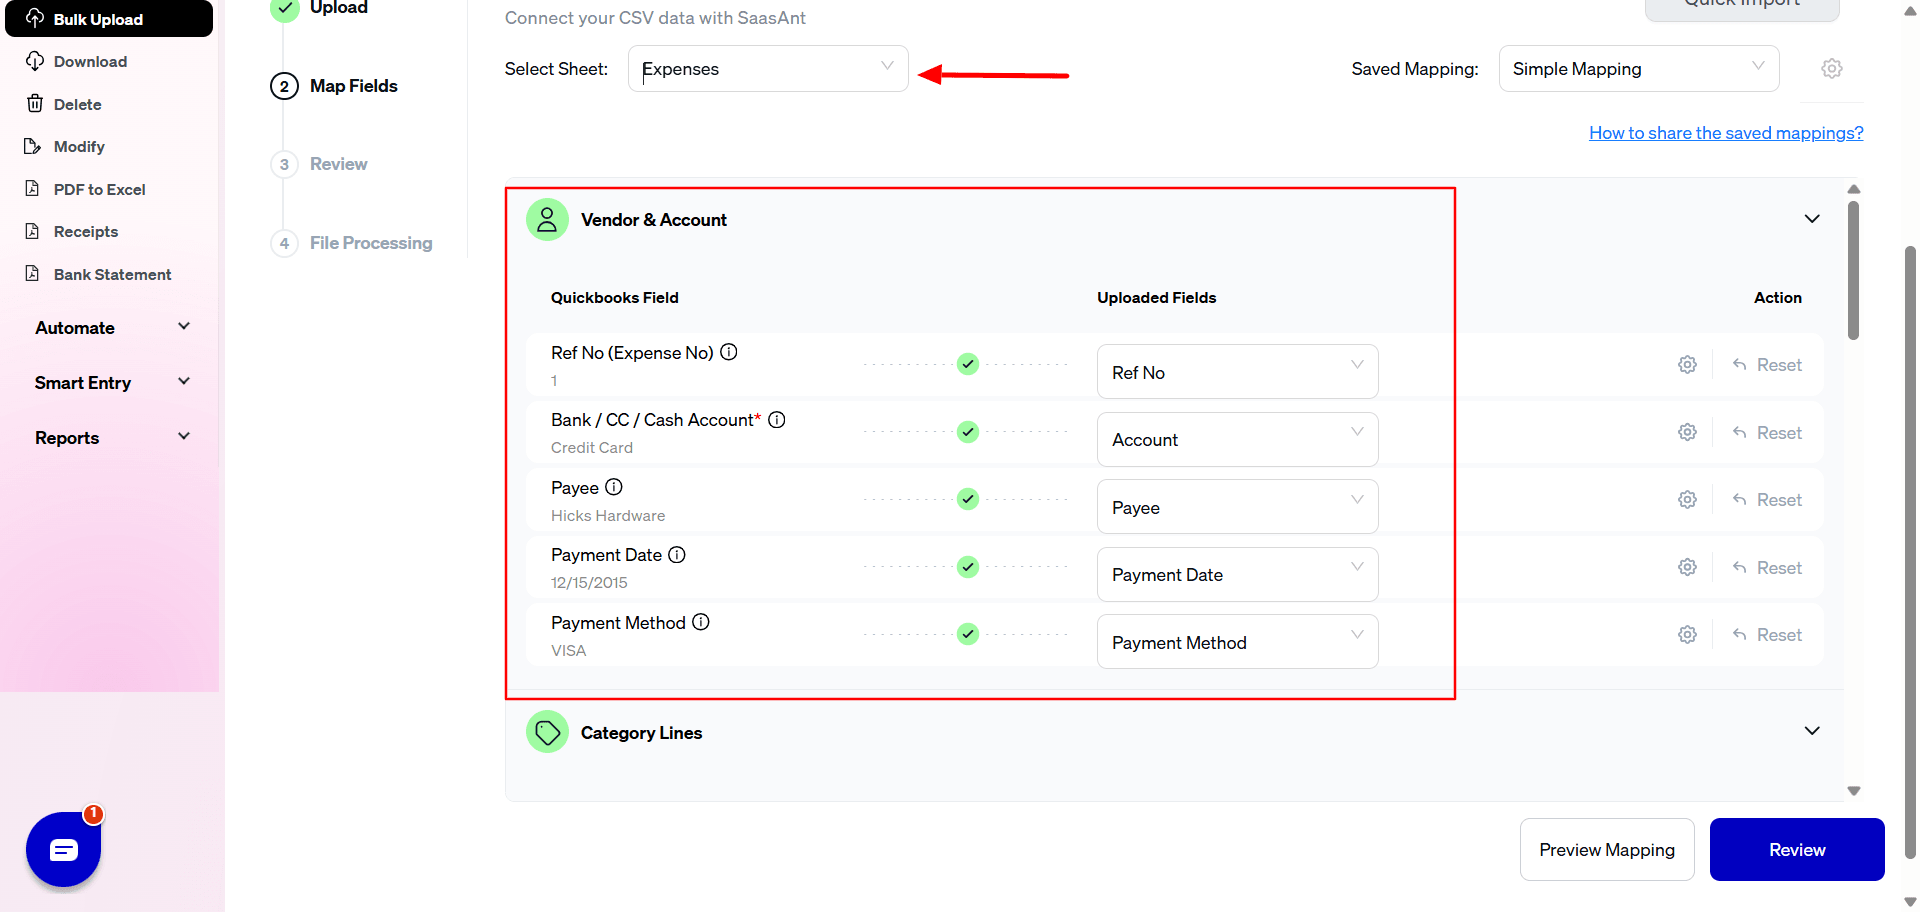
SaasAnt Transactions provides an intuitive mapping interface. Match the header columns in your file with the corresponding fields in QuickBooks Online. Look for auto-mapping features that can recognize standard headers. To make the process even easier, SaasAnt has an import template. So, all you have to do is enter your transaction details into the template and start uploading.
Before the import process, ensure mandatory fields like account, payee, payment date, expense account, etc., are correctly mapped.
Step 6: Import to QuickBooks Online
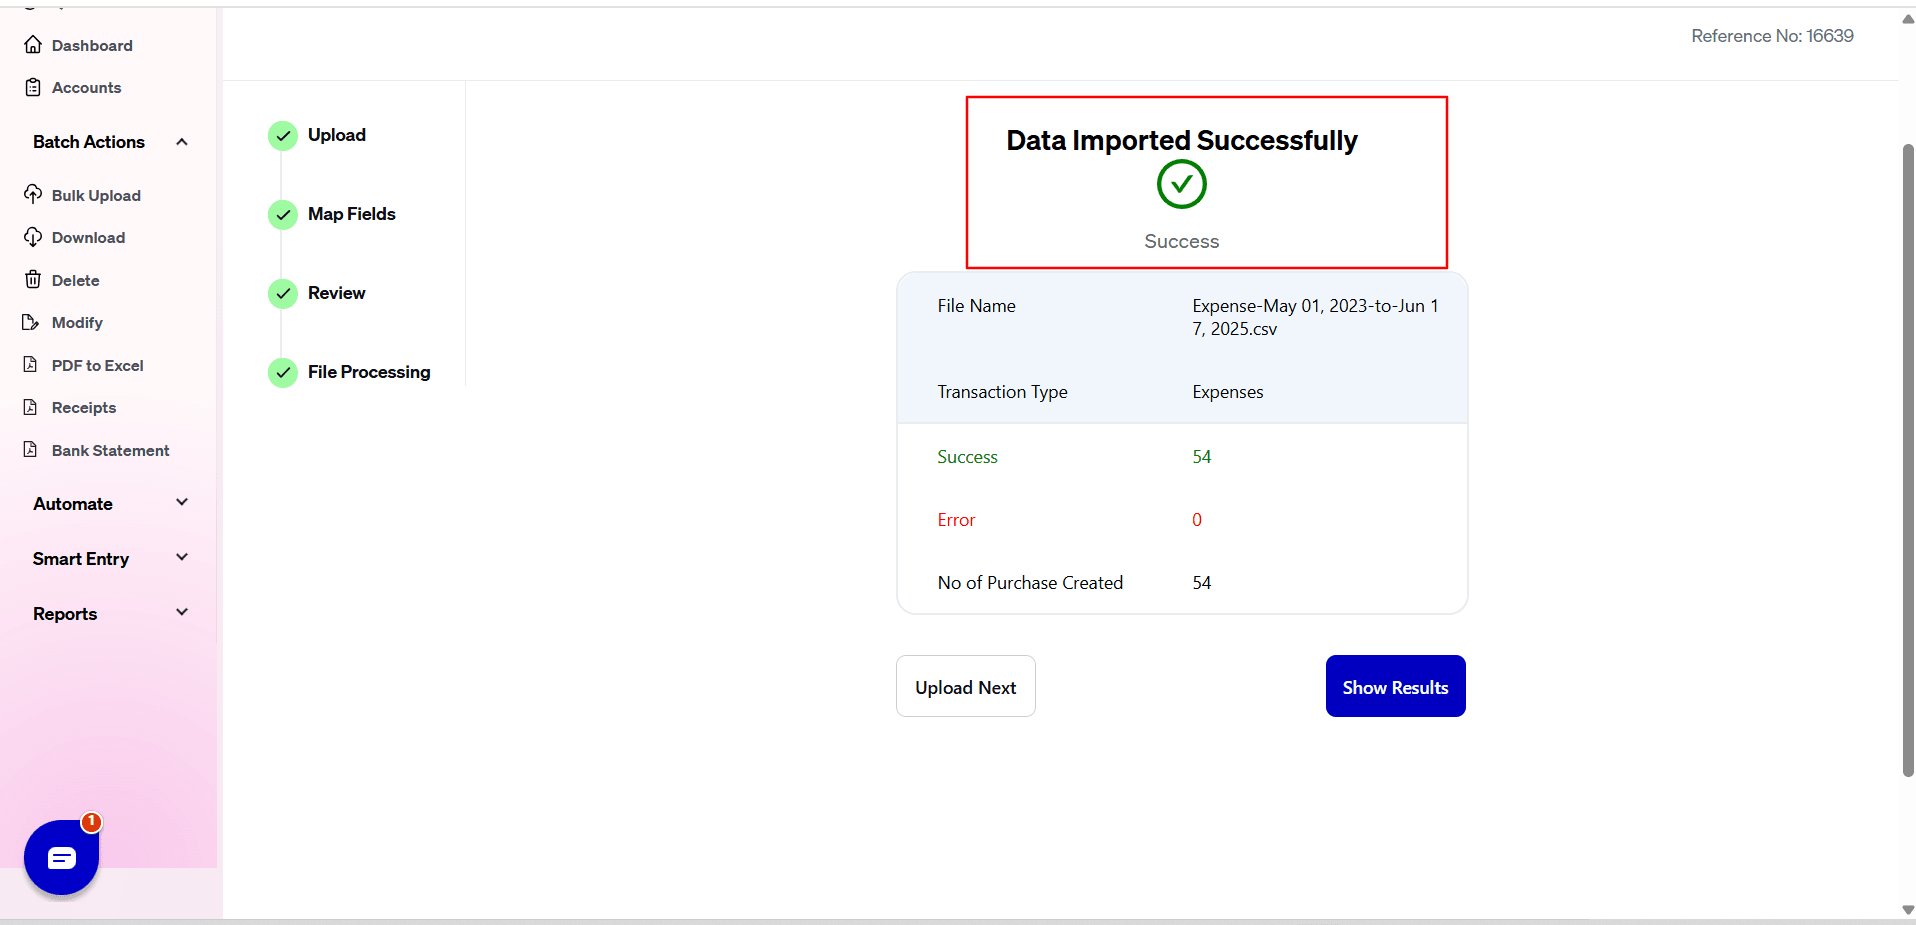
Once satisfied with the mapping and data validation, import your expenses into QuickBooks Online. SaasAnt Transactions will summarize the import, highlighting successful imports and any issues encountered.
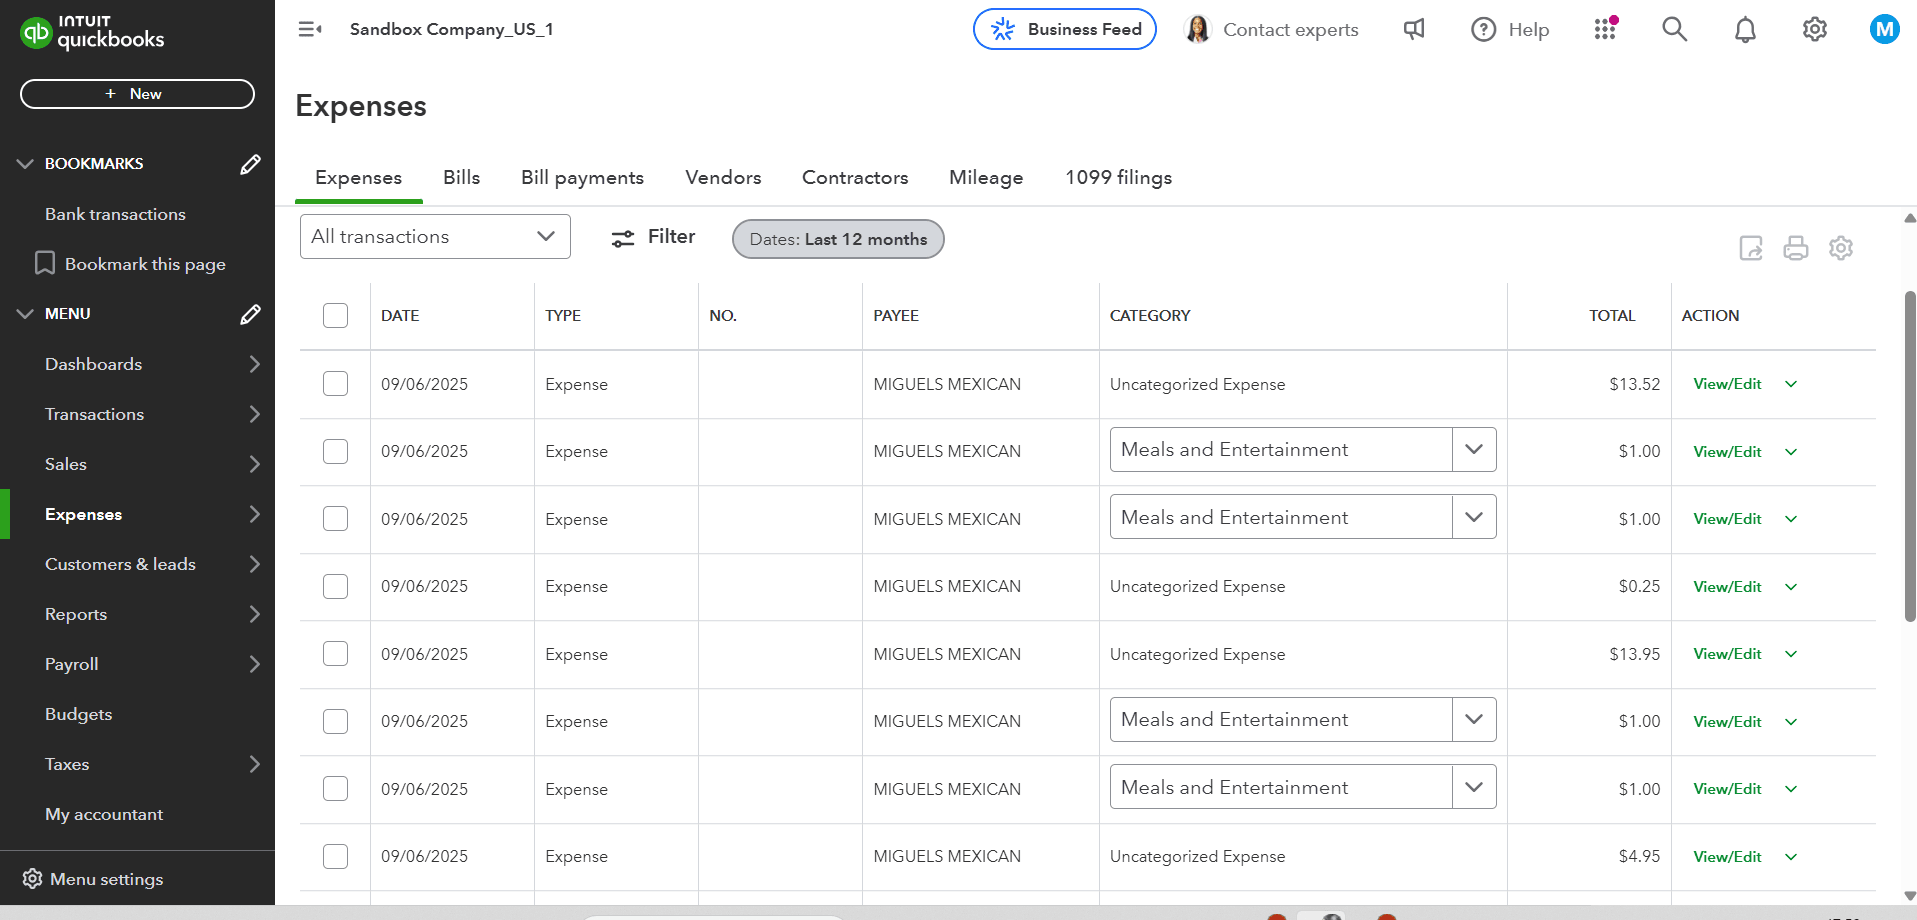
Step 7: Review Imported Transactions in QuickBooks Online
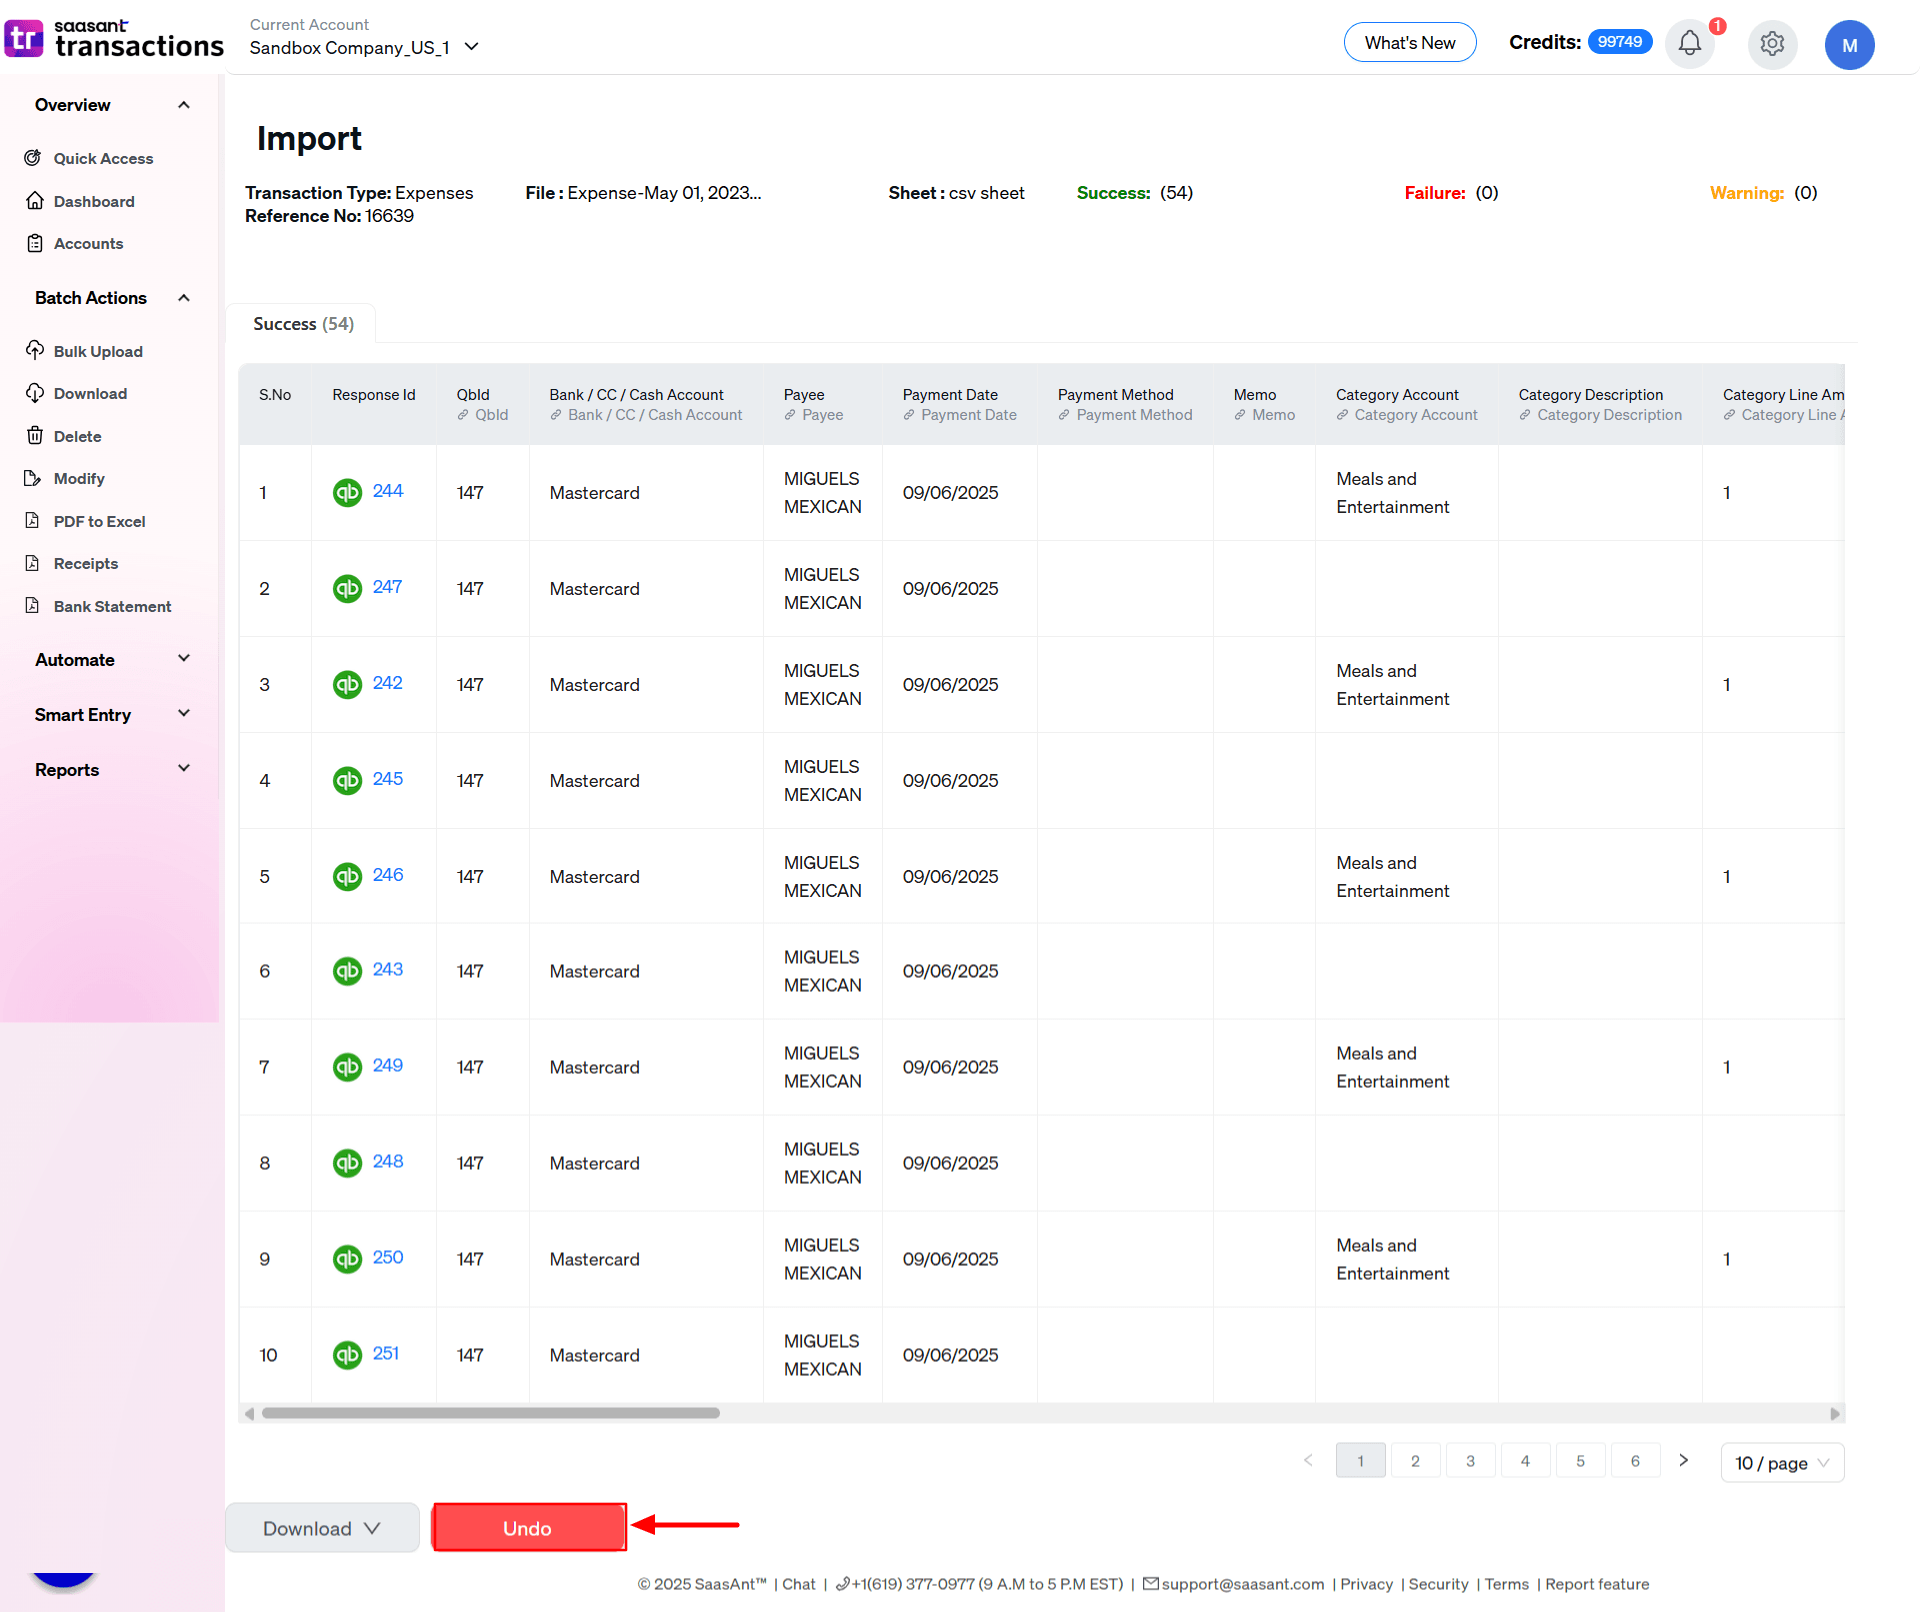
Click on the ‘QuickBooks’ icon in the ‘Response ID’ section to navigate directly to the imported expense transaction in QuickBooks, thereby validating the data accuracy of the imported expenses. Additionally, if you mistakenly imported data into QuickBooks, you can use the rollback/undo feature to delete the imported data.
Step 8: Review and Validate Data
SaasAnt Transactions will validate the data for errors or inconsistencies. Before proceeding, address any issues or warnings. SaasAnt will primarily identify and help address the issues, ensuring an accurate transaction process.
The Real-World Benefits of a Smarter Import
Using an application like SaasAnt Transactions isn't just about moving data. It's about solving real business problems.
For the Business Owner: Reclaim Your Time
Instead of losing a weekend to data entry, you can upload a year's worth of expenses in minutes. Automation eliminates the manual grind, freeing you up to focus on what actually grows your business.For the Accountant: Guarantee Data Integrity
Minimize human error and ensure accuracy. Advanced validation and intuitive field mapping catch mistakes before they mess up your client's books. The powerful rollback feature is your safety net, allowing you to undo any import with one click.
For the Manager: Streamline Your Workflow
Handle large volumes of data effortlessly, whether it's from one complex spreadsheet or ten different team members. Use custom templates to standardize data from any source, ensuring consistency and making reconciliation a breeze.
For a more detailed explanation, here’s a video you can watch:
Conclusion
Importing expenses from Excel into QuickBooks Online doesn't have to be a source of frustration. By understanding your specific needs and leveraging a powerful app like SaasAnt Transactions, you can transform it into an efficient, accurate, and time-saving process. Following the steps in this guide will give you the confidence to take control of your financial data.
Ready to see the difference for yourself? Experience the benefits firsthand by starting a no-risk, 30-day free trial of SaasAnt Transactions. No credit card is required. It's your opportunity to see how simple bookkeeping can be.
Frequently Asked Questions (FAQs)
How do I import expenses from Excel to QuickBooks Online?
To import expenses from Excel to QuickBooks Online, follow these steps:
Connect QuickBooks with SaasAnt Transactions.
Open SaasAnt Transactions and click on ‘Bulk Upload.’
Upload your Expense file.
Map the Data.
Click on ‘Import’ to upload your data into QuickBooks Online
Click on rollback/ undo if needed.
Can I upload expenses to QuickBooks Online?
To upload expenses to QuickBooks online, follow these steps:
Connect QuickBooks with SaasAnt Transactions
Click on ‘Bulk upload’ and upload your file (All formats supported: PDF, Images, IIF, CSV, Excel)
Click on ‘Import’ to upload your data into QuickBooks Online
Click on rollback/ undo if necessary.
How can I ensure my Excel data aligns correctly with QuickBooks fields?
When using SaasAnt Transactions, use the mapping step to align your Excel columns with corresponding QuickBooks fields. Carefully review this mapping to ensure data accuracy during the import.
What are the disadvantages of using QuickBooks for importing data directly?
Direct data import into QuickBooks is limited to certain file types like IIF and can be complex to set up, often leading to errors and data inconsistencies. QuickBooks struggles with bulk operations, which may necessitate manual interventions, increasing the risk of errors.
Why is there a need for an application like SaasAnt Transactions for importing data?
SaasAnt Transactions provides enhanced functionality, such as support for various file formats and advanced data validation. They also offer user-friendly interfaces, customization options, and efficient bulk processing capabilities, essential for effectively managing large data volumes.
Recommended reading
How to Create Expenses from QuickBooks Online
How to Edit an Expense in QuickBooks Online