How to Change Invoice Number in QuickBooks Online?
Every business relies on accurate invoicing for effective financial management, but mistakes can happen, such as duplicate or incorrect sequences. In QuickBooks Online (QBO), changing invoice numbers can be tough, especially with many transactions. SaasAnt Transactions Online, a reliable add-on, allows users to quickly modify invoice numbers in bulk, saving time and reducing manual effort.
This guide explains how to manually change invoice numbers in QBO, the platform's limitations, and how SaasAnt improves this process, making it quicker and more efficient while ensuring accurate transaction tracking and bookkeeping.
Contents
Steps to Change and Customize Invoice Numbers in QuickBooks
Wrap Up
Frequently Asked Questions
Steps to Change and Customize Invoice Numbers in QuickBooks
Always back up your QuickBooks Online data before you begin. Even though SaasAnt is designed to be safe and reliable, a backup provides an added layer of security. Follow the steps below to get started.
Step 1: Log In to Your QuickBooks Account
Log in to your QuickBooks account.
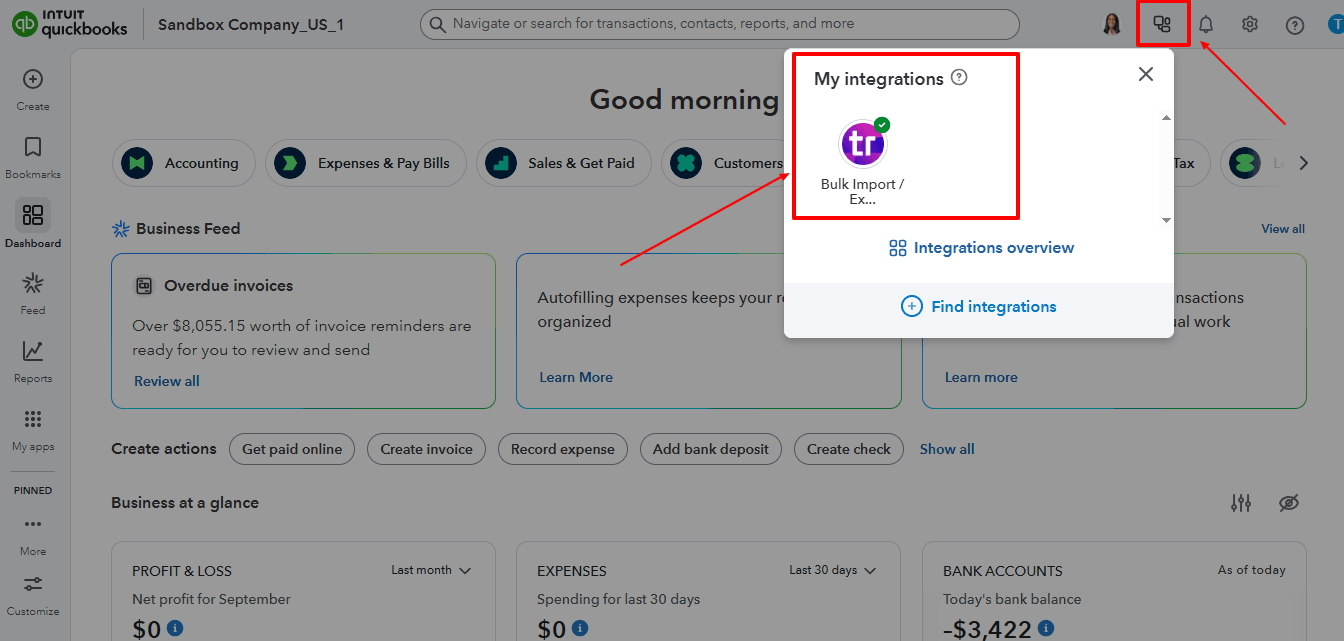
Step 2: Navigate to the Apps Menu
On the left side of the QuickBooks dashboard, you can see the menu bar with various options.
Select “Apps.” Click the dropdown and select “Find Apps.”
Step 3: Search and Install SaasAnt Transactions
In the search bar, type “SaasAnt Transactions” as shown by the arrow in the image below.
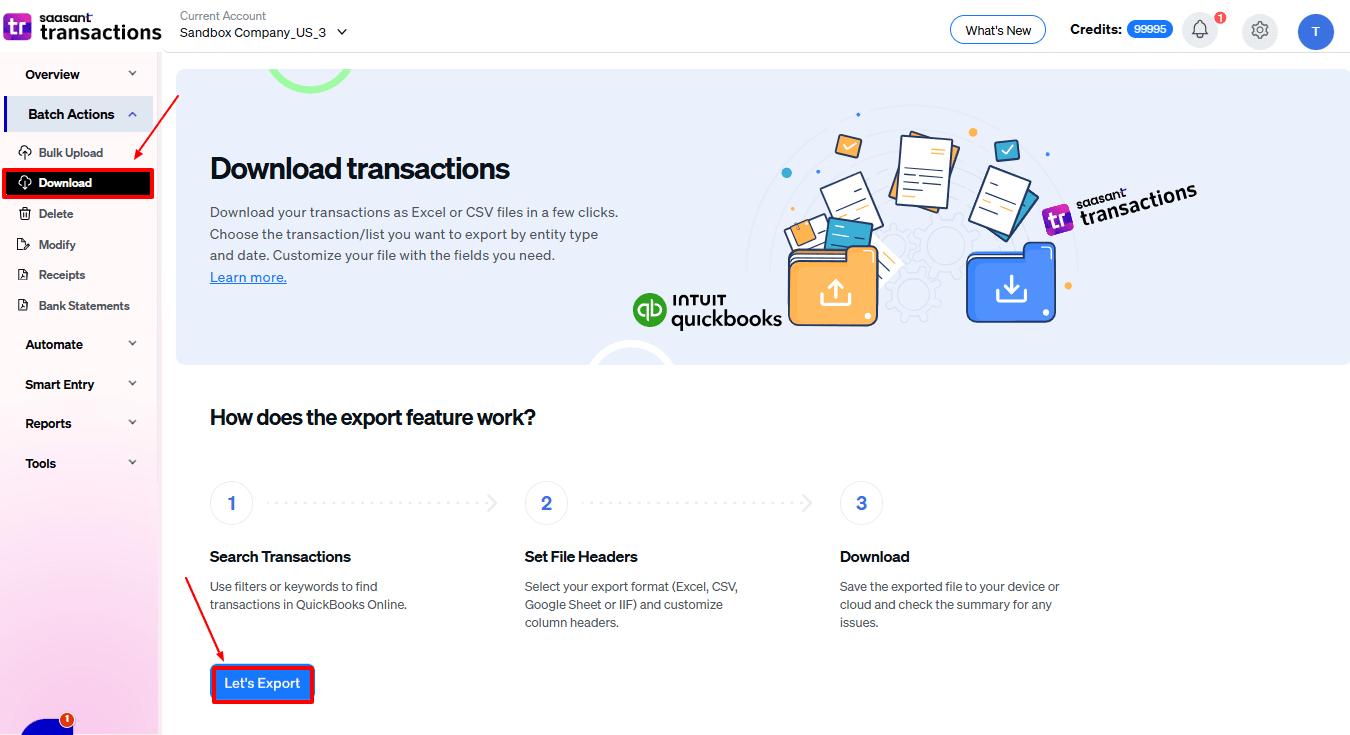
Step 4: Download the existing Invoice
On the SaasAnt dashboard:
On the left side of the SaasAnt Transactions dashboard, you can see the menu bar with various options.
Select “Download.”
At the bottom right, click on “Let’s Export.”
In SaasAnt Transactions, choose the entity "Invoice."
Use filters to select the date range, customer(s), or invoice status you want to modify.
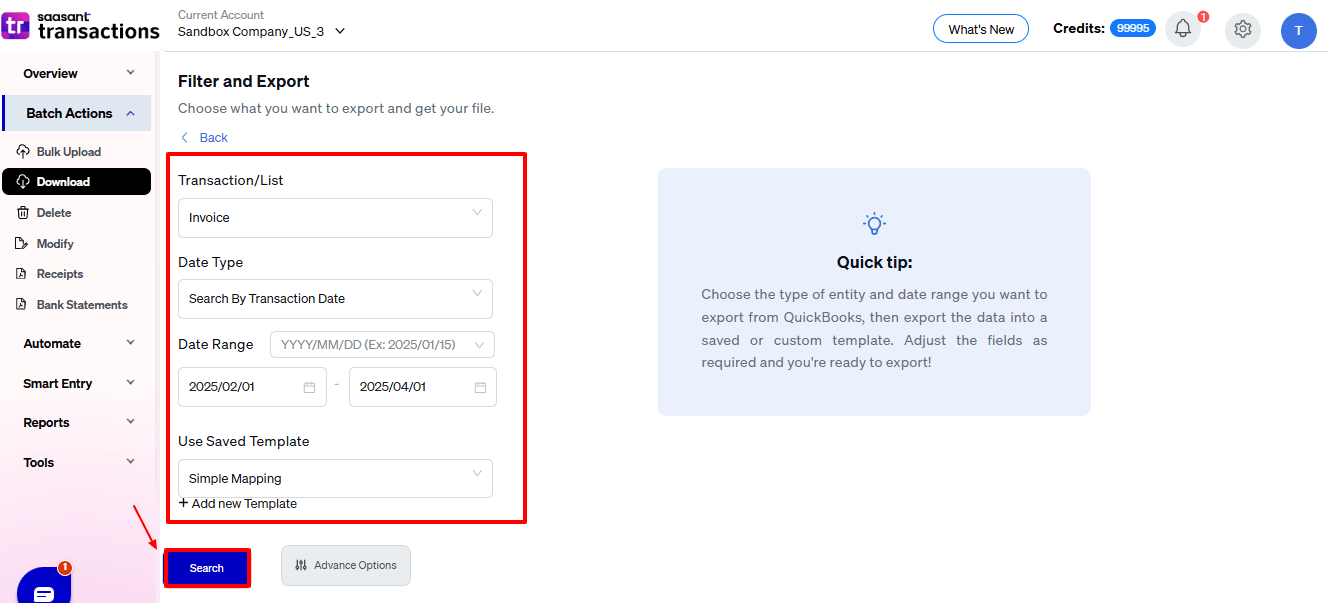
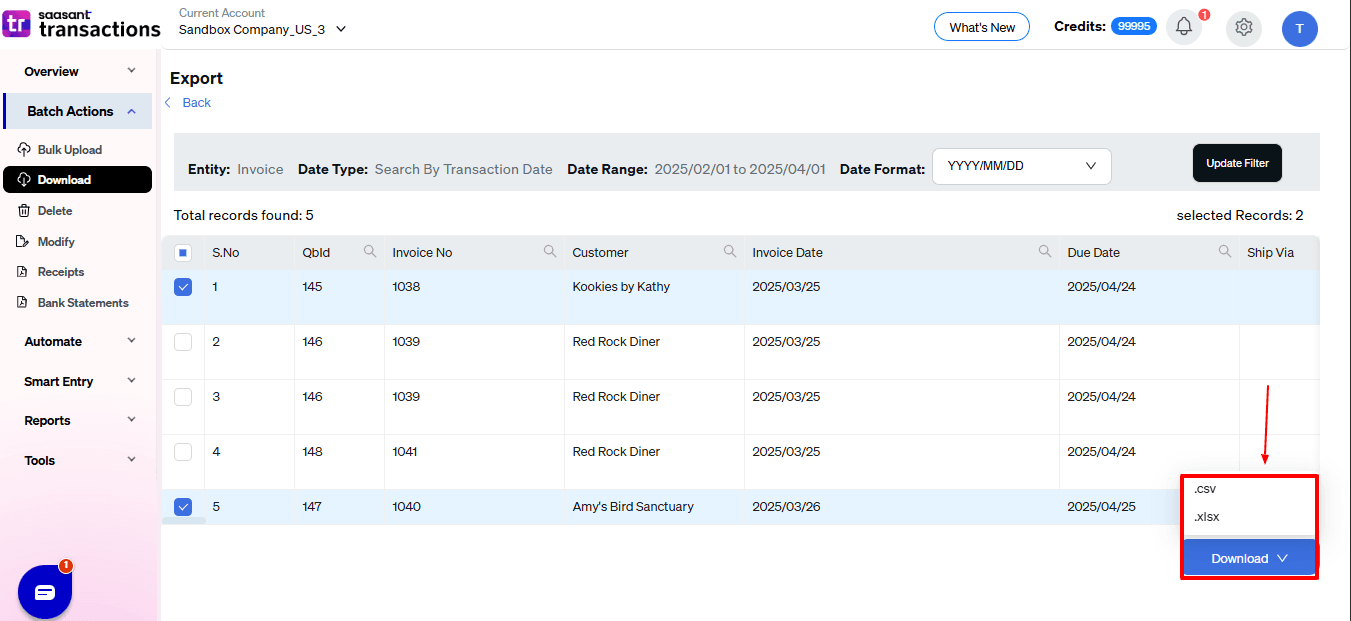
Export the Invoice Number to Excel (.xlsx) or CSV for editing.
Step 5: Make edits in the spreadsheet
Open the exported file using Excel or Google Sheets.
Find the Invoice Number you need to change (by number, customer, or date).
Make the necessary adjustments: change amounts, dates, line items, customer information, etc.
Save the file as a CSV (if SaasAnt requires it).

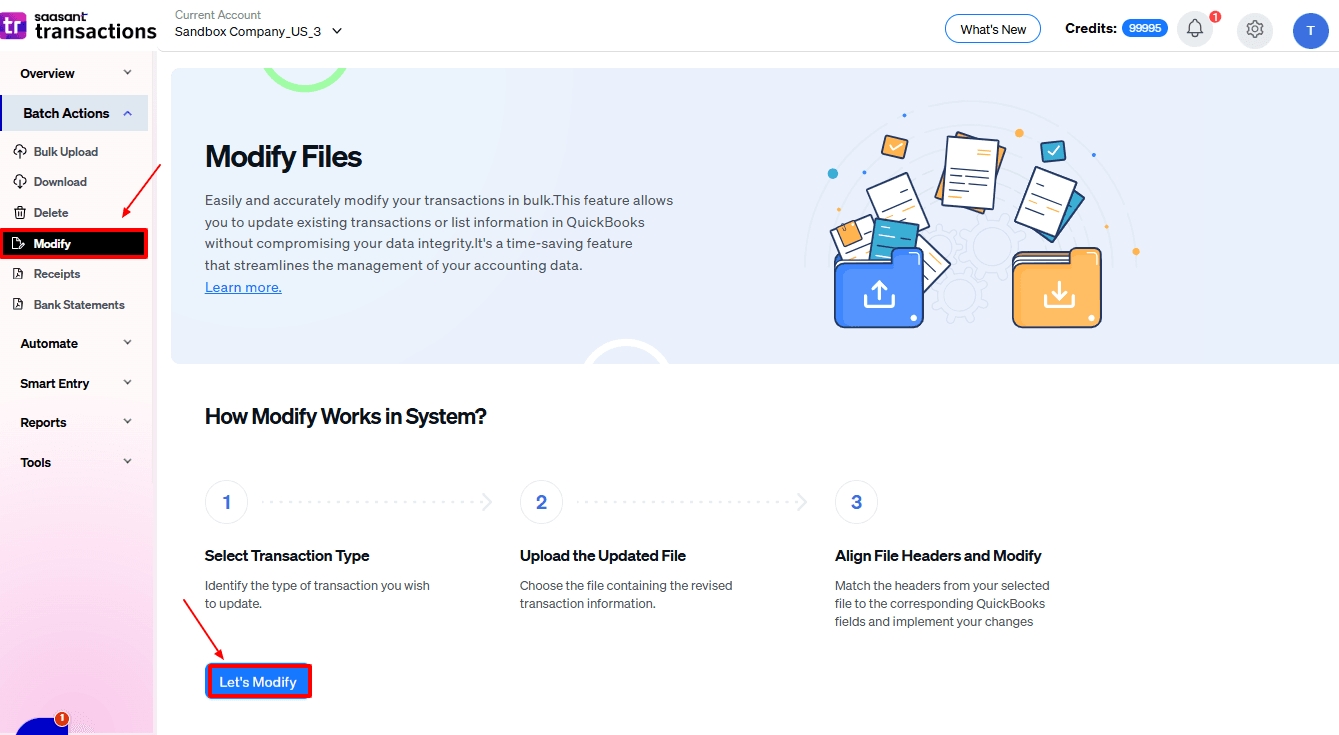
Step 6: Re-import the edited Invoice Number
Return to SaasAnt Transactions.
On the SaasAnt dashboard:
On the left side of the SaasAnt Transactions dashboard, you can see the menu bar with various options.
Select “Modify.”
At the bottom right, click on “Let’s Modify.”
Select “Invoice” under the Customer Transactions section.
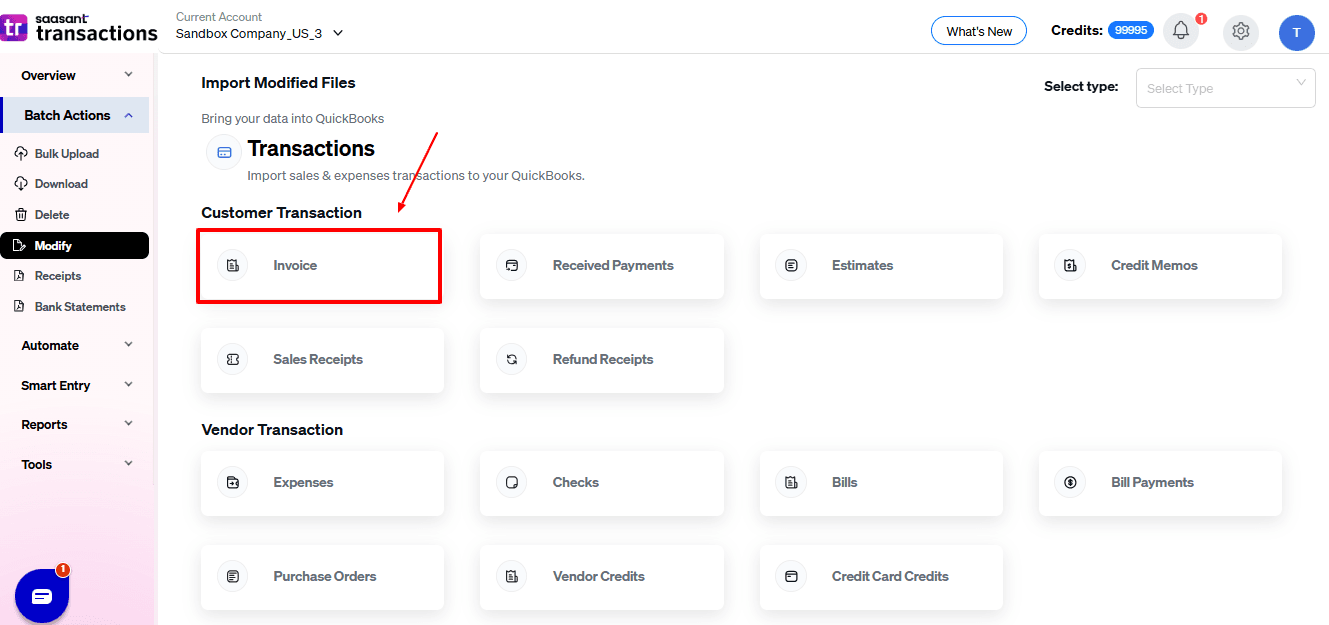
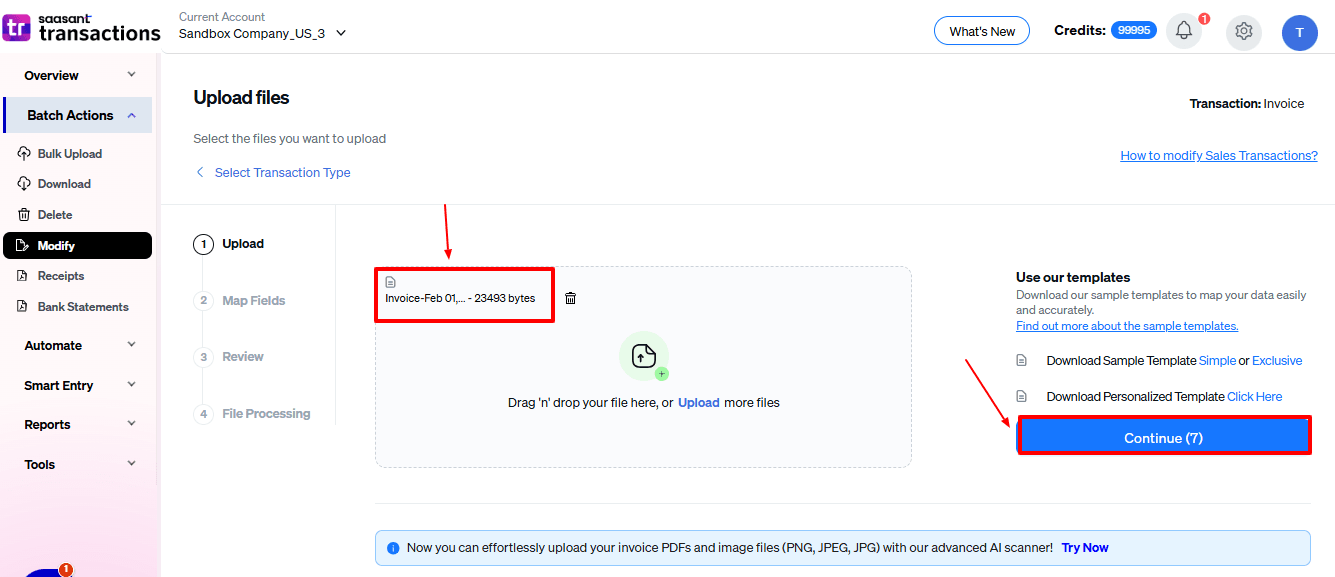
Browse and select the file you want to edit in QuickBooks.

Now, upload your respective invoice files from your device and click “Continue”.
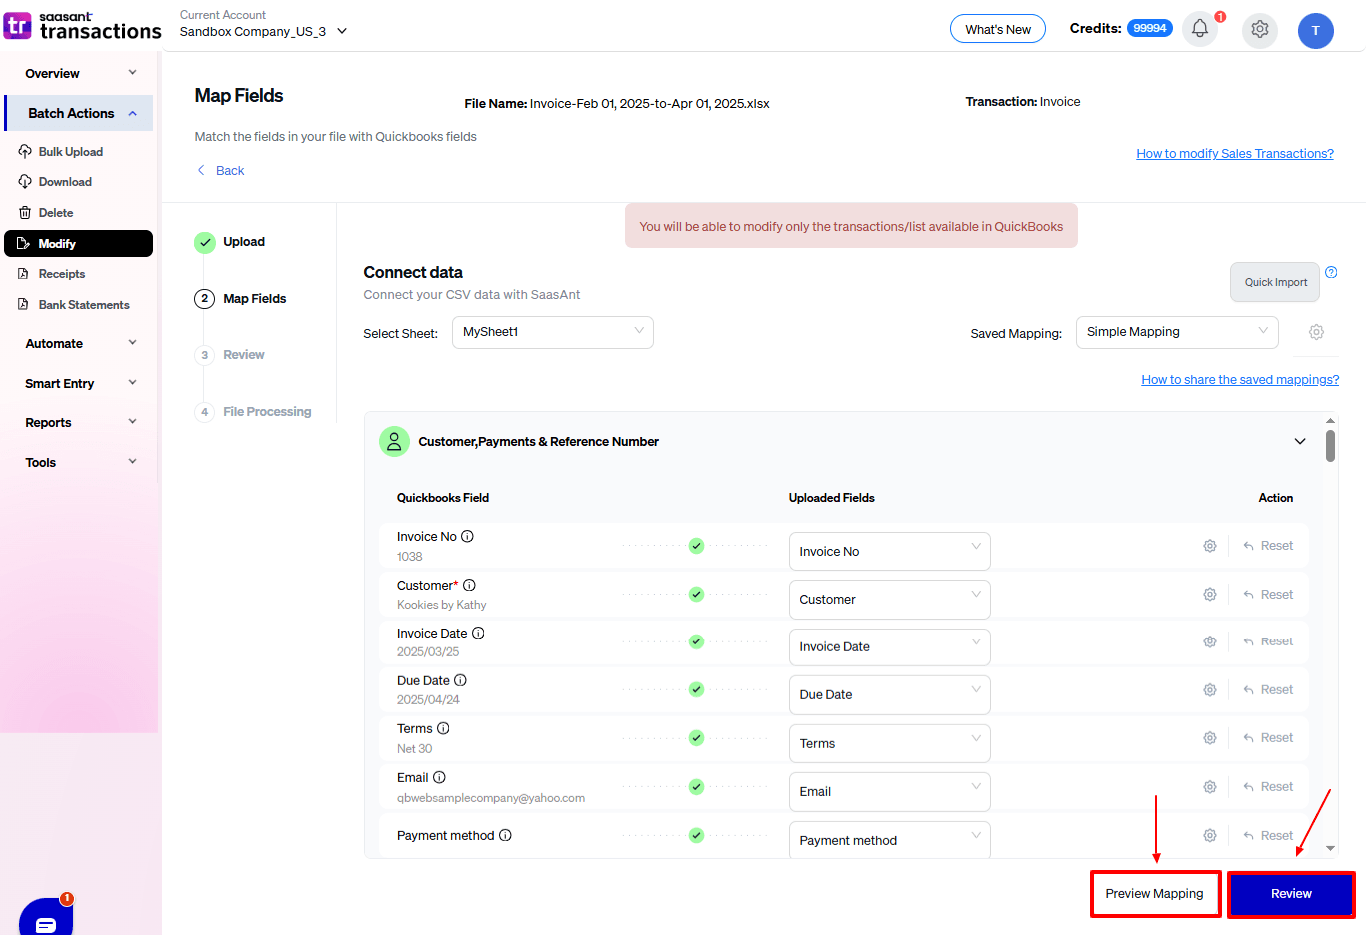
Step 7: Mapping Fields And Review
Ensures accurate mapping of essential fields: deposit number, deposit to account, date, etc.
The ‘Preview Mapping’ feature allows users to verify field alignment before review.
Select “Review” after finalising the mapping of all fields.
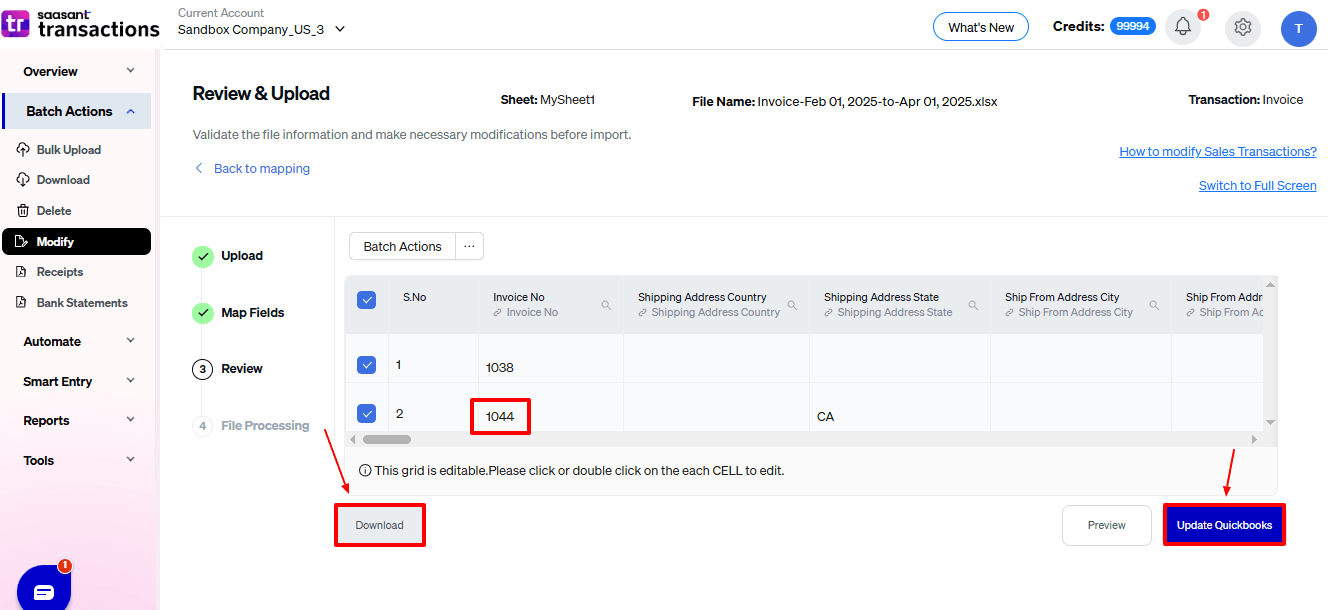
Step 8: Review And Update
Review the modified “Invoice Number” data and select “Update QuickBooks”.
At the bottom left, there is a “Download” option, where you can download this modified data for your future reference.
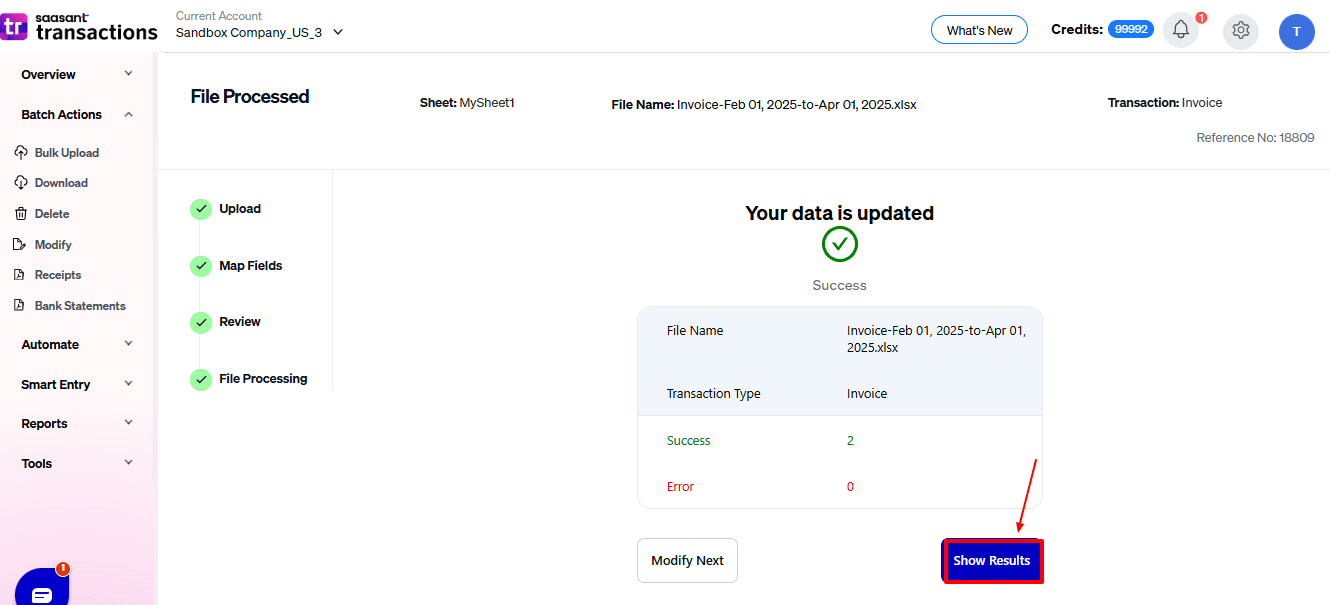
Your modified “Invoice” data will be updated in QuickBooks Online. Click “Show Results”.
Step 9: Modify
Your modified “Invoice Number” data appears. At the bottom left, there is a “Download” option, where you can download your modified deposit data for future reference.
And also next to download, you can see “Undo”, where your “Invoice Number” data will be rolled back.
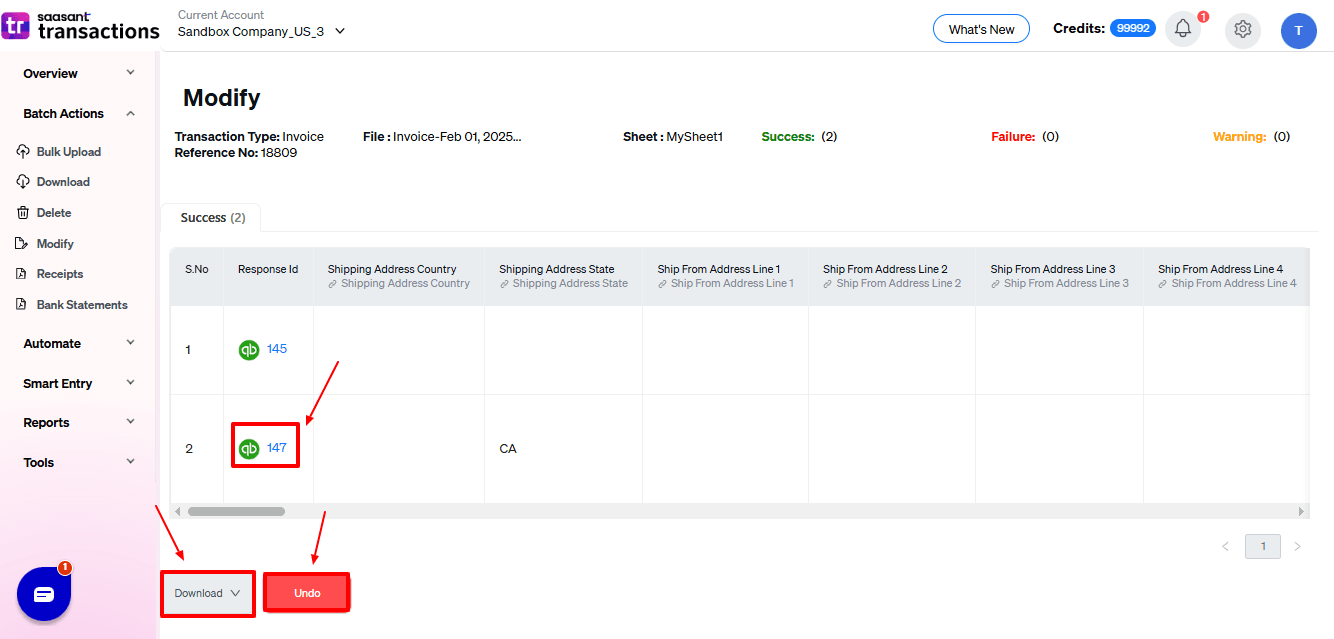
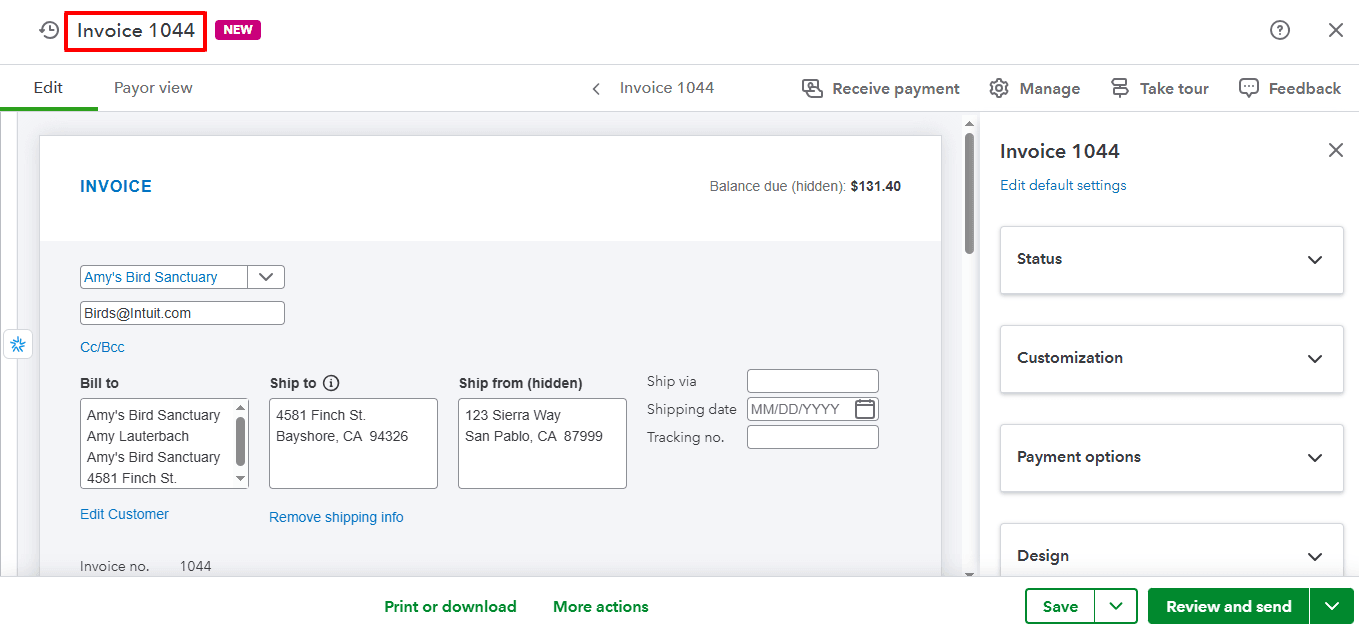
Click the response ID, modified “Invoice Number” data are shown in QuickBooks Online.
Wrap Up
Modifying invoice numbers in QuickBooks Online is important for ensuring that financial records are organised and precise. However, the manual editing method in QuickBooks can be tedious and limiting, particularly when handling a large number of invoices. SaasAnt Transactions Online addresses this issue by providing the ability to update invoice numbers in bulk with accuracy, security, and control. It simplifies every part of the process, from data export to re-importing corrected invoices. Whether you are an accountant, bookkeeper, or small business owner, SaasAnt allows you to save time, reduce errors, and keep your QuickBooks data consistent and ready for audits with just a few clicks.
If you have inquiries regarding our products, features, trial, or pricing, or if you require a personalised demo, contact our team today. We are ready to help you find the ideal solution for your QuickBooks workflow.
Frequently Asked Questions
1) Does QuickBooks Online automatically generate invoice numbers?
Yes, QuickBooks automatically gives sequential invoice numbers by default. But you can change this by enabling the custom transaction number option.
2) Can I bulk change multiple invoice numbers at once in QuickBooks Online?
No. QuickBooks Online does not allow bulk changes for invoice numbers. You will need a third-party application, such as SaasAnt Transactions, to perform bulk updates effectively.
3) How does SaasAnt help in changing invoice numbers?
SaasAnt enables you to export invoices to Excel or CSV, bulk edit invoice numbers, and re-import them into QuickBooks with the updated details, all within a few minutes.
4) Will changing an invoice number affect linked payments or reports?
No. Modifying the invoice number does not change the payment, balance, or transaction information, it only updates the invoice reference number.
5) Can I find and fix duplicate invoice numbers using SaasAnt Transactions?
Yes. SaasAnt simplifies the process of exporting all invoices, quickly spotting duplicates in Excel, and re-importing corrected data, ensuring your records are clean and ready for audits.
Read Also
Batch Upload Invoices to QuickBooks Online
How To Export Invoices from QuickBooks Online
How to Create an Invoice in QuickBooks Online
How to Edit Invoice Template in QuickBooks Online