How to Edit Check in QuickBooks Desktop
Checks play an essential role in assisting businesses to outline anticipated expenses, monitor outgoing payments, and keep precise financial records. They provide transparency regarding expenditures prior to making payments, thereby ensuring effective budgeting and predictable cash flow.
Nevertheless, as vendor information changes, account allocations adjust, or payment amounts need adjustments, it becomes necessary to edit existing Checks. While QuickBooks Desktop allows for manual edits, updating a significant number of Checks individually can be very time-consuming.
This is where automation tools like SaasAnt Transactions Desktop streamline the process, making it quicker, simpler, and more accurate through bulk editing, seamless data mapping, and the capability to easily undo changes.
This blog is perfect for business owners, accountants, bookkeepers, and finance teams who regularly manage Checks and require an effective method to clean, correct, or update data in QuickBooks Desktop using SaasAnt Transactions Desktop.
How to Edit Check in QuickBooks Desktop: Step-By-Step Guide
Follow the steps below to edit Check in QuickBooks Desktop using SaasAnt Transactions Desktop.
Step 1: Install and Connect SaasAnt Transactions
Download the latest SaasAnt Transactions Desktop version.
Run SaasAntTransactions-Setup.exe as an administrator.
Accept the license agreement and complete the installation.
Open the app, go to Subscription > Register.
Enter the license key from your confirmation email.
Keep your internet connection active.
Step 2: Launch SaasAnt Transactions Desktop
Start by opening the SaasAnt Transactions Desktop app on your system.
Make sure QuickBooks Desktop is open and connected to your company file before you continue.
Step 3: Connect to QuickBooks Desktop
To access Check, you need to connect the SaasAnt Transactions Desktop with QuickBooks Desktop. Here's how:
Go to the ‘File’ menu in the top-left corner of SaasAnt Transactions Desktop.
Click ‘Connect to QuickBooks’ from the dropdown.
The company is now successfully connected to QuickBooks.
Step 4: Open SaasAnt Transactions
On the SaasAnt dashboard:
On the top-left of the SaasAnt Transactions dashboard, you can see various options. Select “Export.”

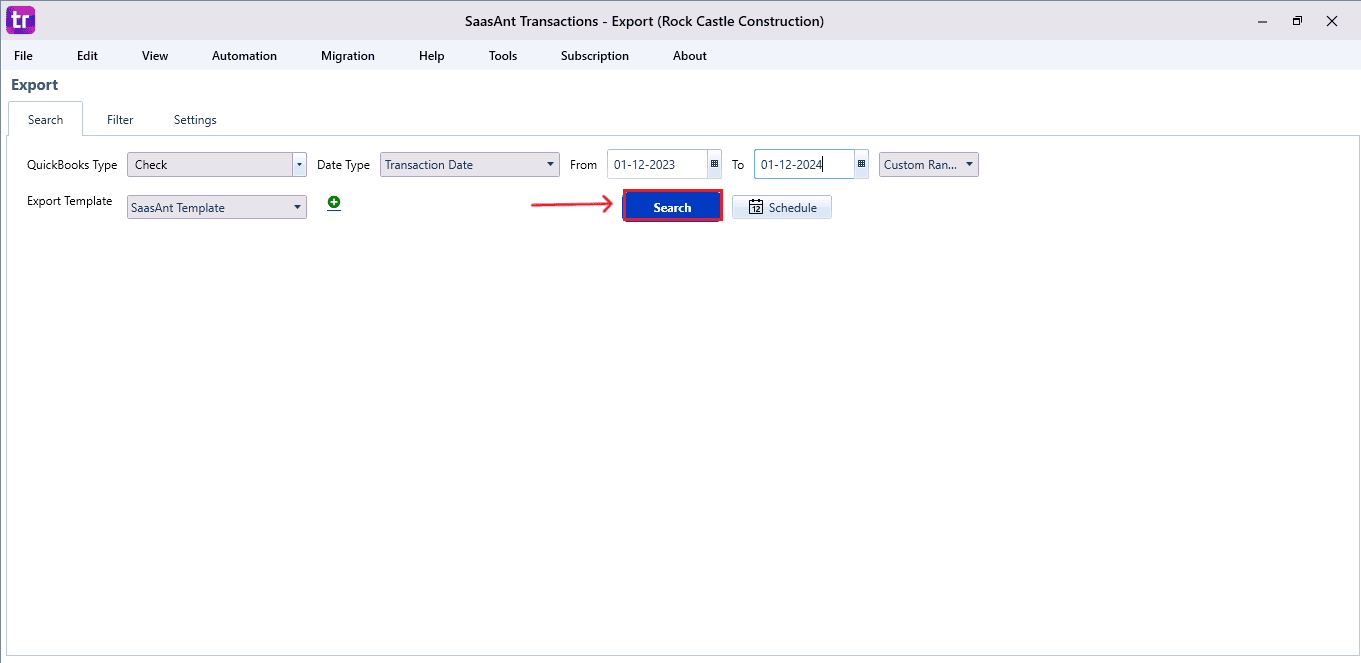
Step 5: Search and Download Check
Fill in the required fields, such as QuickBooks Type, Date Type, From Date, and To Date.
You can also choose Export template from the options available in the dropdown menu.
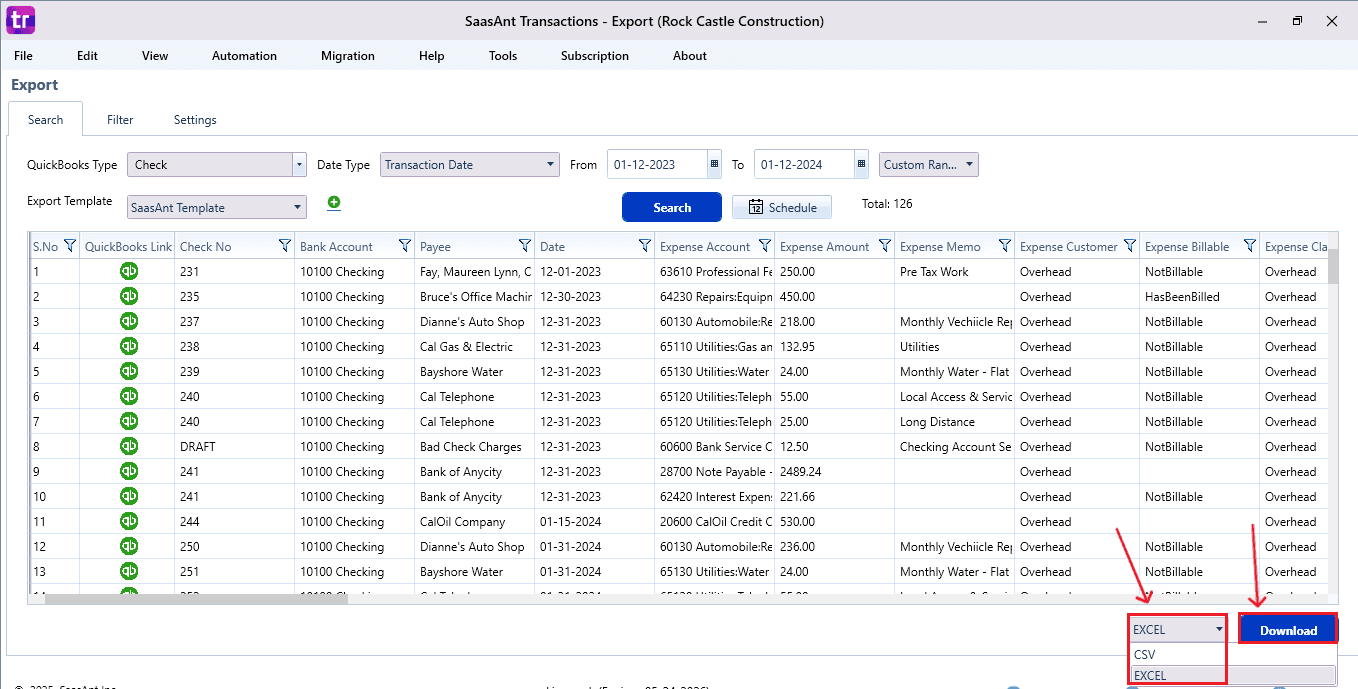
Export the Check file in Excel (.xlsx) or CSV for editing.
Step 6: Make edits in the spreadsheet
Open the exported file using Excel or Google Sheets.
Find the Check you need to change (by number, customer, or date).
Make the necessary adjustments: change amounts, dates, line items, customer information, etc.
Save the file as a CSV (if SaasAnt requires it).
Step 7: Re-import the edited Check
Return to SaasAnt Transactions.
On the SaasAnt dashboard:
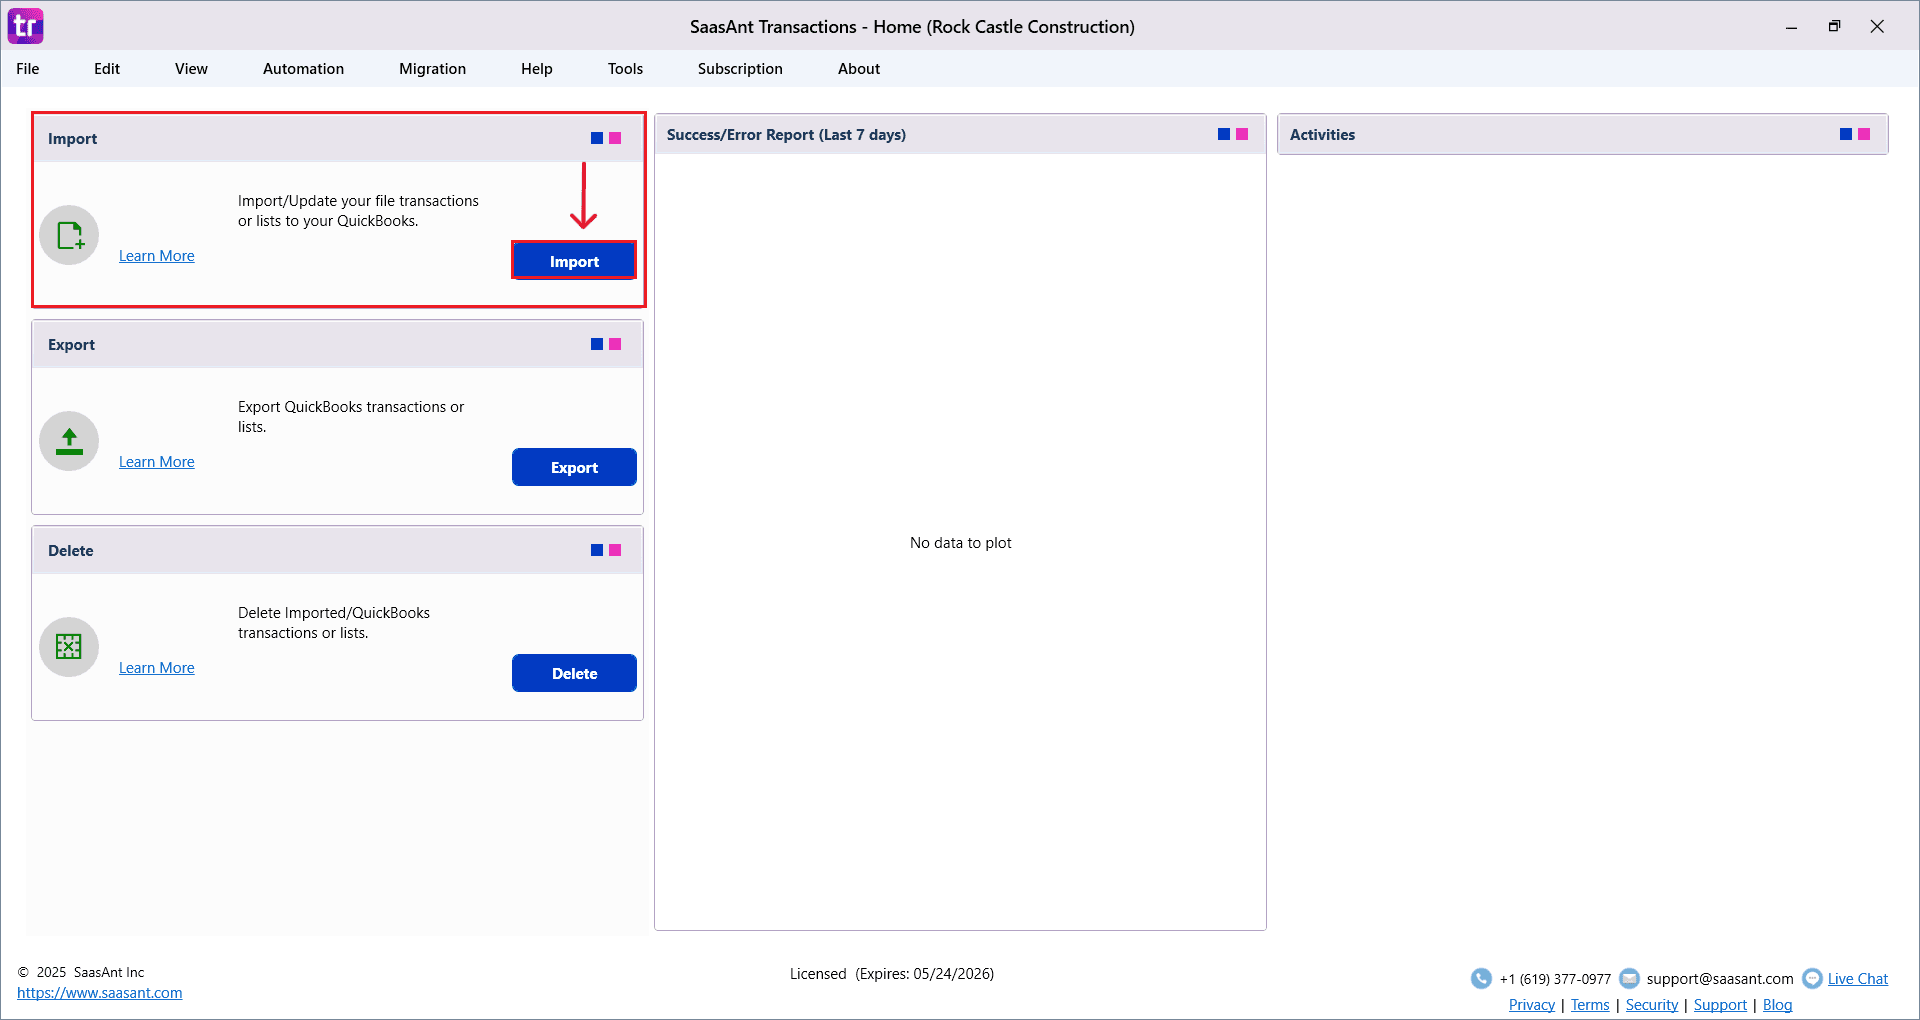
On the top left side of the SaasAnt Transactions dashboard, select “Import”.
The dashboard appears as shown in the image below.
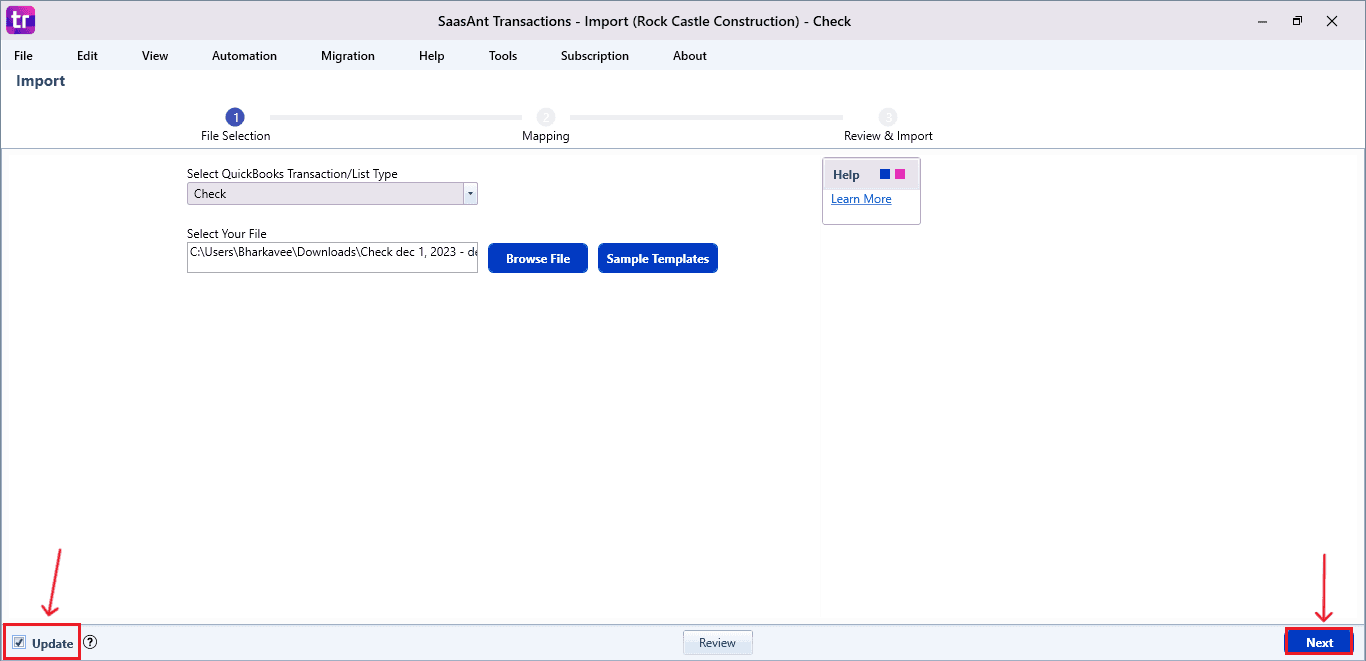

Select “Check” from the SaasAnt Transaction Type dropdown and upload your Excel or CSV file.
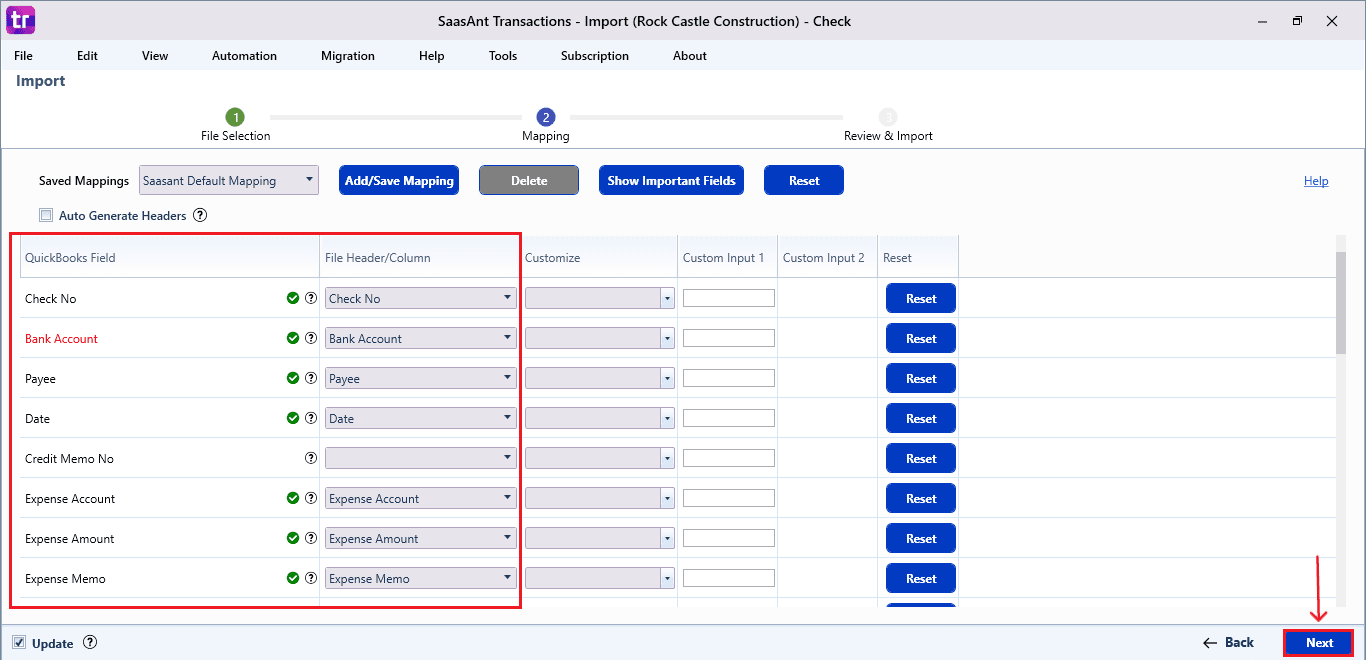
Select “SaasAnt Default Mapping” under the Saved Mapping dropdown.
Step 8: Mapping Fields
Ensures the mapping of essential fields, including Check number, Check date, Check to account, payment method, etc.
Select the Update button in the bottom left corner to indicate that you are modifying existing data in QuickBooks.
Select “Next” at the bottom right of the dashboard.
Step 9: Import the Data
Click the “Send to QuickBooks” option at the bottom right of the dashboard, as shown in the image below.
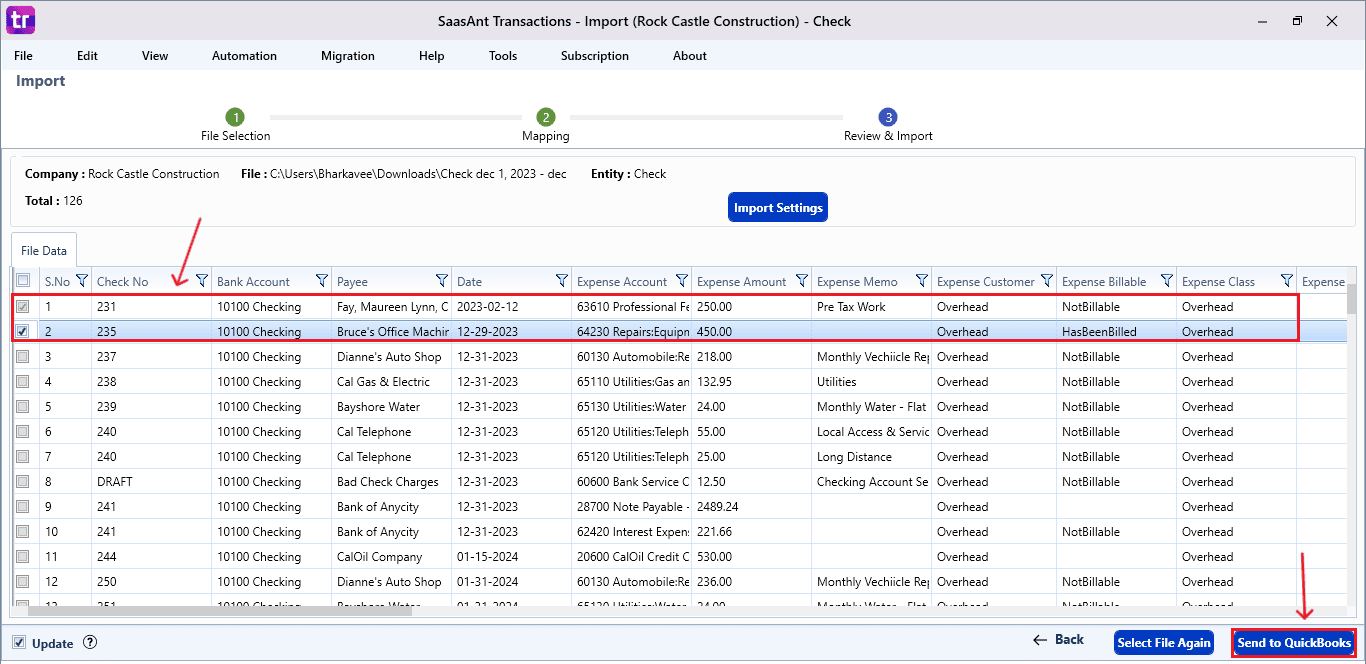
SaasAnt will now push the Check into your connected QuickBooks Desktop account.
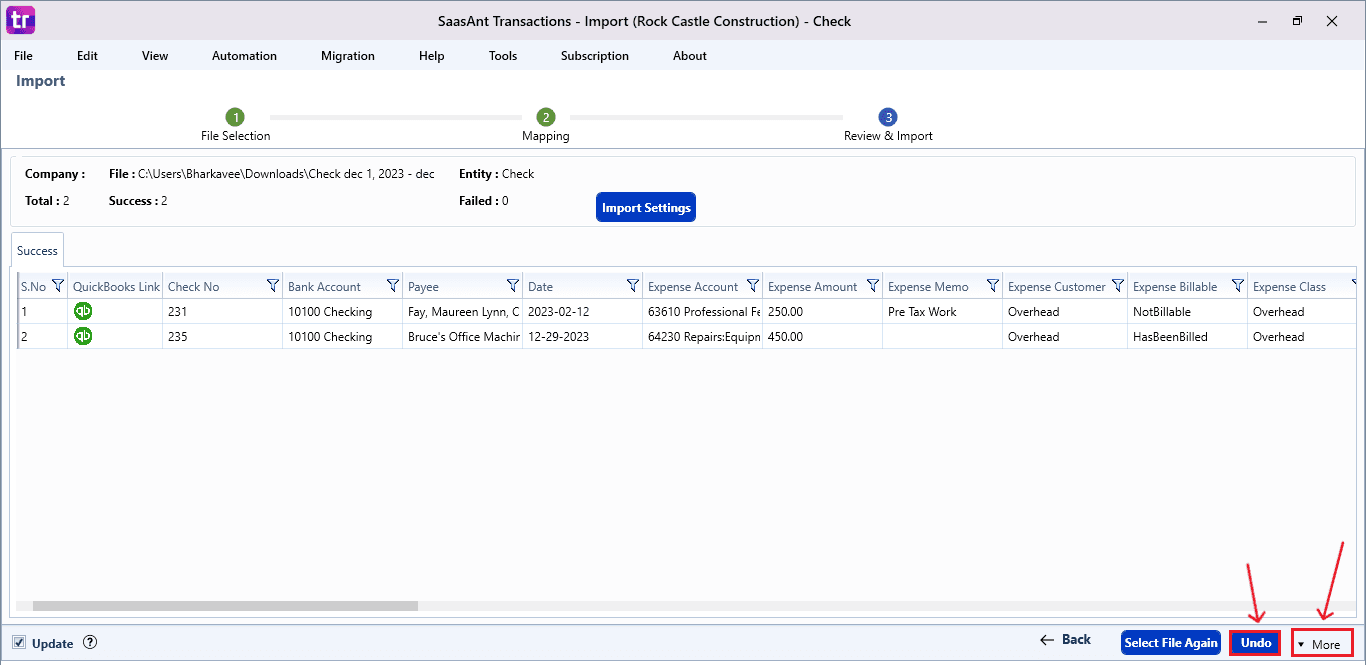
The checks are reflected in the dashboard.
At the bottom right, click the “More” dropdown and select the option to download your Check for reference.
Additionally, next to the download option, you can see “Undo”, which allows you to roll back your “Check”.
Step 10: Verify in QuickBooks Desktop
Click the “qb” icon to view the imported Check.
The updated Check with your changes will be reflected in your QuickBooks Desktop as shown in the image below.
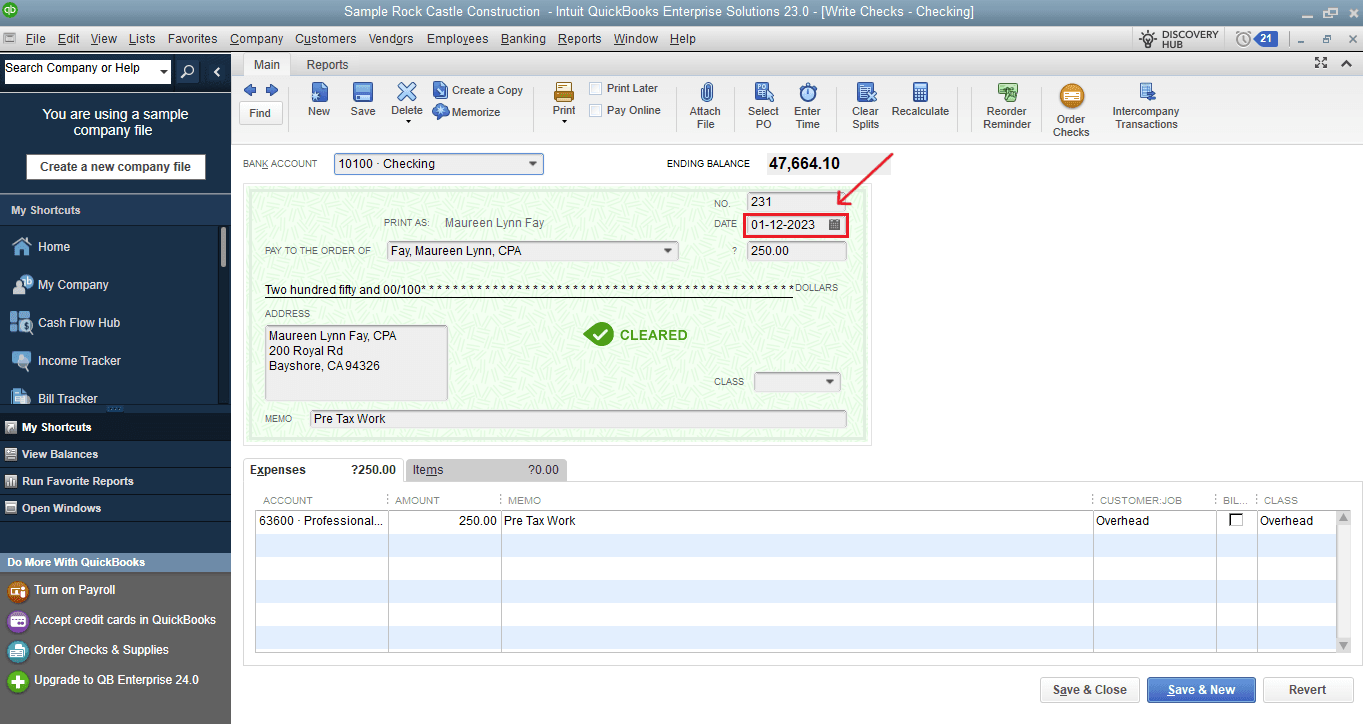
This final step ensures your data is accurate and properly reconciled in QuickBooks.
Why the SaasAnt Transactions Desktop Is the Best Add-On for Check Edit
Manually editing multiple Checks in QuickBooks Desktop is tedious and can lead to errors. SaasAnt Transactions Desktop streamlines large updates with both speed and precision. Below are the key reasons that make SaasAnt Transactions Desktop is the top add-on for editing Checks in QuickBooks Desktop
Bulk Editing Efficiency: SaasAnt eliminates the need for repetitive manual modifications by allowing users to edit hundreds or thousands of Checks all at once. This bulk-processing ability is particularly useful for accountants and bookkeepers who are performing major cleanups, vendor corrections, or updating historical payments.
Accurate Data Mapping: SaasAnt offers smart and adjustable field mapping, making sure that every Check detail, like account allocation, vendor name, memo, line items, and amounts, aligns with QuickBooks formatting. This greatly minimizes errors and keeps data consistent during updates.
Preview Before Import: The preview screen shows how each edited Check will look in QuickBooks. This allows users to spot mismatched accounts, wrong vendor names, or formatting problems before completing the import, avoiding data corruption.
Rollback Safety (Undo Option): Mistakes can occur when making bulk updates, but SaasAnt’s Undo button delivers instant support. It can revert the complete Check edit import with one click, guaranteeing unmatched protection during crucial data alterations.
Reusable Mapping Templates: Users can save personalized mapping templates to speed up recurring Check edits. This guarantees a consistent structure, minimizes repetitive setup, and makes periodic payment record updates easier.
Wrap Up
Editing checks in QuickBooks Desktop is vital for ensuring precise financial records. However, making manual adjustments to multiple Checks can be slow and lead to errors. By using SaasAnt Transactions Desktop, you can bulk edit, validate, update, and verify Checks effortlessly. SaasAnt's automated mapping, preview capabilities, and undo function deliver outstanding efficiency and safety.
If you have inquiries regarding our products, features, trial, or pricing, or if you require a personalized demo, contact our team today. We are ready to help you find the ideal solution for your QuickBooks workflow.
Frequently Asked Questions
1) Will my existing data be overwritten when importing the edited Check?
This will only happen if you choose the Update option in SaasAnt. This ensures that you are adjusting existing Checks rather than creating new ones.
2) Can I update line items inside Check using SaasAnt?
Yes. SaasAnt allows for detailed editing of line items, which includes descriptions, amounts, accounts, and quantities.
3) Which file formats does SaasAnt support for editing Check?
SaasAnt is compatible with CSV, XLSX, and TXT formats. You can effortlessly export, edit, and re-import Check data using your preferred spreadsheet software to ensure smooth and consistent processing.
4) Can I undo check edits if mistakes occur during import?
Yes. SaasAnt features an effective Undo option that promptly rolls back the entire import, allowing you to rectify errors without changing your QuickBooks data.
5) Can I save mapping settings for repeated Check updates?
Yes. With SaasAnt, you can save custom mapping templates, making it easier to edit Checks in the future with consistent formatting and minimizing repetitive setup for multiple imports.
Read Also
Bulk Import, Export, Edit, Delete in QuickBooks Desktop using SaasAnt Transactions Desktop
How to Edit Receive Payments in QuickBooks Desktop
How to Edit Transactions in QuickBooks Desktop
How To Edit A Bill In QuickBooks Desktop