How to Export Receive Payments in QuickBooks Desktop
Exporting Receive Payments from QuickBooks Desktop is often necessary for reporting, reconciliation, audits, or data migration. But doing it manually through QuickBooks can be slow, restrictive, and prone to formatting issues, especially if you need large volumes of payment records or custom filtering.
That’s where SaasAnt Transactions Desktop makes the process far easier. Whether you’re preparing payment summaries for accountants, analyzing customer receipts in Excel, or moving data to another system, SaasAnt gives you clean, structured, and filtered exports with just a few clicks. Instead of dealing with messy CSV files or incomplete exports, SaasAnt lets you export Receive Payments in bulk with proper formatting, free from QuickBooks’ built-in limitations.
This blog is perfect for accountants, bookkeepers, and expanding businesses that require precise, customizable, and bulk exports of Receive Payments from QuickBooks Desktop for audits, reporting, data migration, and financial analysis with little manual work and high accuracy.
How to Export Receive Payments from QuickBooks Desktop: Step-By-Step Guide
Follow the steps below to export the Receive Payments in QuickBooks Desktop using the SaasAnt Transactions Desktop.
Step 1: Install and Connect SaasAnt Transactions
Download the latest SaasAnt Transactions Desktop version.
Run SaasAntTransactions-Setup.exe as an administrator.
Accept the license agreement and complete the installation.
Open the app, go to Subscription > Register.
Enter the license key from your confirmation email.
Keep your internet connection active.
Step 2: Launch SaasAnt Transactions Desktop
Start by opening the SaasAnt Transactions Desktop app on your system.
Ensure that QuickBooks Desktop is open and connected to your company file before proceeding.
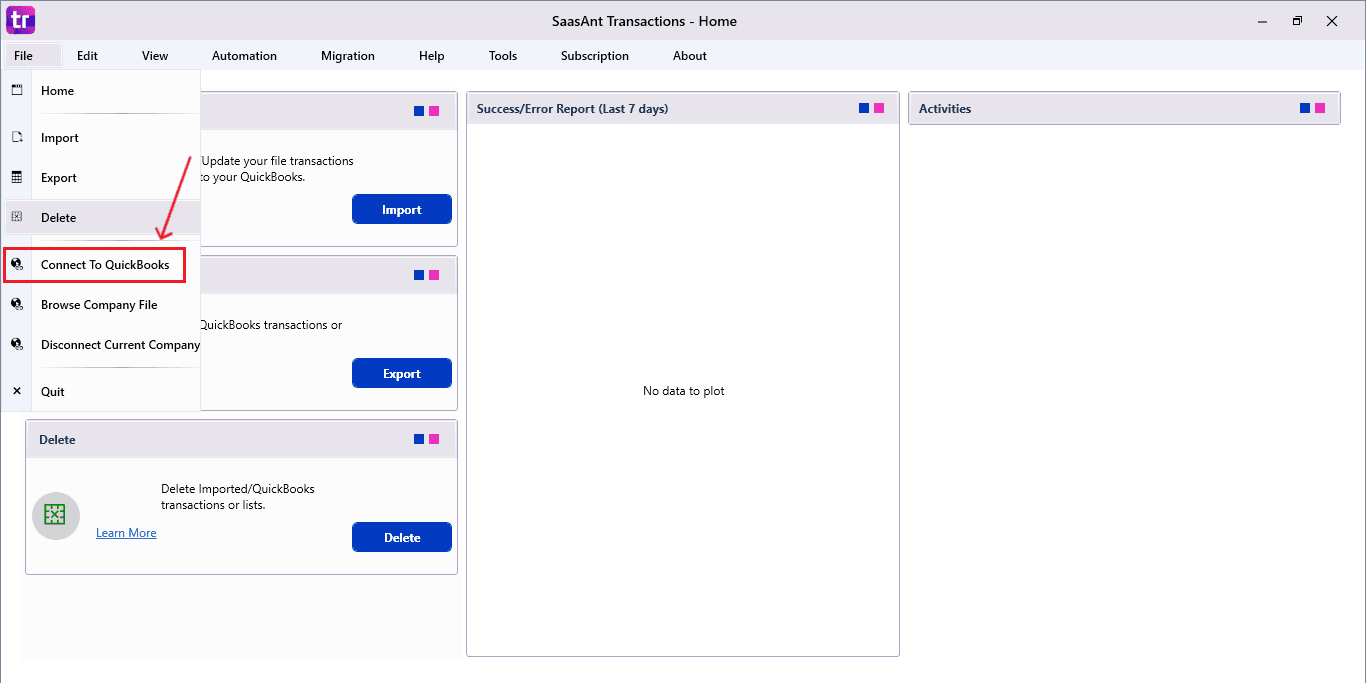
Step 3: Connect to QuickBooks Desktop
To access, you need to connect the SaasAnt Transactions Desktop with QuickBooks Desktop. Here's how:
Go to the ‘File’ menu in the top-left corner of SaasAnt Transactions Desktop.
Click ‘Connect to QuickBooks’ from the dropdown.
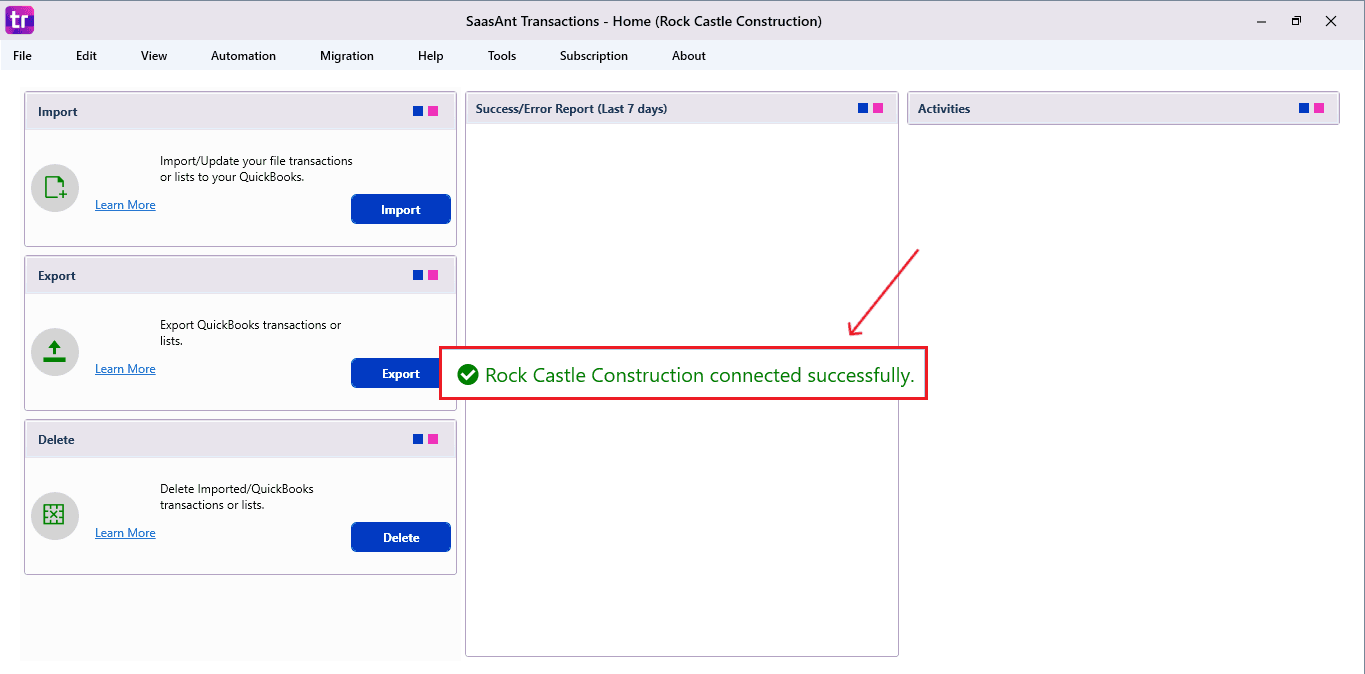
The company is now successfully connected to QuickBooks.
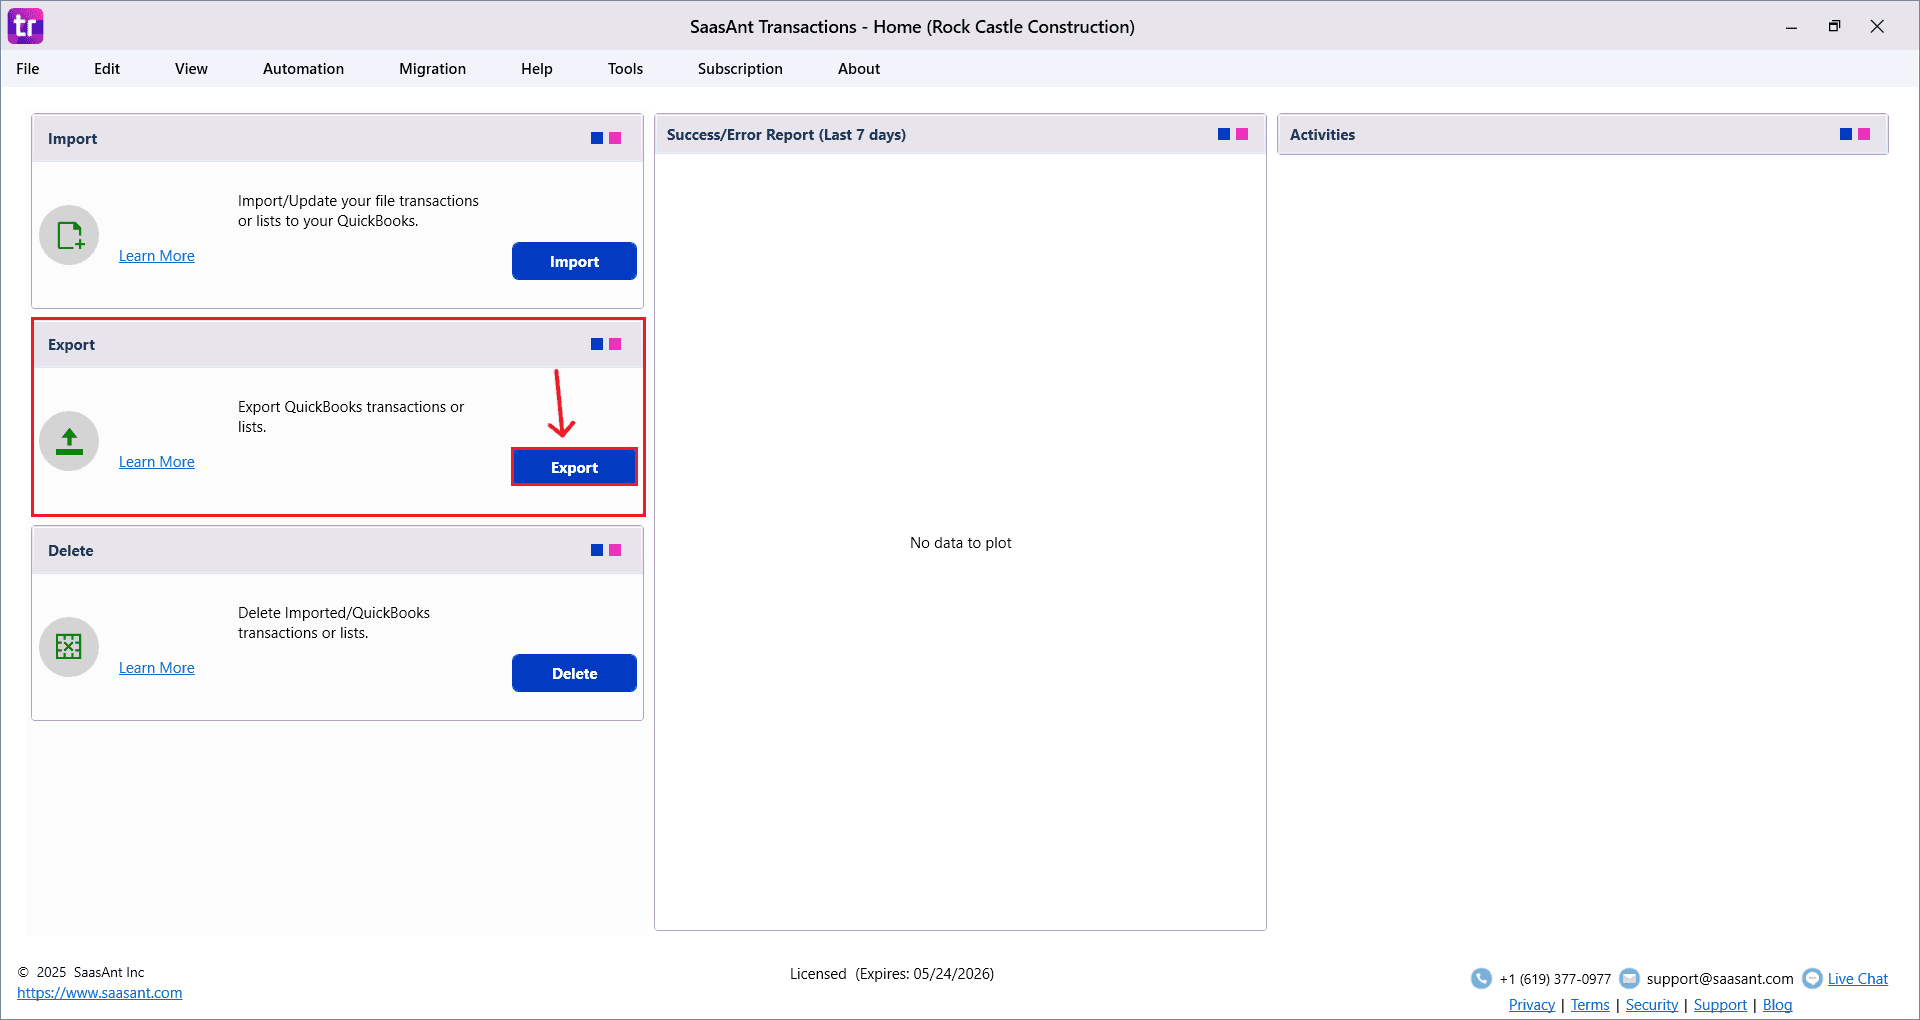
Step 4: Open SaasAnt Transactions
On the SaasAnt dashboard:
On the top-left of the SaasAnt Transactions dashboard, you can see various options. Select “Export”.
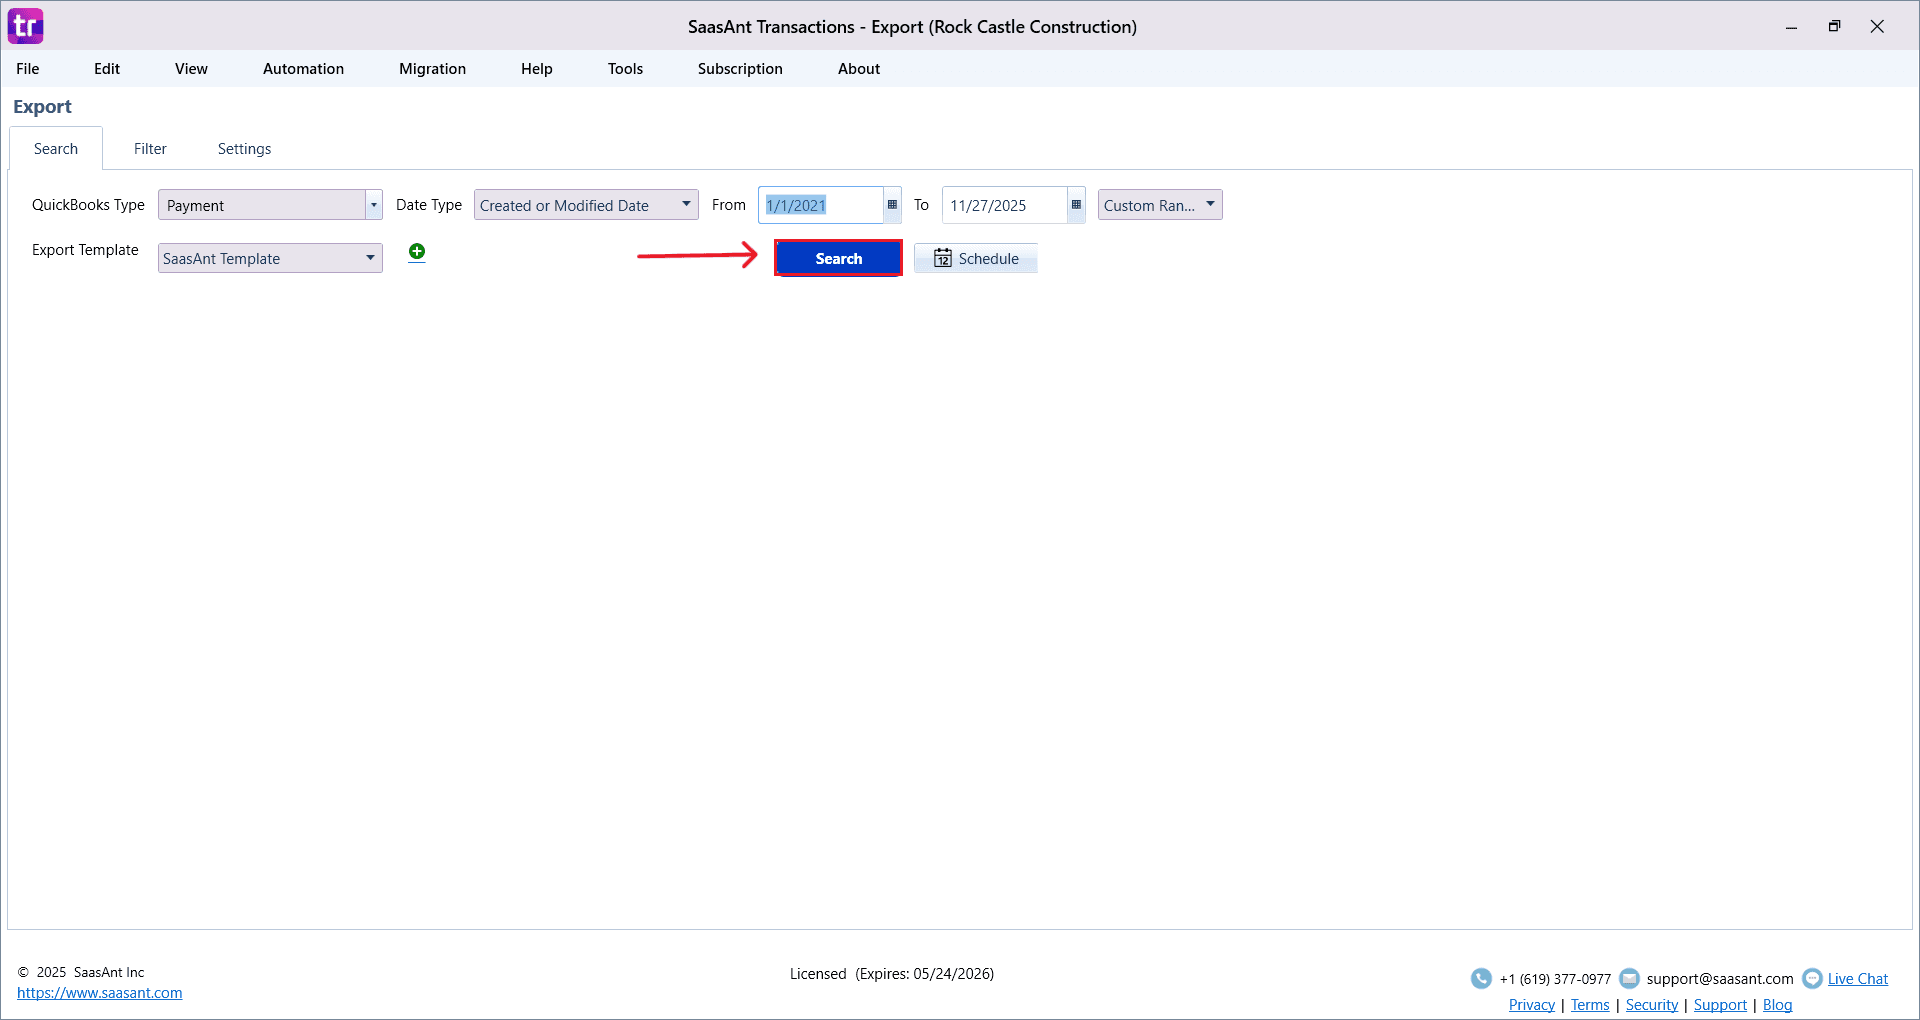
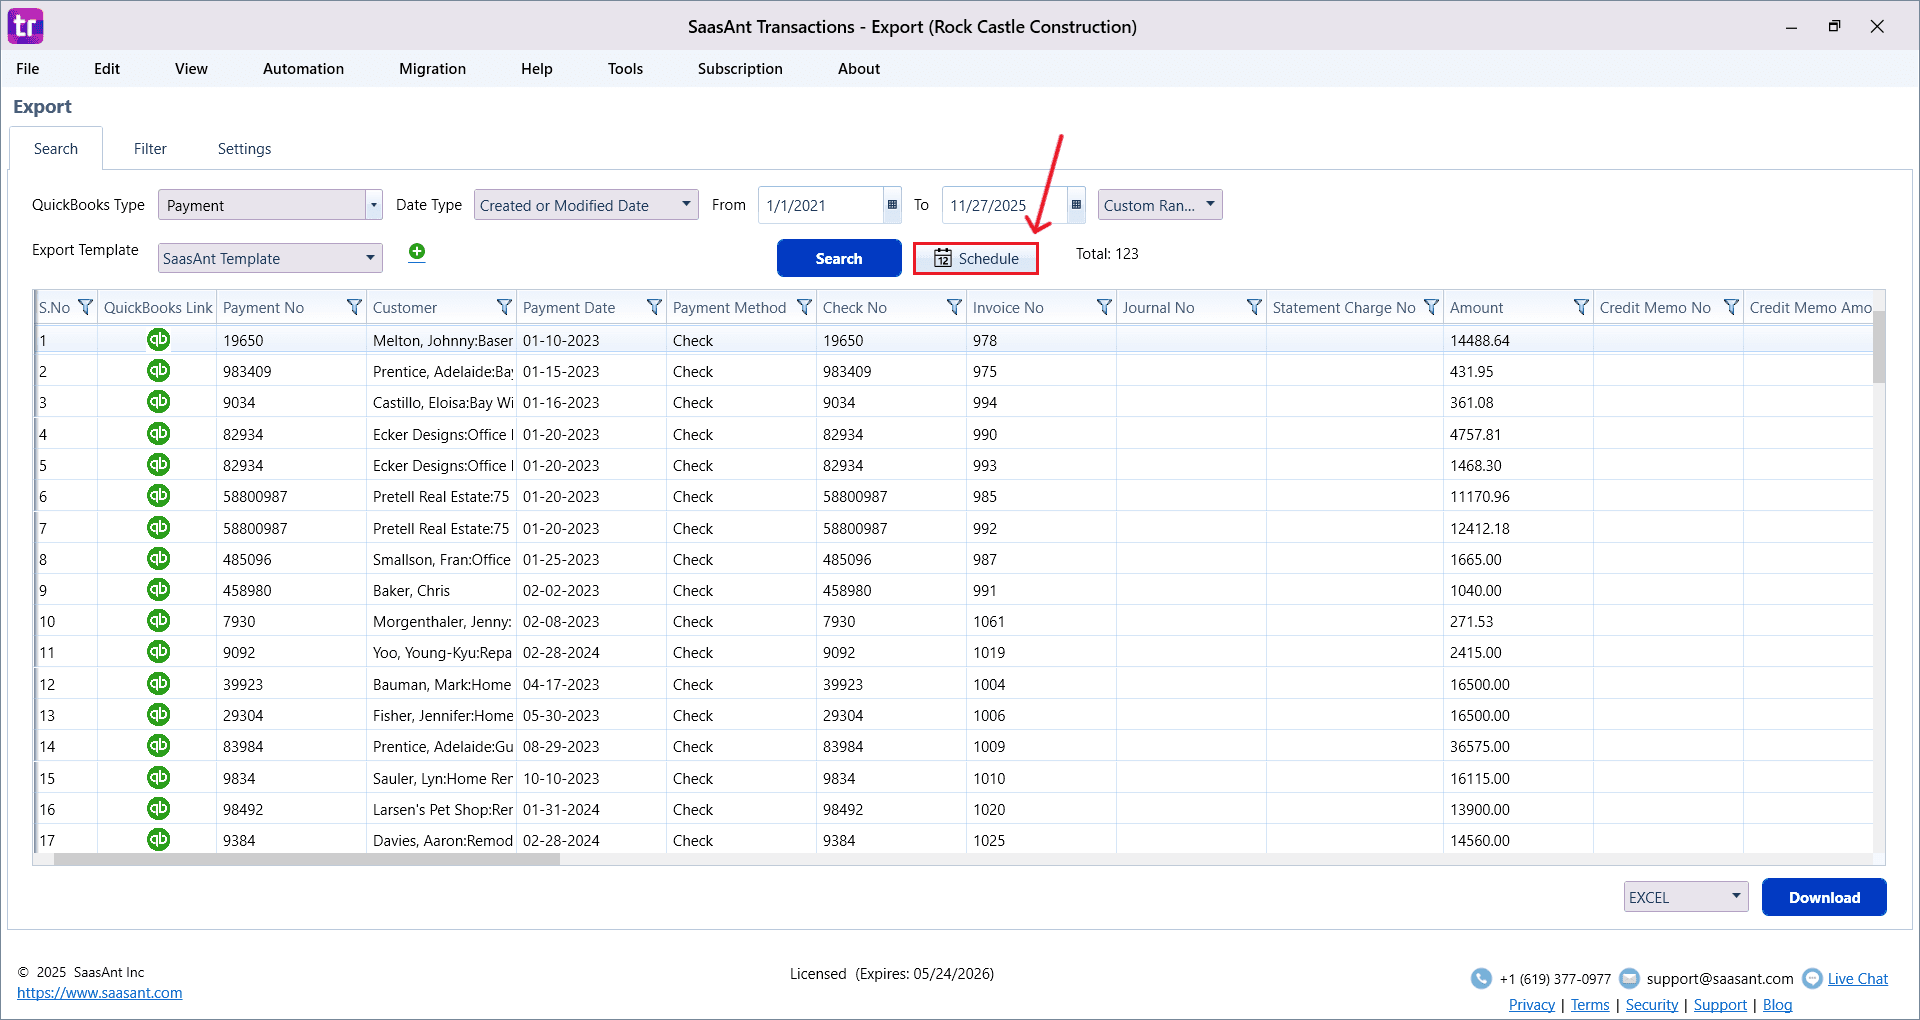
Step 5: Search and Download Receive Payments
Fill in the required fields, such as QuickBooks Type, Date Type, From Date, and To Date.
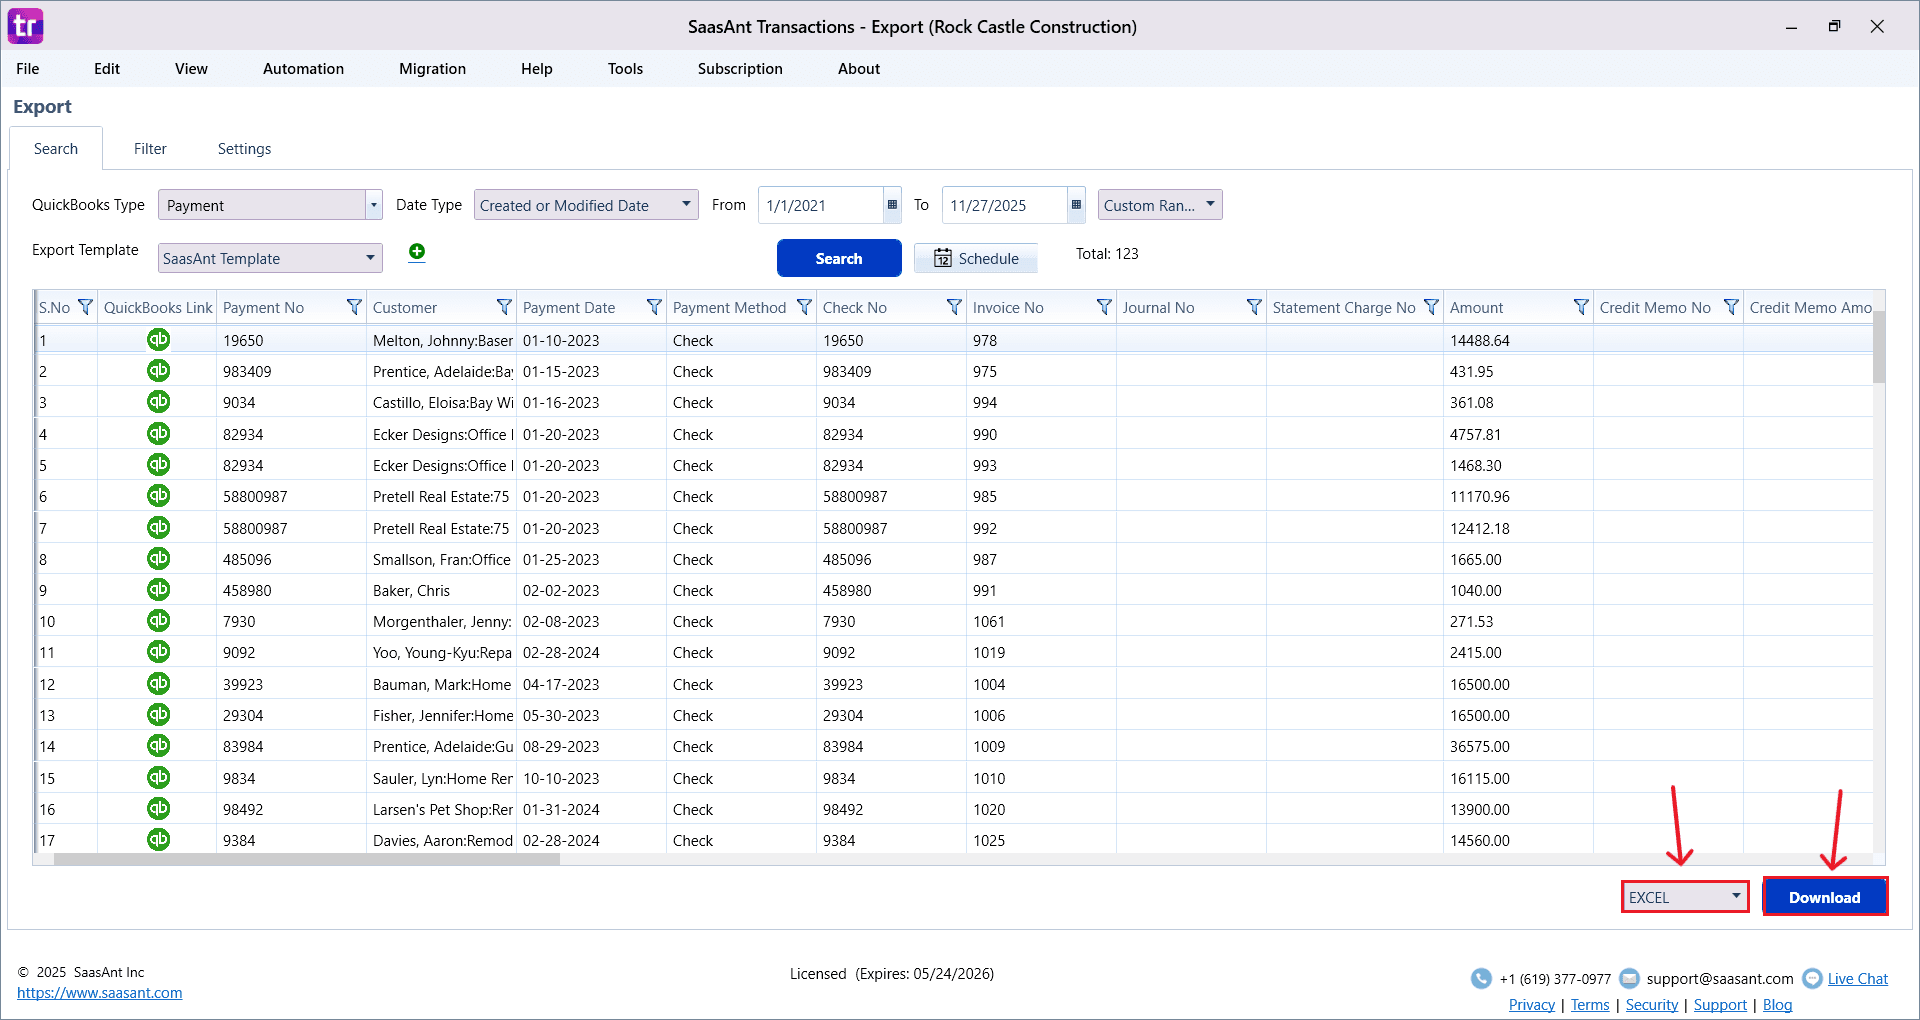
Click “Search,” and the Receive Payments appear in the dashboard. Now select “Download”.
The file can be downloaded in both Excel and CSV formats. Choose the file format according to your requirement.
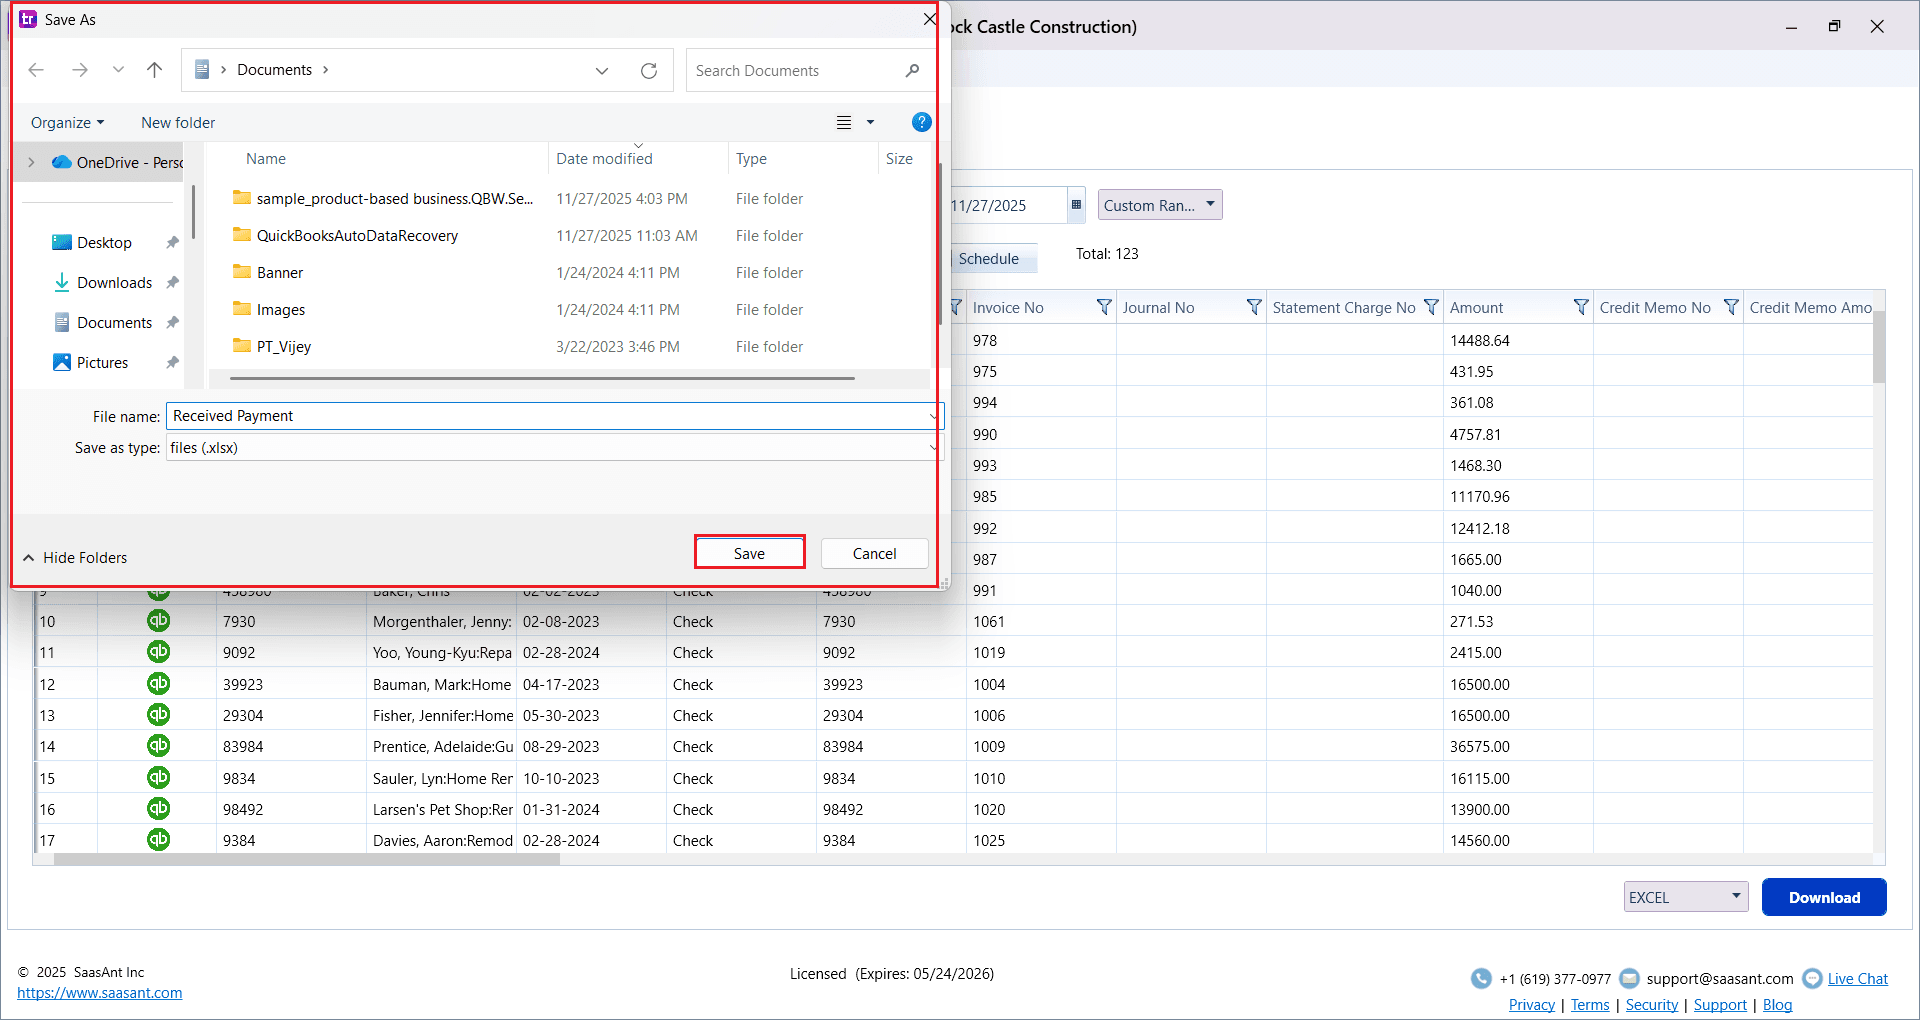
Step 6: Export the Data
Choose the file location when the pop-up appears.
Save the exported Receive Payments to your system.
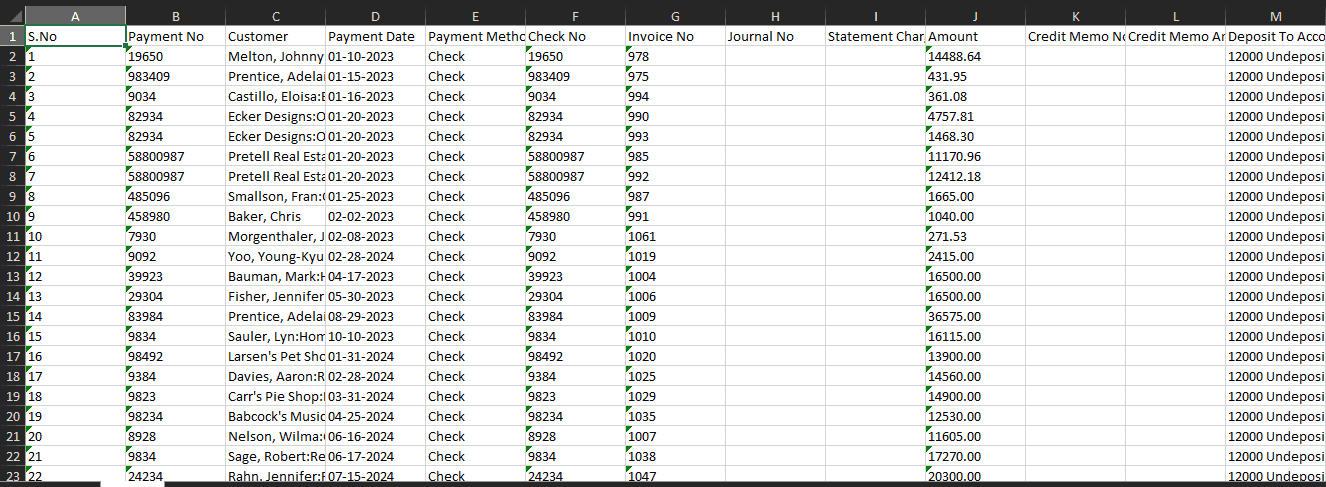
Step 7: Exported Receive Payments Data
Your exported Receive Payments data looks like this in your system.
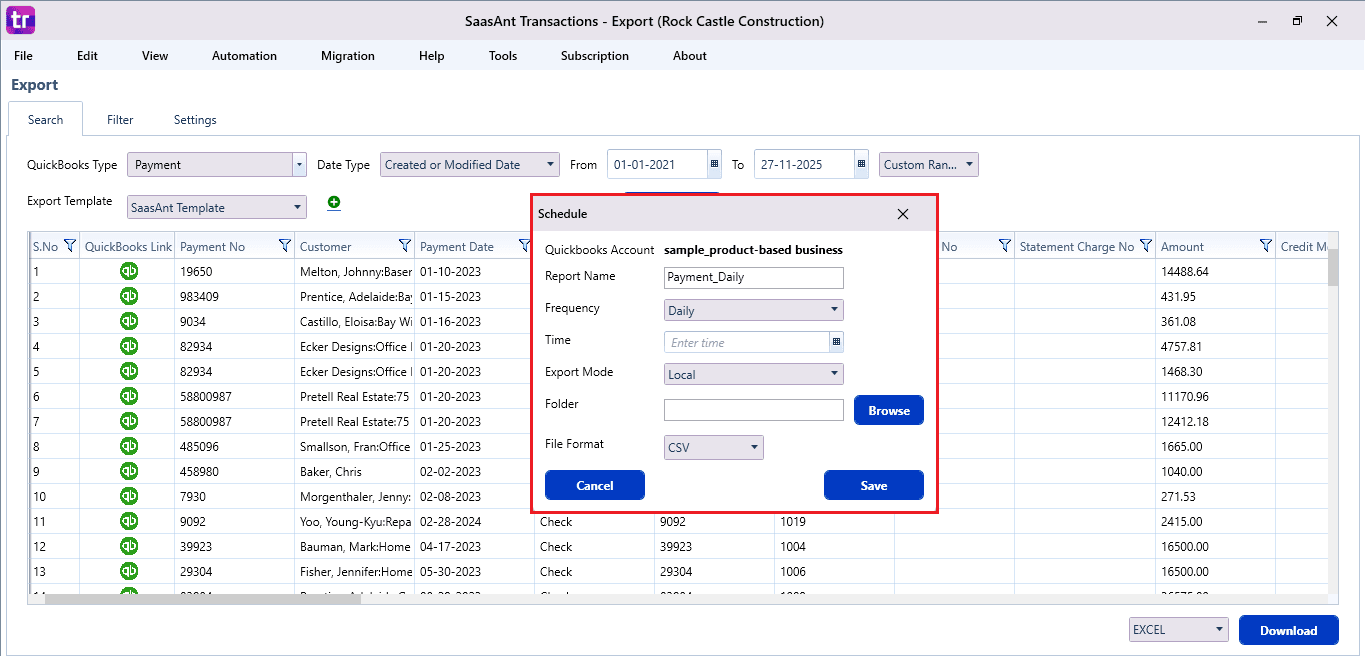
Step 8: Schedule Export (Optional)
There is another option, “Schedule”, where you can schedule the export of your data.
Fill in the required fields, such as report name, frequency (daily, weekly, or monthly), time, export mode (local, server, or email), folder location, and file format.
Once all fields are filled, click “Save”. Your Receive Payments (or any selected data) will now be exported at the scheduled time and location.
Why SaasAnt Transactions Desktop Is the Best for Exporting Receive Payments
Here are the primary reasons that establish SaasAnt as the most dependable, efficient, and user-centric solution for exporting Receive Payments from QuickBooks Desktop:
Bulk Export Without Data Limitations: QuickBooks usually limits large data exports, but SaasAnt manages large volumes smoothly, letting users export multiple years of Receive Payments all at once without any delays.
Customizable Filters and Date Ranges: Users can filter by customer, payment method, date, amount, reference number, and more. This makes it simple to get only the specific payments needed for analysis.
Reusable Export Templates: Once you save your chosen column mapping or export format, you can easily reuse it at any time, making it ideal for teams that regularly export the same reports.
Automated and Scheduled Exports: Whether you need daily customer payment reports or weekly or monthly AR summaries, SaasAnt’s scheduling system lets you automate everything without manual effort.
Wrap Up
Exporting Receive Payments in QuickBooks Desktop can be easy and not limited by its native limitations. With SaasAnt Transactions Desktop, you can quickly export full and precise Receive Payment data in just minutes, whether you're managing daily financial tasks, preparing audit documents, or transferring important records. SaasAnt removes manual tasks, minimizes mistakes, and guarantees that all data is organized, customizable, and ready for reporting.
If you have inquiries regarding our products, features, trial, or pricing, or if you require a personalized demo, contact our team today. We are ready to help you find the ideal solution for your QuickBooks workflow.
Frequently Asked Questions
1) How do I export Receive Payments from QuickBooks Desktop using SaasAnt Transactions?
Open SaasAnt Transactions → Connect to QuickBooks Desktop → Go to Export → Select Receive Payments → Choose date range → Search → Export as Excel or CSV.
2) Can I export only specific Receive Payments instead of all payments?
Yes. SaasAnt allows filtering by customer, payment method, payment date, amount, and other fields, so you only export the records you need.
3) Why won’t QuickBooks Desktop export my Receive Payments to Excel?
This typically happens due to outdated QuickBooks or Excel versions, missing permissions, or compatibility issues. Updating both applications usually resolves it.
4) Can I export large volumes of Receive Payments in one file?
QuickBooks has size limits, but SaasAnt Transactions removes those limits, allowing you to export thousands of Receive Payments at once.
5) Will my exported Receive Payments keep the correct formatting?
Yes. SaasAnt ensures clean column structure, accurate number formatting, and properly aligned fields, avoiding common CSV issues from QuickBooks.
Read also
Bulk Import, Export, Edit, Delete in QuickBooks Desktop using SaasAnt Transactions Desktop
How to Import Payments in QuickBooks Desktop
How to Delete a Received Payment in QuickBooks Desktop
How to Export Data from QuickBooks Desktop to Excel