How to Edit a Customer in QuickBooks Online
Maintaining accurate customer information in QuickBooks Online (QBO) is essential for effective financial management and seamless transactions. Whether you're updating contact details, adjusting payment terms, or modifying customer classifications, QBO offers straightforward methods to edit customer information. For bulk updates, SaasAnt Transactions provide efficient solutions.
How to Edit a Customer in QuickBooks Online
Access the Customers List:
Log in to your QuickBooks Online account.
Navigate to Sales > Customers.
Select the Customer to Edit:
Use the search bar or scroll to find the customer.
Click on the customer's name to open their profile.
Edit Customer Details:
Click the Edit button.
Update necessary fields such as:
Name, Company, Email, Phone Number
Billing and Shipping Addresses
Payment Terms and Credit Limits
Customer Notes and Attachments
Save Changes:
After making updates, click Save to apply the changes.
Note: Ensure that updates align with existing invoices, estimates, and payment records to prevent discrepancies.
Troubleshooting Common Issues
A. Unable to Edit Customer Information
Insufficient Permissions:
Verify that you have Admin or Full Access rights in QBO.
Restricted Fields Due to Linked Transactions:
Some fields may be non-editable if the customer has associated transactions.
B. Changes Not Saving
Browser Issues:
Clear your browser's cache and cookies.
Try using an incognito or private browsing window.
Incomplete Mandatory Fields:
Ensure all required fields are filled out correctly before saving.
C. Duplicate Customer Entries
Merging Duplicate Customers:
Edit the duplicate customer's name to match the original.
QBO will prompt you to confirm the merge.
Confirm to consolidate the records.
Edit Customers in QuickBooks Online: Step-by-Step Guide
Start by logging in to QuickBooks Online and opening the Customers list. In my demo file I see two “Maple Renovations” records, while “Net Solutions” and “Net Fast” are really the same customer. Several profiles also lack email addresses or proper first and last names.
Launch SaasAnt Transactions from Apps › Find Apps. Search “SaasAnt Transactions,” click Get App Now—or hit Launch if it’s already installed—and choose your company.
Method 1: Download, edit, and re-import
On the SaasAnt dashboard click Bulk Download › Let’s Export.
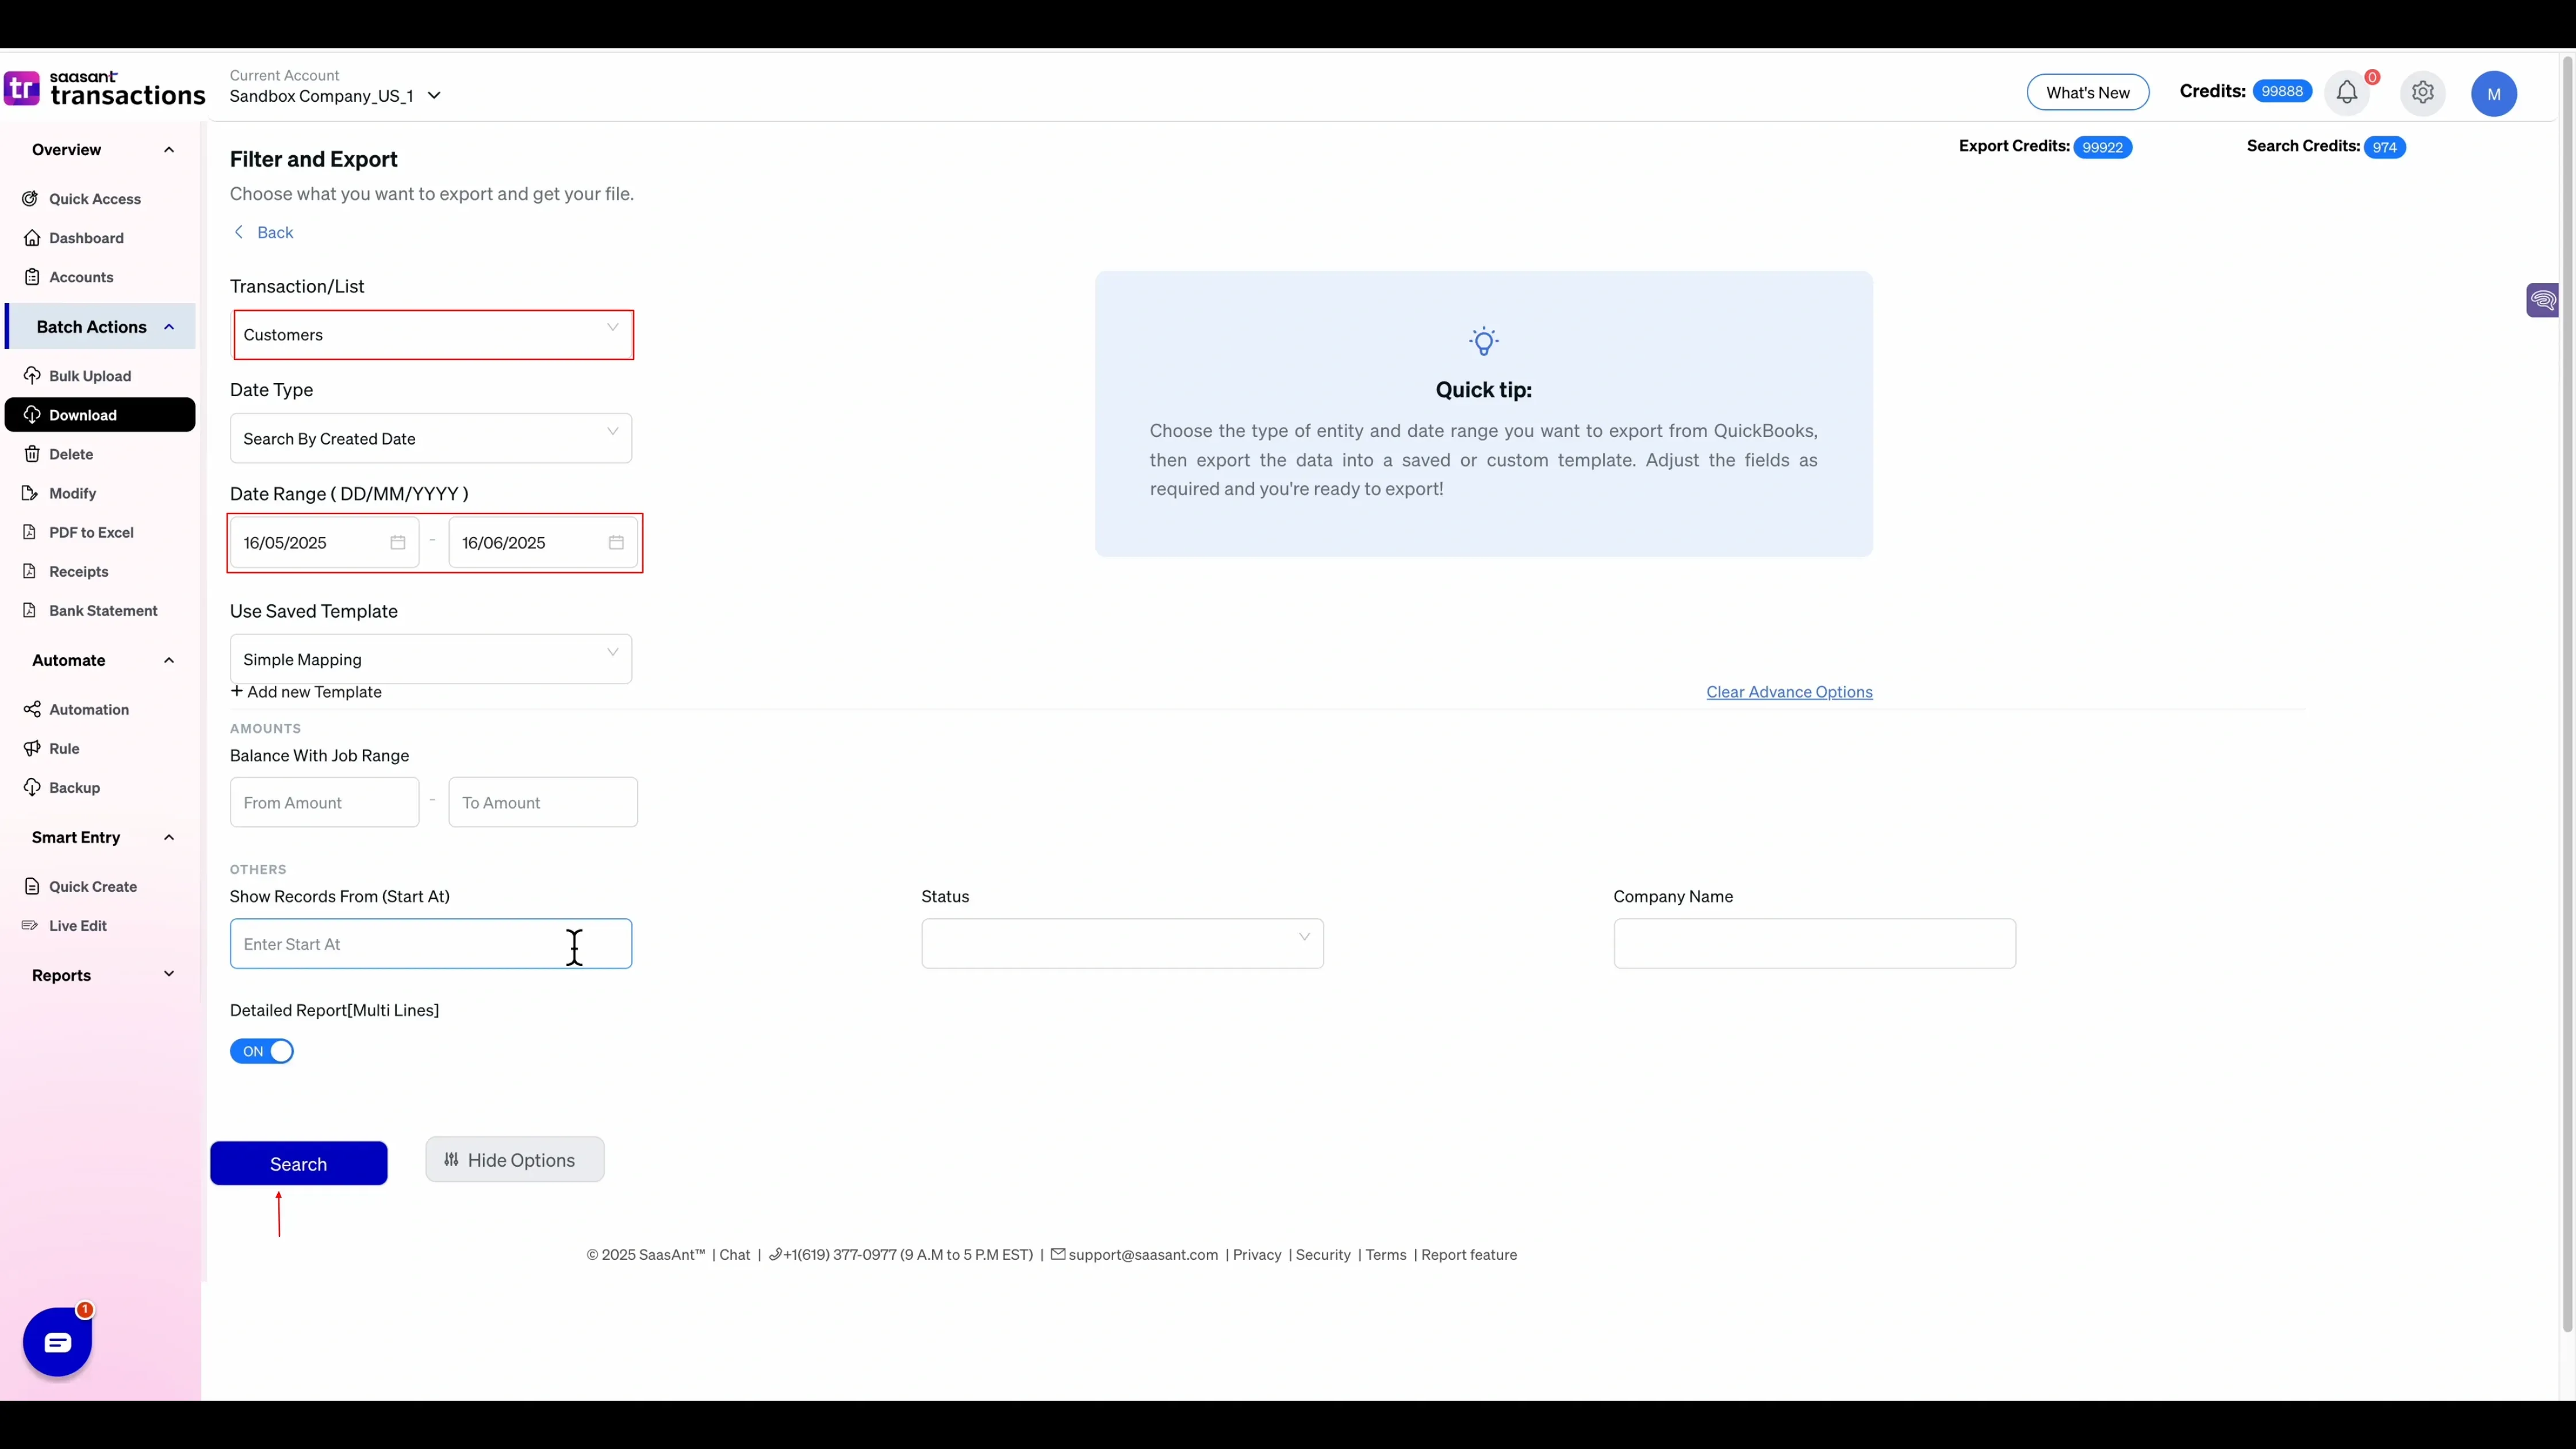
Set Customers as the transaction type, pick a date range, and open Advanced Options for finer filters.
Click Select. SaasAnt lists every matching customer; download the file as CSV or Excel.
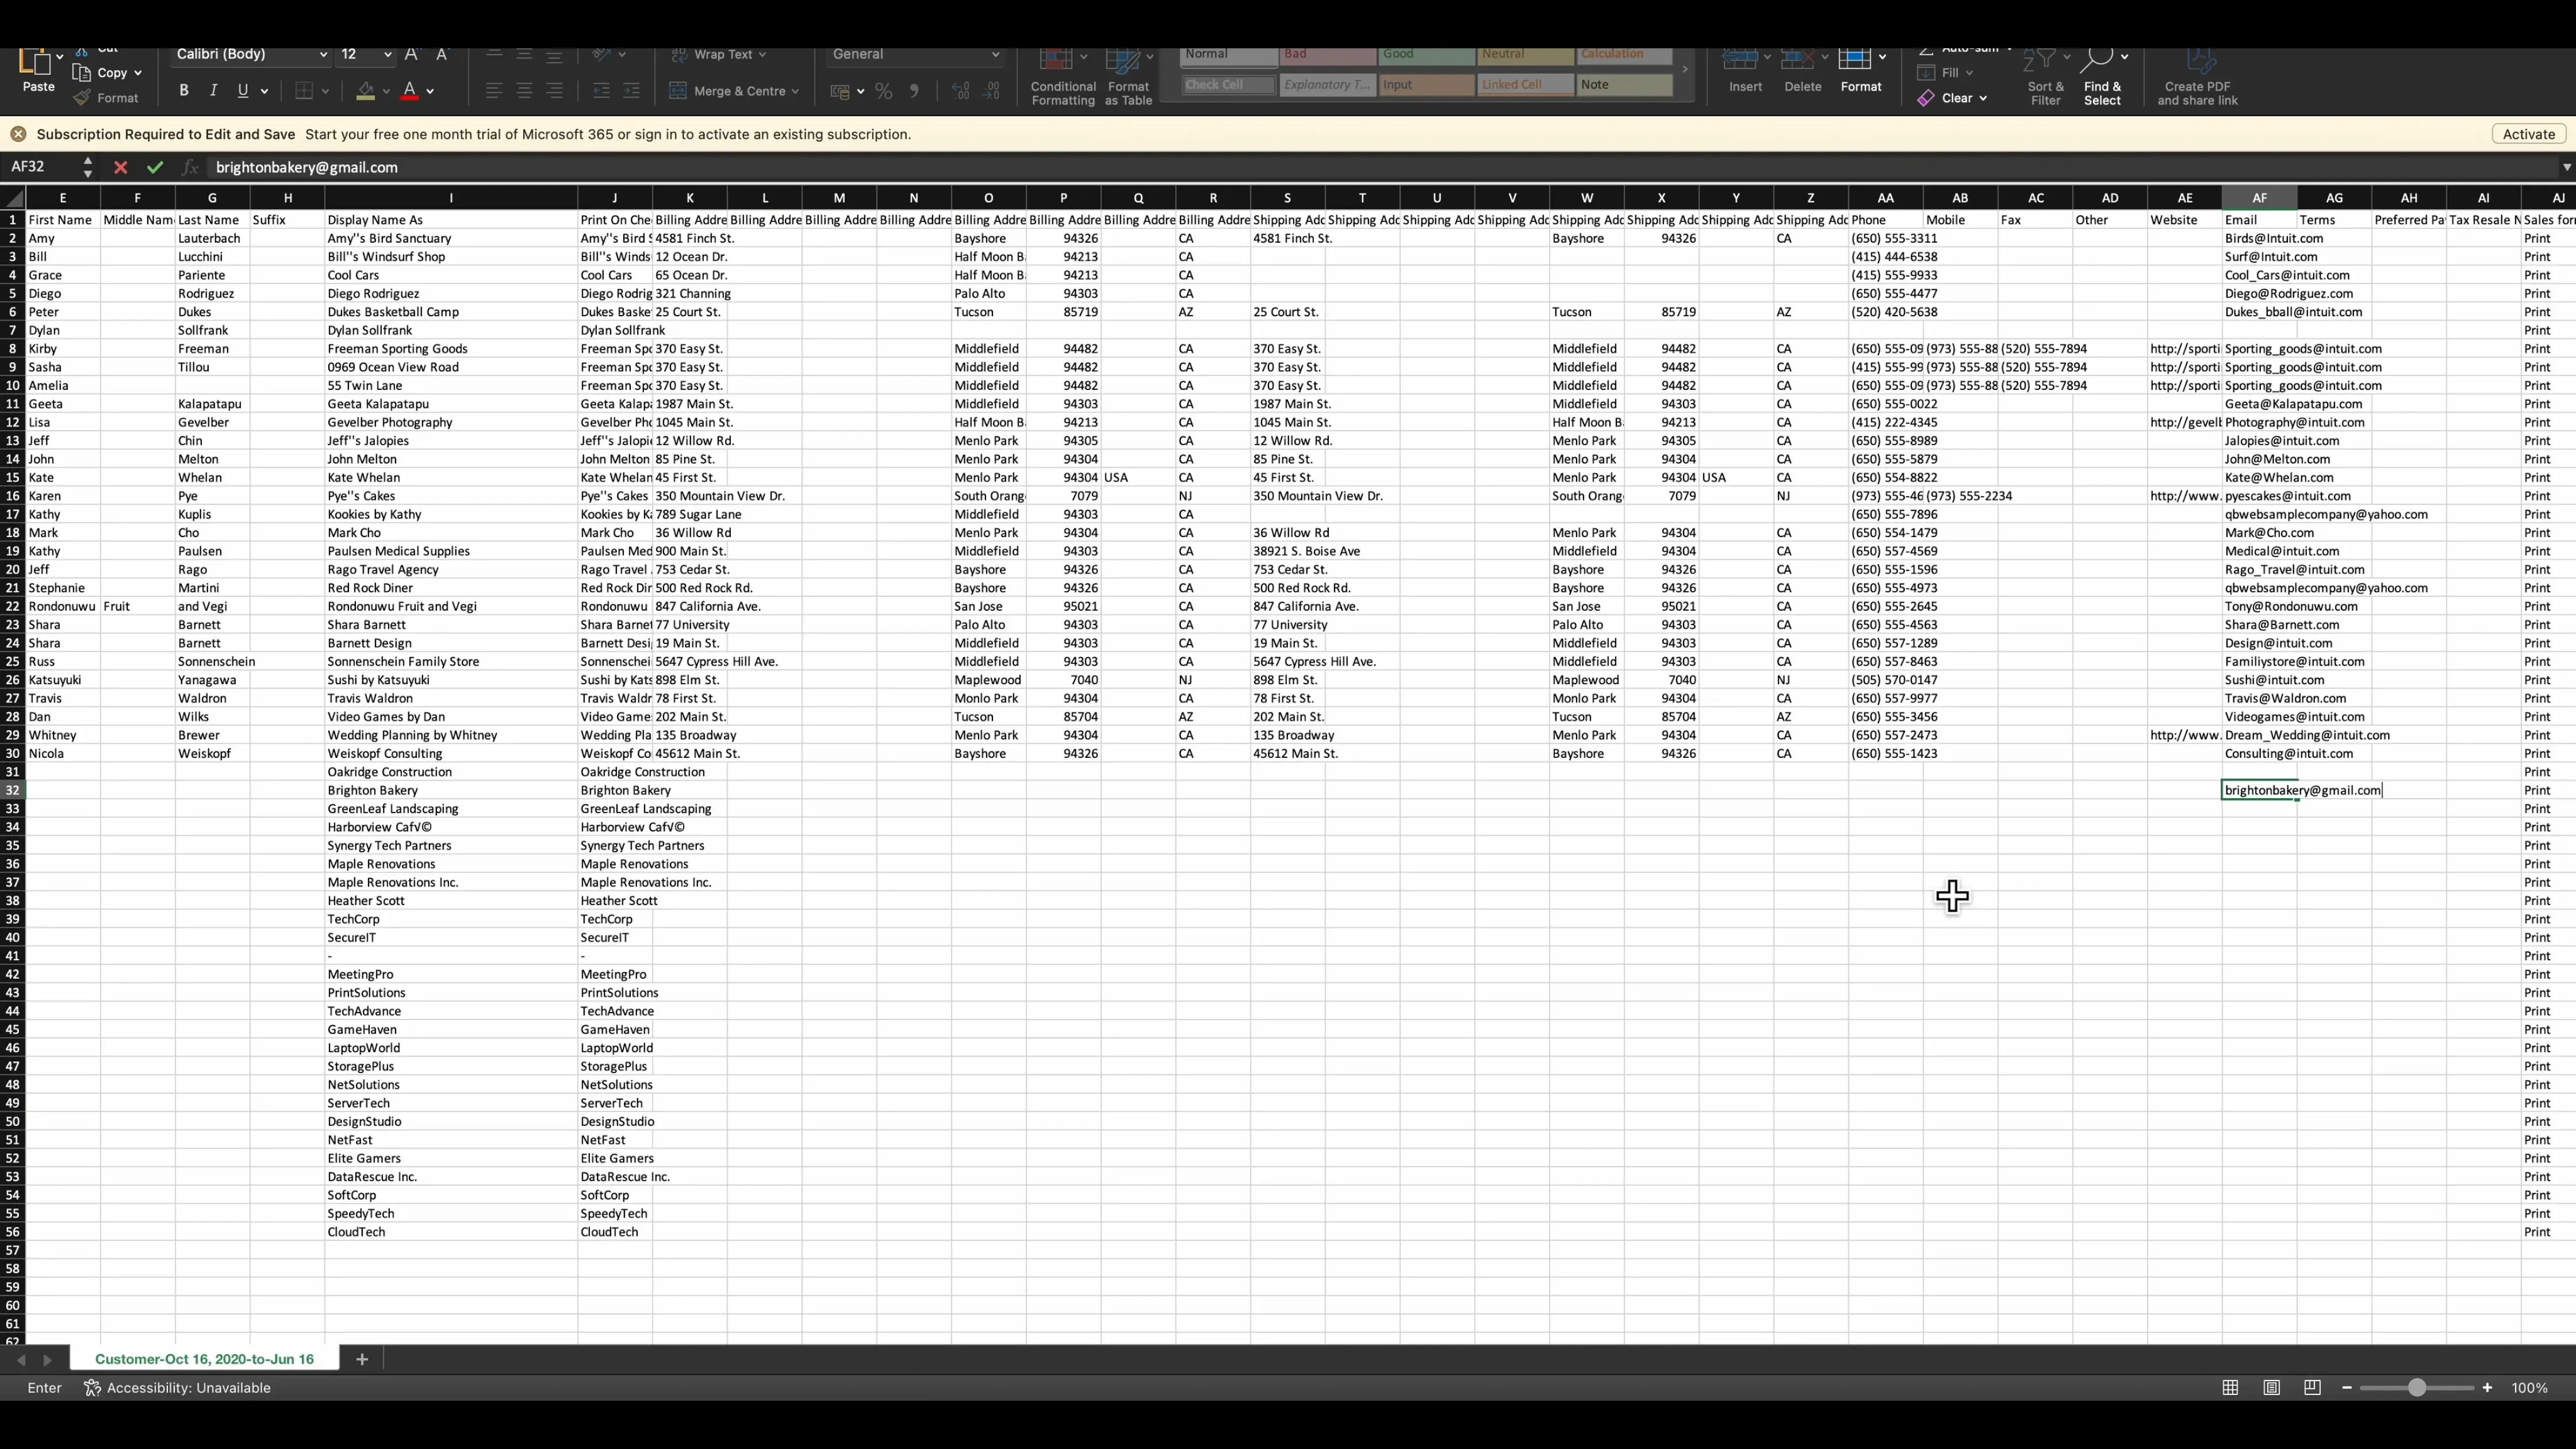
In the CSV add brightonbakery@gmail.com to Brighton Bakery, change display name “Net Fast” to “Net Solutions,” and make any other fixes. Save the file.
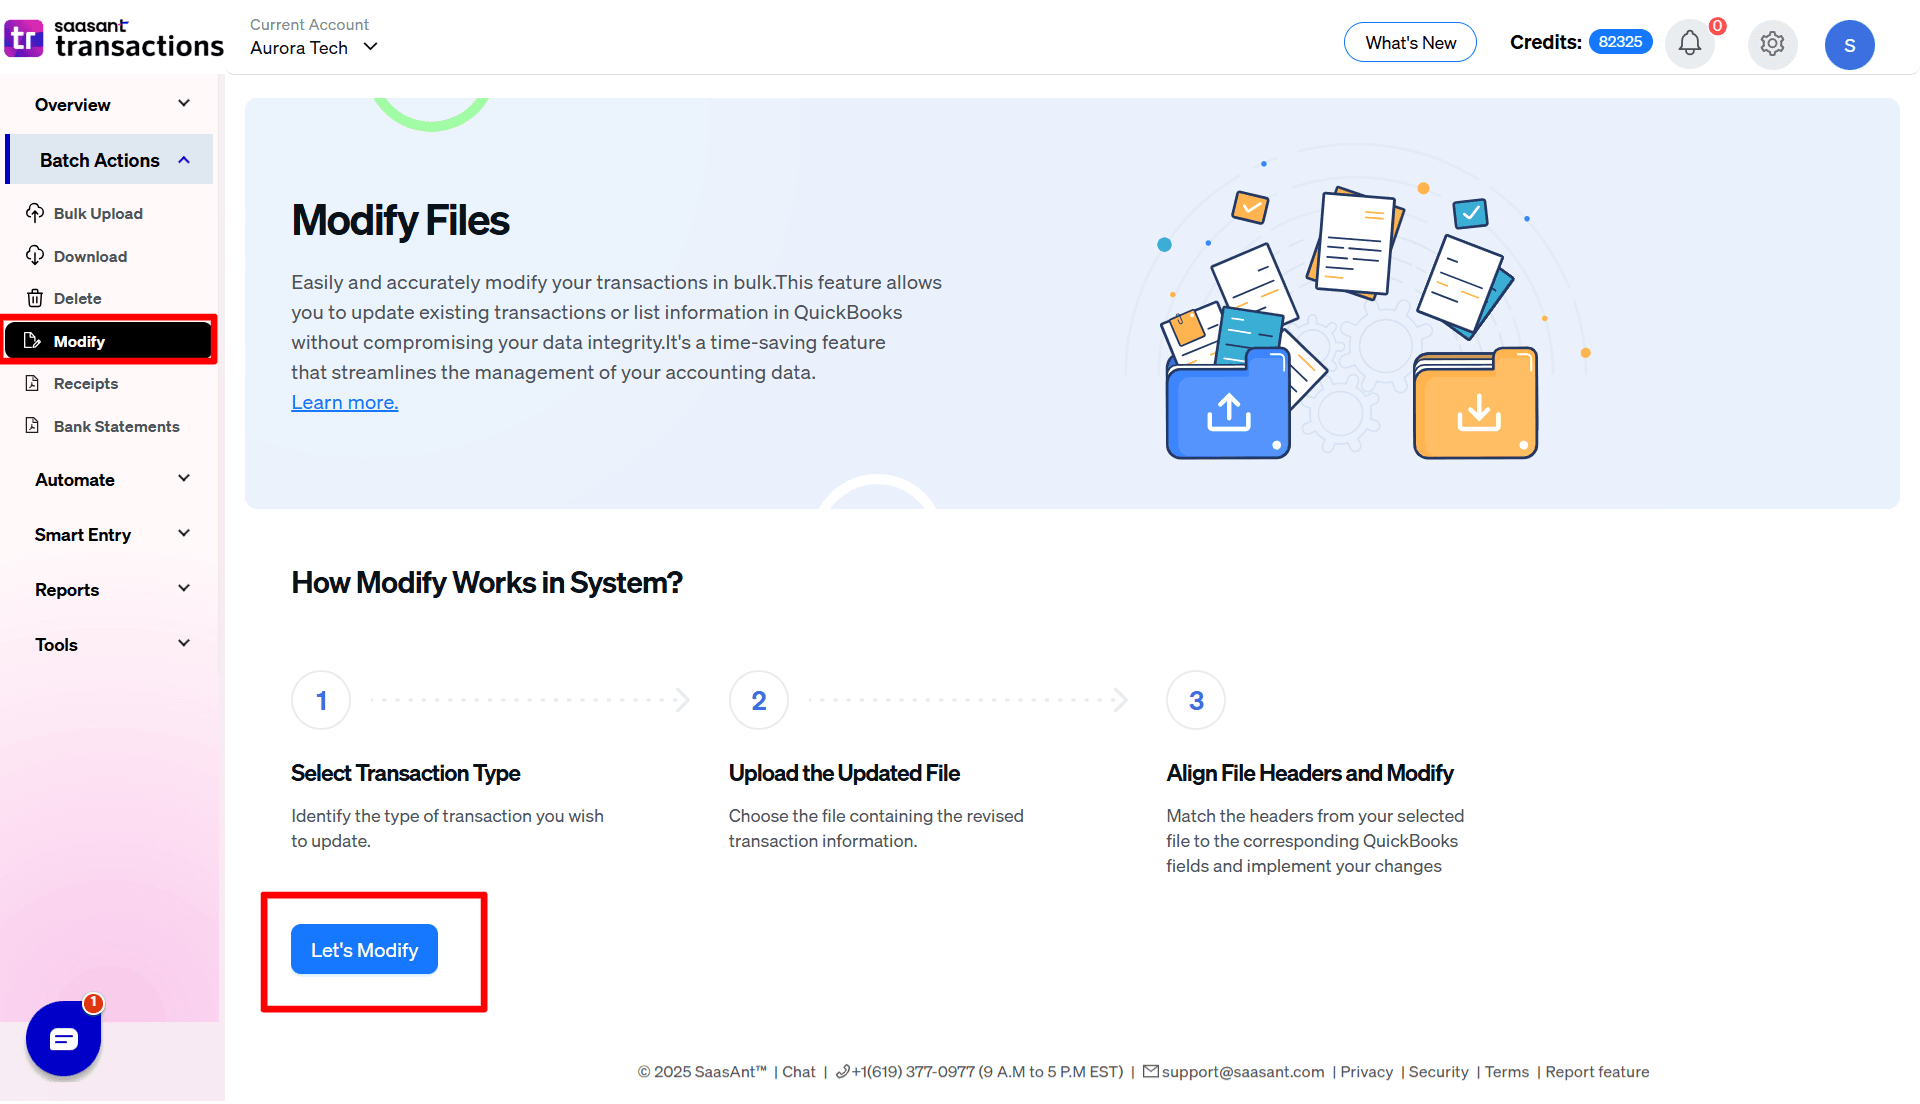
Back in SaasAnt choose Modify › Let’s Modify,
Select the Customers as Entity.
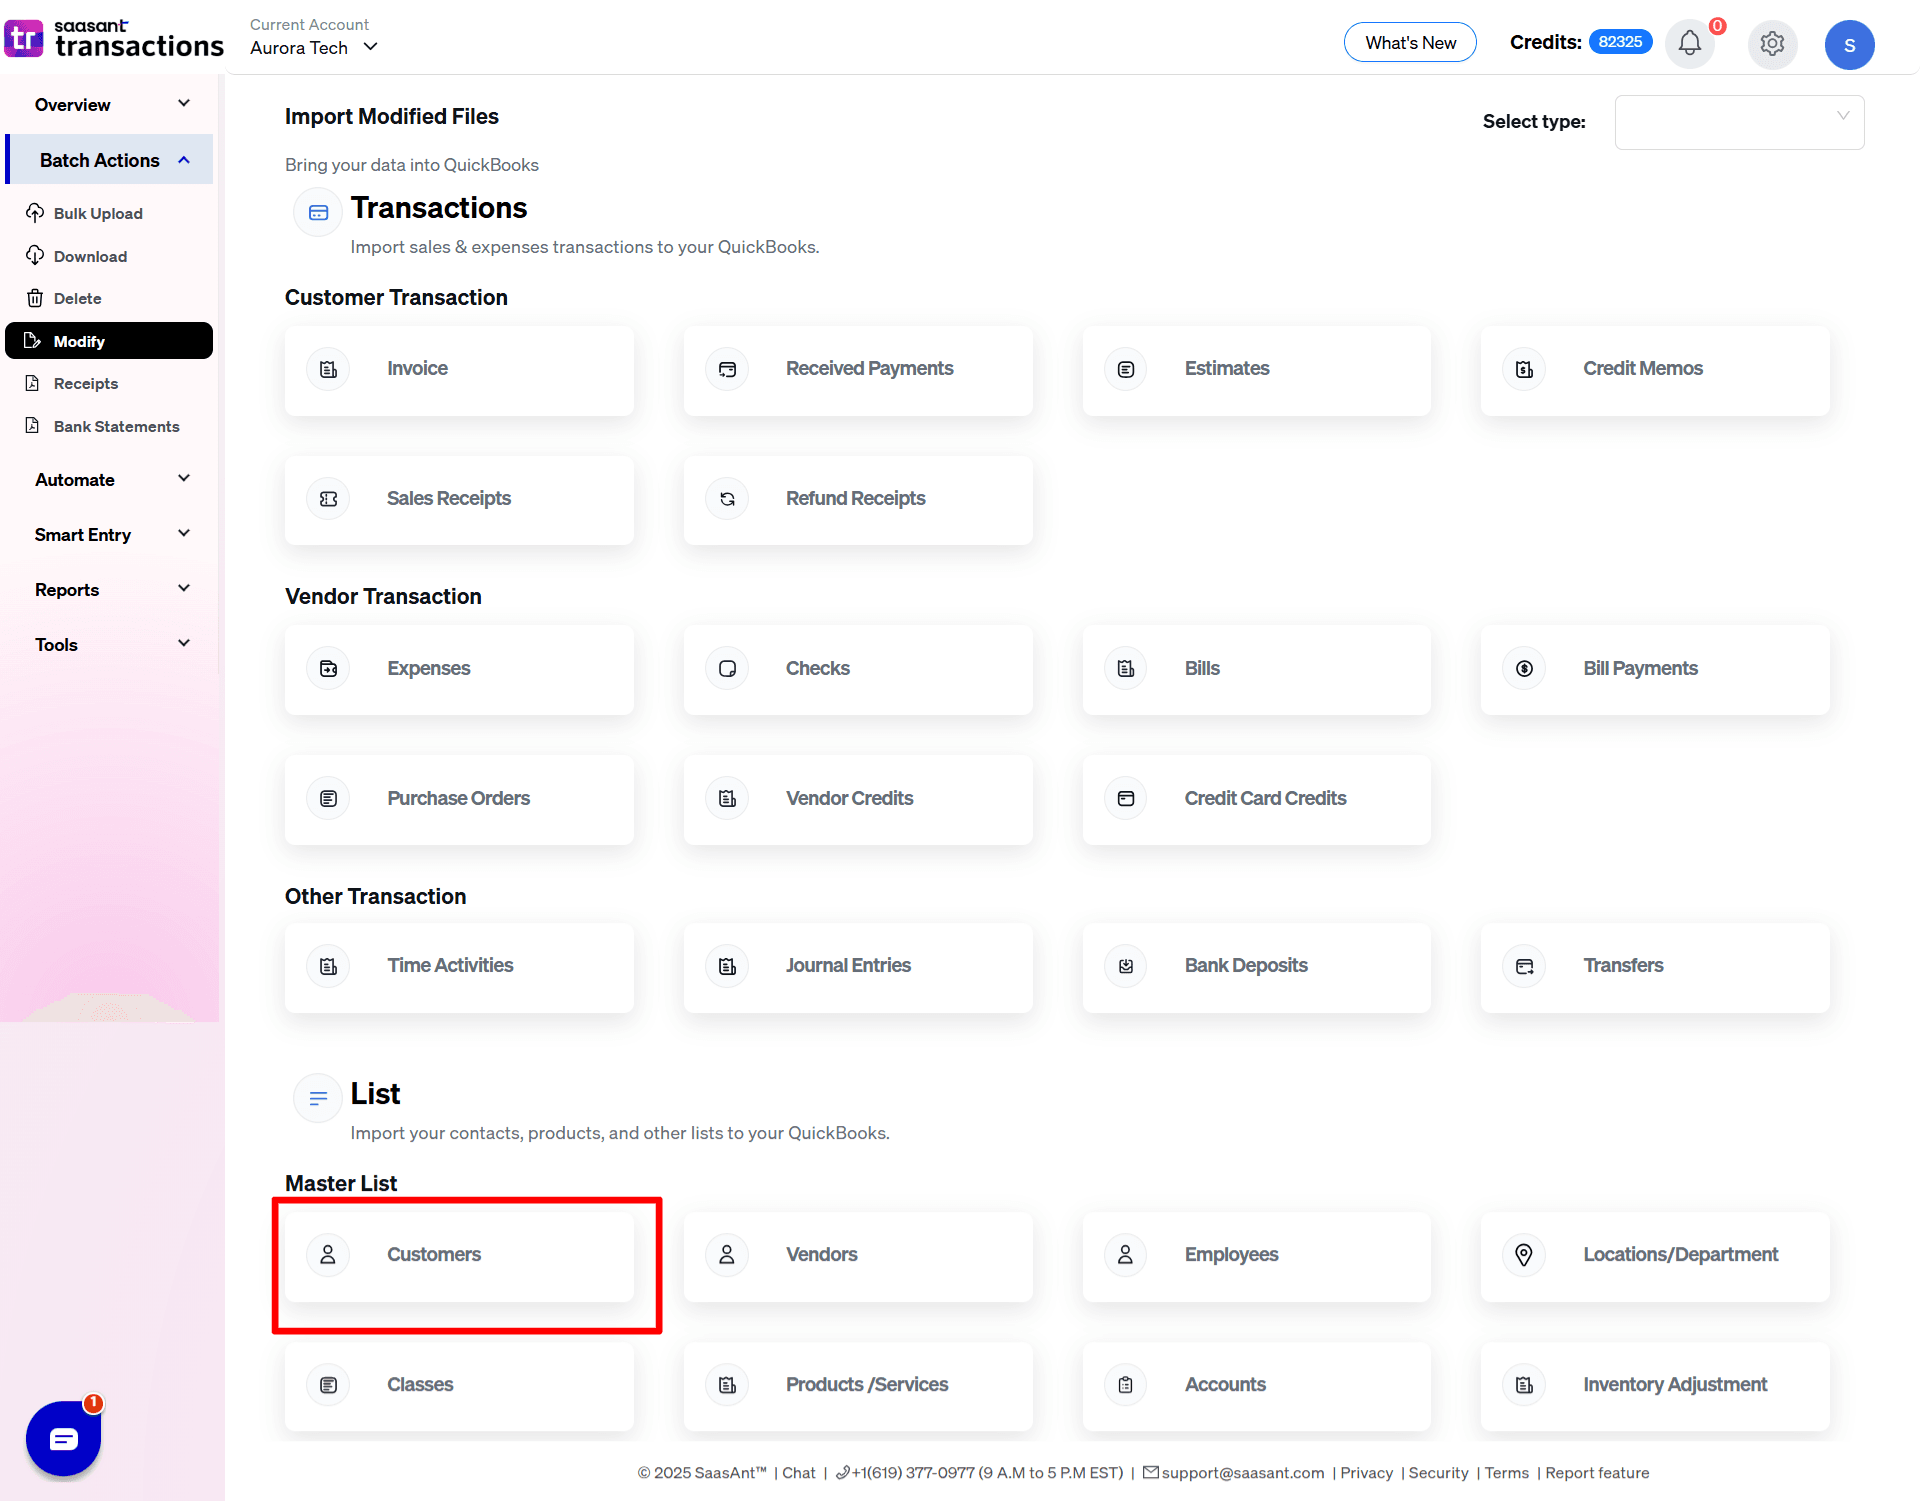
Upload the edited CSV or Excel File.
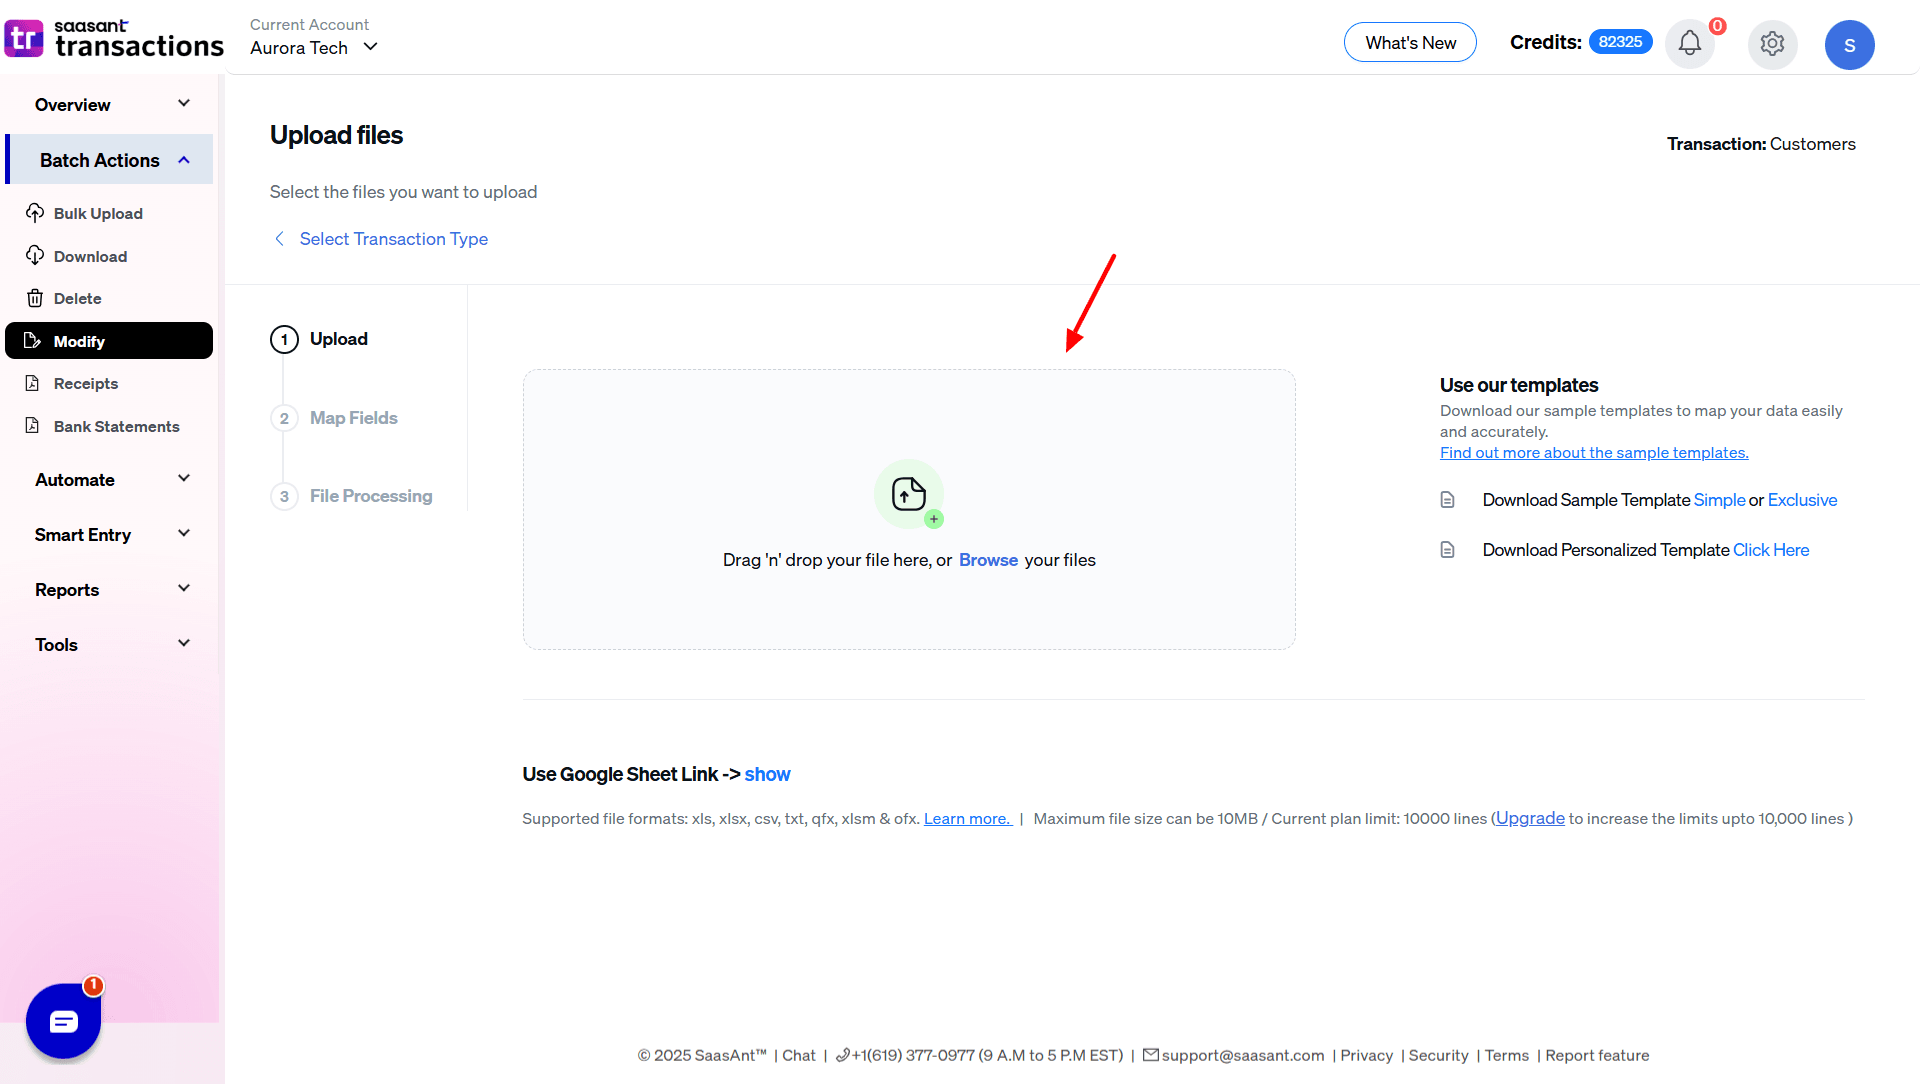
Review the preview, and click Update QuickBooks.
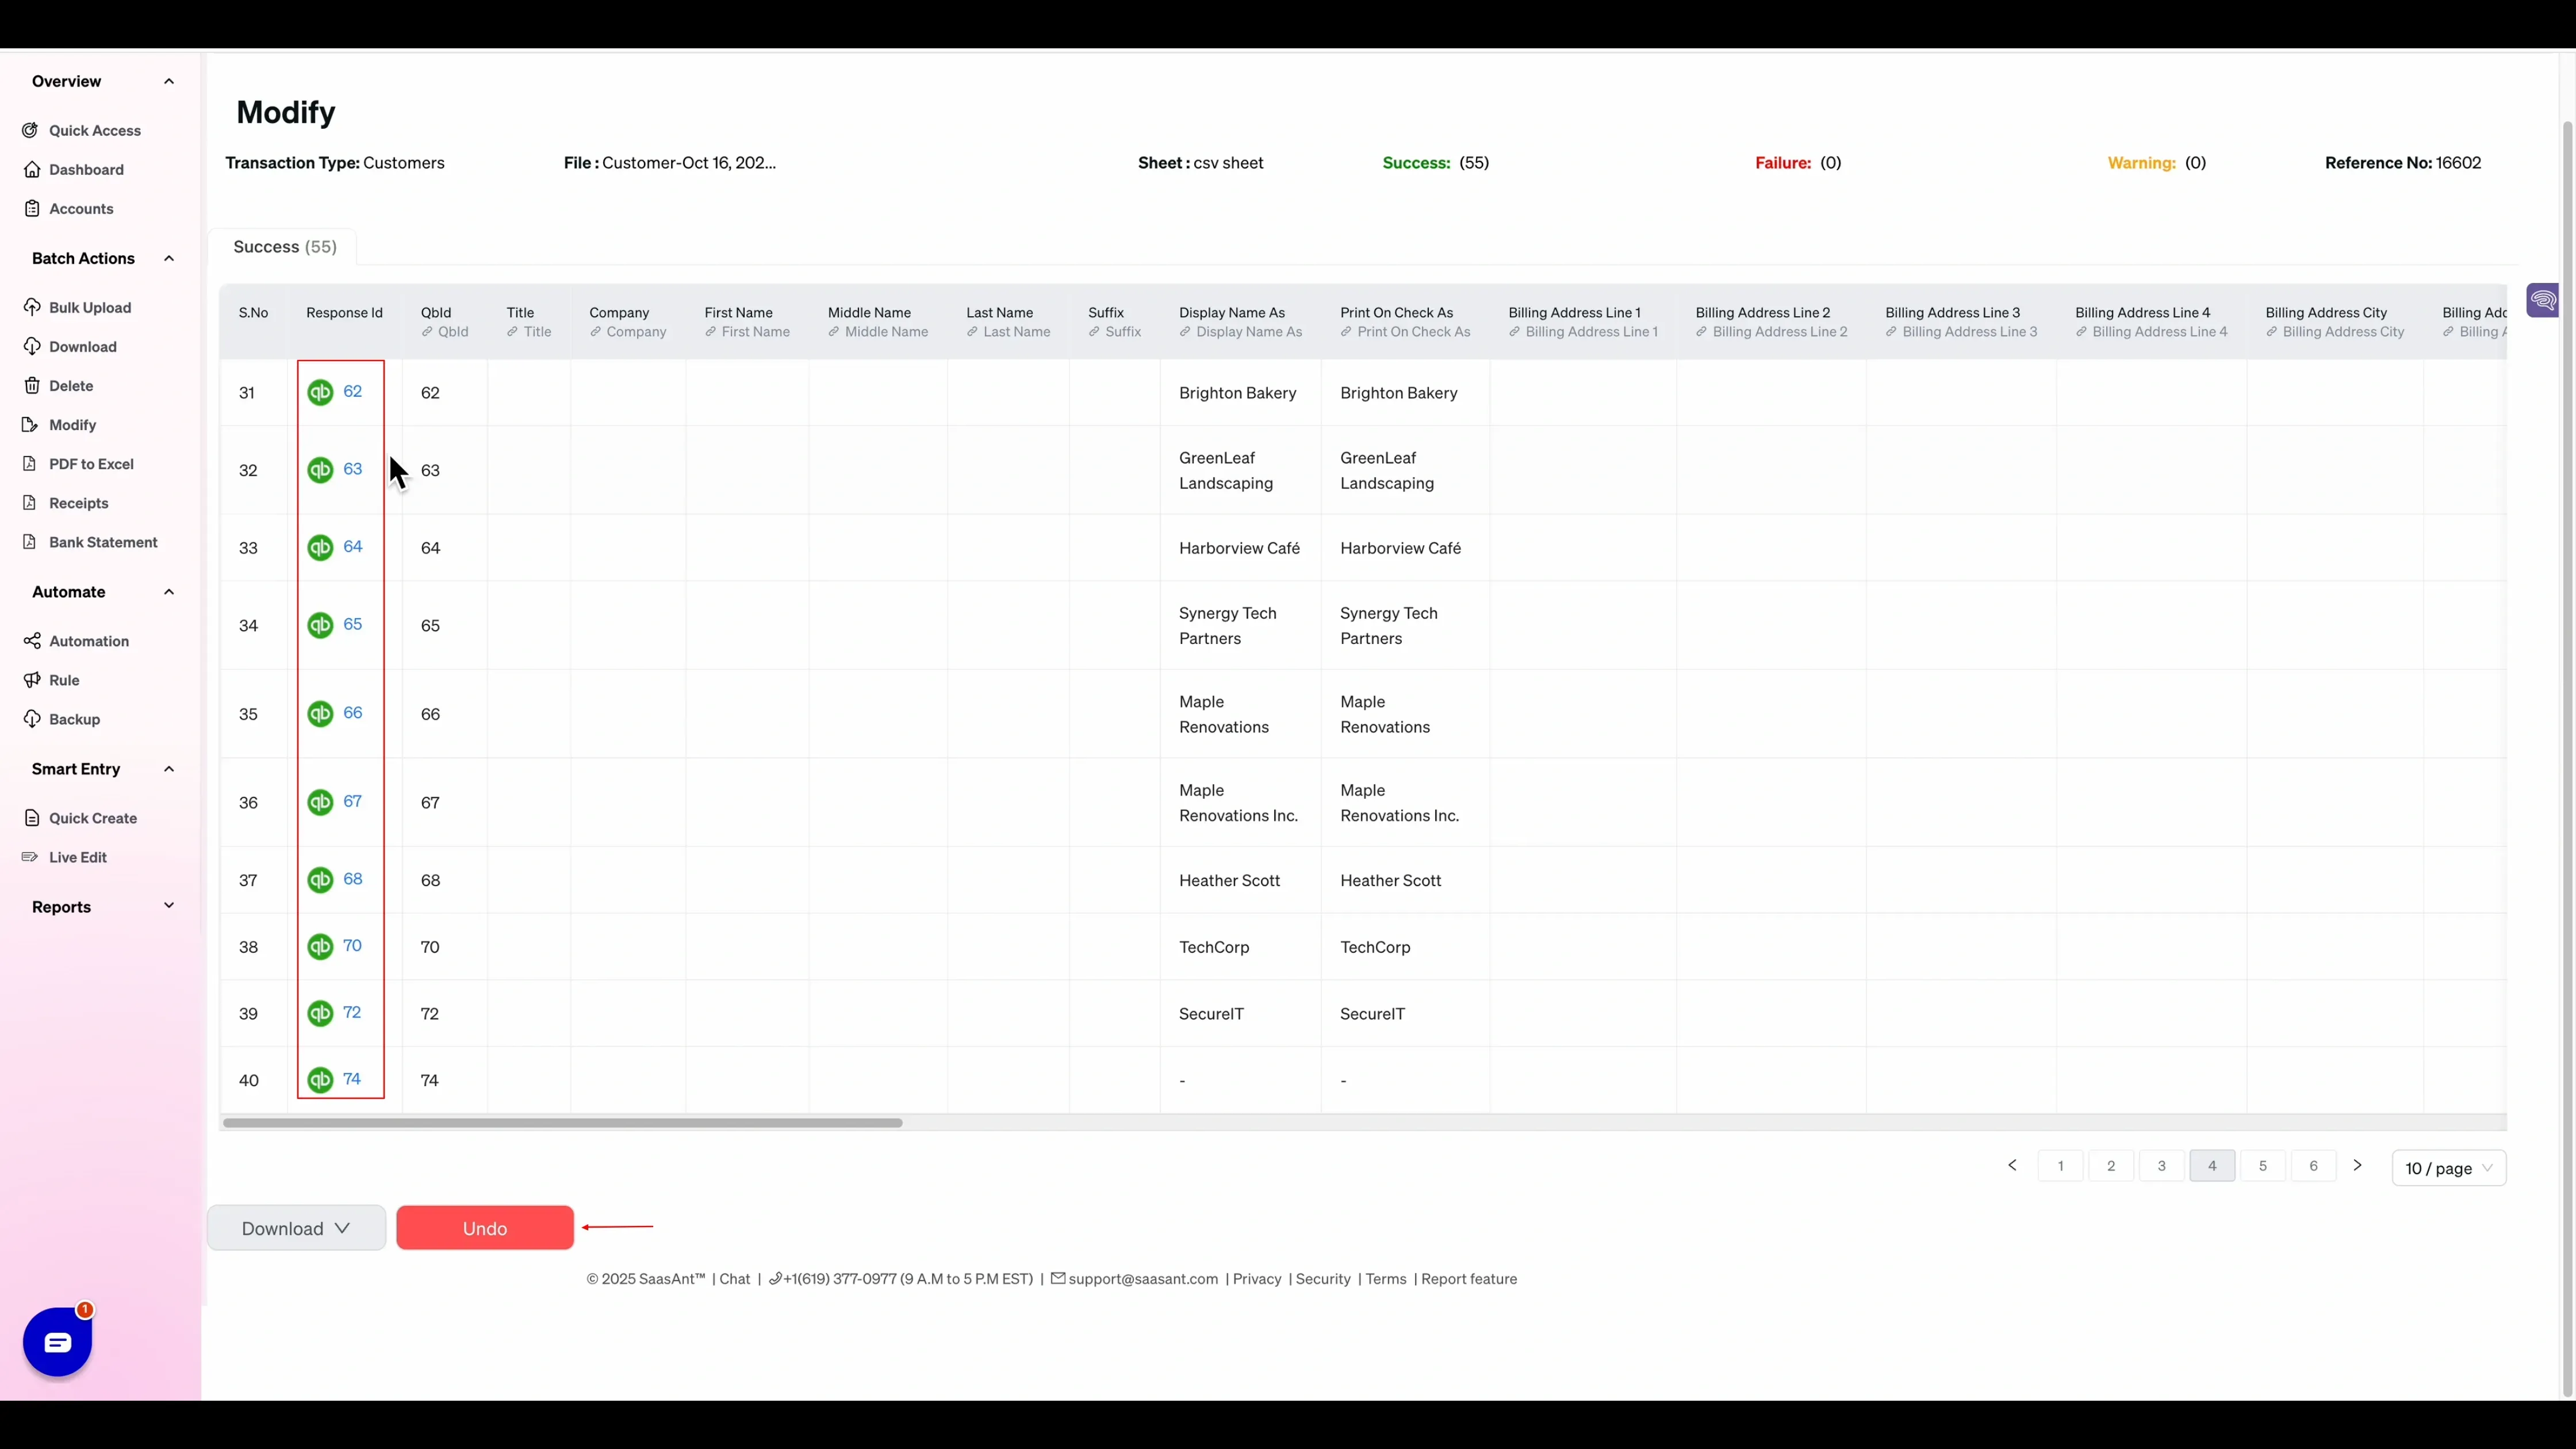
Return to QuickBooks, refresh Customers, and confirm the updates.
Method 2: Live Edit
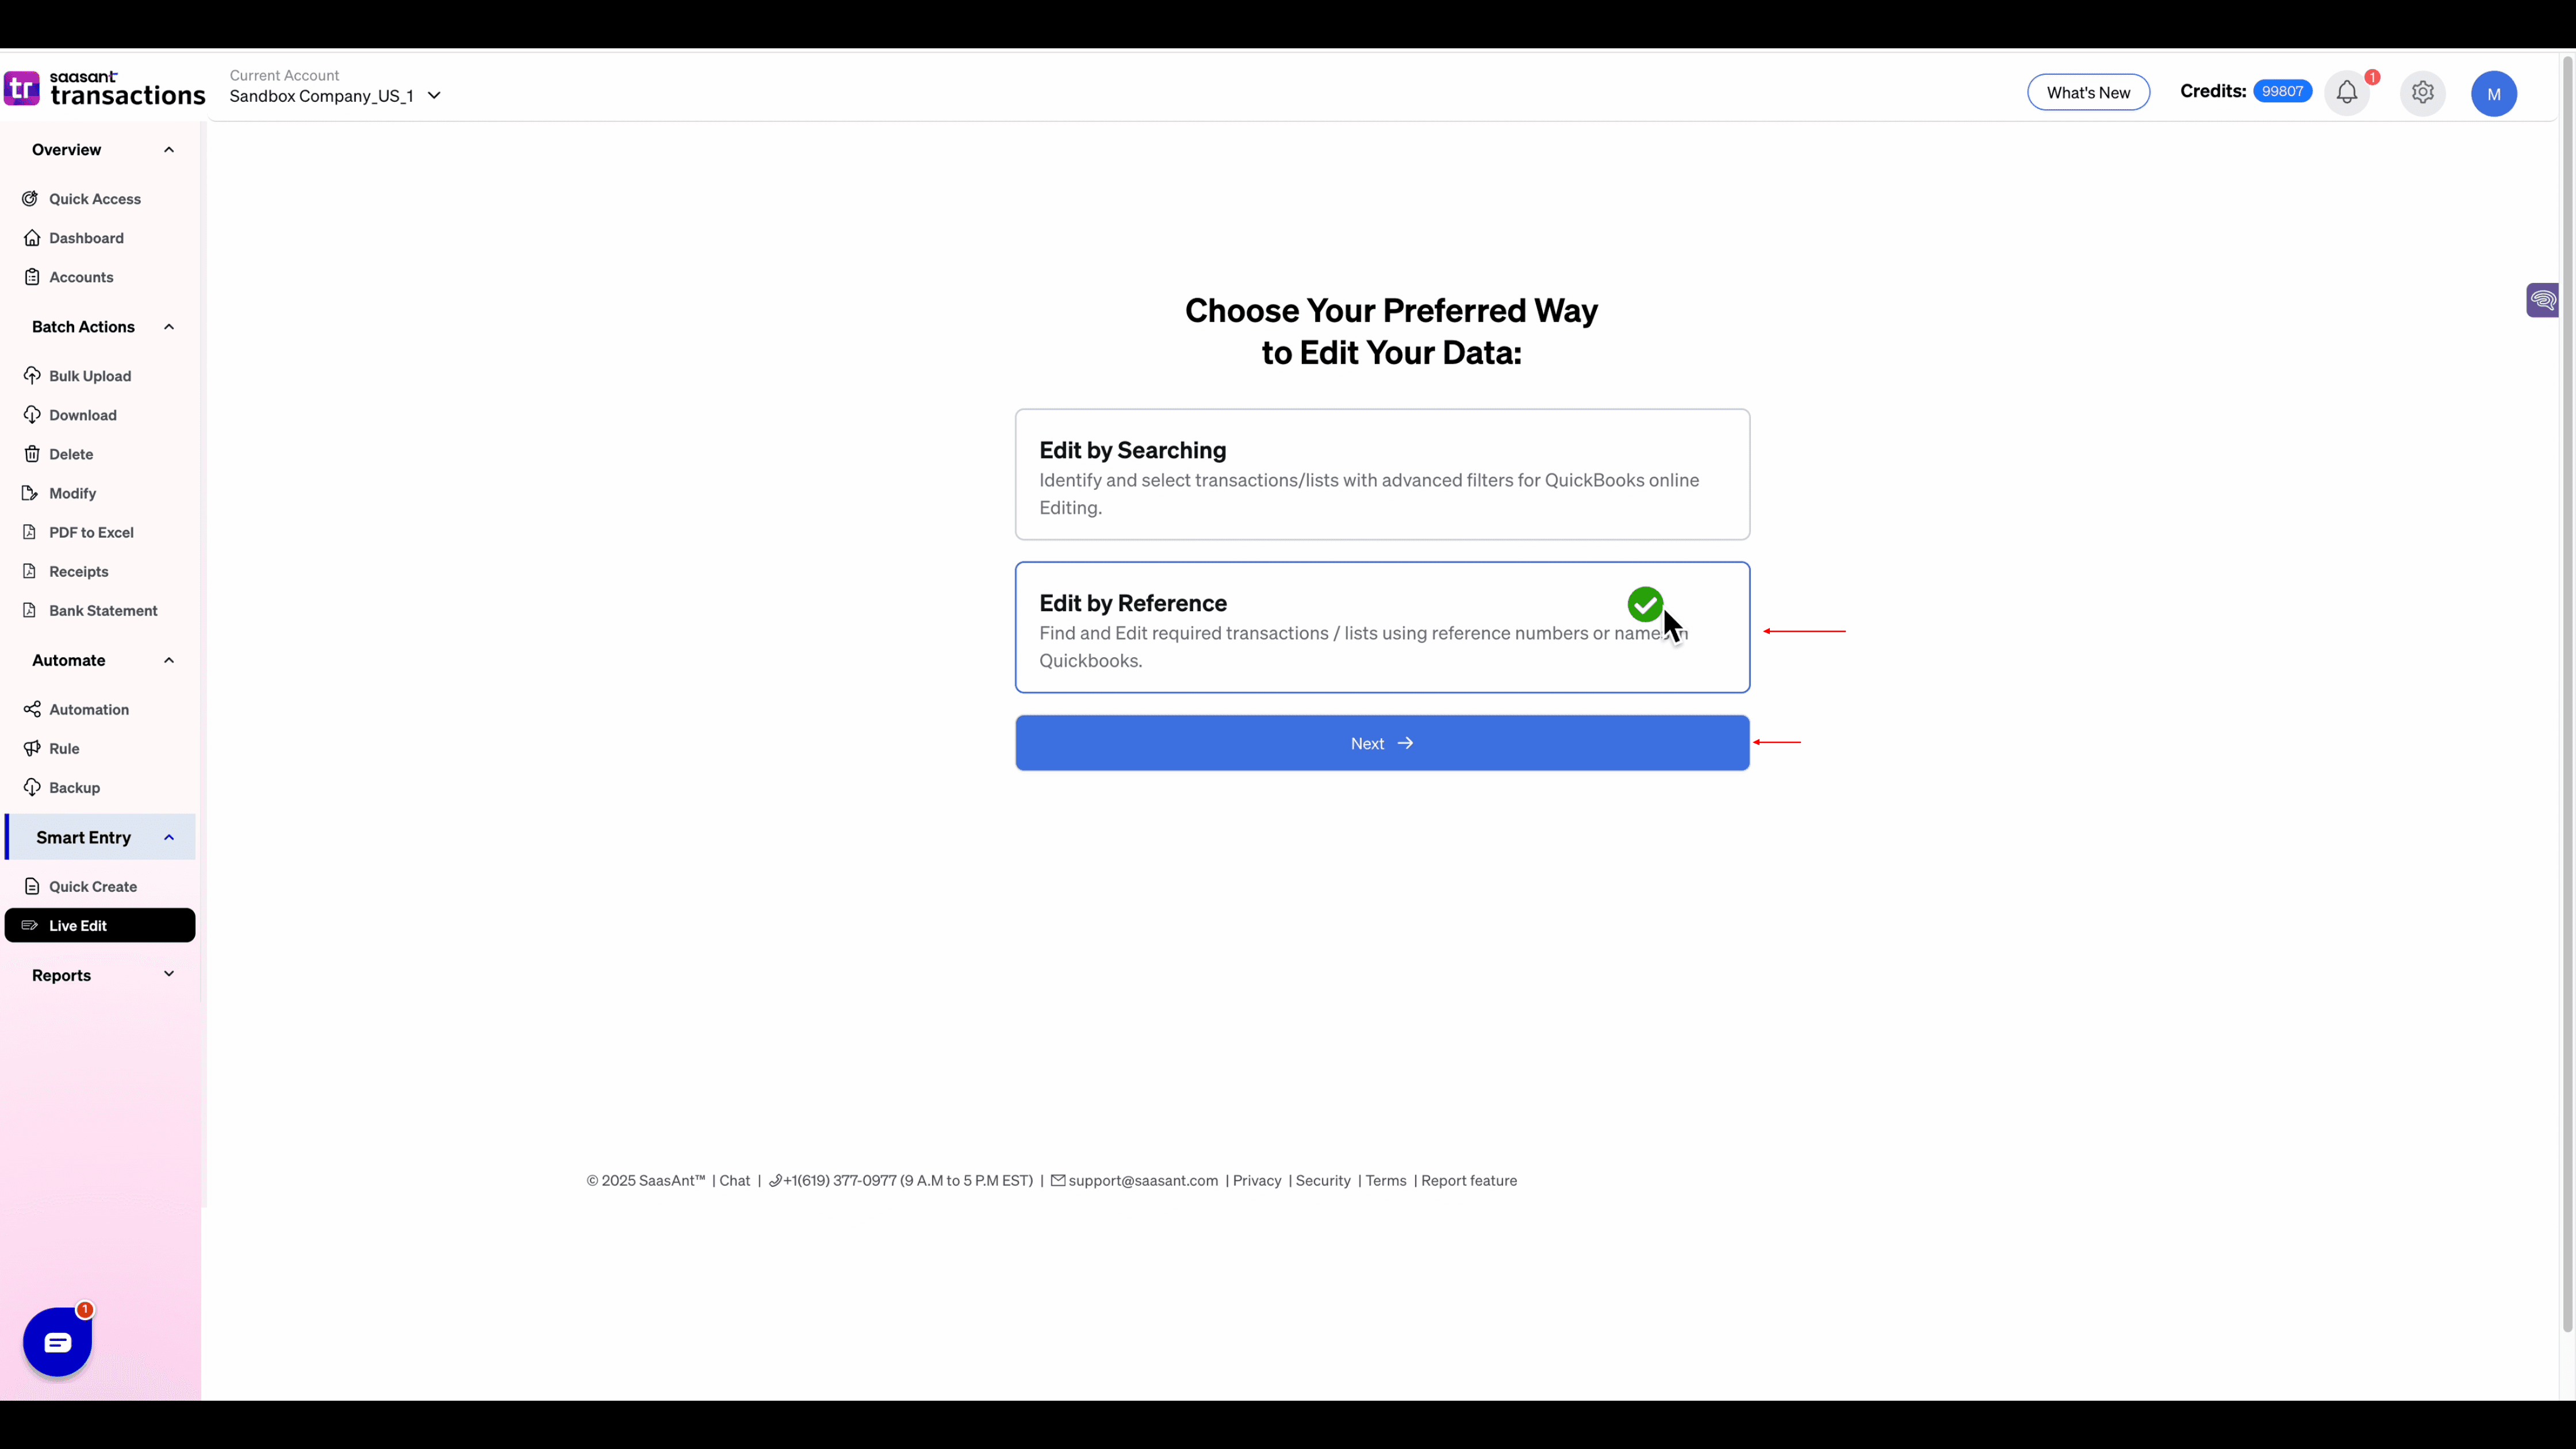
Live Edit lets you update customers from inside SaasAnt without touching a spreadsheet. Click Ready to Edit and pick one of two options:
Edit by Searching – identify and select customers with advanced filters such as date range or amount.
Edit by Reference – pull specific customers by name or reference number.
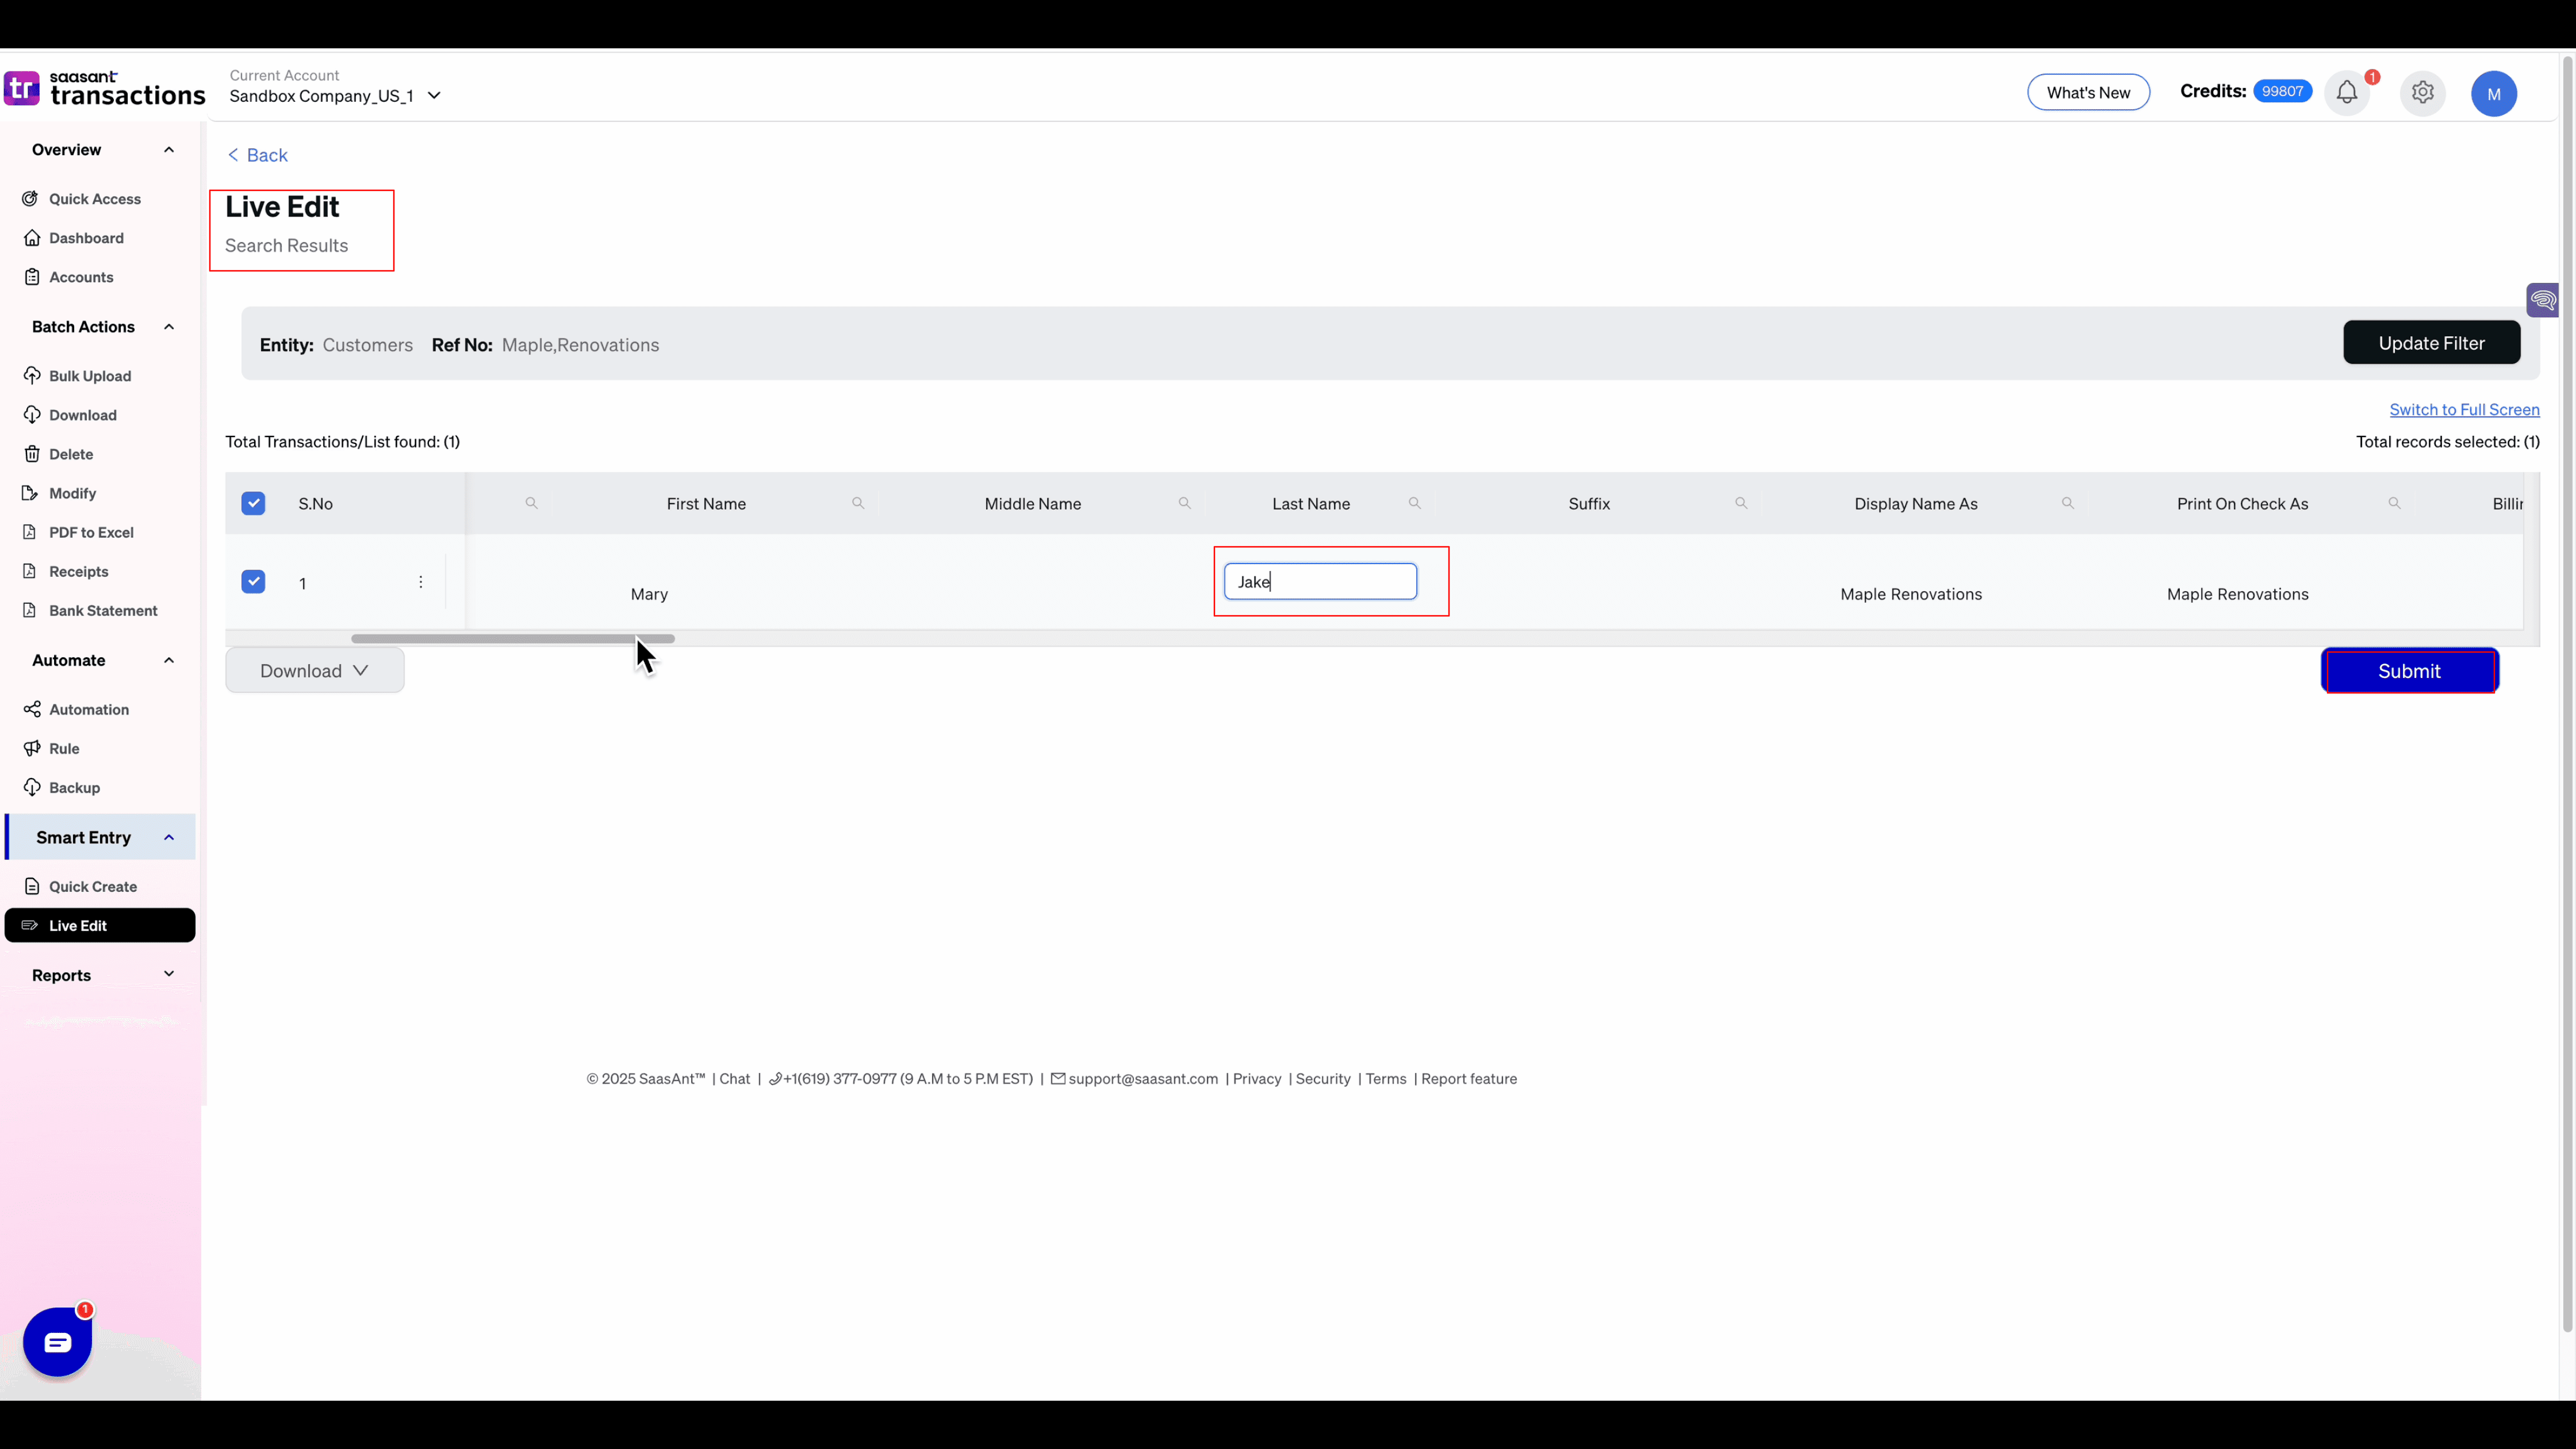
We’ll use Edit by Reference. Enter multiple customer names—for example, both “Maple Renovations” profiles—and click Search. SaasAnt displays them side by side. Directly in the grid you can:
Add first name Mary and last name Jake.
Enter or correct email addresses.
Change the Currency Code.
Flip Active from True to False to inactivate a duplicate.
Press Submit and SaasAnt writes the changes to QuickBooks in seconds. A quick refresh in QBO shows the single active Maple Renovations profile with the new details.
Smart Rules to Prevent Future Duplicates
To keep new imports from creating more duplicates:
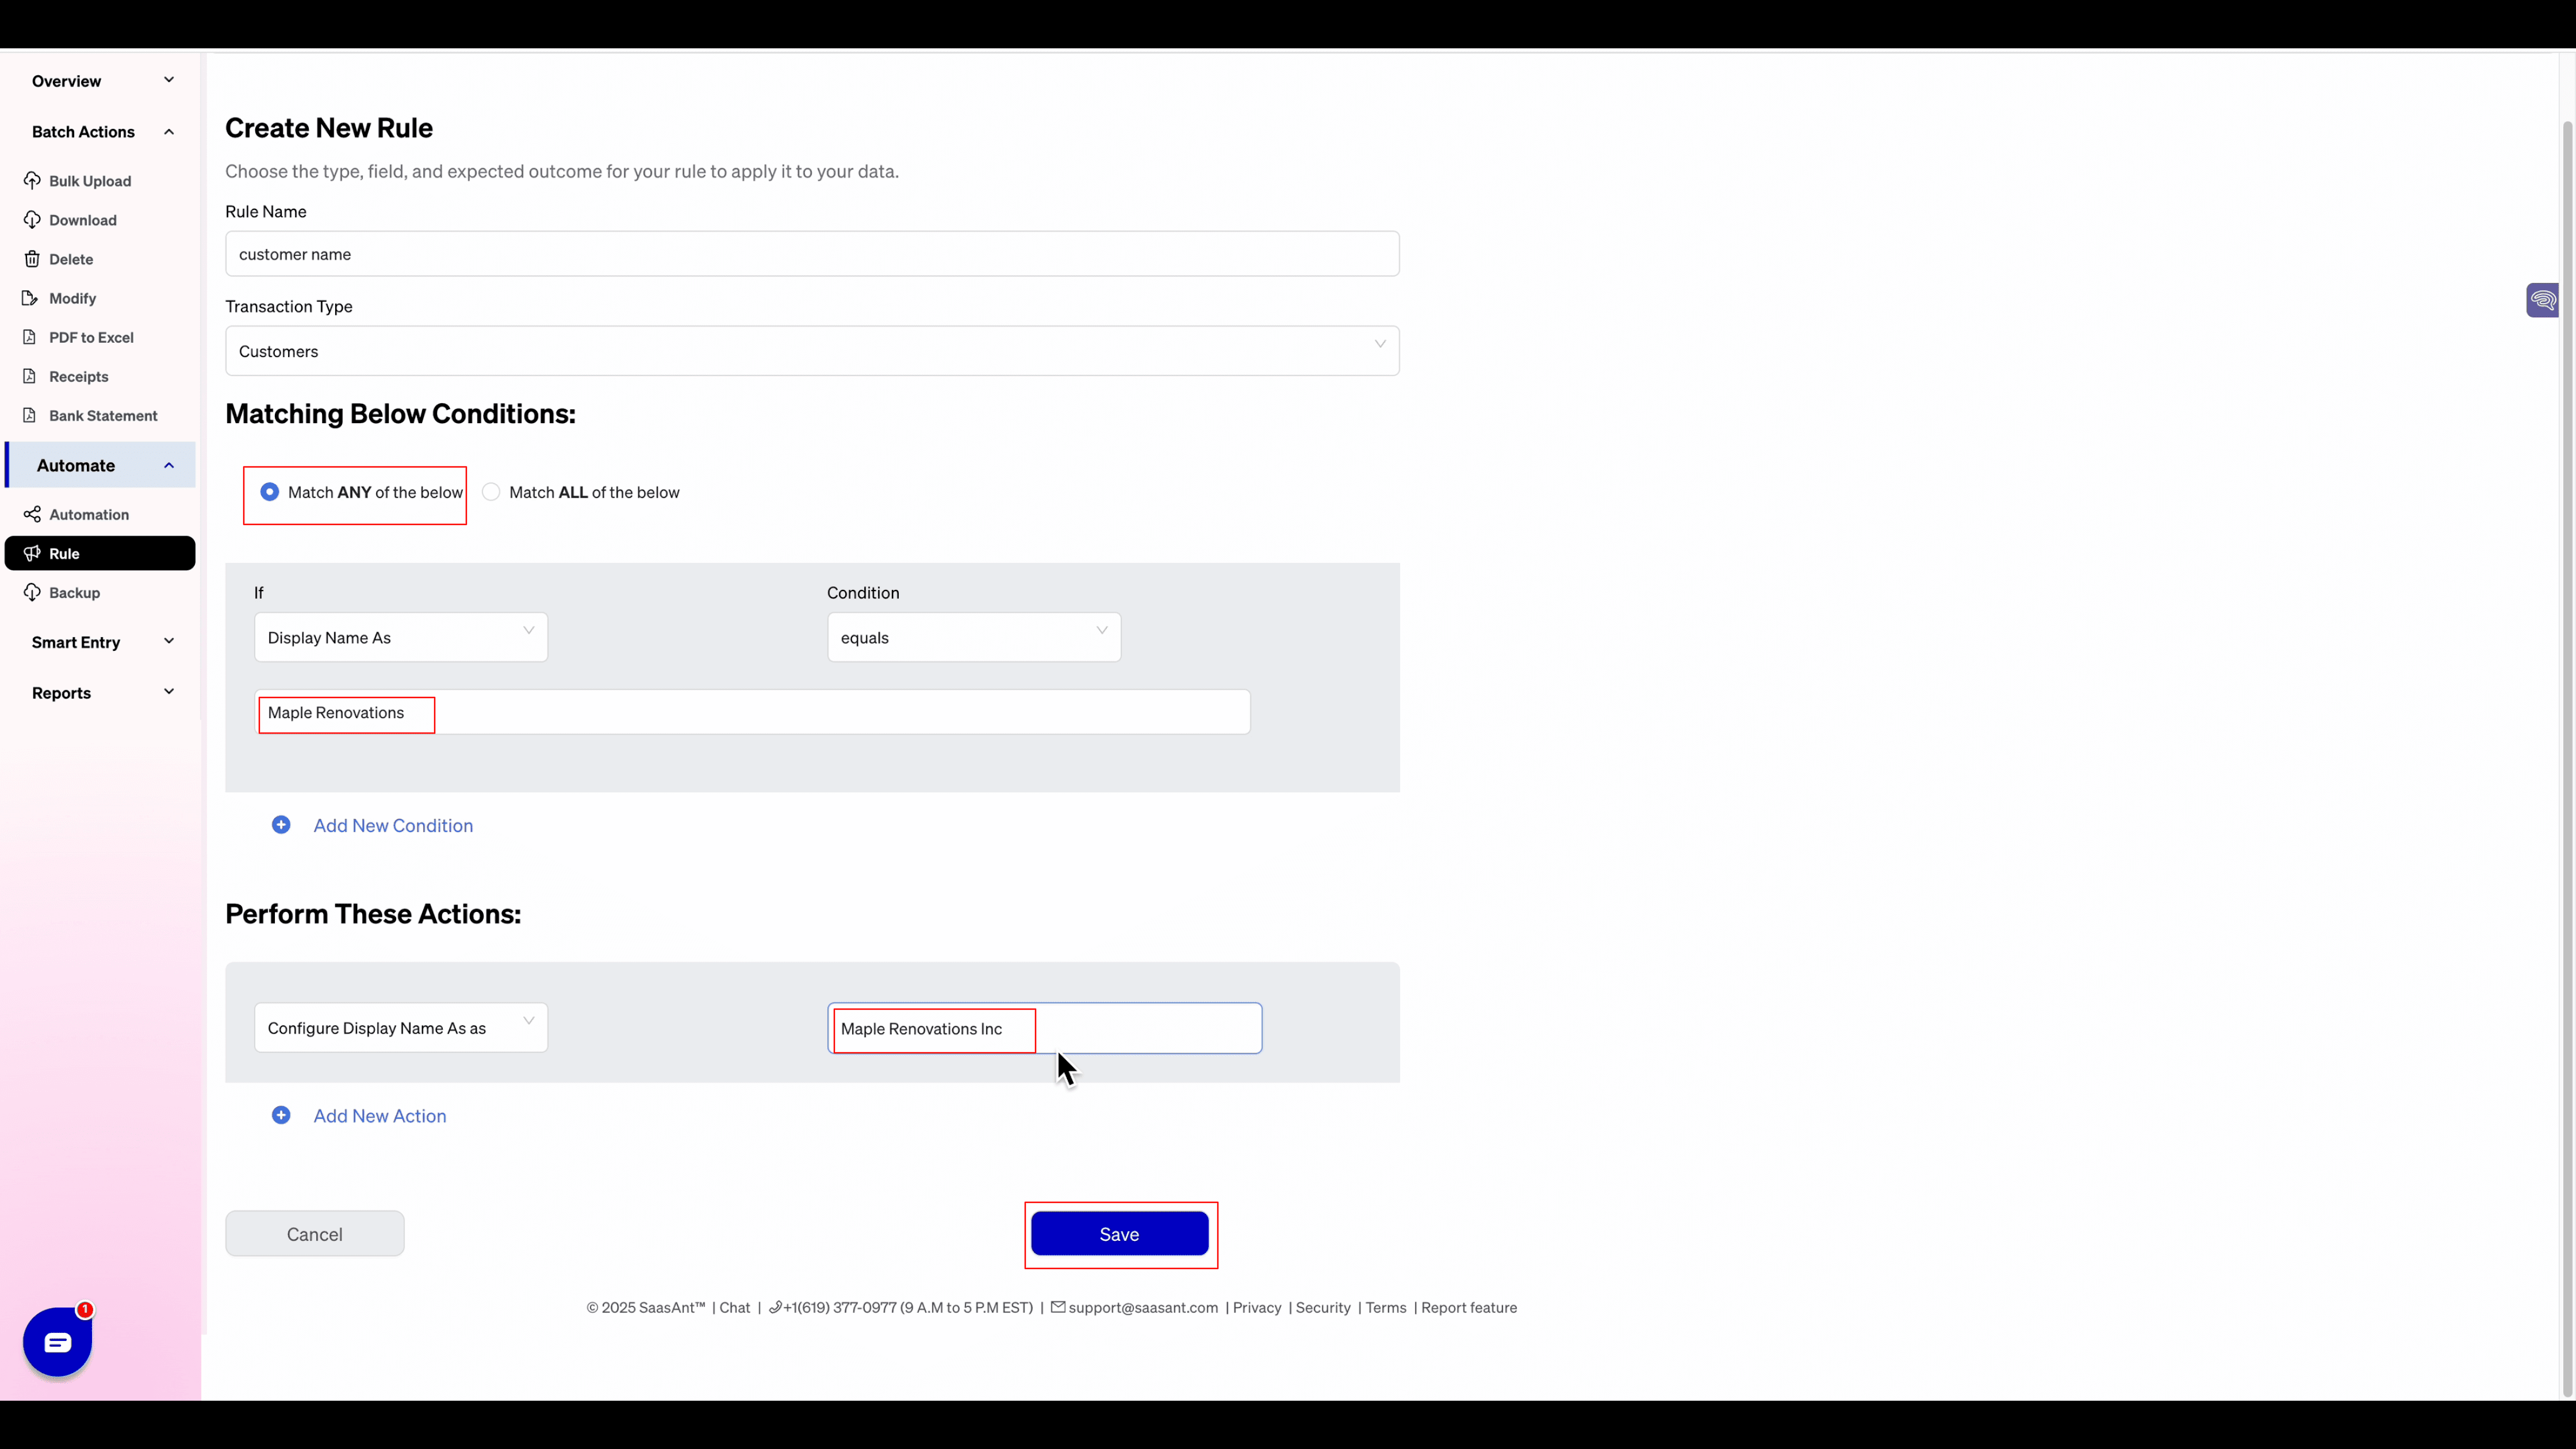
Go to Smart Entry › Rules and click Create New Rule.
Name the rule, set the type to Customers, and add a condition—for example, “If Display Name equals ‘Maple Renovations’, replace with ‘Maple Renovations Inc.’.”
Save the rule. From now on, any file or app that tries a slightly different spelling will map to the existing customer.
You can build as many conditions as you need and modify nearly any field, saving hours of cleanup time.
Advanced Customer Management with SaasAnt Transactions
A. Automating Customer Data Updates
Set Up Rules:
Define rules to automatically update customer details based on specific criteria.
Schedule Updates:
Automate periodic bulk updates to keep customer records current.
B. Industry-Specific Use Cases
E-Commerce:
Synchronize customer contact details across multiple sales platforms.
Accounting Firms:
Maintain accurate client records for precise financial reporting.
Service-Based Businesses:
Automate adjustments to customer payment terms in line with contract changes.
Using rules to automate Customer management
Rules in SaasAnt Transactions are a feature designed to automate and customize the import process of financial data into QuickBooks.
How Rules Manipulate Data (Like Changing Customer Names)
Here’s the step-by-step process of how rules work for data manipulation, focusing on your example of changing customer names:
Set Conditions:
You define a condition to identify when the rule should apply. For instance:
"If the customer name is 'Cust A'."
"If the customer name contains 'Doe'."
Conditions are flexible and can be based on any field in your import file (e.g., customer name, description, amount).
Define Actions:
You specify what change to make when the condition is met. For example:
"Set customer name to 'Customer A'."
"Override customer name with 'John Doe'."
The action directly manipulates the data by replacing or modifying the original value in the import file.
Apply During Import:
When you upload your file (e.g., Excel or CSV) to SaasAnt Transactions, the rule runs automatically. It scans each row, checks the condition, and applies the action before the data is sent to QuickBooks.
Example:
Import File: Customer name is "Cust A."
Rule: "If customer name = 'Cust A,' set customer name to 'Customer A'."
Result in QuickBooks: The transaction imports with "Customer A" instead of "Cust A."
Frequently Asked Questions (FAQs)
How do I edit a customer in QuickBooks Online?
To edit a customer in QuickBooks Online, go to the 'Sales' menu, select 'Customers', choose the customer you want to edit, click 'Edit', make the necessary changes, and then click 'Save'.
How do I update customer information in QuickBooks Online?
To update customer information in QuickBooks Online, navigate to the 'Sales' menu, select 'Customers', find and select the customer, click 'Edit', update the necessary information, and click 'Save'.
Where is the customer list in QuickBooks Online?
In QuickBooks Online, the customer list is located under the 'Sales' menu. Click on 'Sales', then select 'Customers' to view the list.
How do I edit users in QuickBooks Online?
To edit users in QuickBooks Online, click on the 'Settings' icon (gear icon), select 'Manage Users', find the user you want to edit, click 'Edit' in the 'Action' column, make the necessary changes, and then click 'Save'.
Recommended reading: