How to Delete Vendor in QuickBooks Desktop
In QuickBooks Desktop, vendor records are vital for tracking payables and managing purchases. Over time, your vendor list can become cluttered with outdated, duplicate, or incorrect entries, which can complicate your accounts and reporting. Instead of manually checking each vendor, you can automate and simplify the process with SaasAnt Transactions Desktop.
This guide will walk you through the steps to delete vendors in QuickBooks Desktop using SaasAnt, enabling you to clean your records and improve workflow efficiency.
At a mid-sized retail company, a bookkeeper identified over 100 inactive vendors in their QuickBooks Desktop file, resulting in confusion and delays. With SaasAnt Transactions, she quickly deleted all outdated vendor records in bulk, saving hours of manual work and reducing the risk of entry errors when processing invoices.
This blog is ideal for bookkeepers, accountants, and small business owners, as well as QuickBooks Desktop users who want to simplify vendor management, ensure cleaner records, and automate data cleanup with SaasAnt.
How to Delete a Vendor in QuickBooks Desktop: Step-by-Step Guide
Follow the steps below to delete a Vendor in QuickBooks Desktop using SaasAnt Transactions.
Step 1: Install and Connect SaasAnt Transactions
Download the latest SaasAnt Transactions Desktop version.
Run SaasAntTransactions-Setup.exe as administrator.
Accept the license agreement and complete the installation.
Open the app, go to Subscription > Register.
Enter the license key from your confirmation email.
Keep your internet connection active.
Step 2: Launch SaasAnt Transactions Desktop
Start by opening the SaaSAnt Transactions Desktop app on your system.
Ensure that QuickBooks Desktop is open and connected to your company file before proceeding.
Step 3: Connect to QuickBooks Desktop
To access, you need to connect the SaasAnt Transactions Desktop with QuickBooks Desktop. Here's how:
Go to the ‘File’ menu in the top-left corner of SaasAnt Transactions Desktop.
Click ‘Connect to QuickBooks’ from the dropdown.
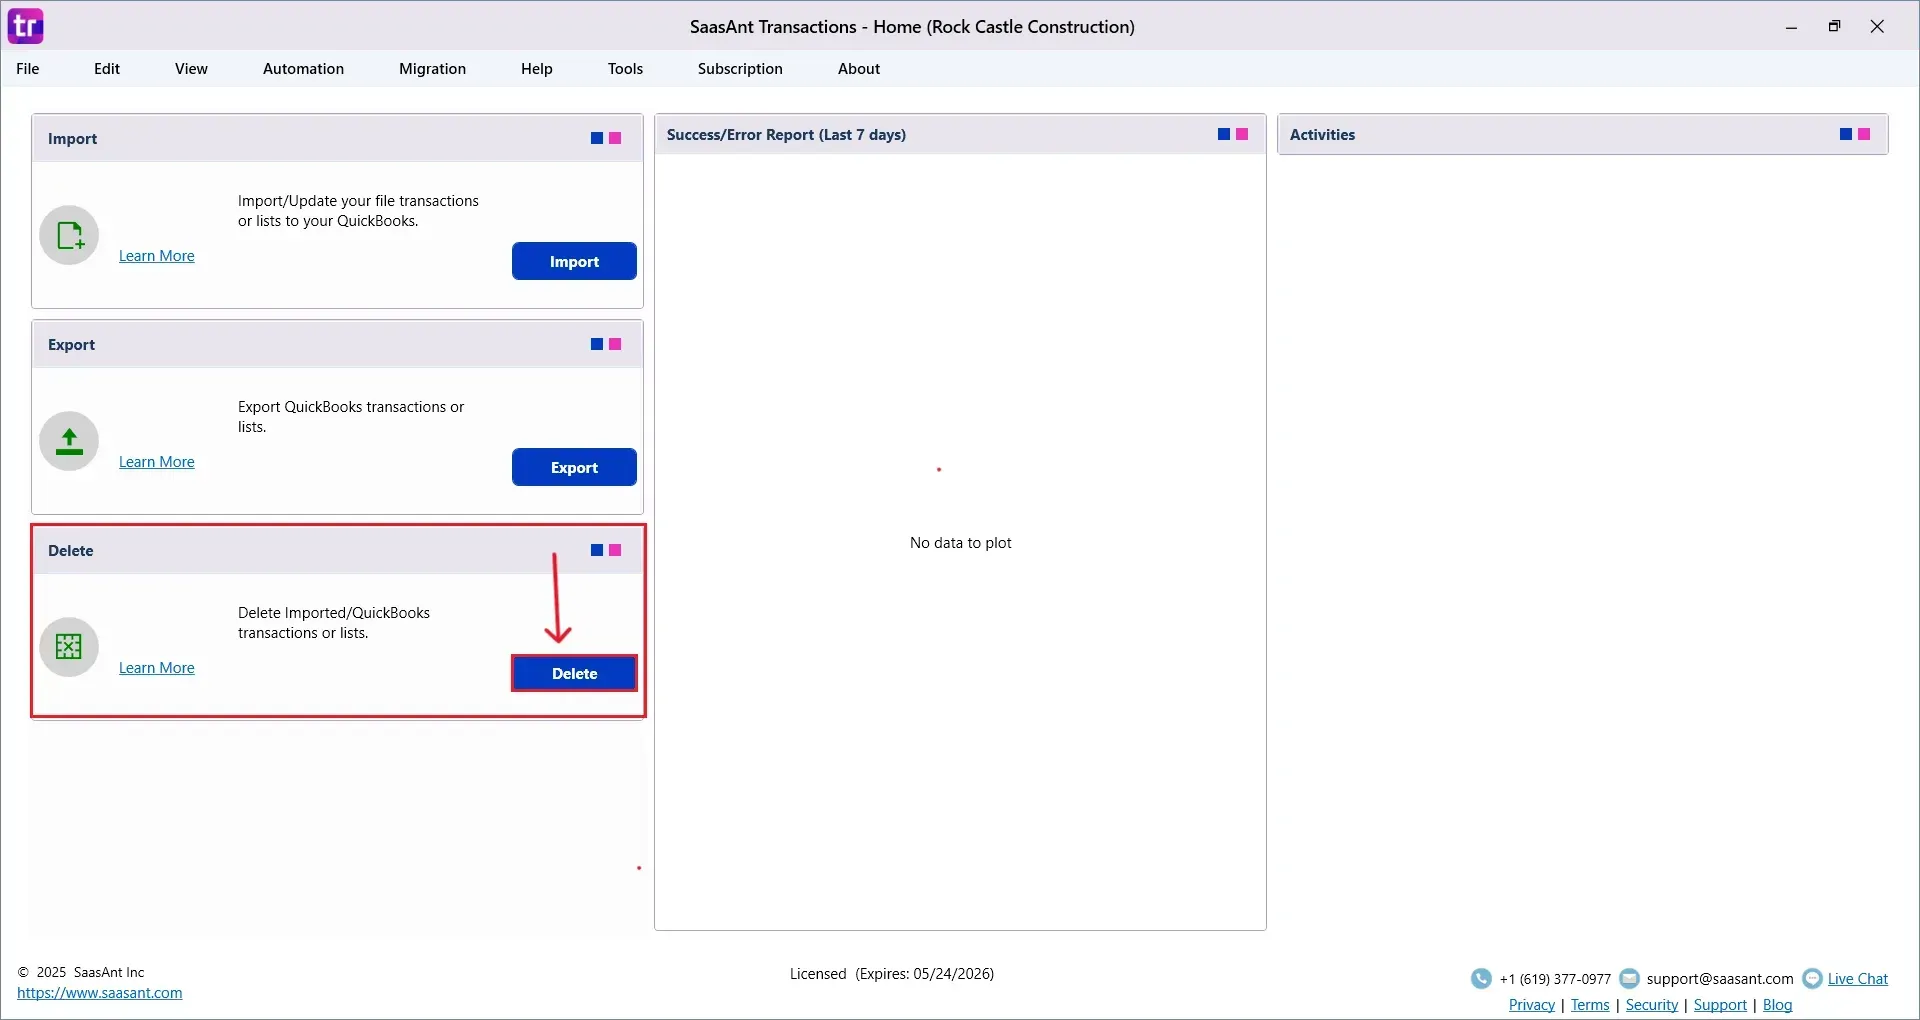
Step 4: Open SaasAnt Transactions
On the SaasAnt dashboard:
On the left side of the SaasAnt Transactions dashboard, you can see the menu bar with various options.
Select “Delete.”
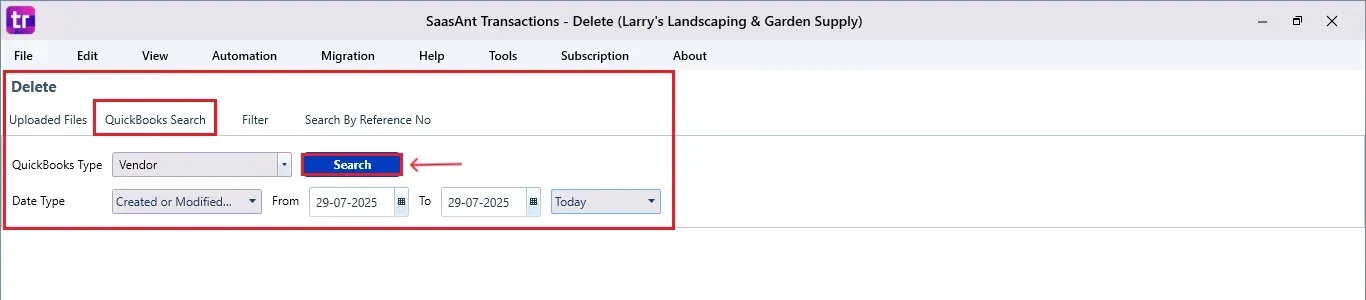
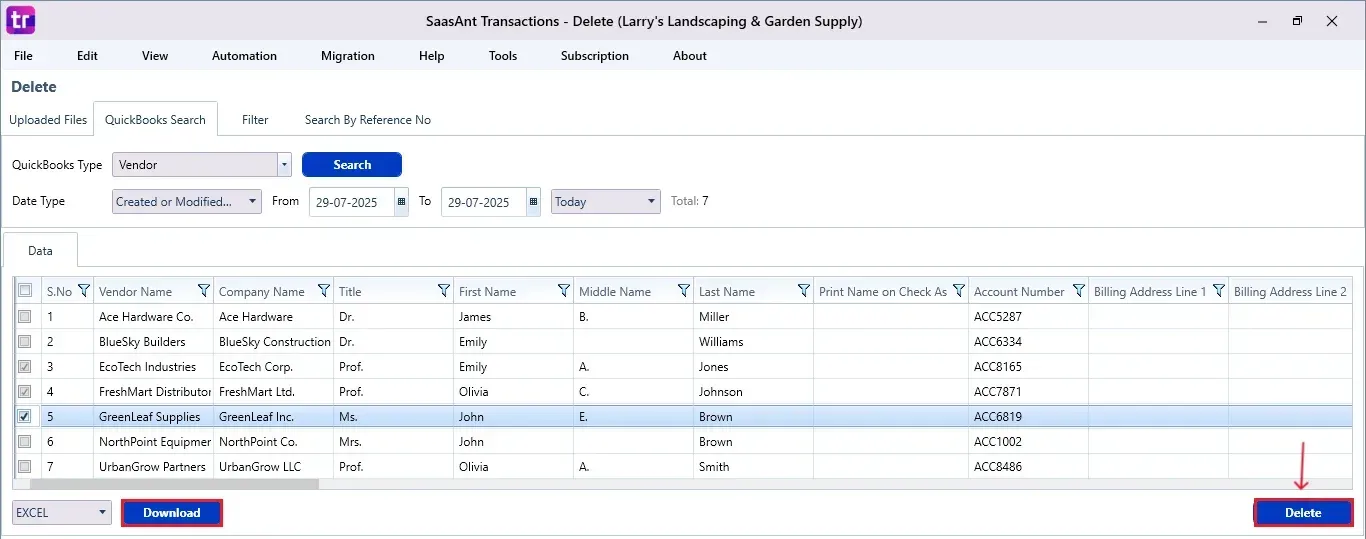
Step 5: Filter and Search
In the Search By dropdown, choose “QuickBooks Search”
Set QuickBooks Type to “Vendor ”
Enter the data type, from date, and to date you want to delete.
Click “Search.”
Step 6: Select Vendor
A list of matching vendors will appear.
Review the list and check the boxes for the ones you want to delete.
At the bottom right, click “Delete.”
Before deleting, remember to back up your Vendor data by clicking the “Download” button at the bottom left.
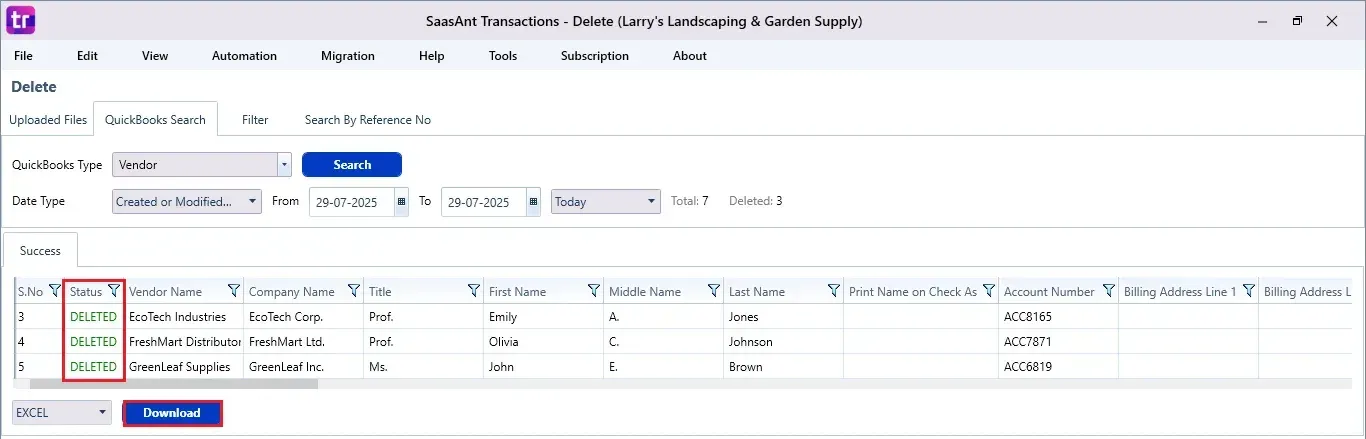
Step 7: Confirm Deletion
Once you click delete, a pop-up will ask you to confirm your deletion.
Click “OK” to proceed.

Step 8: View Deleted Vendor
After deletion, the removed Vendor will be listed on your SaasAnt dashboard.
You can download the deleted Vendor by clicking “Download” at the bottom left.
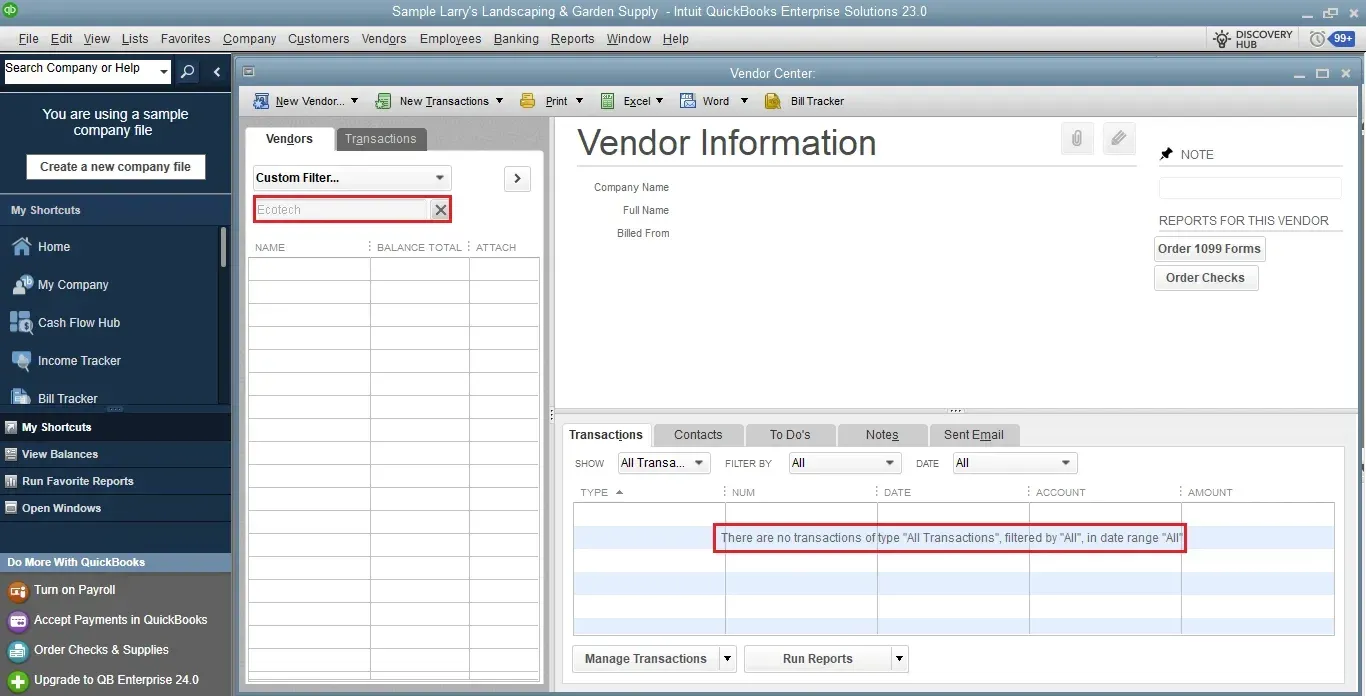
Open QuickBooks Desktop, select the “Vendors” section, and select “Vendor Centre”. You'll notice that the Vendor has been deleted.
Wrap Up
Keeping your vendor list accurate in QuickBooks Desktop doesn’t have to be complicated. By using SaasAnt Transactions Desktop, you can simplify data management, minimize clutter, and save time. Whether you have many vendors or just a few, SaasAnt helps you clean up quickly, safely, and effectively.
By leveraging trustworthy platforms like QuickBooks for your accounting processes and SaasAnt for transaction management and automation, you can enhance the overall workflow, minimize errors, save time, and acquire greater financial insight.
If you have inquiries regarding our products, features, trial, or pricing, or if you require a personalized demo, contact our team today. We are ready to help you find the ideal solution for your QuickBooks workflow.
Frequently Asked Questions
1) Can I delete multiple vendors at once in QuickBooks Desktop using SaasAnt?
Yes, SaasAnt allows you to select and delete multiple vendor entries simultaneously, making it ideal for bulk cleanups.
2) What should I do before deleting vendors?
Make sure to back up your vendor list with the 'Download' option in SaasAnt Transactions so you don’t lose crucial information.
3) Can I recover a vendor after deleting it?
If you have a backup downloaded, you can re-import the vendor into QuickBooks Desktop with SaasAnt.
4) Do I need to have QuickBooks open while using SaasAnt?
Yes, you need to have QuickBooks Desktop and your company file open and available when connecting to SaasAnt Transactions.
Read Also
How To Delete An Invoice In QuickBooks Desktop
How To Delete Purchase Order In QuickBooks Desktop
How To Delete Sales Receipt From Deposit In QuickBooks Desktop
How to Delete Multiple Transactions in QuickBooks Desktop?