How to Delete a Customer in QuickBooks Online
In QuickBooks, “deleting” a customer actually means making them inactive—this hides them from your active lists while preserving their transaction history. Here’s how it works:
Delete (Make Inactive) a Single Customer
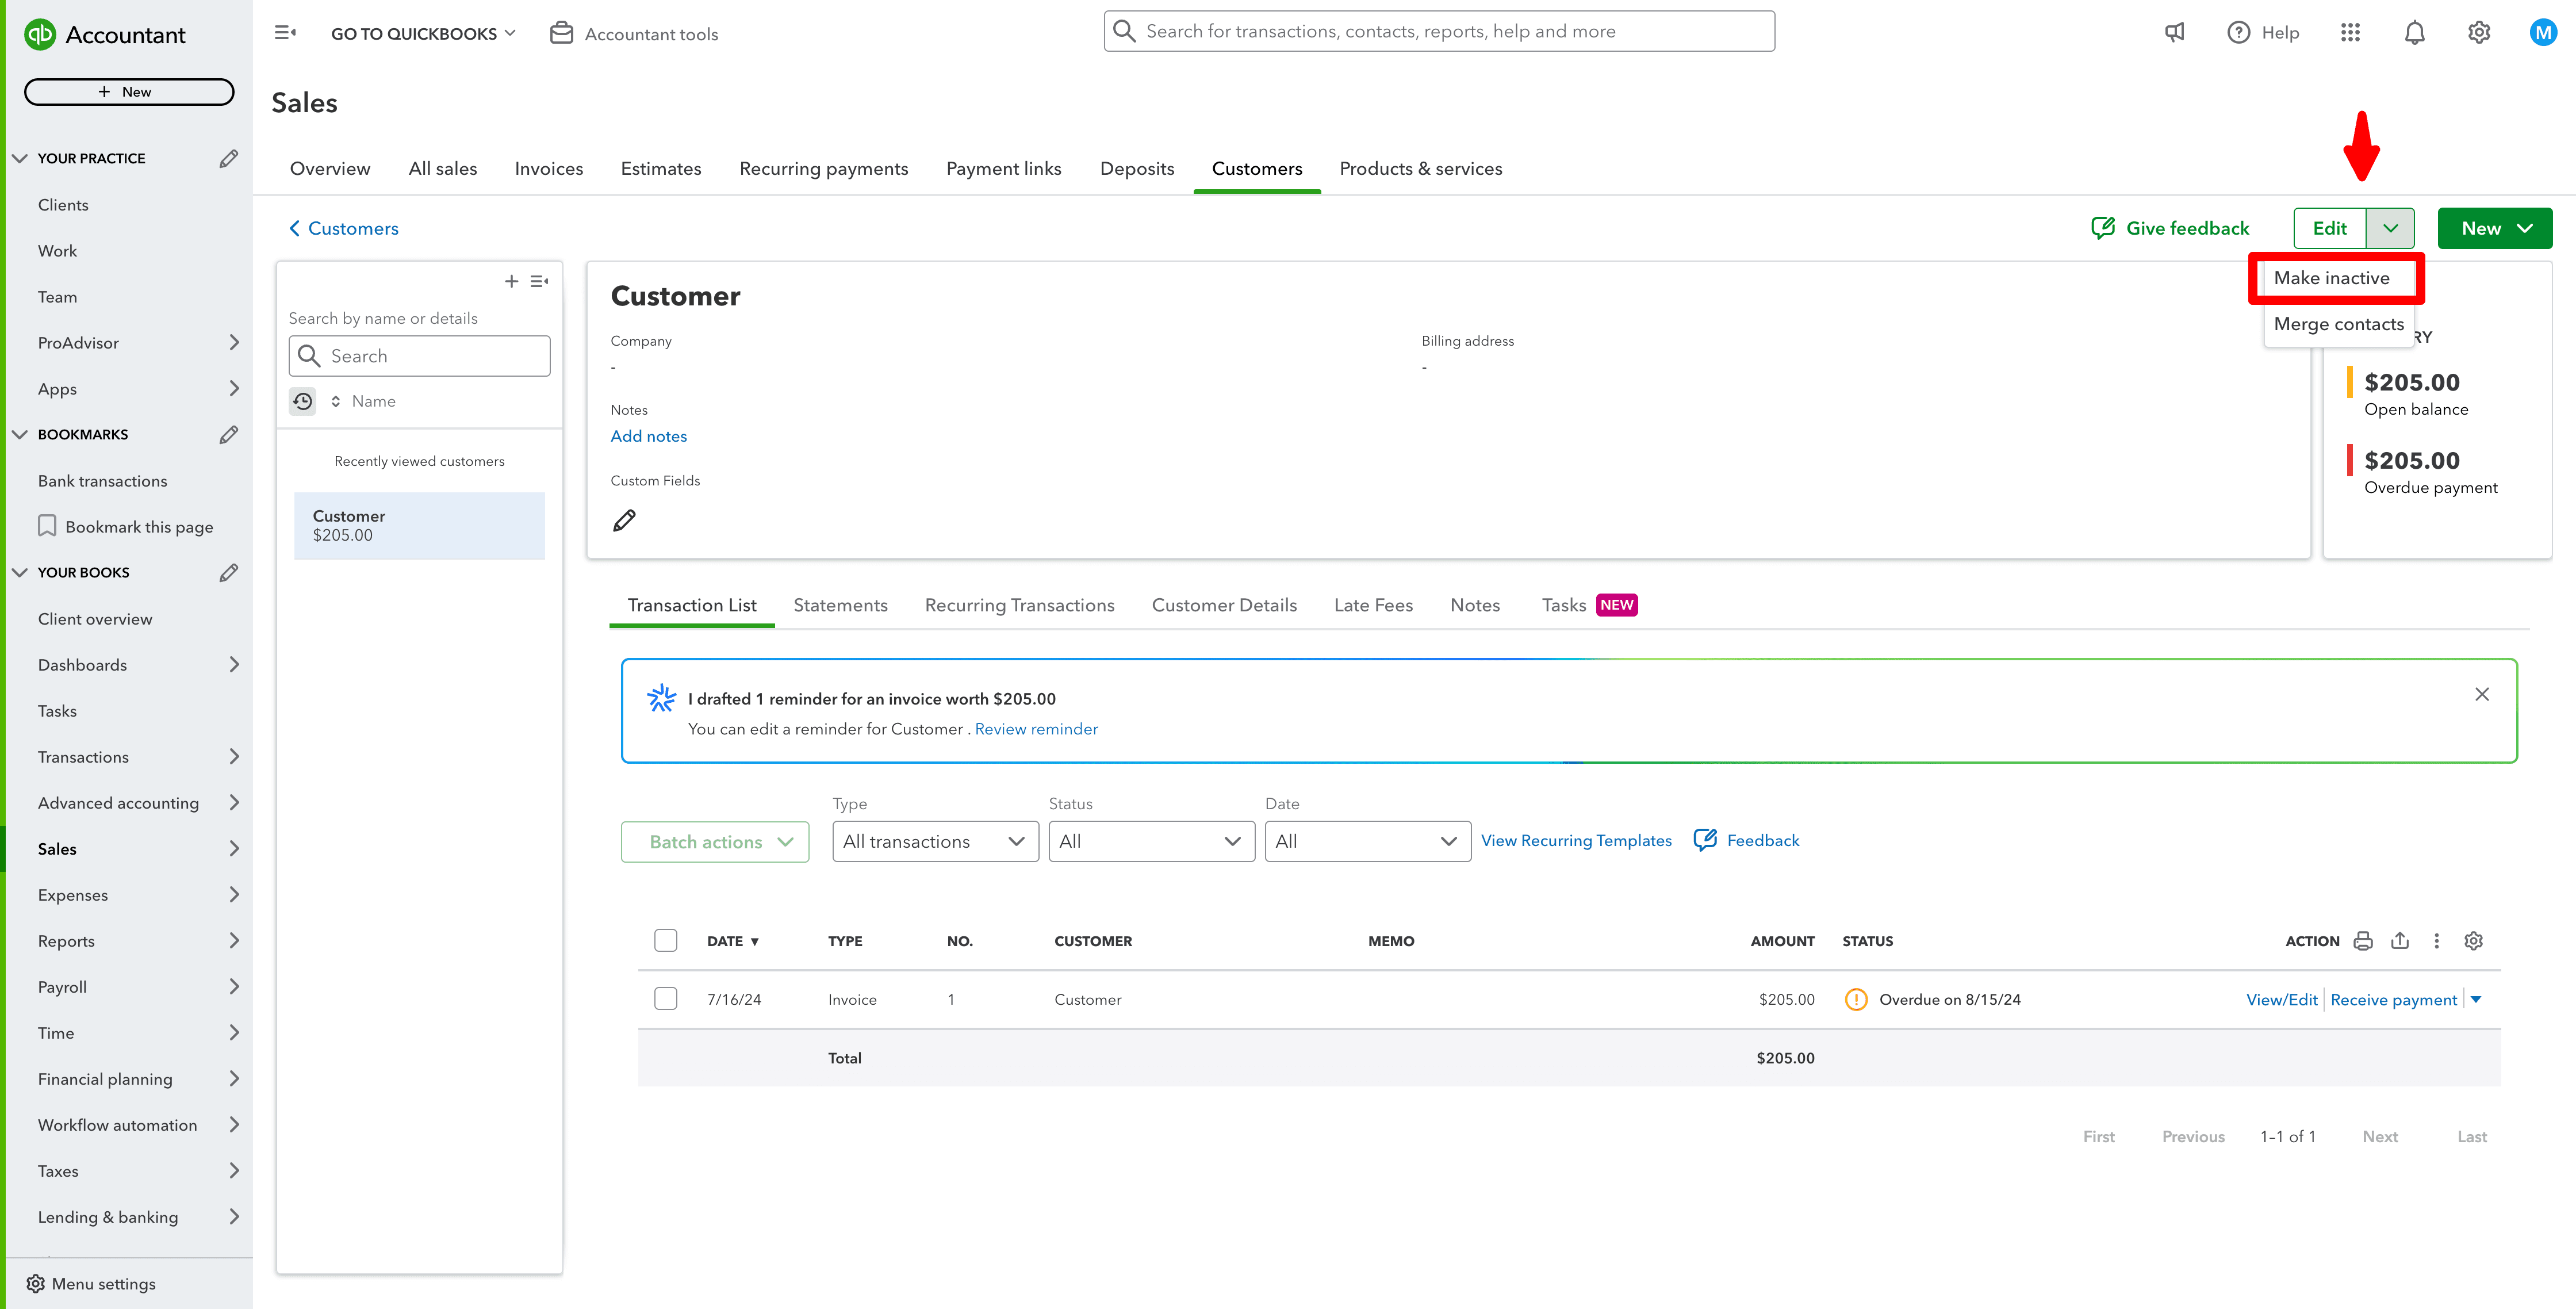
Go to Sales → Customers.
Click the ▼ next to Edit on the customer’s row.
Choose Make inactive, then confirm “Yes, make inactive.”
Delete (Make Inactive) Multiple Customers at Once
In Sales → Customers, check the boxes beside each customer you want to remove.
From the Batch actions ▼ dropdown, select Make inactive.
Click Yes to confirm.
Note: There’s no permanent deletion of active customers with transactions. If you need to fully remove records (and understand you’ll lose related transactions), QuickBooks Online doesn’t support that; only inactive status.
Can You Delete a Customer in QuickBooks Online?
Understanding Deletion Restrictions
QuickBooks Online prevents the permanent deletion of customers with associated transactions to maintain data integrity. Instead, you can:
Make the customer inactive, which hides them from active lists while preserving transaction history.
Merge duplicate customers to consolidate records and avoid duplicates.
Deleting Customers Without Transactions
If a customer has no linked transactions, you may be able to delete them by:
Ensuring there are no pending or completed transactions tied to the customer.
Navigating to Customer Center.
Selecting the customer and clicking Delete Customer:Job.
If the option to delete is unavailable, QuickBooks requires you to use the "Make Inactive" option instead.
Troubleshooting: QuickBooks Won’t Let Me Delete a Customer
Common Problems and Solutions
Customer Has Unbilled Charges or Open Transactions
Navigate to Sales > All Sales.
Locate any unbilled charges or open invoices linked to the customer.
Either finalize the charges by billing them or delete them if they are not needed.
System Limitation on Permanent Deletion
If QuickBooks does not allow deletion due to past transactions, making the customer inactive is the best option.
Accidentally Deleted a Customer?
If you need to restore an inactive customer, go to Customers, filter the list to show Inactive Customers, select the customer, and choose Make Active.
Limitations of QuickBooks and Benefits of Using SaasAnt
QuickBooks Online Limitations
Cannot delete customers with transaction history
No bulk deletion option
Inactive customers still count toward list limits
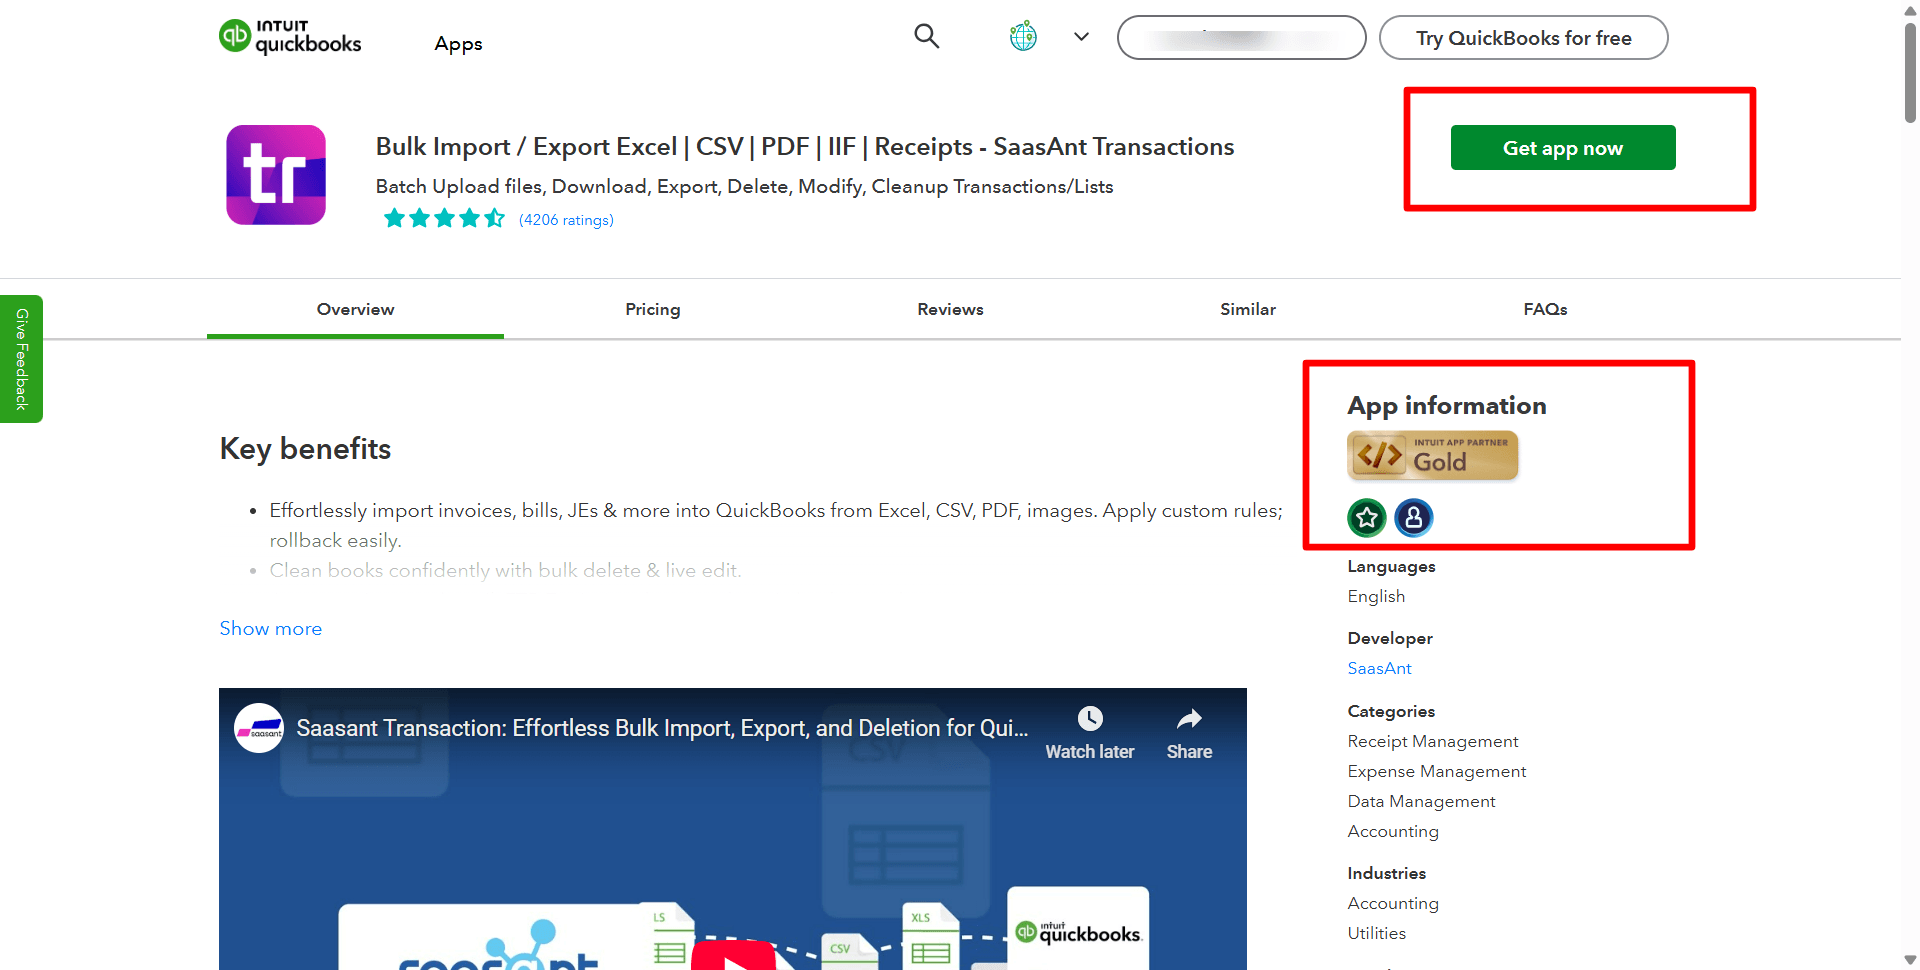
SaasAnt is an application that allows you to bulk delete multiple customers at once.
How to Delete Customers in QuickBooks Online: Step-by-Step Guide
If you need to delete multiple customers or completely remove customer records in bulk, SaasAnt Transactions, an Accountant's Favorite and User's choice award-winning app, provides an efficient solution. Follow these steps to delete customers using SaasAnt:
Log in to SaasAnt Transactions: In the QuickBooks App Store, search for SaasAnt Transactions, and log in to your account.
Connect to QuickBooks Online: Ensure your QuickBooks Online account is linked to SaasAnt Transactions.
Navigate to Delete Customers:
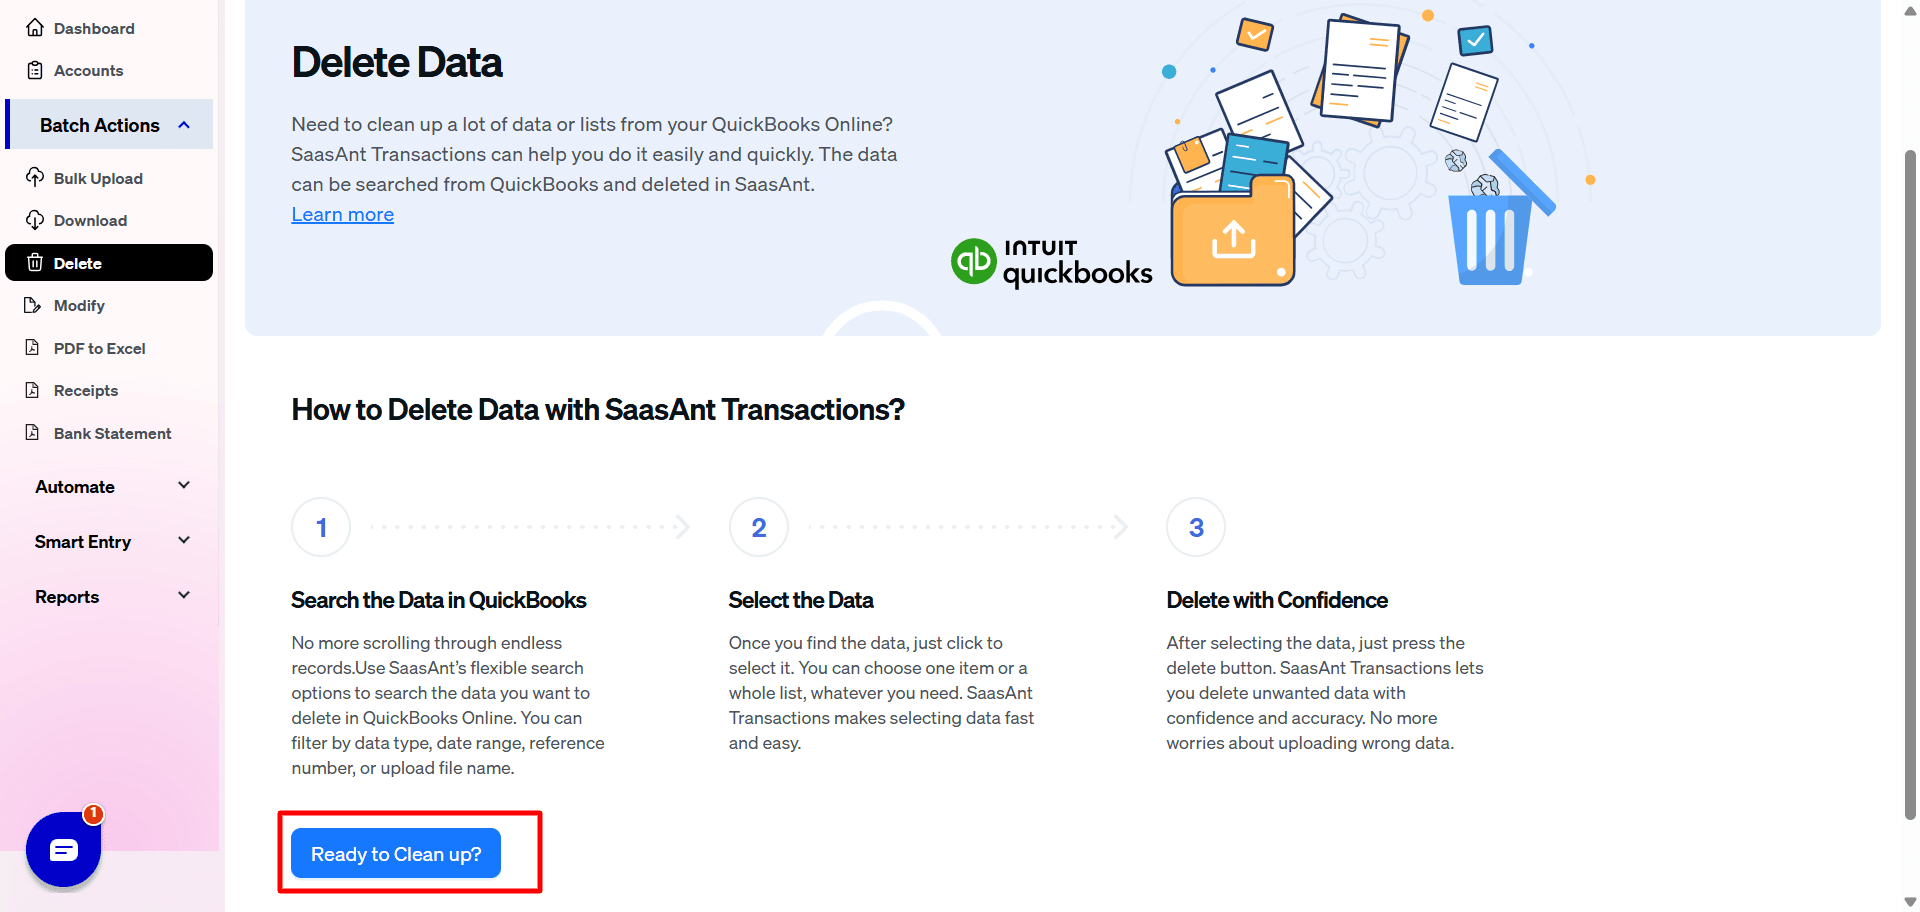
In the SaasAnt Transactions dashboard, go to the Delete section.
Choose Customers from the list of transaction types.
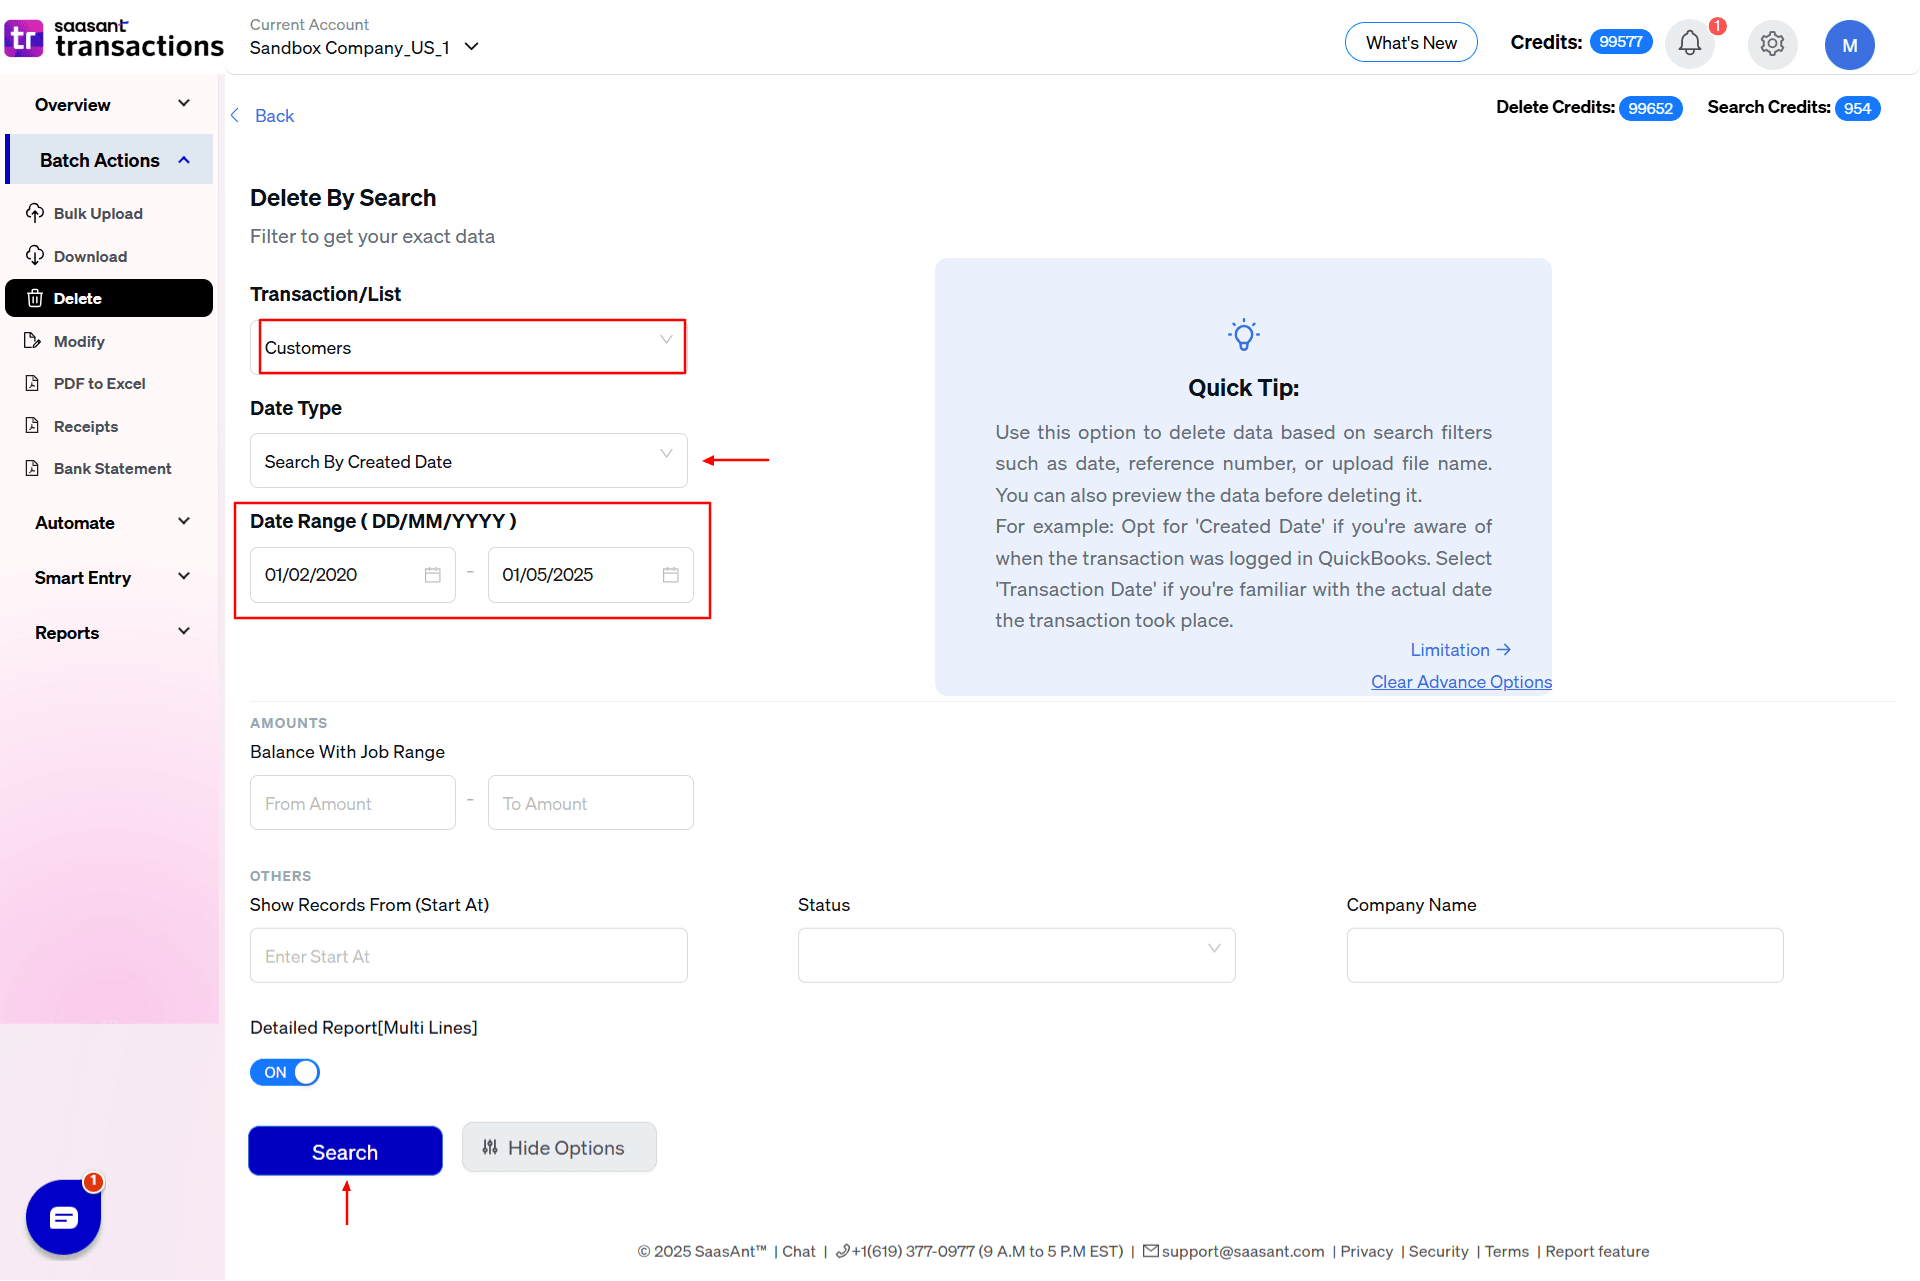
Search Customers to Delete:
Search for the customers you want to delete using the filters: date range, status, and name.
Confirm Deletion:
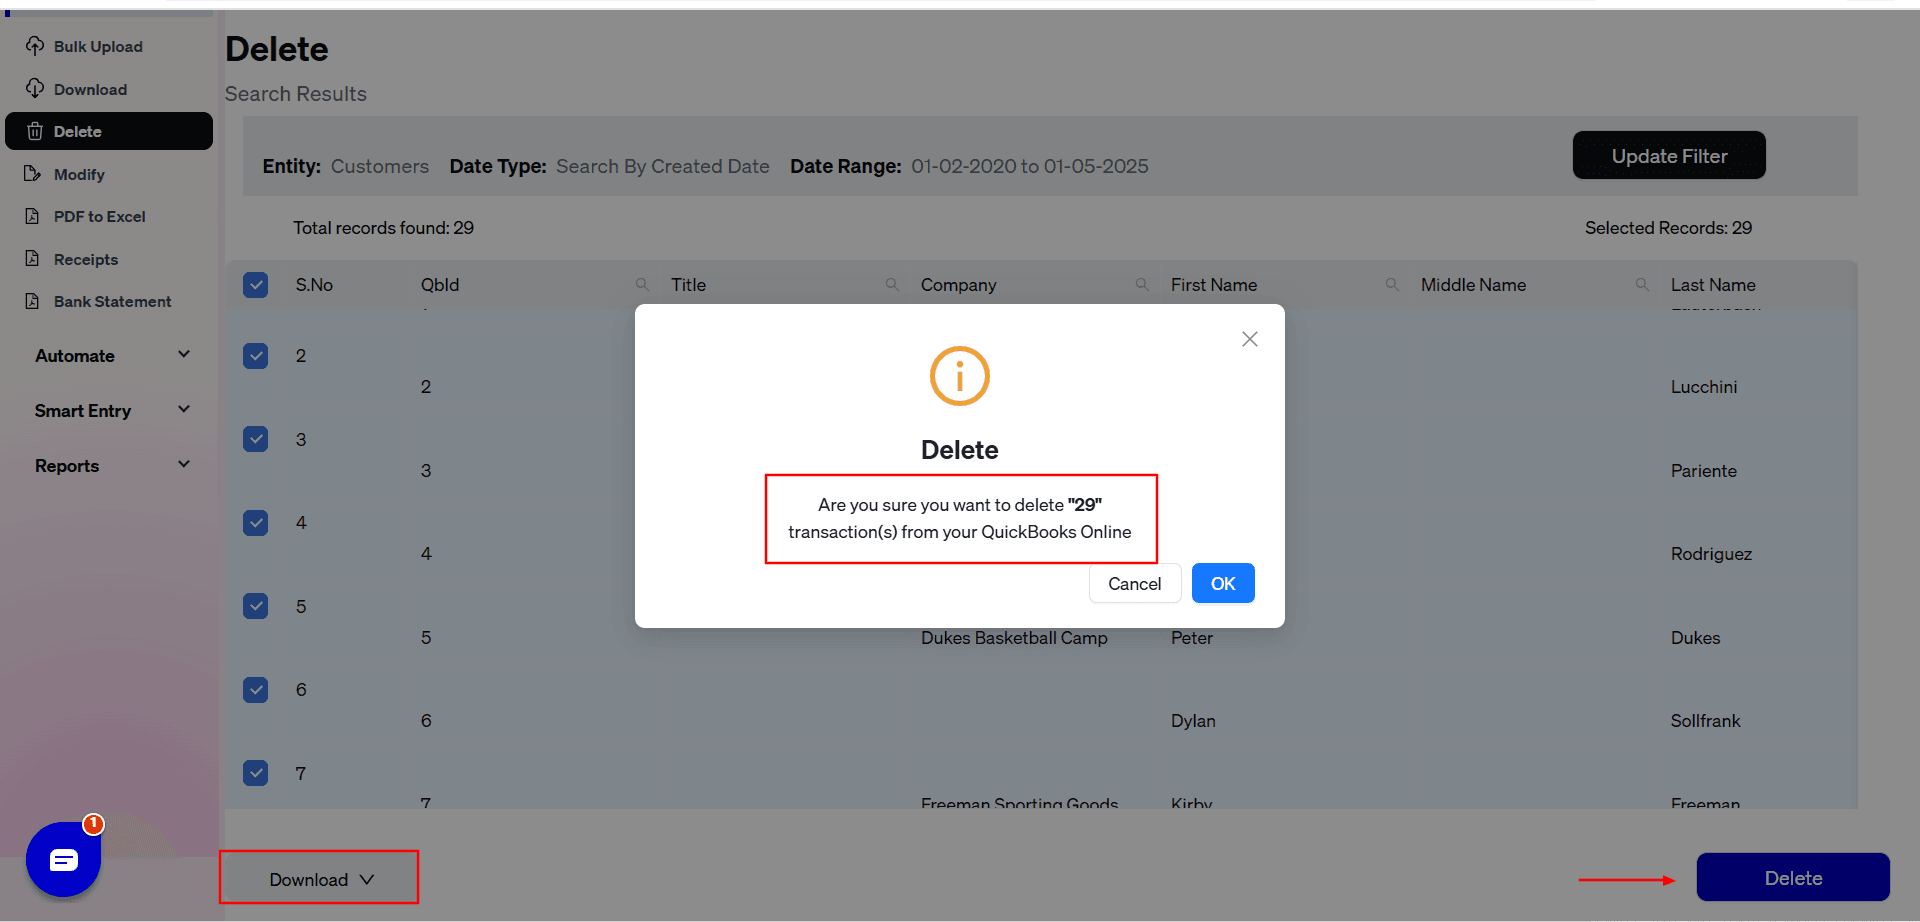
Review the selected customers' results page and choose the ones you want to delete, or select them all to make all of them inactive.
Confirm the deletion action in the prompt.
Verify Deletion in QuickBooks Online:
Log in to QuickBooks Online and check the Customers List to ensure the customers have been successfully removed.
Note: Deleting customers using SaasAnt is irreversible. Ensure you have backed up your data before proceeding, so you can import it later if needed.
FAQs
How to Delete a Customer Payment or Credit in QuickBooks Online?
Go to Sales > Customers.
Locate the payment or credit linked to the customer.
Open the transaction and select More > Delete.
Confirm deletion.
How to Delete Customer Messages in QuickBooks Online?
Navigate to Settings > Audit Log.
Locate customer-related messages.
Use the delete option where available.
How to Delete a Customer’s Credit Card from QuickBooks Online?
Go to Sales > Customers.
Select the customer and edit their payment details.
Remove the stored credit card information and save changes.
Recommended Reading: