A Step-by-Step Guide to Migrating from QuickBooks Desktop to Online
In this article, we’ll see the step-by-step guide to migrating from QuickBooks Desktop to QuickBooks Online through SaasAnt Transactions.
Migrating from QuickBooks Desktop to Online Using SaasAnt
Migrating from QuickBooks Desktop to Online is a structured process involving several vital steps. Here’s a straightforward guide to make this transition smooth
Step 1: Exporting Data from QuickBooks Desktop
Begin by extracting your data from QuickBooks Desktop. It can be done directly within QuickBooks Desktop (via Transactions -> Customer Centre -> Excel -> Export Transactions/Customer List) or use SaasAnt Transactions for a more streamlined process.
How to Export via SaasAnt Transactions
Install SaasAnt Transactions from the official website.
Launch SaasAnt, and connect to QuickBooks by clicking ‘File’ then ‘Connect to QuickBooks.’
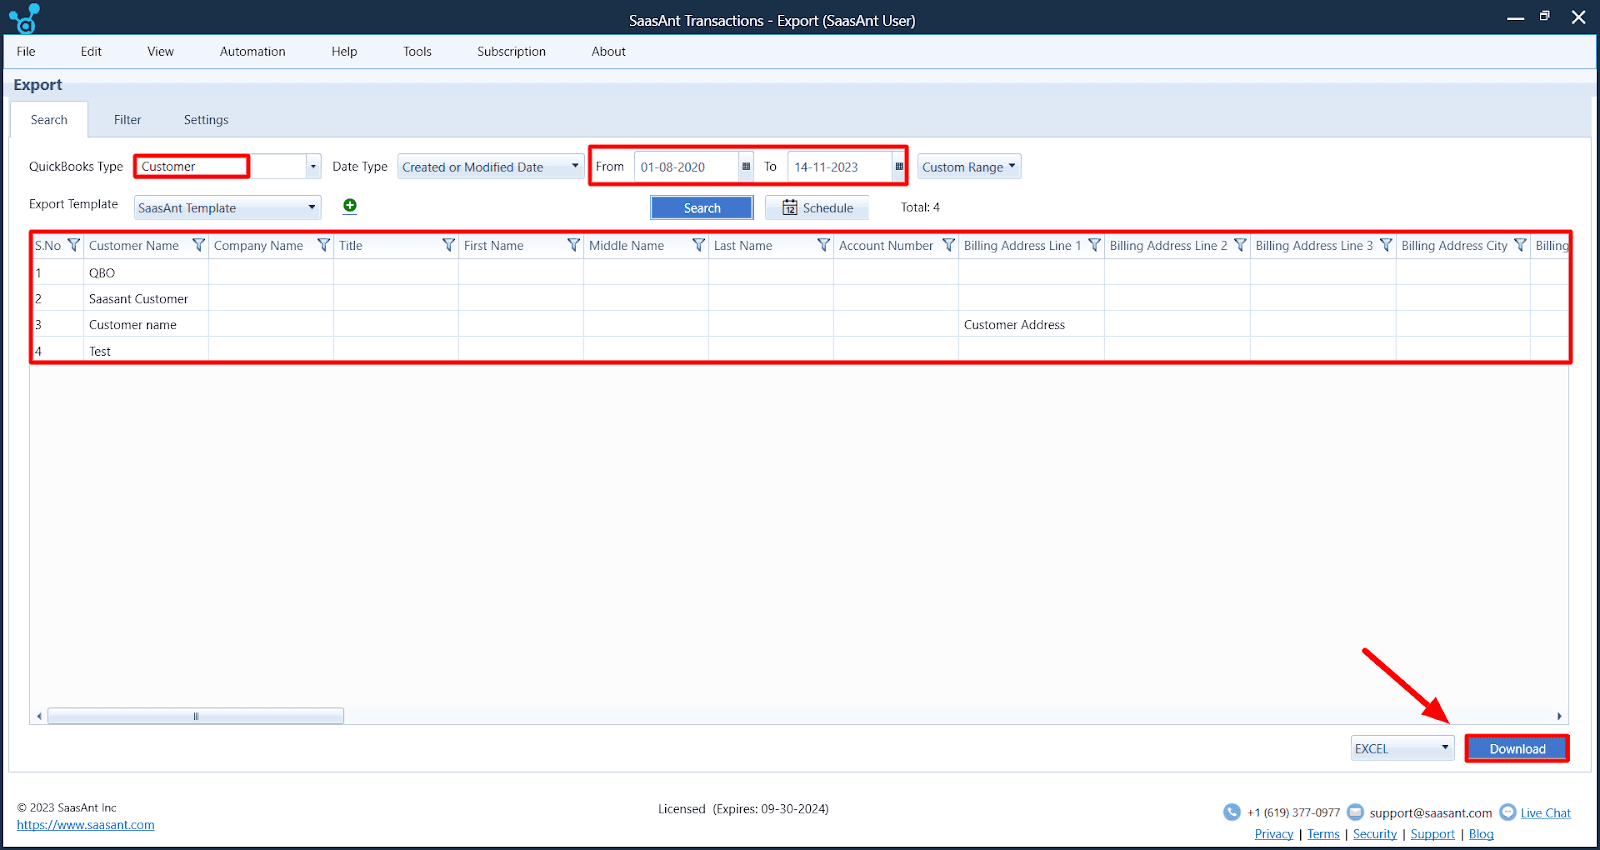
Choose ‘Export’ to start exporting your transactions. Specify the type of transactions, template, and date range, then download in a format like Excel or CSV.
Step 2: Preparing and Verifying Excel Data
Once exported, prepare your Excel sheet to match your business requirements. Ensure the file format is compatible with QuickBooks Online (CSV, Excel, or IIF).
Clean your data: Check for and remove any duplicates, missing transactions, or incorrect amounts.
Align your Excel structure with QuickBooks Online’s format, checking column headers, data types, and formats.
Step 3: SaasAnt’s Excel Template
Use SaasAnt’s Excel Template for a smooth migration, especially to avoid any mismatch in column mapping. Custom templates are usable but can lead to errors if not aligned correctly.
Fill the SaasAnt template with your exported transactions, ensuring all data, like invoices and journal entries, is correctly placed and the accounts are balanced.
Step 4: Setting Up QuickBooks Online
Create a new QuickBooks Online account, especially if you have an existing one, to prevent confusion and errors during the import.
Customize your QuickBooks Online settings (under Gear Icon -> Accounts and Settings) to reflect your business’s specifics, like chart of accounts, tax rates, and user permissions.
Step 5: Importing Data into QuickBooks Online
Prepare your data using the SaasAnt template and import it into QuickBooks Online via SaasAnt Transactions Online.
How to Import with SaasAnt
Log into your QuickBooks Online account and go to the ‘Apps’ section to find ‘SaasAnt Transactions.’
Connect SaasAnt to your QuickBooks Online account.
Start the import by selecting ‘New Import,’ uploading your transaction files, and ensuring correct field alignment during mapping.
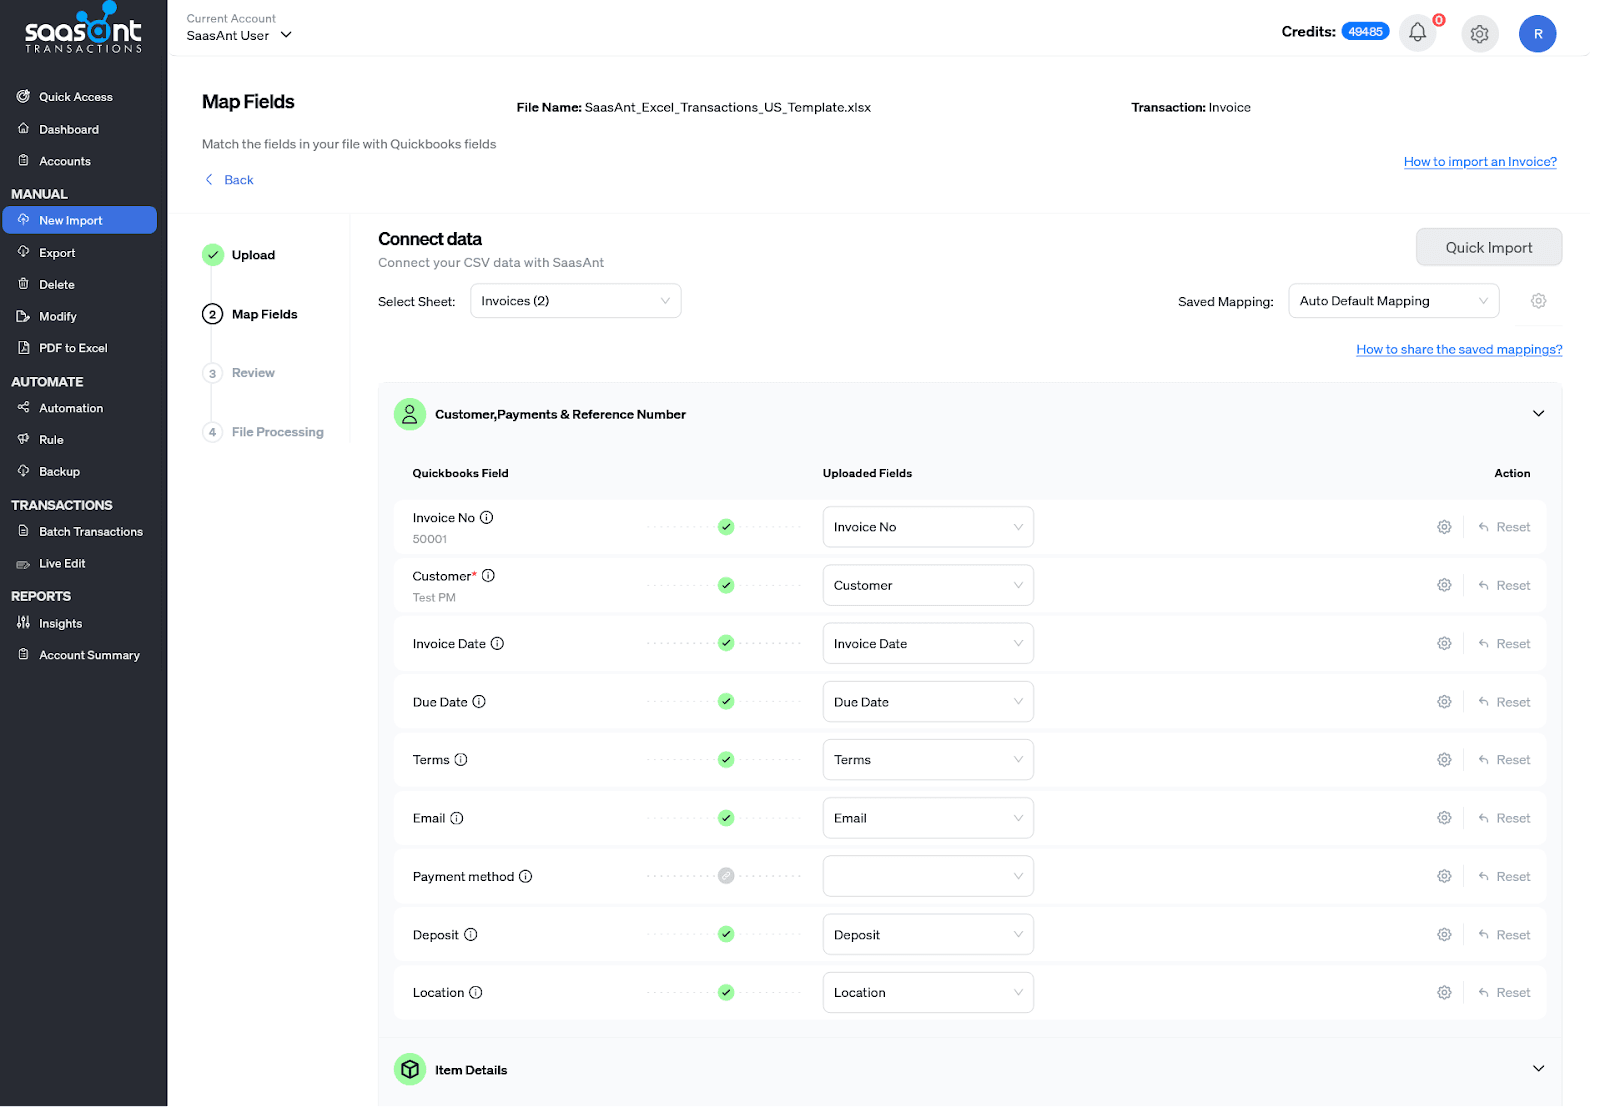
Review the mapping setup, commence the import, and validate the data in QuickBooks Online for accuracy.
Conclusion
In conclusion, migrating from QuickBooks Desktop to Online involves exporting data from QuickBooks Desktop, either directly or through SaasAnt Transactions, followed by careful preparation and cleansing of the exported data to ensure integrity. SaasAnt’s Excel Template is essential for accurate data mapping and avoiding discrepancies during import. Setting up and customizing a new QuickBooks Online account is crucial to avoid conflicts with existing data. The import into QuickBooks Online, guided by SaasAnt Transactions, must be executed precisely, ensuring correct data mapping and validation post-import to ensure a seamless and efficient data transition.
FAQ(Frequently Asked Questions)
Q1. Can I directly export data from QuickBooks Desktop to Online?
You can directly export data from QuickBooks Desktop through the SaasAnt Transactions, where you can export transactions or customer lists to Excel formats and prepare for import into QuickBooks Online.
Q2. What role does SaasAnt Transactions play in the migration process?
SaasAnt Transactions facilitates exporting and importing from QuickBooks. It connects to QuickBooks Desktop and Online, offers customizable exports, and has a robust import.
Q3. How crucial is the data format and structure during migration?
The data format and structure are vital. Your data must be in a QuickBooks Online-compatible format (CSV, Excel, or IIF) with a structure that matches QuickBooks Online’s formatting requirements. It includes correct column headers, data types, and formats to ensure a smooth import.
Q4. Should I use the SaasAnt Excel Template for migration?
Using SaasAnt’s Excel Template is recommended, primarily to ensure the correct mapping of data fields. It helps prevent discrepancies if the column mapping in a custom template doesn’t align with QuickBooks Online’s structure.
Q5. What are the key steps in setting up and importing data into QuickBooks Online?
After exporting and preparing your data, set up a new QuickBooks Online account, customizing settings like chart of accounts and tax rates. Then, use SaasAnt Transactions to import your data. It involves uploading your transaction files, correctly mapping the fields, and reviewing the data post-import to ensure accuracy and integrity.
Q6. Have users experienced issues with file size limitations when migrating to QuickBooks Online?
Users may experience file size issues when migrating if they have a file size greater than 3 MB when importing files or if they have more than 5000 lines using SaasAnt Transactions integrated with QuickBooks Online for migration. Ensure that you have a legitimate file size and the maximum number of lines for migration.