How to Delete Multiple Expenses in QuickBooks Online
Manually deleting multiple expenses in QuickBooks Online can be a frustrating, time-consuming chore—especially when you’re juggling duplicates, errors, or outdated transactions. Small business owners, accountants, and bookkeepers know the struggle: QuickBooks Online lacks a built-in bulk deletion feature, leaving you to handle each expense one by one. But there’s a better way.
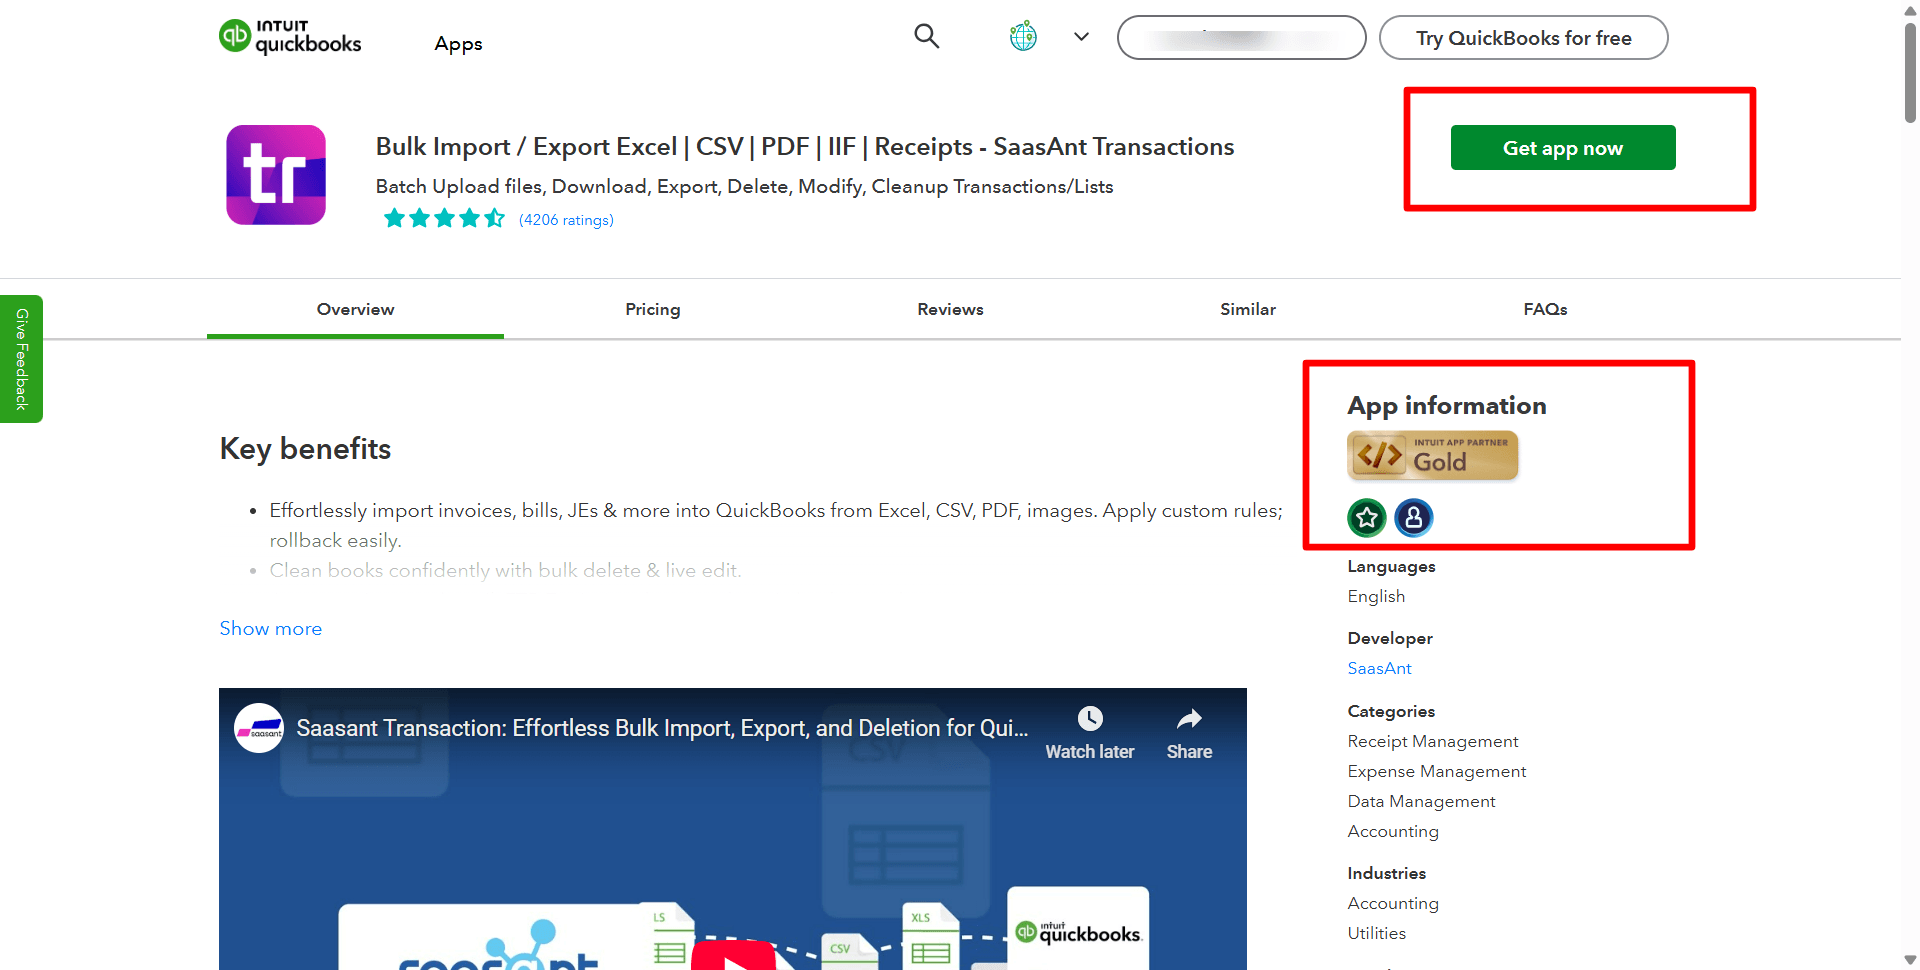
Say hello to SaasAnt Transactions, an Accountant's Favorite and User's choice award-winning app that simplifies bulk expense management. With its powerful automation, advanced filters, and data backup options, you can delete hundreds of expenses in minutes—without the stress. In this guide, we’ll show you exactly how to use SaasAnt Transactions to clean up your QuickBooks Online expenses, highlight its standout benefits, and share expert tips to keep your books spotless.
Contents
How to Delete Multiple Expenses in QuickBooks Online: Quick Instructions
Why Deleting Multiple Expenses Is a Must
How to Delete Multiple Expenses in QuickBooks Online: Step-by-Step Guide
Why SaasAnt Transactions Beats Manual Deletion
Conclusion
FAQs
How to Delete Multiple Expenses in QuickBooks Online: Quick Instructions
Log in to SaasAnt Transactions with your Intuit credentials.
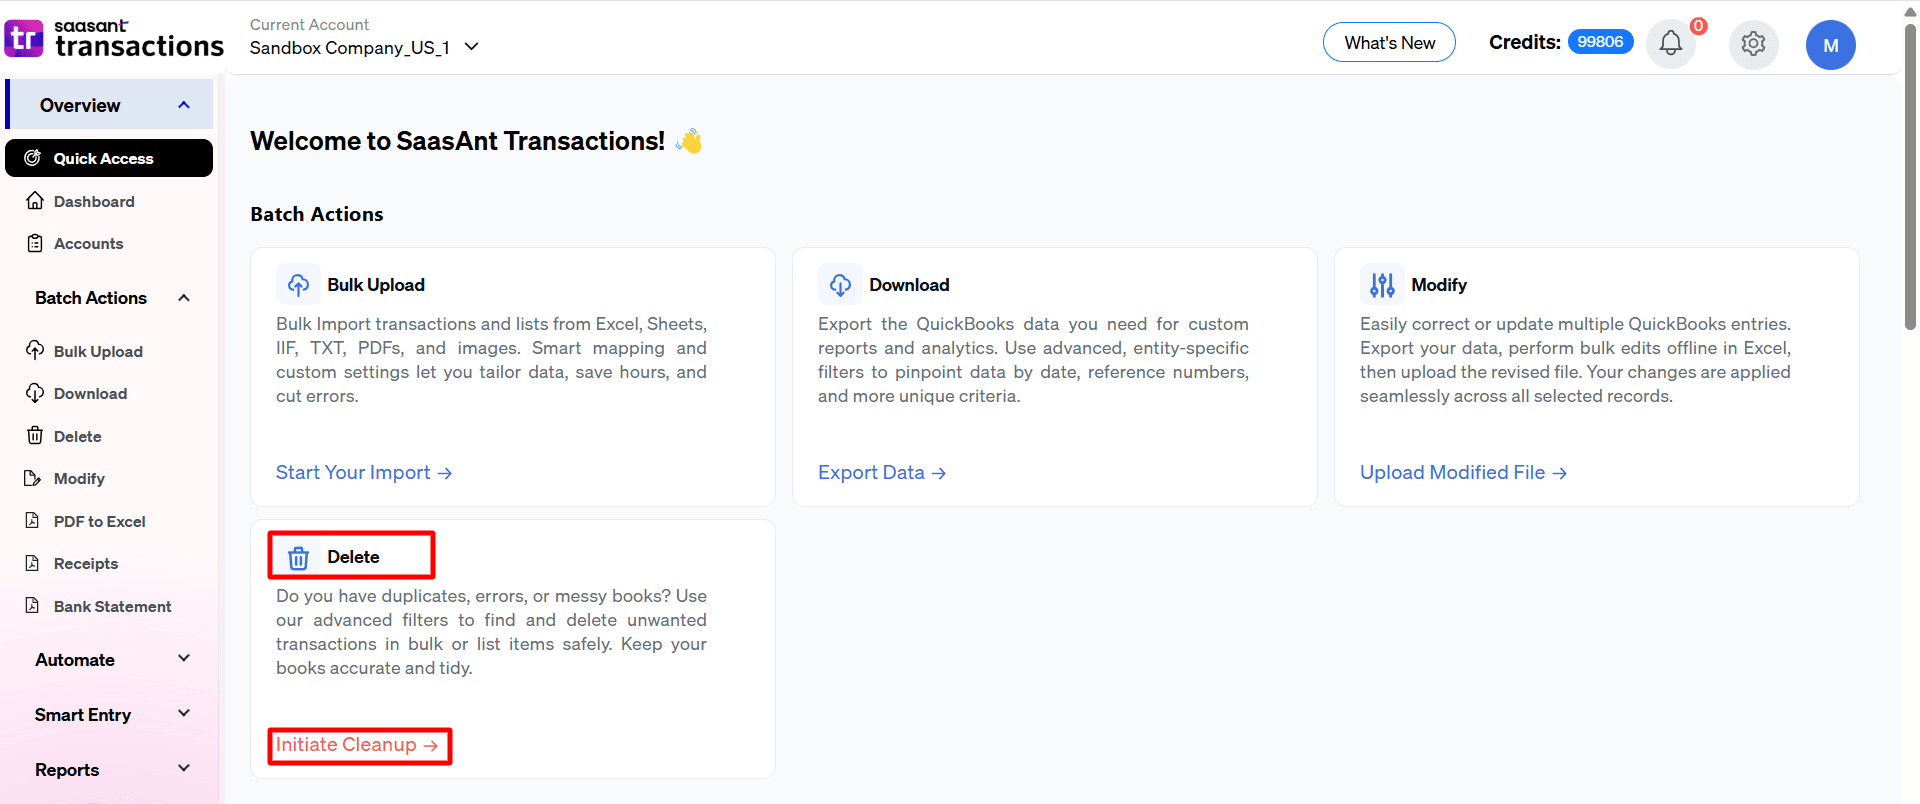
Navigate to 'Delete' and select 'Initiate Cleanup.'
Identify and select unwanted transactions/lists with advanced filters
Select the expenses you wish to delete, click 'Delete,' and confirm by clicking 'Ok.'
Why Deleting Multiple Expenses Is a Must
Messy expense records can wreak havoc on your business. Whether it’s duplicate entries from a bank feed, misclassified transactions, or old data clogging your ledger, these issues can lead to:
Inaccurate financial reports that skew your decision-making
Audit headaches from missing or unclear records
Wasted time fixing errors down the line
SaasAnt Transactions solves these problems by streamlining the deletion process, so you can focus on growing your business—not wrestling with your books.
How to Delete Multiple Expenses in QuickBooks Online: Step-by-Step Guide
Let’s look into the detailed step-by-step process of deleting multiple expenses in QuickBooks Online using SaasAnt Transactions. SaasAnt offers a user-friendly interface and makes the process straightforward.
Step 1: Connect to SaasAnt Transactions
Connect your QuickBooks account with SaasAnt Transactions. Then, click on the company you want to delete the transaction from.
Step 2: Initiate Cleanup
Click on Delete and select ‘Initiate Cleanup.’
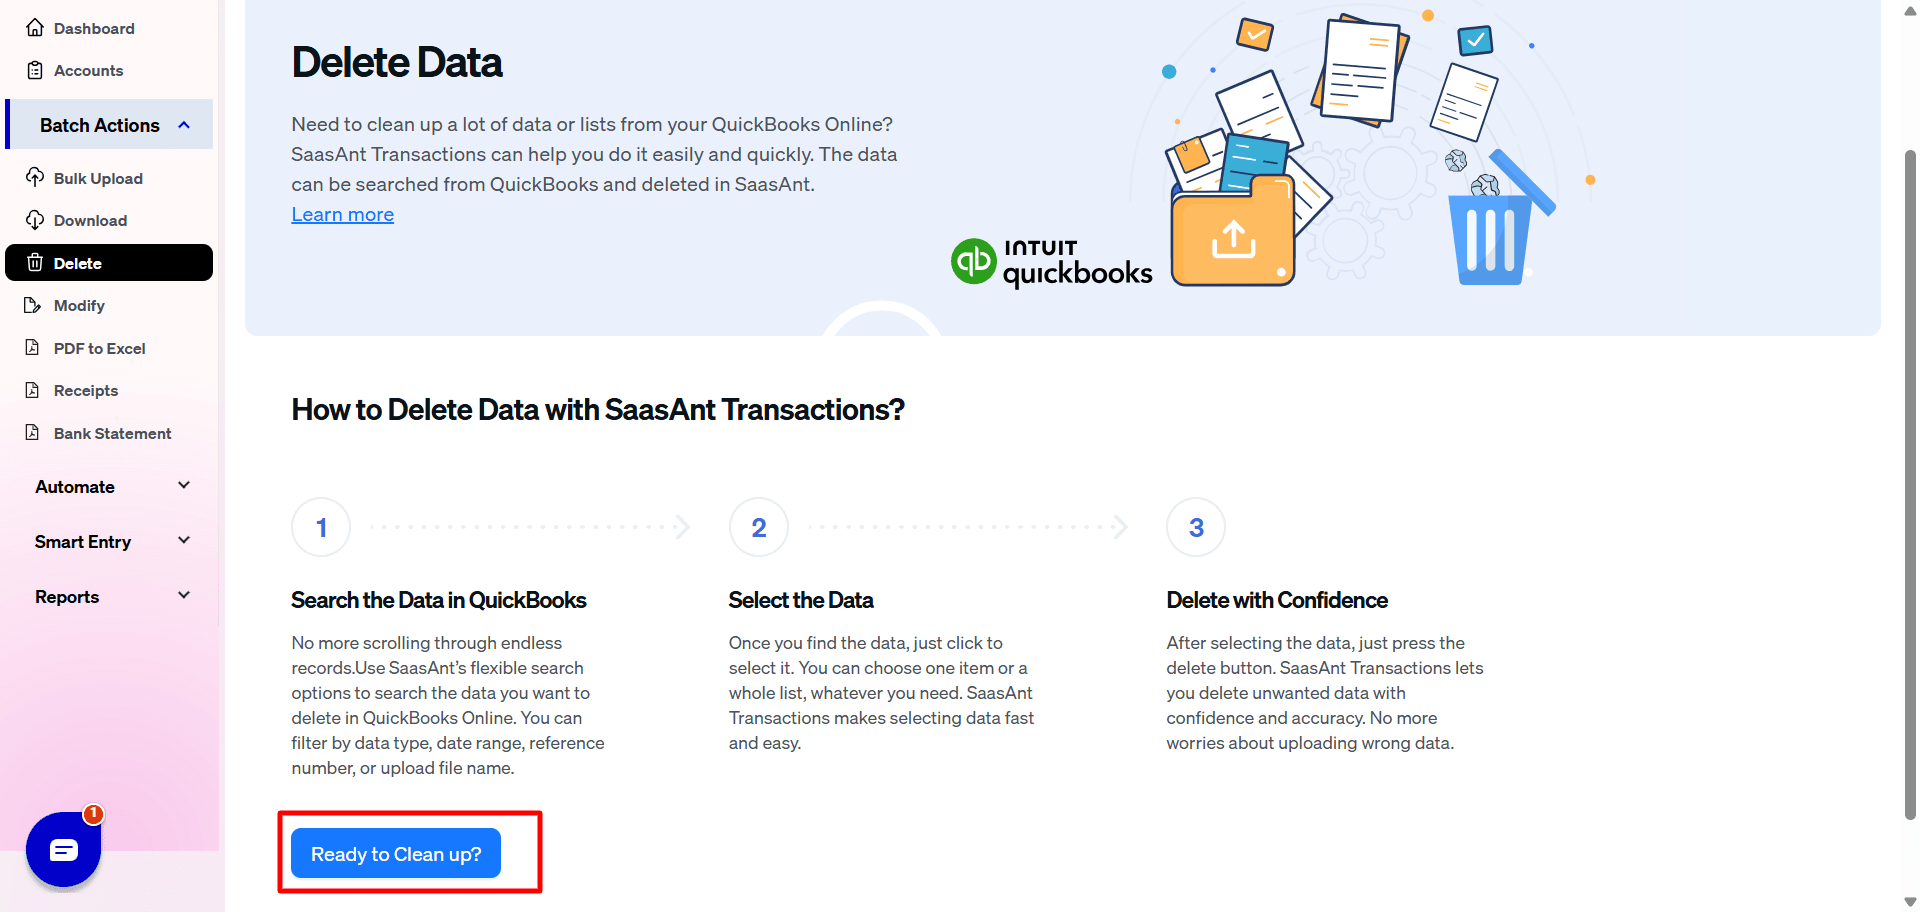
Step 3: Prepare for Deletion
Click ‘Ready to clean up,’ select ‘Delete by Searching,’ and click ‘Next.’
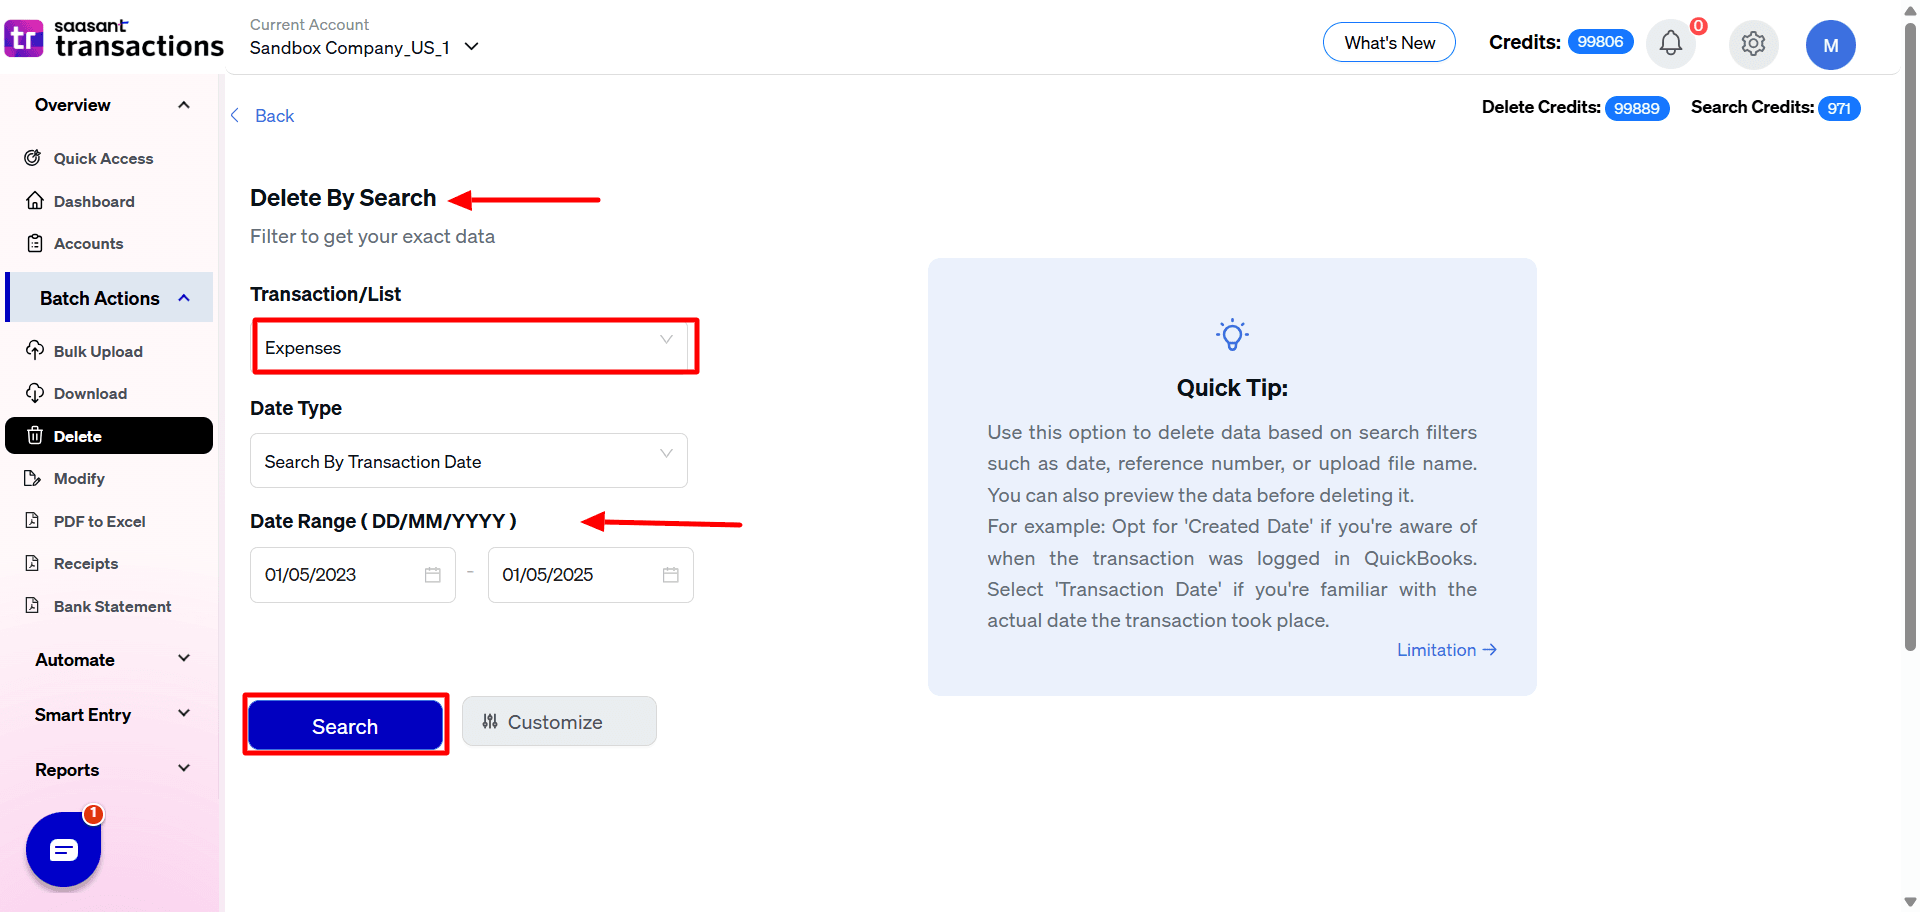
Step 4: Select Transactions
Now choose ‘Expenses’ from the transaction/list, select ‘Search by Transaction Date,’ choose the date range you want to delete the transaction and click ‘Search.’ Also, you can use the advanced filter to search filters such as date, reference number, or upload file name.
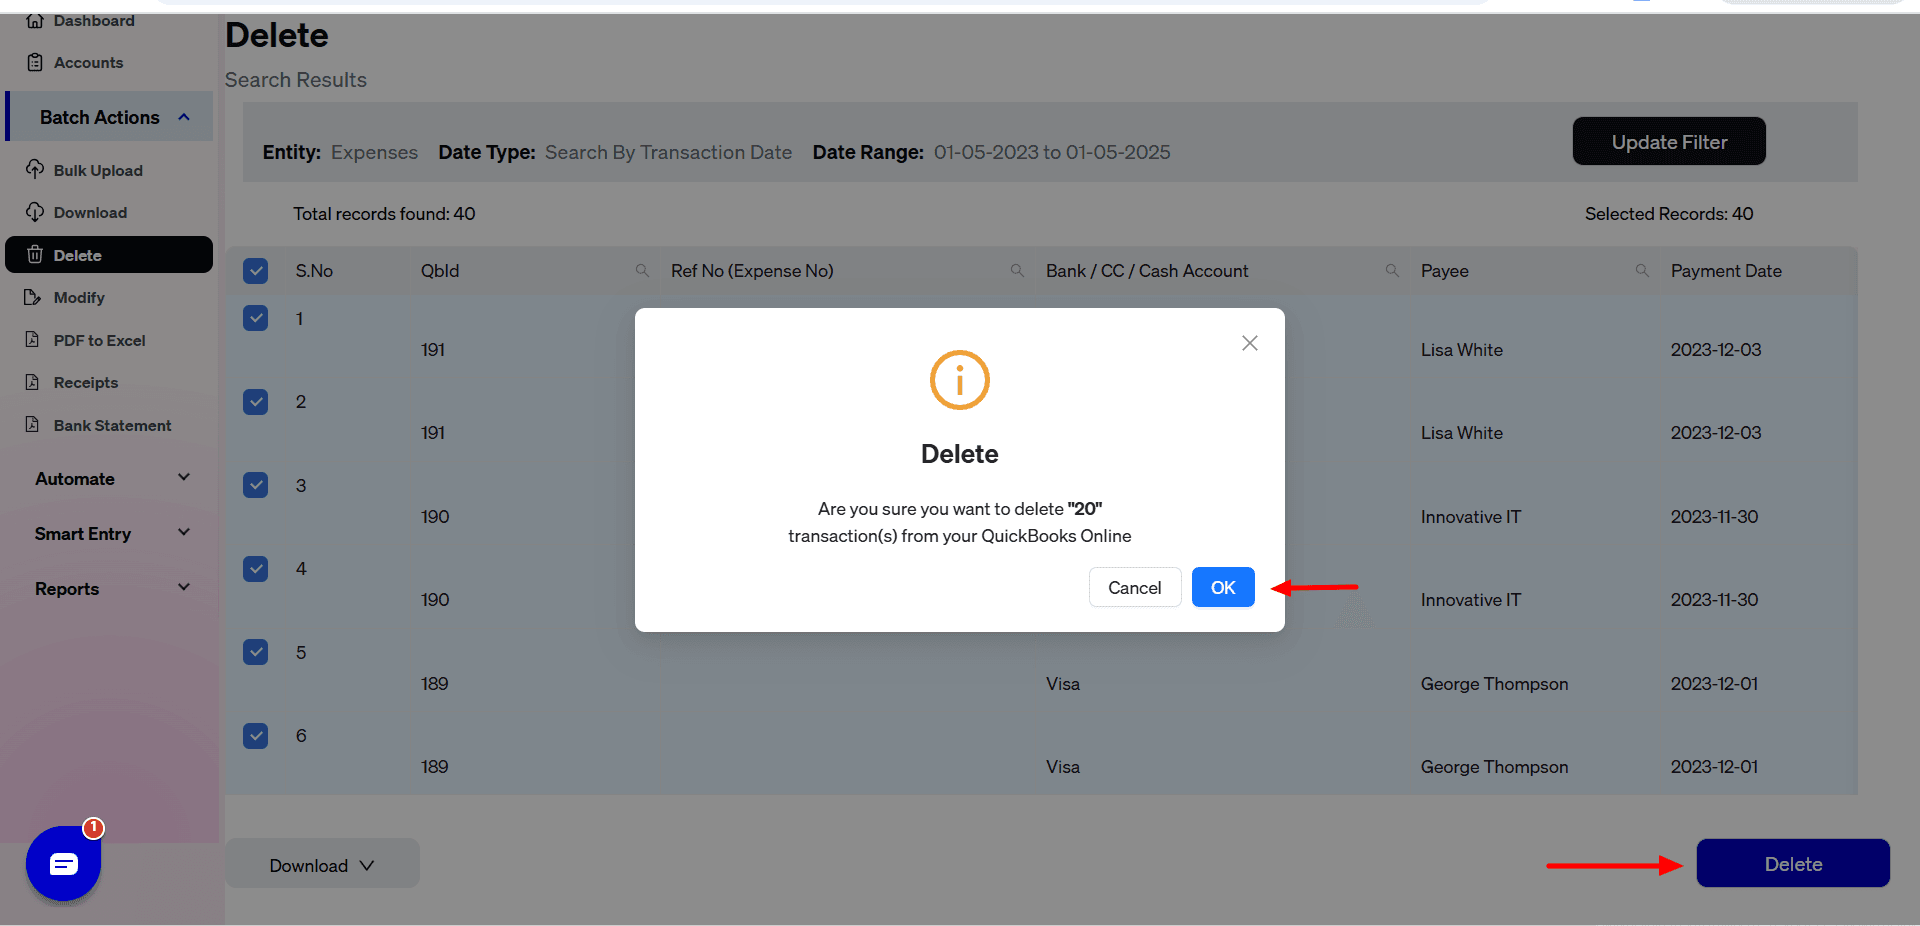
Step 5: Confirm Deletion
Once selected, click on ‘Delete’ and click on ‘Ok’ to confirm the deletion. Note: Ensure to use the download feature to back up your data before completely deleting the transactions.
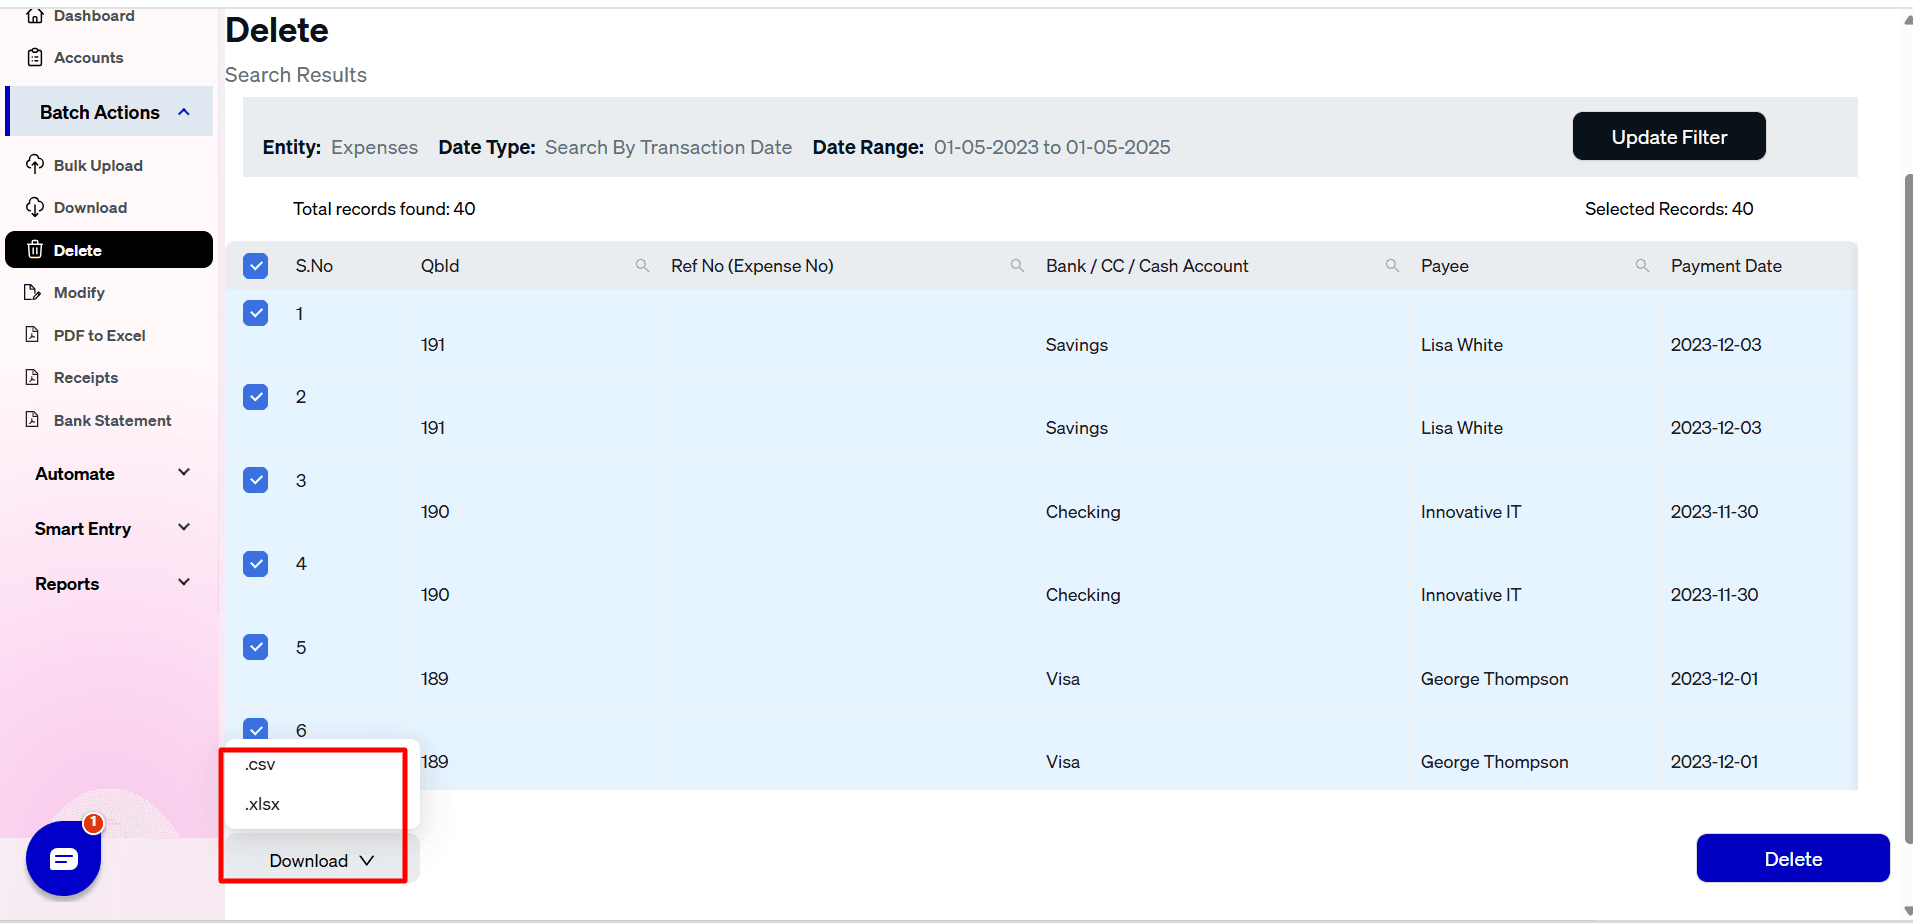
Note: You can download the data you are going to delete from SaasAnt as CSV or Excel and reupload it back if you made an error during the deletion.
Video tutorial: How to delete multiple expenses
Why SaasAnt Transactions Beats Manual Deletion
SaasAnt Transactions isn’t just a time saver; it’s a smarter way to manage QuickBooks Online expenses. Here’s what sets it apart:
Bulk Deletion: Clear hundreds of expenses in minutes, not hours. Example: A retailer with 300 duplicate expenses can tidy up in under 10 minutes.
Data Backup: Export your expenses to Excel or CSV before deleting; peace of mind included.
Flexible Options: Delete by search or reference number, tailored to your needs.
Advanced Filters: Target specific transactions by date, reference, or file name; no guesswork.
Preview Feature: Double-check your selections to avoid costly mistakes.
Best Practices for Managing Your Expenses
Deleting expenses is only half the battle; keeping your records clean and compliant is key. Try these tips:
Document Everything: Record why you’re deleting an expense (e.g., “Removed duplicate from 3/15 import”). It’s a lifesaver for audits.
Check the Audit Trail: Use QuickBooks’ built-in tracking to verify changes.
Always Backup: Download your data before bulk deletions; SaasAnt makes it effortless.
Reconcile Regularly: Monthly check-ins catch errors before they spiral.
Limit Access: Restrict deletion permissions to trusted team members.
Scenario: An accountant deletes a misposted expense and notes “Corrected vendor error.” With a backup and audit trail, they’re covered if questions arise later.
Conclusion
Say goodbye to the headache of deleting multiple expenses in QuickBooks Online. With SaasAnt Transactions, you can reclaim your time, reduce errors, and keep your financial records pristine. Ready to simplify your expense management? Start your 30-day free trial today and see the difference for yourself.
FAQs
How to delete multiple expenses in QuickBooks?
To delete multiple expenses in QuickBooks, follow the below steps:
Open SaasAnt Transactions and connect it with your QuickBooks account.
Open SaasAnt Transactions, click on ‘Delete,’ and click on ‘Initiate Clean Up.’
Select ‘Date by Searching’ and choose the preferred date range.
Click on ‘Ok’ to confirm deleting multiple expenses in QuickBooks.
How do I clear all expenses in QuickBooks?
To clear all expenses in QuickBooks, follow the below steps:
Launch SaasAnt Transactions and link it with your QuickBooks account.
In SaasAnt Transactions, select ‘Delete,’ then click ‘Initiate Clean Up.’
Choose ‘Date by Searching’ and set your desired date range.
Click ‘Ok’ to confirm the deletion of multiple expenses in QuickBooks.
How to Import Expenses in QuickBooks Online using SaasAnt Transactions?
To import expenses in QuickBooks Online using SaasAnt Transactions:
Log into SaasAnt Transactions using your Intuit QuickBooks credentials.
Navigate to the Import Section and select 'Expenses'.
Ensure the expense data file is in the required format (All formats supported, PDF, Images, IIF, CSV, Excel).
Match the columns in your file to the corresponding fields in QuickBooks.
Validate the data and confirm the import. Check for any errors and make necessary adjustments.
How to Export Expenses in QuickBooks Online using SaasAnt Transactions?
To export expenses in QuickBooks Online using SaasAnt Transactions:
Access SaasAnt Transactions and sign in with your credentials.
Go to the Export Section and choose 'Expenses'.
Filter the expenses by date, category, or other relevant parameters.
Select the Export Format (e.g., CSV, Excel) and customize the data fields to include in the export.
Initiate the export and download the file once complete.
How to Edit Expenses in QuickBooks Online?
To edit expenses in QuickBooks, follow the below steps:
Login to your QuickBooks account.
Click on ‘Expenses,’ select the Expense, and choose the edit option.
Make Necessary Changes to the expense details such as amount, category, or date.
Confirm the modifications and update the record in QuickBooks.
What convenience does SaasAnt offer when downloading backups?
SaasAnt Transactions makes downloading backups easy with just a few clicks, providing data in accessible formats like Excel or CSV. This convenience allows you to quickly safeguard your data without interrupting your workflow, allowing you to focus on other important tasks.
Recommended reading: