How to Add Categories in QuickBooks Online
In QuickBooks Online, categories are used to organize and classify the products and services you sell to customers. These categories are created and managed through the Products and Services list and allow you to group similar items under a common structure. The category feature is available only in QuickBooks Online and is commonly used to improve inventory organization and reporting.
By using categories, businesses can manage product lists more efficiently, maintain cleaner records, and generate clearer sales and inventory reports. Categories make it easier to analyze performance across product groups rather than reviewing individual items in isolation. The following guide explains, step by step, how to set up and use categories in QuickBooks Online.
How to Add a Category in QuickBooks Online
Step 1: Creating a Category
Categories can help group similar types of items. You can also create sub-categories for more specific groupings. Here's how you can create a category:
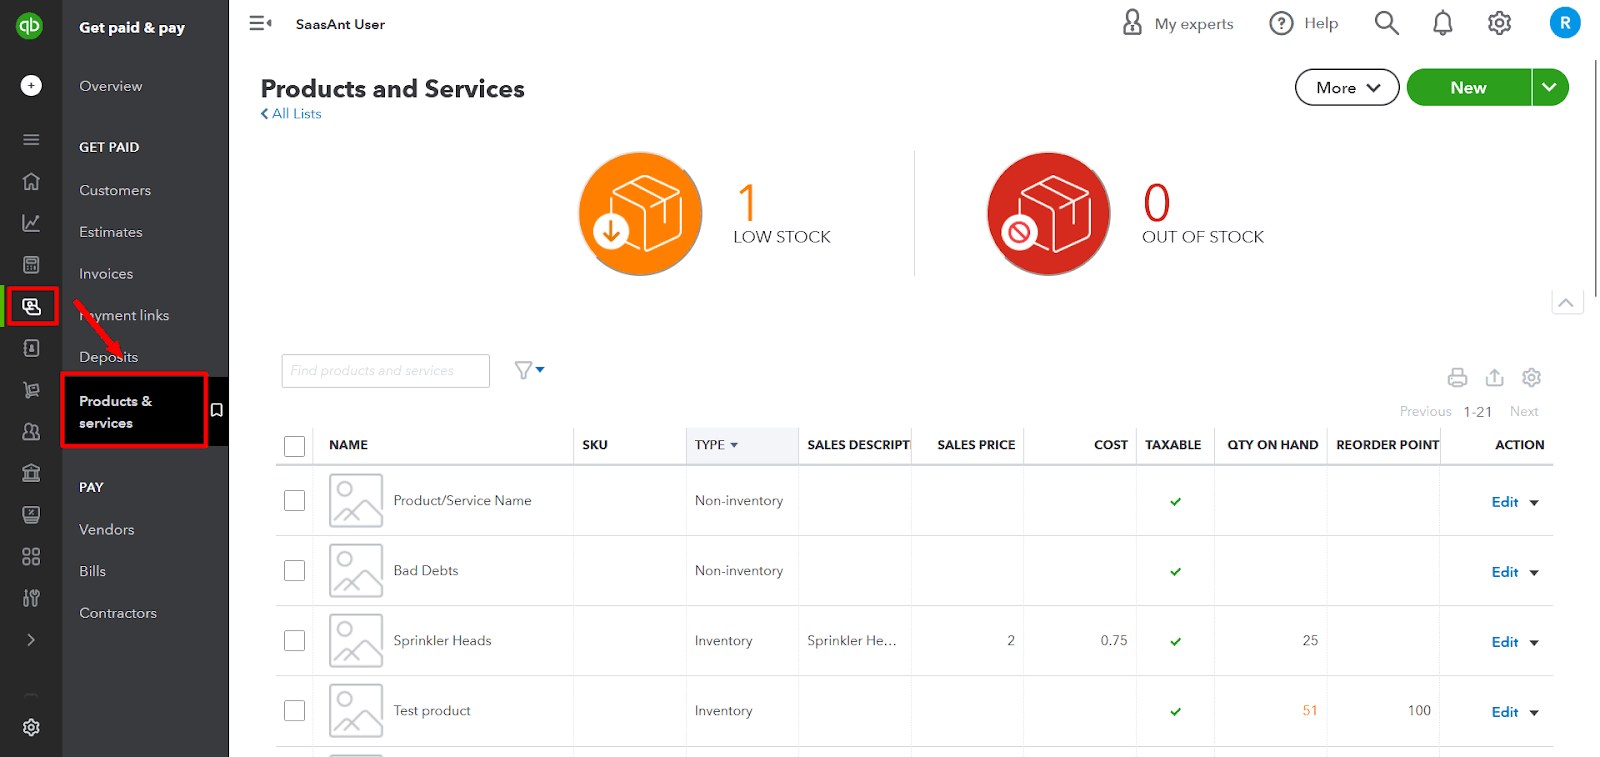
Navigate to 'Get Paid & pay' or 'Sales,' then select 'Products & Services.'
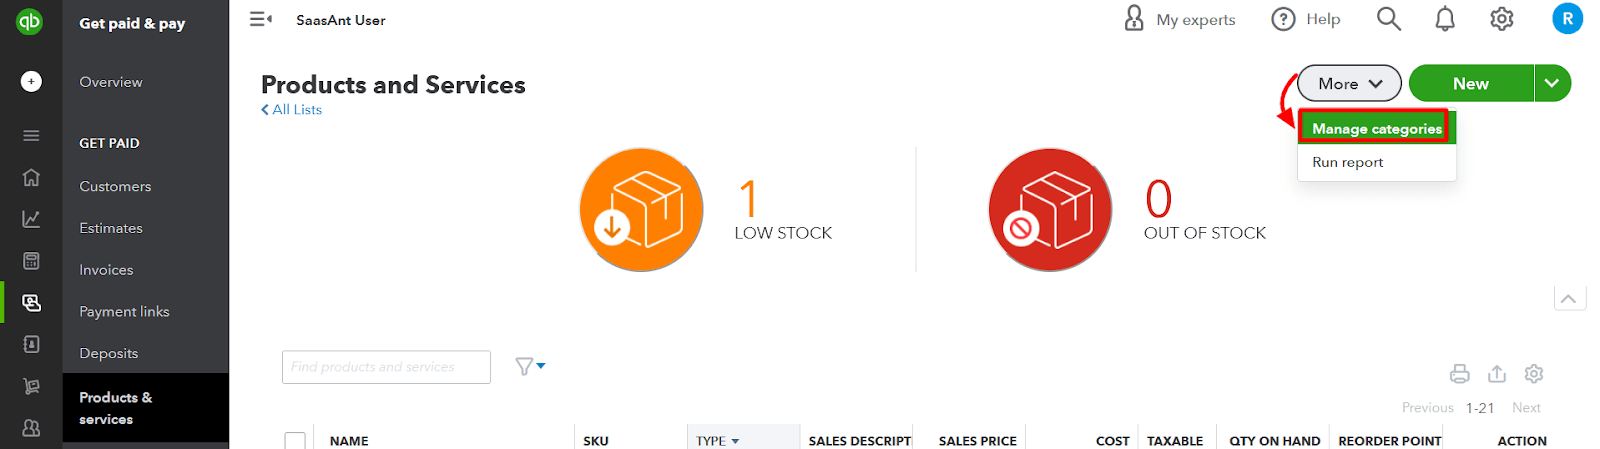
Select the dropdown 'More,' then 'Manage categories.'
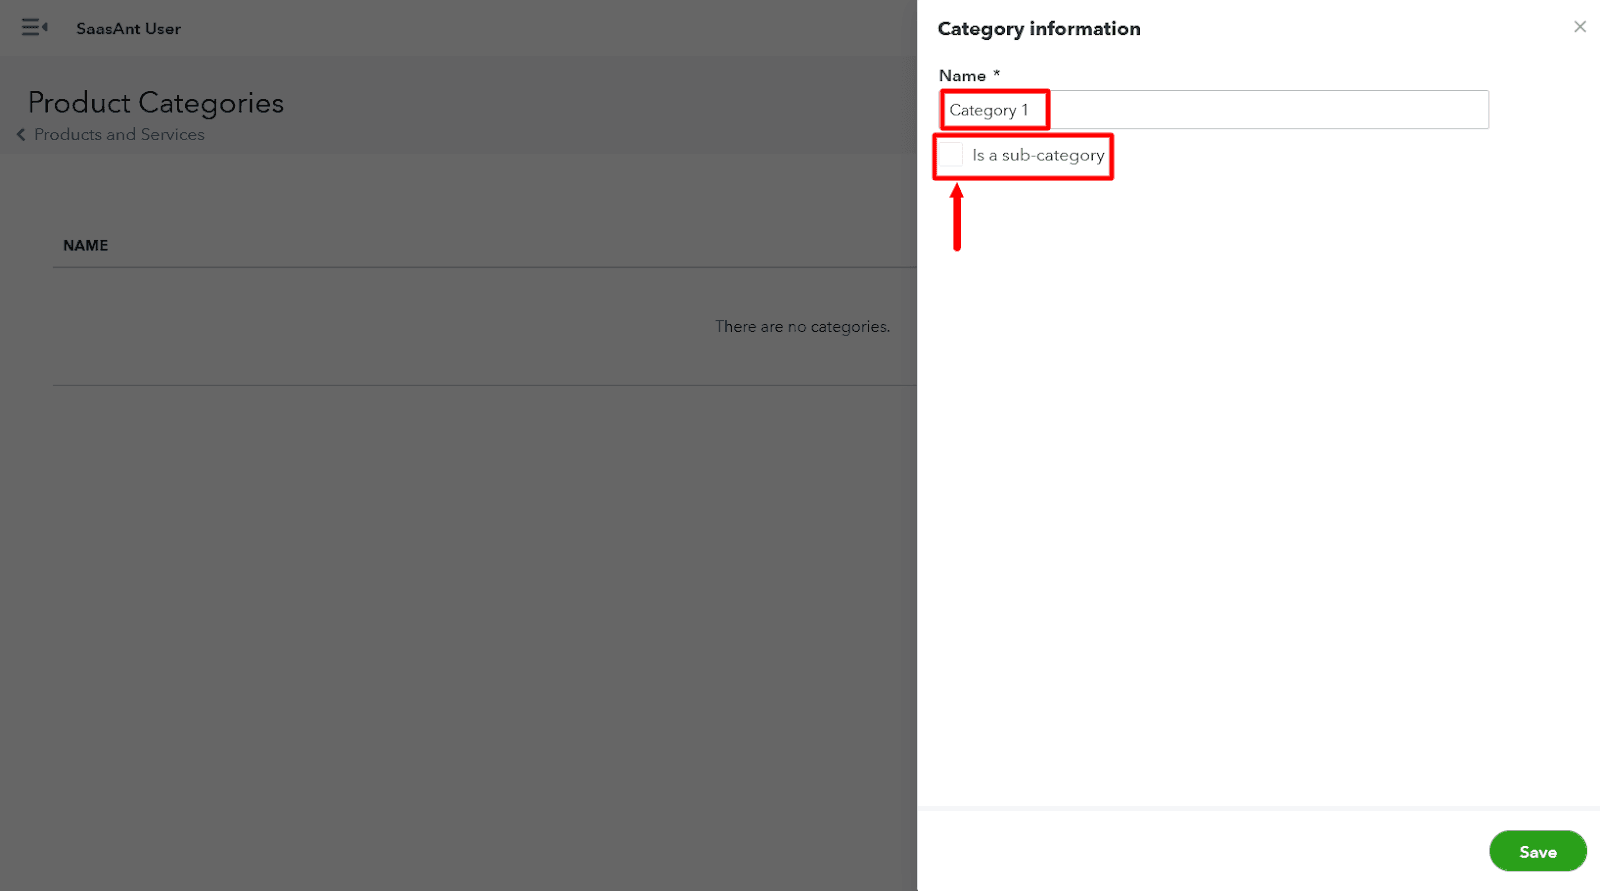
Select 'New category,' then enter the name of the category.

If you need to create a sub-category, select 'Is a sub-category' checkbox and select the main category.
Finally, select 'Save.’
Step 2: Adding Products or Services to a Category
You can add new or existing products or services to a category. Here's how you can do this:
Adding a New Product or Service
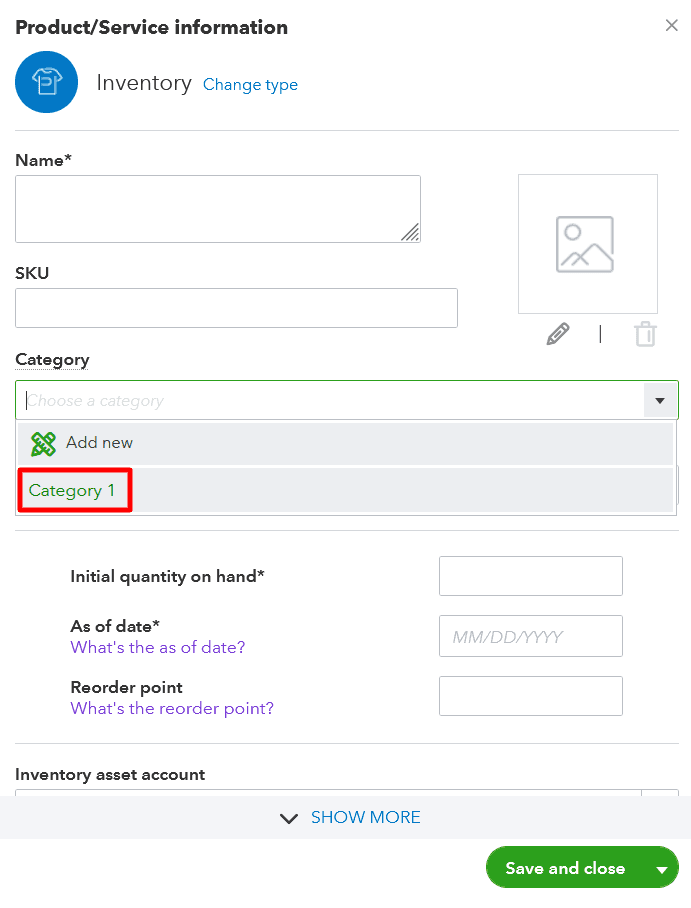
You can select a category when you add a new inventory product, service, or non-inventory product.
Adding an Existing Product or Service
If you have an uncategorized item, here’s how to add it to a category:
Go to 'Get paid & pay' or 'Sales,' then select 'Products & services.'’
Find the product or service you want to categorize.
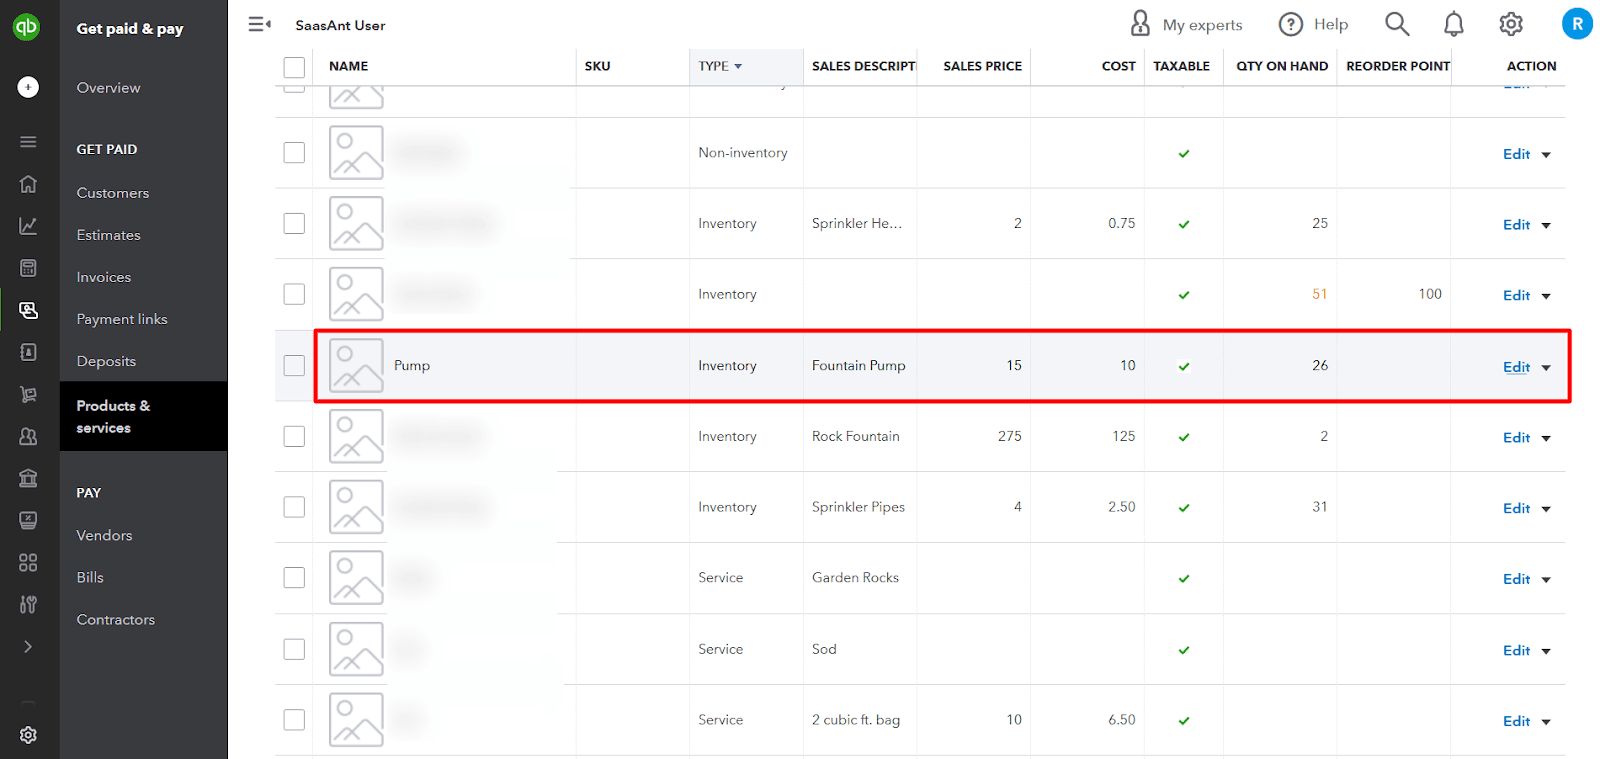
Select 'Edit' from the 'Action' column.

Select the 'Category' dropdown, select one that fits this item, or select '+ Add new' to create a new one.
Select 'Save and close.'
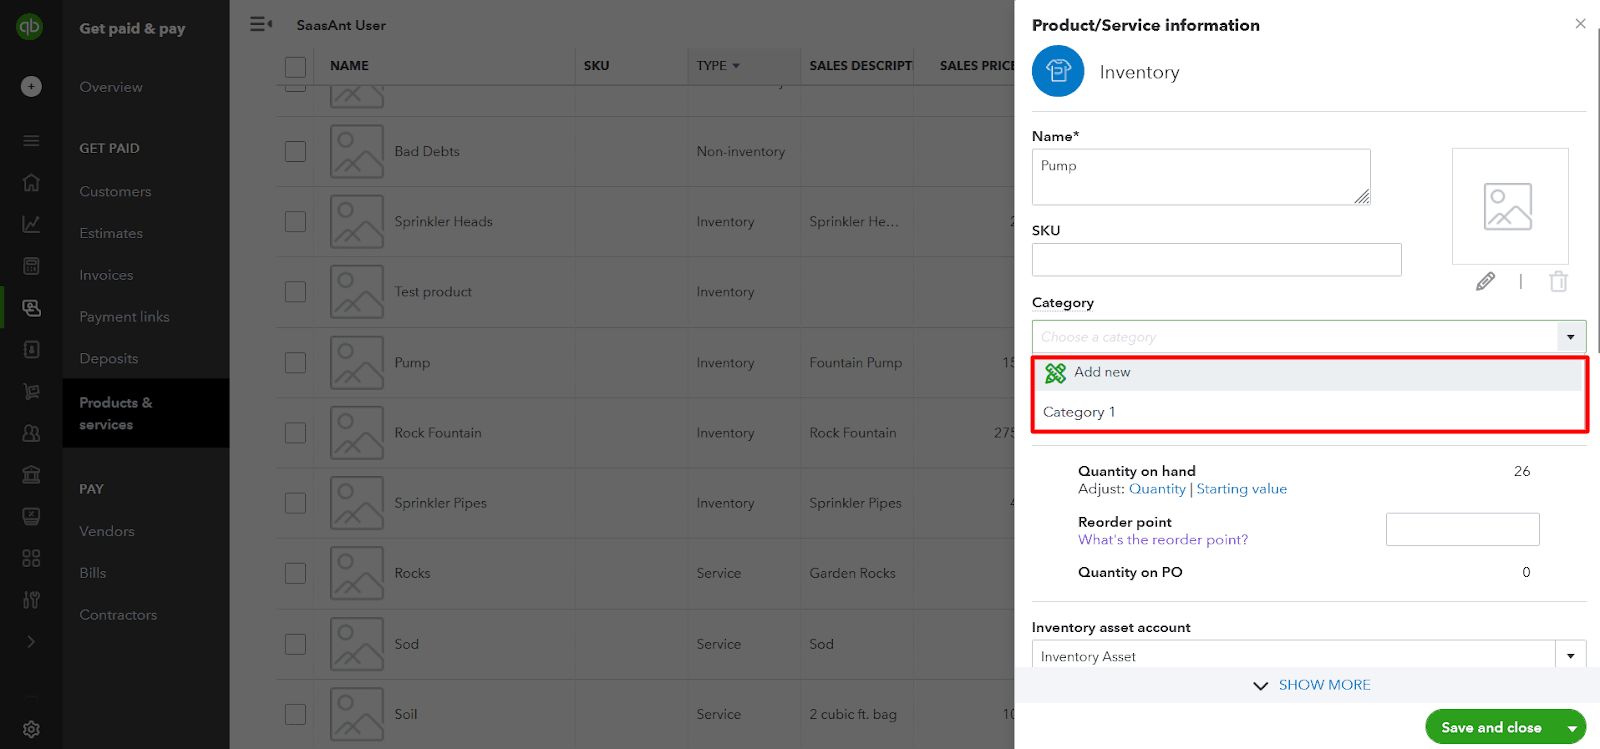
Note: When you select a product/service, the categories field will be filled automatically.
Editing or Removing a Category
If you need to edit or remove a category, follow these steps:
Navigate to 'Get paid & pay' or 'Sales,' then select 'Products & services.'
Select the dropdown 'More,' then 'Manage categories.'
Select 'Edit' from the 'Action' column.
Make the changes you want and select 'Save.' Or select 'Remove,' then 'OK.'
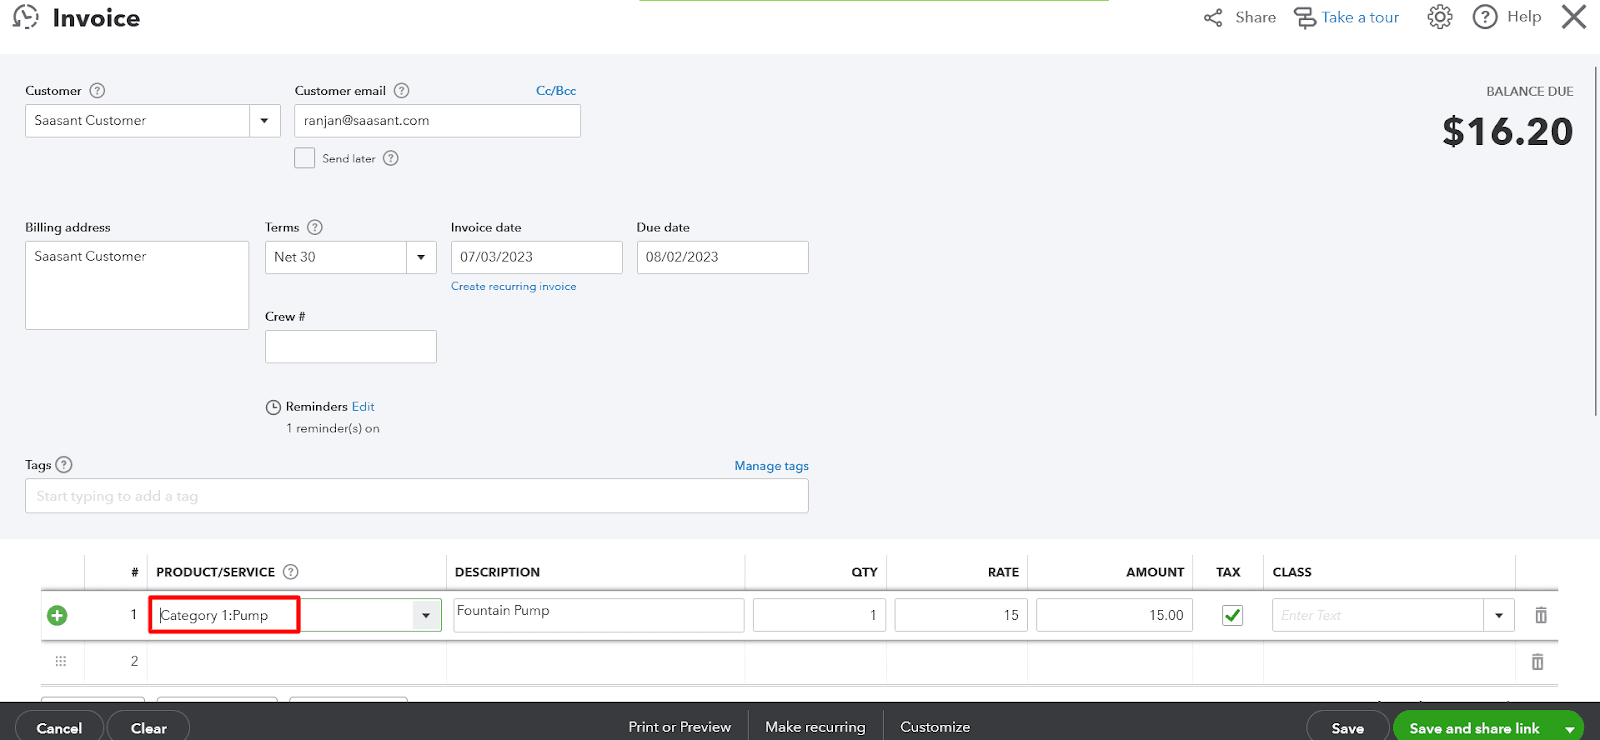
Using Categories for Reporting
You can run sales or inventory reports; products; and services are grouped by categories. This way of grouping gives you a clearer picture of your sales. It’s easy to see what types of services are popular. And the total for each category helps you know where the bulk of sales comes from.
QuickBooks' categories streamline inventory management and enable comprehensive report generation. Reports such as Sales by Category, Inventory Valuation Summary, Profit and Loss by Category, Sales by Product/Service Detail, and Expense by Category can be created. Consistent category maintenance and updates are vital for maximizing these reports' utility.
Frequently Asked Questions
1. What is categories in QuickBooks?
Categories in QuickBooks help you organize your income, expenses, and transactions. They can give you a clearer picture of where your money is coming from and where it's going.
2. How do I create a category in QuickBooks?
To create a category, go to the Lists menu, select 'Chart of Accounts,' then click on the 'Account' button at the bottom, and choose 'New.' From there, you can specify the type and name of your new category.
3. Can I edit or delete a category in QuickBooks?
You can edit or delete a category by going to the Chart of Accounts, selecting the category you want to change, and clicking 'Edit' or 'Delete' from the drop-down menu.
4. What are parent and subcategories in QuickBooks?
Parent categories are the primary categories under which you can group similar transactions. Subcategories, or 'sub-accounts,' are subsets of these parent categories. They can be used for more specific transaction categorization.
5. How do I use categories for reporting in QuickBooks?
Categories can be used in QuickBooks reports to filter and organize data. When generating a report, you can choose to filter by category, which can provide more detailed insights into specific areas of your income or spending.
6. Can I import categories into QuickBooks?
Yes, you can import categories into QuickBooks using a formatted CSV or Excel file, which can be helpful if you have many categories to add simultaneously.
7. Why can't I see certain categories in my QuickBooks?
If you can't see certain categories, it might be because they're inactive or because you don't have the necessary permissions to view them. To view inactive categories, go to the Chart of Accounts and check the box next to 'Include inactive.'
Read also
How to Change Transaction Type in QuickBooks Online
Batch Transactions in QuickBooks Online - Detailed Guide
How to Export Transactions from QuickBooks Online
How to Edit Multiple Transactions in QuickBooks