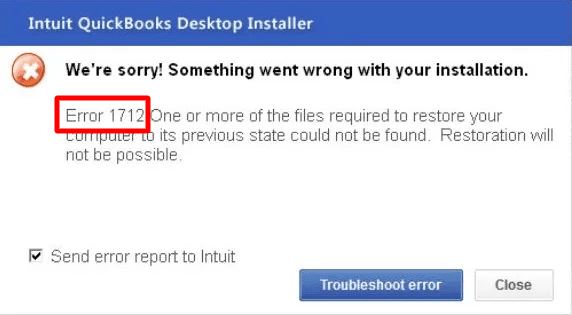
Steps to Resolve QuickBooks Desktop Error 1712
QuickBooks, developed by Inuit, is an effective accounting software that simplifies business financial management, despite occasional errors. One such error is QuickBooks Desktop Error 1712, which may also occur during the installation or update of QuickBooks if registry errors in your Windows operating system or a background process interfere with the installation.
Contents
Causes of QuickBooks Desktop Error 1712
Symptoms of QuickBooks Desktop Error 1712
Methods to Resolve QuickBooks Desktop Error 1712
Conclusion
Frequently Asked Questions
Causes of QuickBooks Desktop Error 1712
Installation overlap
Installing the newer version of QuickBooks without uninstalling the older version may trigger the QuickBooks Desktop error 1712 occurs.
Registration error
Registry error in the Windows operating system may result in the QuickBooks Desktop error 1712.
Malware attack
Any malware or virus attack during QuickBooks installation may lead to error 1712.
No proper Admin Rights
Error 1712 occurs when no proper admin rights are granted to the system using QuickBooks Desktop.
Outdated Operating system
An operating system that is not updated in the system where QuickBooks Desktop software runs might cause this error.
Symptoms of QuickBooks Desktop Error 1712
The display of the system with QuickBooks Desktop software shows a blue screen.
QuickBooks Desktop software freezes frequently.
Providing Input and Getting Output will be a problem, and errors will occur there.
Http will encounter an error.
There will be a delay or malfunction in the laptop or system.
Methods to Resolve QuickBooks Desktop Error 1712
If you come across Error 1712 while working with QuickBooks Desktop, don't worry! There are some methods with which you can try to resolve. You can go through these methods individually and use QuickBooks Desktop without hindrance.
Method 1: Abort all processes in the Task Manager
Step 1: Click ‘Ctrl’ + ‘Shift’ + ‘Delete’ on your keyboard.
Step 2: A window appears from which you can choose 'Task Manager.'
Step 3: Now select the 'Processes' tab.
Step 4: Then select the 'QuickBooks' software that is running.
Step 5: After that, click on 'End Task.'
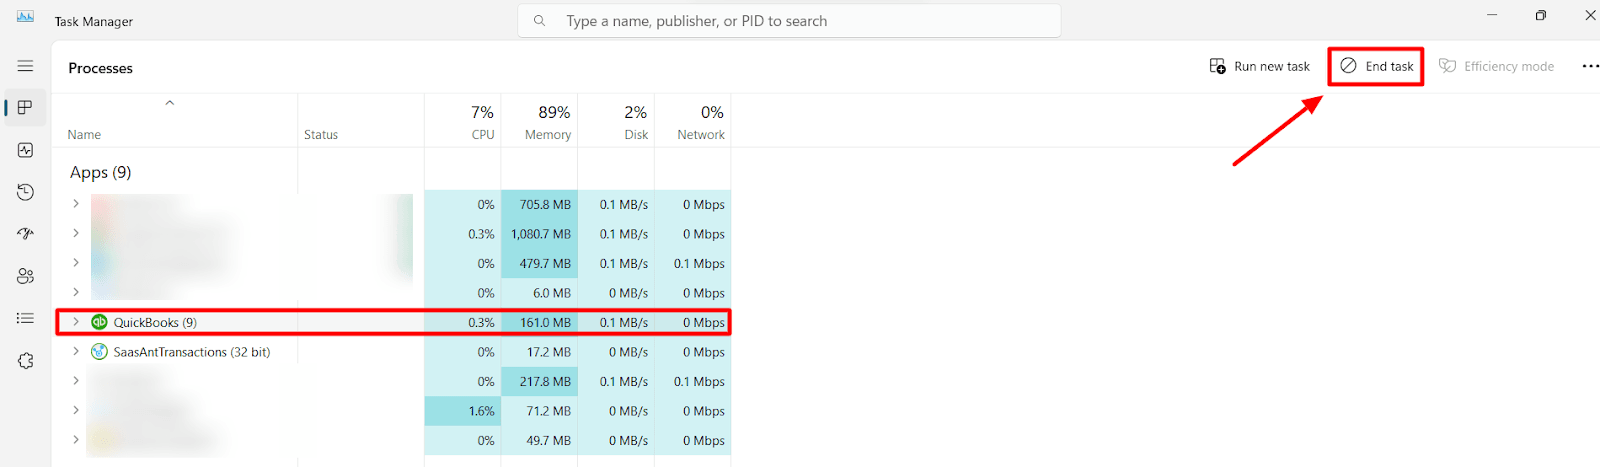
Step 5: Now, 'Reboot' the system to save the changes and run smoothly.
Method 2: Analyse the Data path of the registry
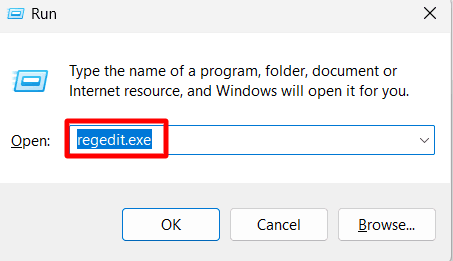
Step 1: Go to 'start' and search 'regedit.exe.'
Step 2: Now search for the path 'Computer\HKEY_CURRENT_USER\Software\Microsoft\Windows\CurrentVersion\Explorer\User Shell Folders.'
Step 3: Then Double-click 'AppData.'
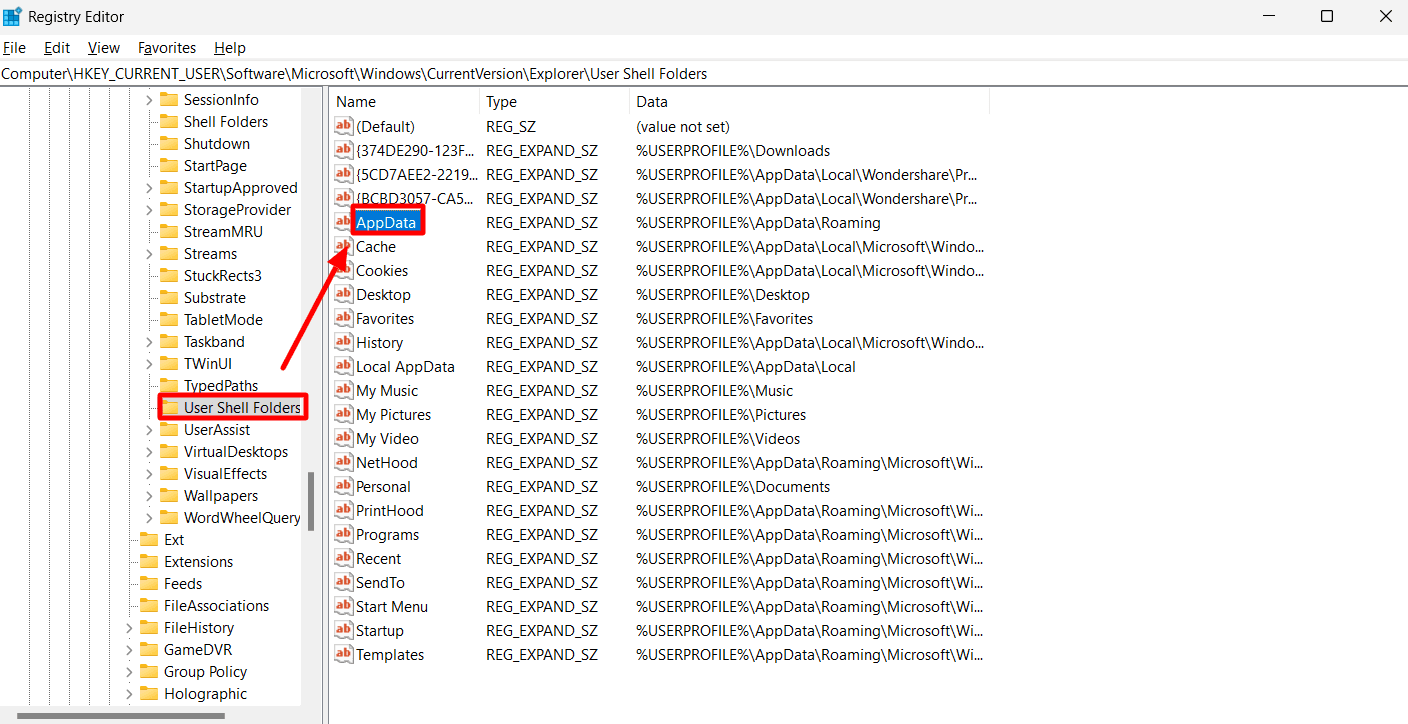
Step 4: Change the Original value with Local Profile Path.
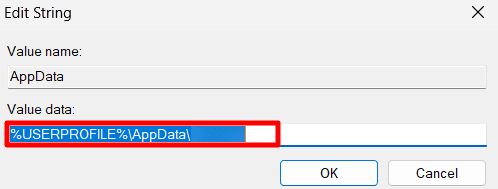
Step 5: Finally, 'Reboot' the system.
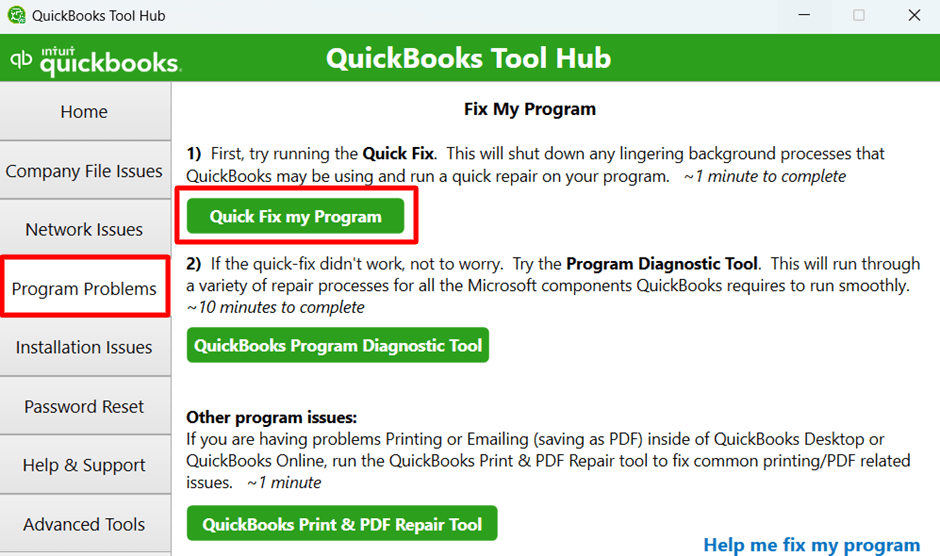
Method 3: Apply QuickBooks Tool Hub
Step 1: Run 'Quick Fix my Program' in the QuickBooks Tool Hub.
Close all the 'QuickBooks' Software.
If you have 'QuickBooks Tool Hub,' open it.
Otherwise, Download the 'QuickBooks Tool Hub.'
Go to the 'QuickBooksToolHub.exe' for installation.
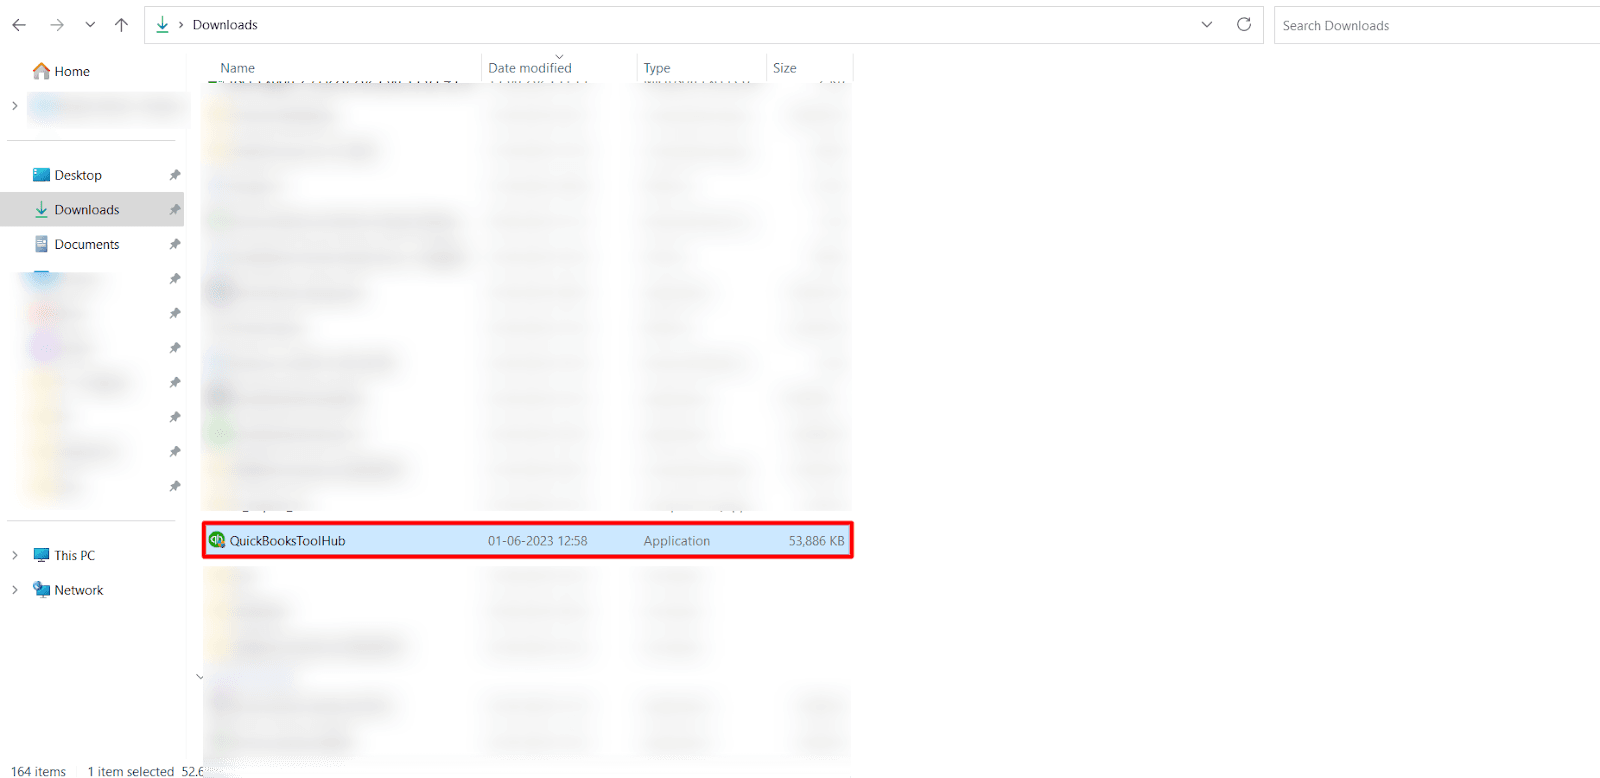
Follow the on-screen prompt to install the 'QuickBooks Tool Hub.'
After installation, Double click 'Quickbooks Tool Hub.'
Select the 'Program Problems' tab.
Then Navigate to the 'Quick Fix my Program.'
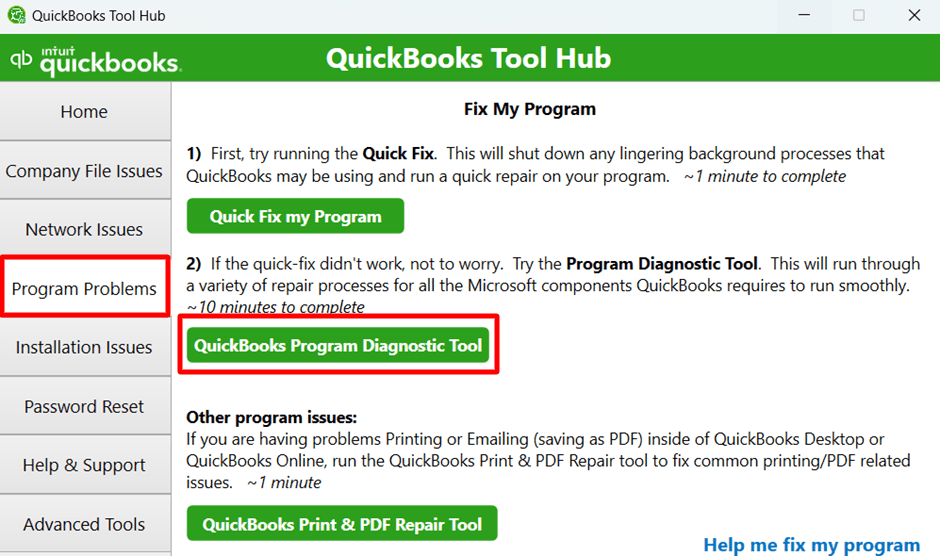
Step 2: Run the 'QuickBooks Program Diagnostic Tool' in QuickBooks Tool Hub.
If 'Quick Fix my Program' doesn’t work, click 'QuickBooks Program Diagnostic Tool.'
Step 3: Install the 'QuickBooks Diagnostic Tool' from QuickBooks Tool Hub.
Click the 'Installation Issues' tab in the Tool Hub.
Then Select ' QuickBooks Install Diagnostic Tool' on your desktop.
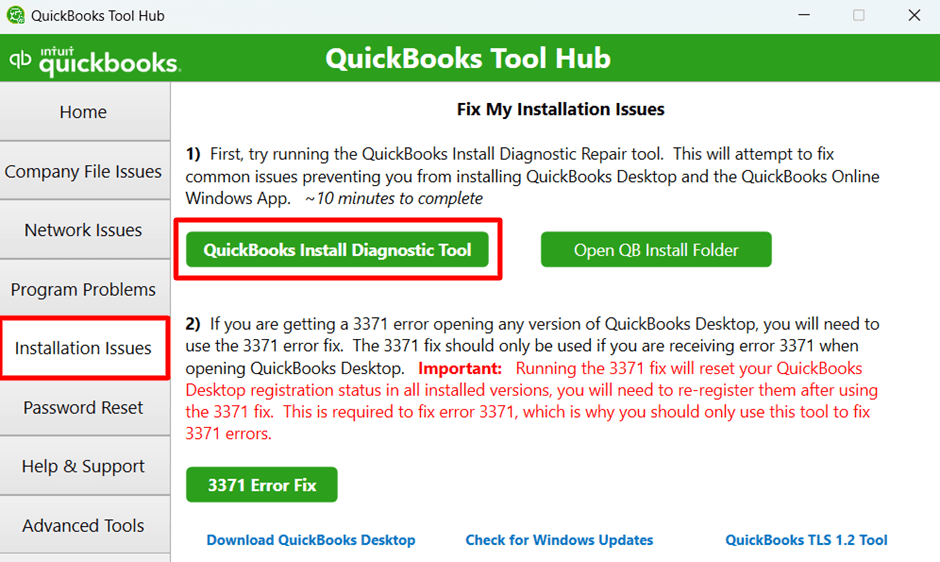
'Reboot' to check the error.
Method 4: Grant Admin Rights to the QuickBooks Software
Step 1: Press 'Windows + I' to go to 'Settings.'
Step 2: Then navigate to the 'Accounts' option and click 'Other people or Family.'
Step 3: Select 'Add someone else as an authorized user to the computer.'
Step 4: Then, you will be asked for your email address(it is optional).
Step 5: Once done, click 'I don’t have this person’s sign information.'
Step 6: You will have the option to add a user who does not have a ‘Microsoft account.'
Step 7: Create a unique username and password for this new user and click 'Next.'
Step 8: By this, create a new 'Local administrator' account.
Step 9: Now, on the 'Accounts' page, click on the 'Local account.'
Step 10: Select the 'Change account type' option.
Step 11: Using this, change this from Standard to the local administrator.
Step 12: Then click 'Ok' to move further.
Step 13: Finally, 'Reboot' the system to check.
Method 5: Reinstall QuickBooks Desktop
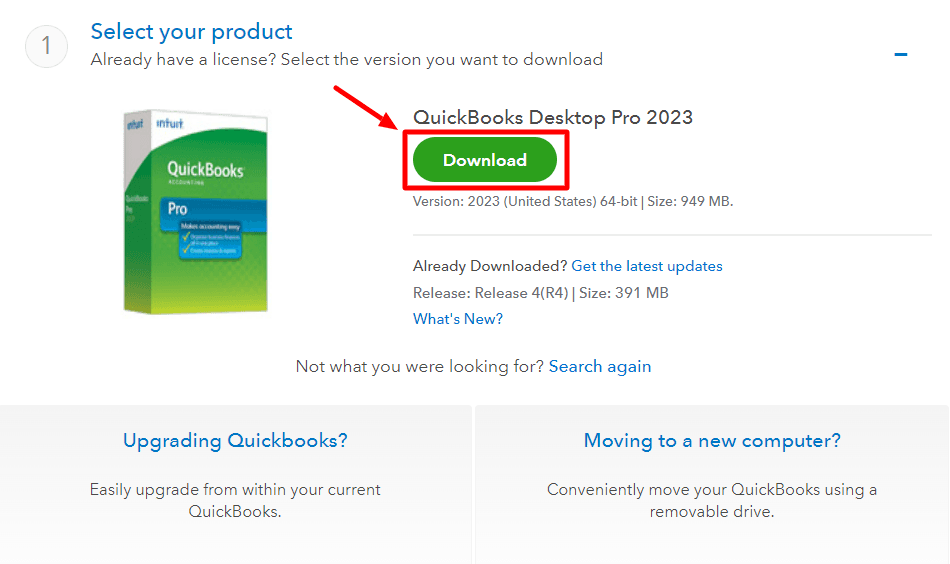
Step 1: Download the latest Quickbooks Desktop application version.
Step 2: Select whether you're using a 'Multi-user mode.' (Optional)
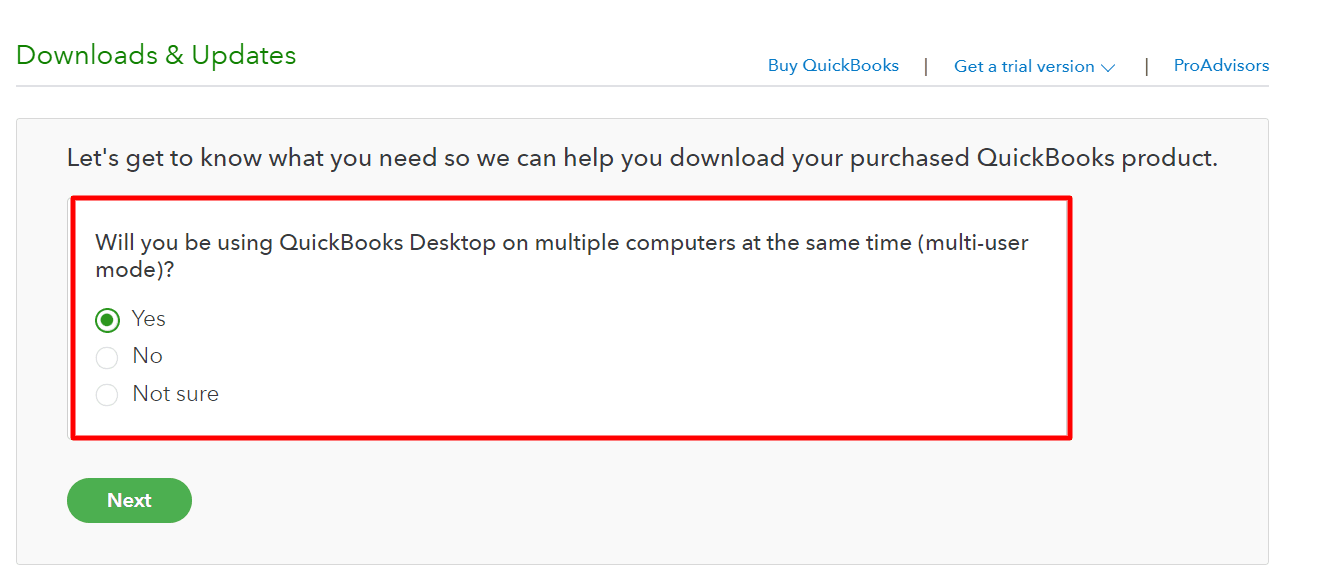
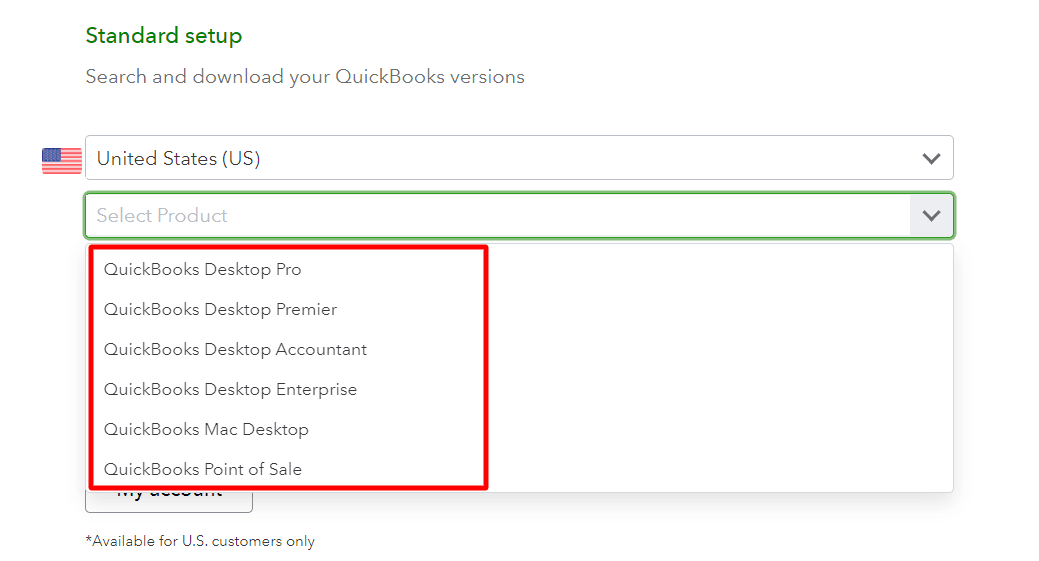
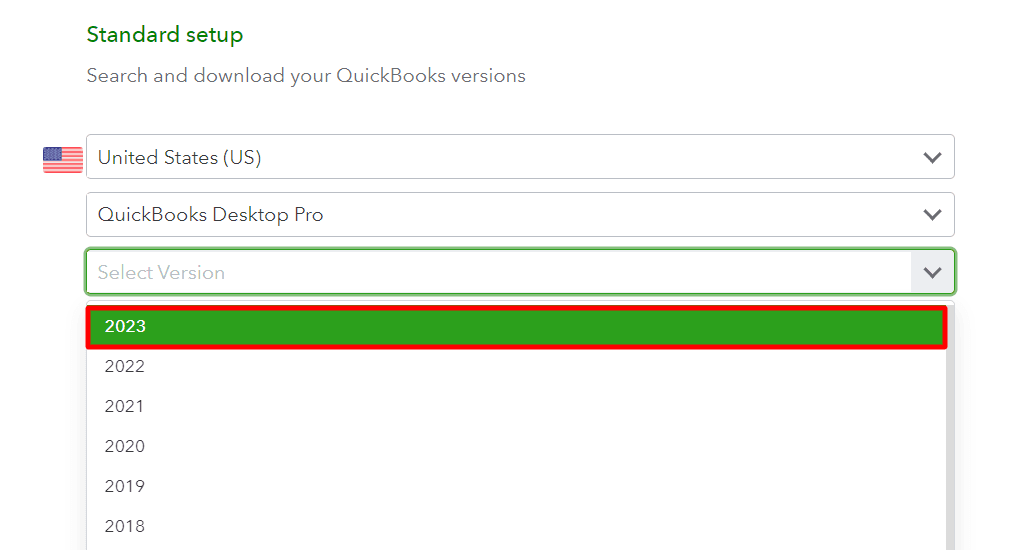
Step 3: Select 'Country, Product, and Latest Version' of QuickBooks Desktop, then click 'Search.'

Step 4: When done, click 'Download.'
Step 5: Open the downloaded file and click 'Next.'
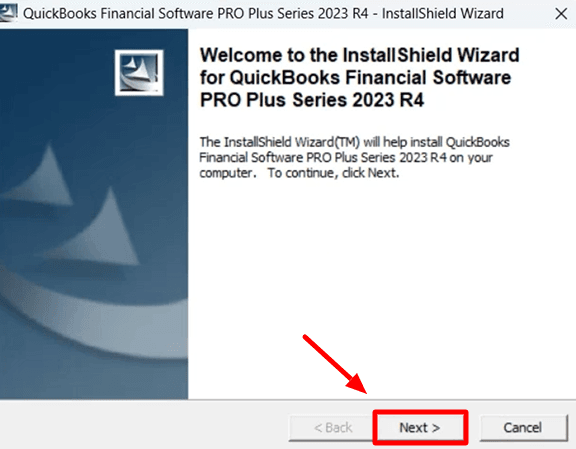
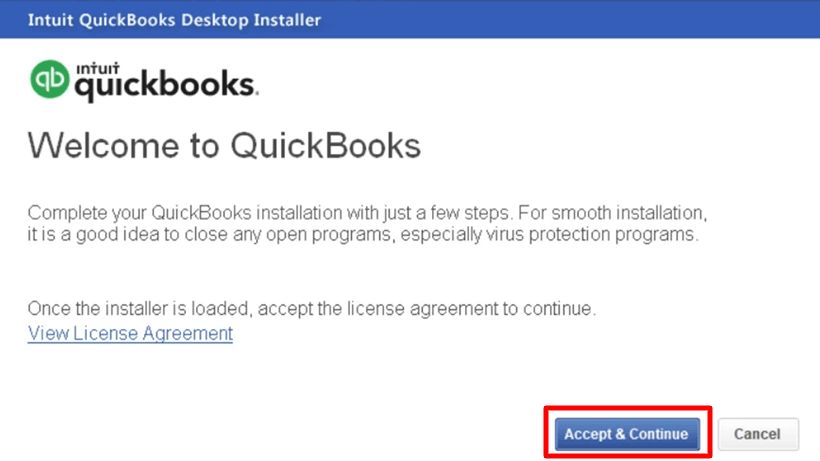
Step 6: Follow the on-screen instructions.
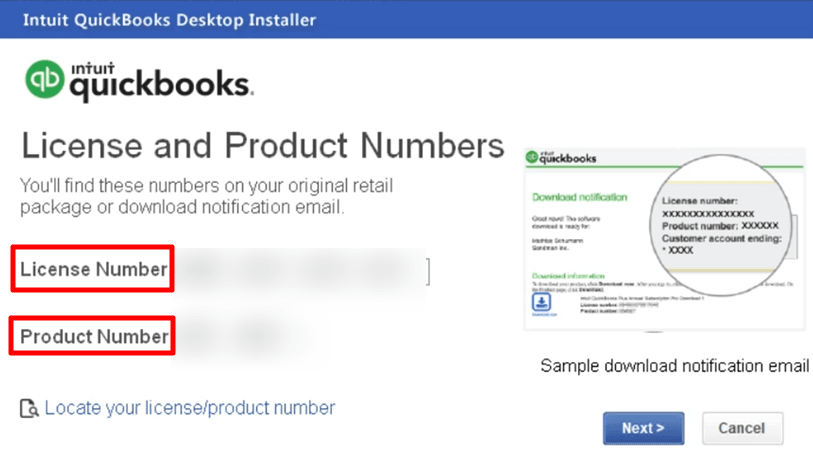
Step 7:Then enter the 'License number' and click 'Next.'
Step 8: In Installation type, choose 'Express' and click 'Next.'
Step 9: Now, Click on 'Install.'
Step 10:Then Open 'QuickBooks.'
Step 11:After that, 'Reboot' the system.
Step 12:Click on 'Begin Activation' after rebooting.
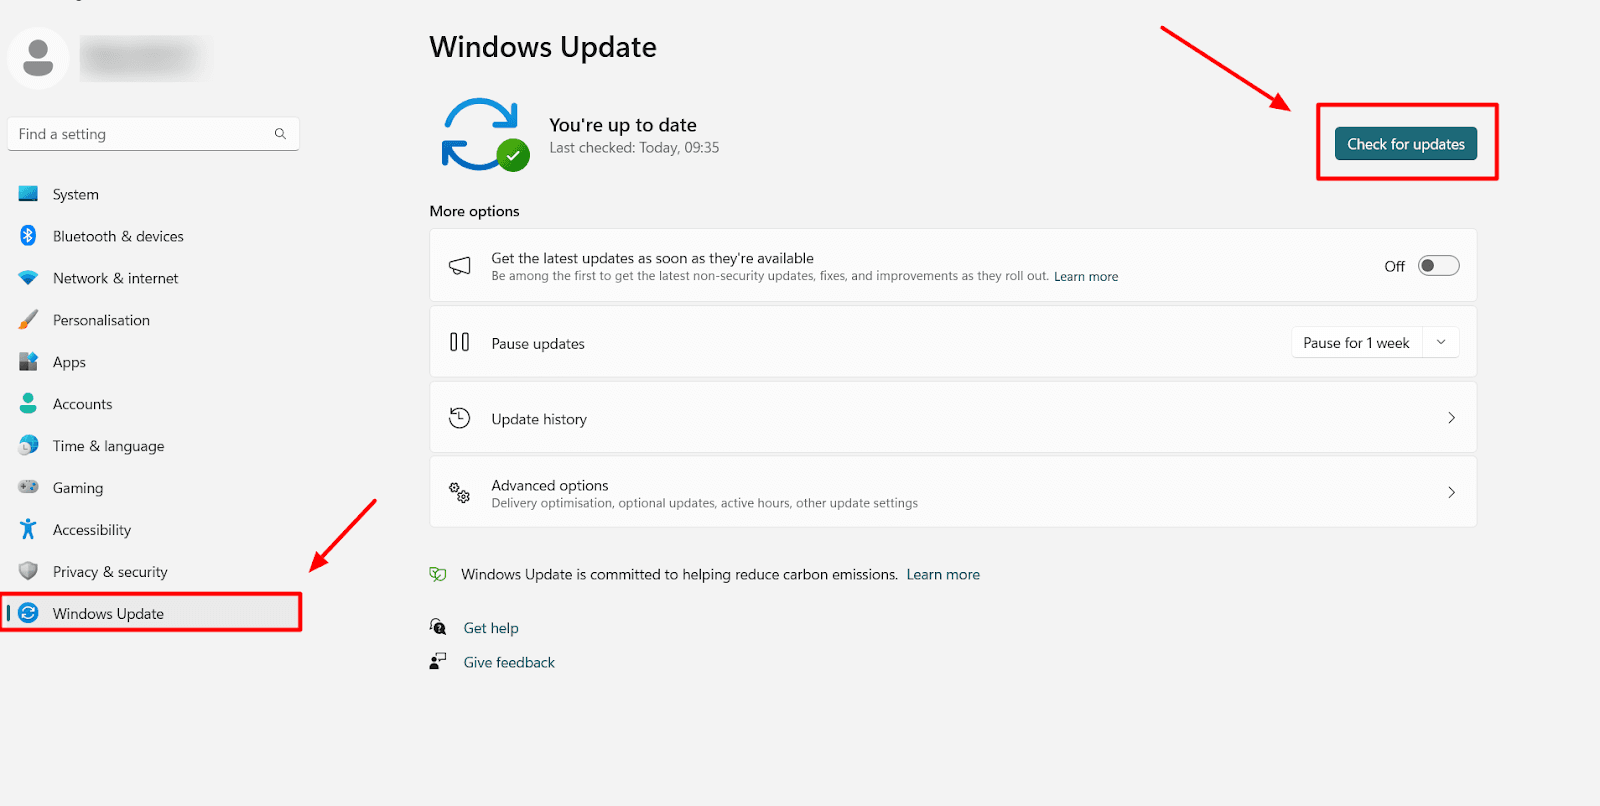
Method 6: Update the Windows
Step 1: Navigate to 'Start' and click 'System Settings.'
Step 2: There select 'Update and Security.'
Step 3: Click 'Windows Update.'
Step 4: If there is any update, click ‘Check for updates' to download and install.
Conclusion
Though QuickBooks Desktop error 1712 may disrupt workflow, it can be resolved by following the step-by-step methods to troubleshoot it efficiently. If the Quickbooks Error 1712 still exists, contact QuickBooks Support Team to fix it. Regularly monitoring and checking QuickBooks would prevent such errors.
Frequently Asked Questions
What causes QuickBooks Desktop Error 1712?
Several factors, including an incomplete installation or uninstallation of QuickBooks software, corruption in the Windows registry, a virus or malware attack, or an improper system shutdown, can cause QuickBooks Desktop Error 1712.
How to fix QuickBooks Error 1712 when installing?
To fix QuickBooks Error 1712 during installation, you can try the following steps:
End all QuickBooks processes from the Task Manager.
Download and install the QuickBooks Tools Hub.
Run the ‘Quick Fix My Program’ from the QuickBooks Tools Hub.
QuickBooks Error 1712 Windows 10: How to solve?
To solve QuickBooks Error 1712 on Windows 10, you can try the following steps:
Use the QuickBooks Install Diagnostic Tool from the QuickBooks Tools Hub.
Reinstall QuickBooks using a clean install.
Can QuickBooks Error 1712 be fixed without technical support?
QuickBooks Error 1712 can often be fixed without technical support using the QuickBooks Tools Hub.
What are the common signs of QuickBooks Error 1712?
The common signs of QuickBooks Error 1712 include an error message that appears and crashes the active program window, your PC frequently crashes when running the same program, or your Windows running sluggishly and responding slowly to mouse or keyboard input.
Troubleshooting steps for QuickBooks Desktop Error 1712?
The troubleshooting steps for QuickBooks Desktop Error 1712 include the following:
Ending all QuickBooks processes from the Task Manager.
Downloading and installing the QuickBooks Tools Hub.
Running the Quick Fix My Program from the QuickBooks Tools Hub.
Using the QuickBooks Install Diagnostic Tool.
Reinstalling QuickBooks.
Tags
Read also
Export QuickBooks Online to Desktop - A Comprehensive How to Guide
How to Import Invoices into QuickBooks Desktop
How to Delete Multiple Transactions in QuickBooks Desktop?
QuickBooks Desktop to Online Migration: Frequently Asked Questions