How to Set Up Recurring Transactions in QuickBooks Online?
The recurring transactions feature in QuickBooks Online automates routine accounting entries to reduce manual data entry and minimize errors. You can create templates for frequently used transactions—such as monthly invoices, bills, expenses, and journal entries.
Once set up, these templates can record transactions automatically, prompt you with reminders, or serve as reusable drafts for complex, multi-line entries.
Here's a step-by-step guide on how to set this up.
How to Create a Recurring Transaction Template
Step 1: Open the Recurring Transactions List
Click the Gear icon (⚙️) in the top-right corner of the dashboard. Under the Lists column, select Recurring Transactions.
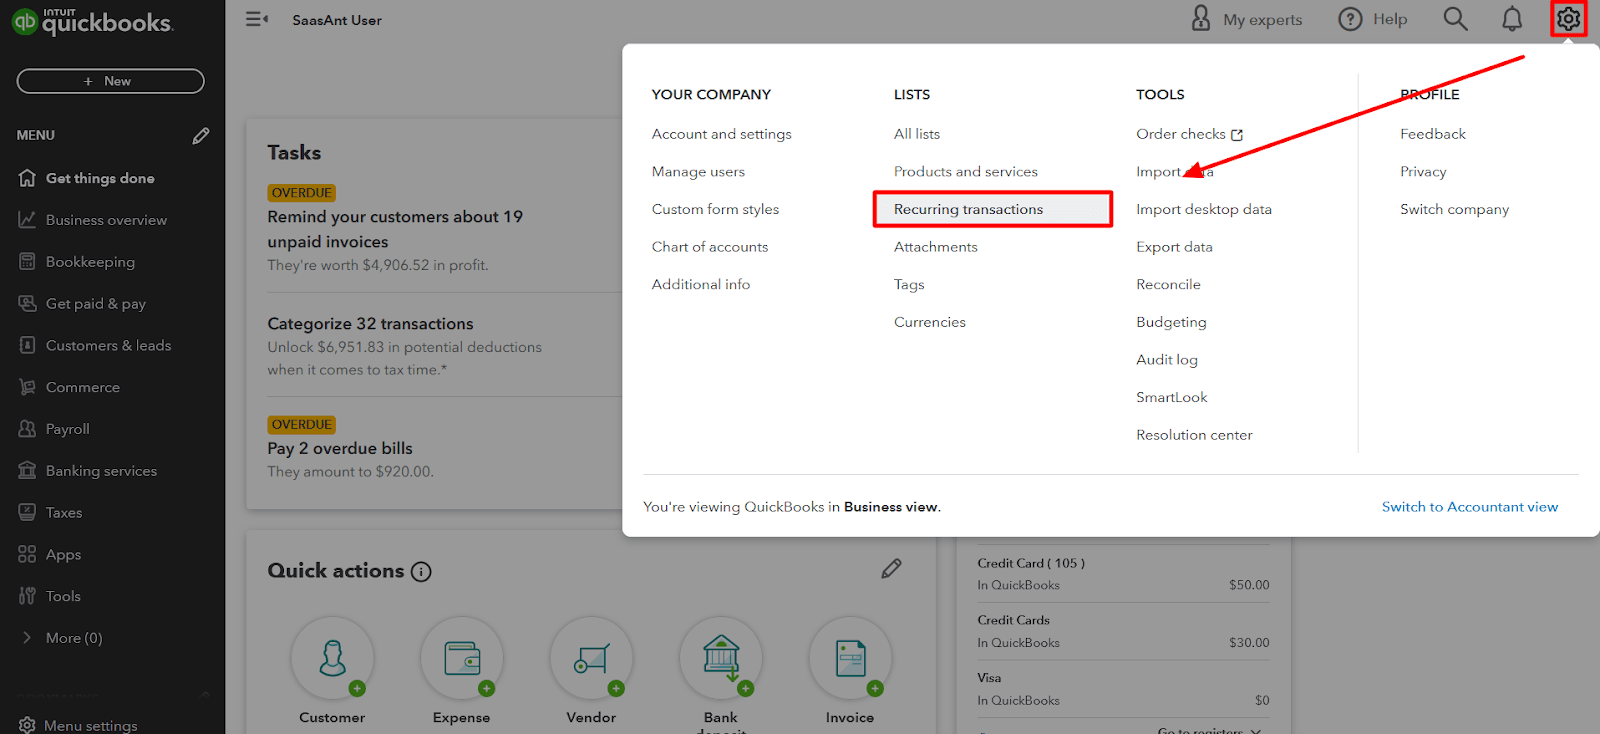
Step 2: Start a New Template
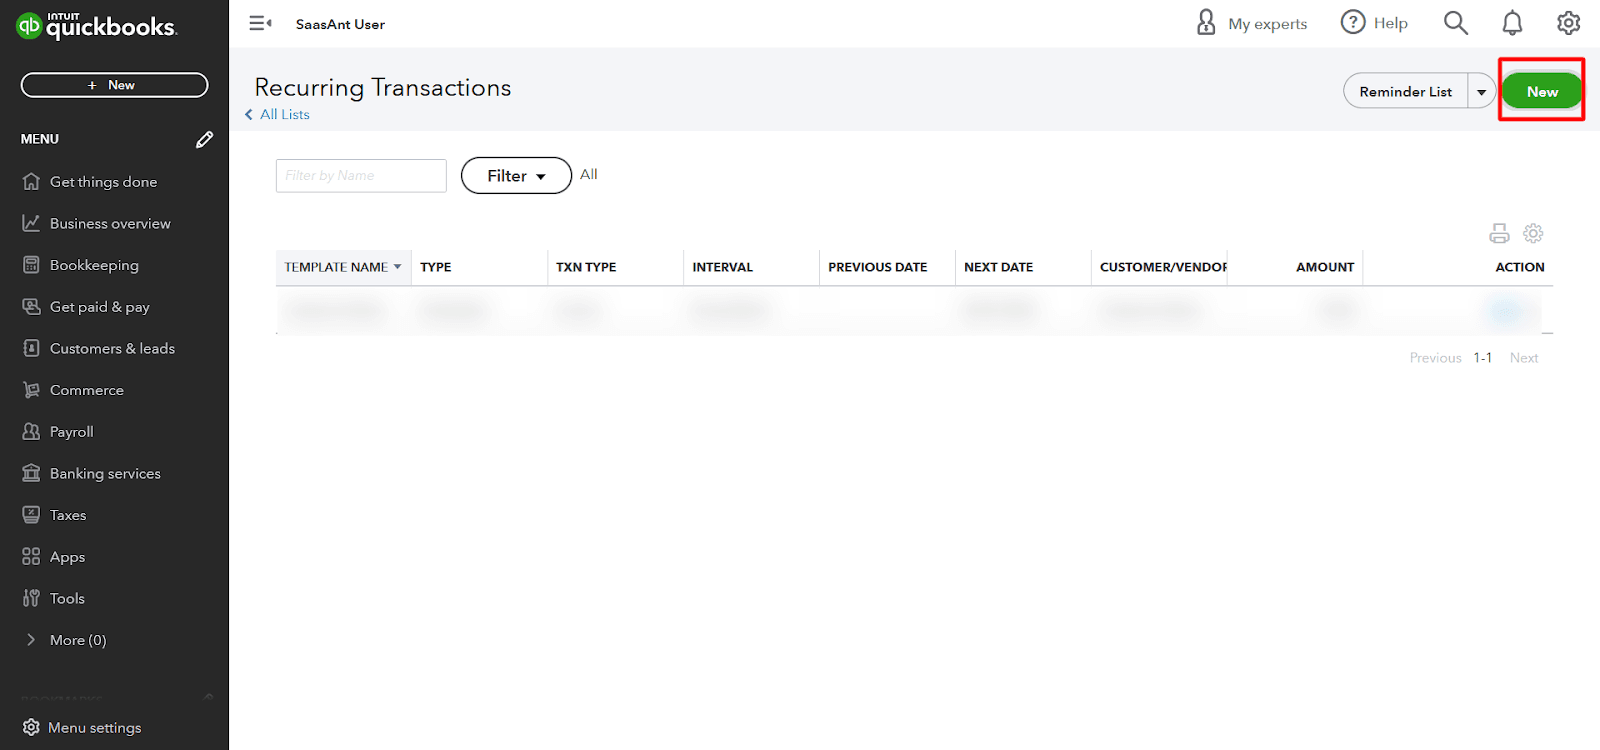
Click New in the top-right corner of the screen.
(Note: If you frequently enter identical transactions manually, QuickBooks Online’s built-in AI may proactively prompt you to convert those patterns into a recurring template.)
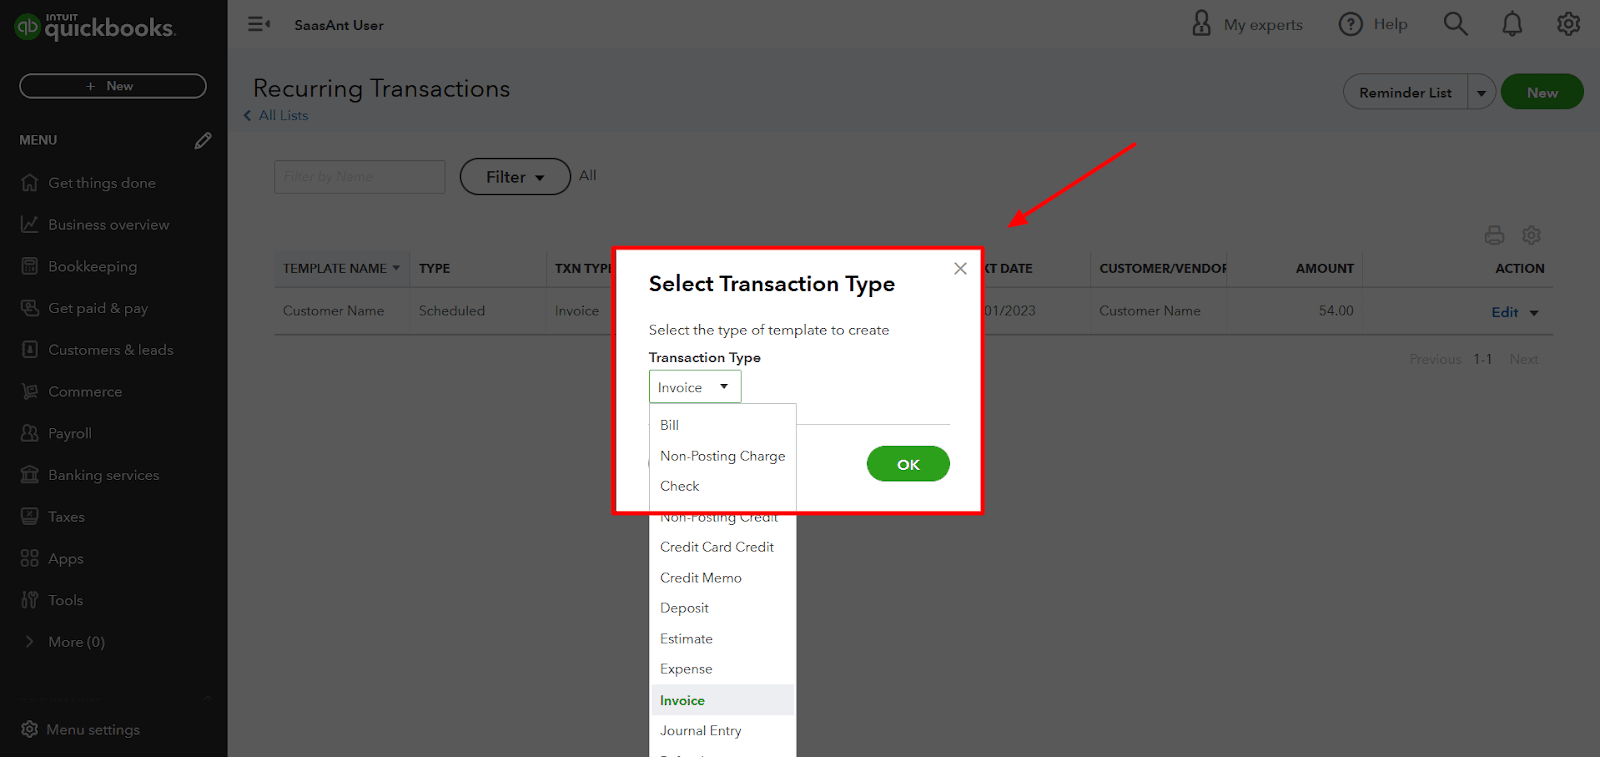
Step 3: Choose the Transaction Type
Select the specific type of transaction you want to automate (such as an Invoice, Bill, Expense, or Journal Entry) from the dropdown menu, then click OK.
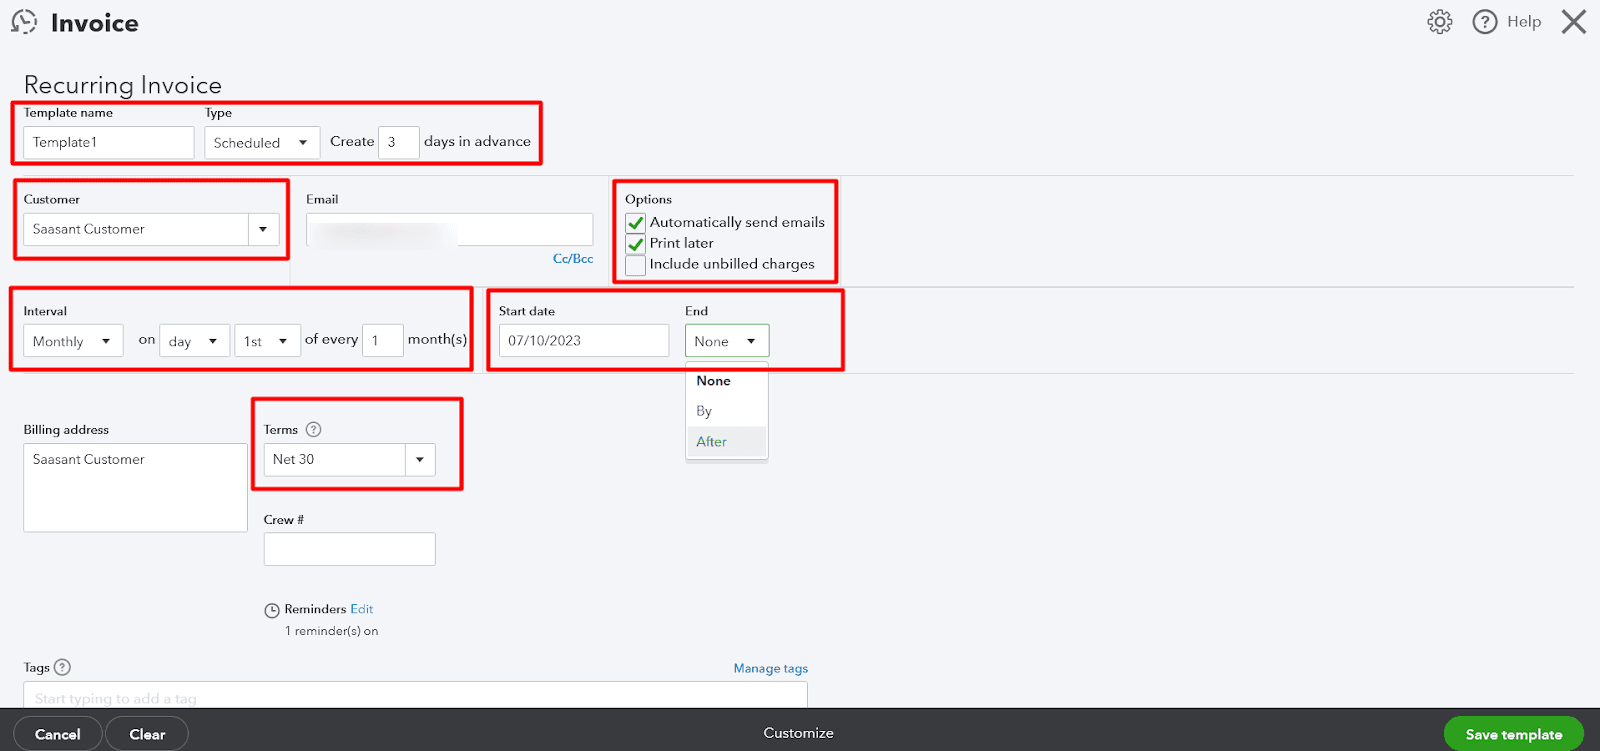
Step 4: Define the Template Schedule and Rules
Fill out the top portion of the form to establish how and when the transaction runs:
Template Name: Enter a unique, descriptive name to help you identify the template in your list.
Type: Select one of three operational formats:
Scheduled: QuickBooks automatically creates and records the transaction on the exact date specified.
Reminder: QuickBooks alerts you on your dashboard to review and manually post the entry.
Unscheduled: Saves the form as a pre-filled template that you can manually open and use at any time.
Days in Advance to Create: (Optional) Enter a number if you want QuickBooks to generate the transaction draft ahead of the official posting date. This helps you preview upcoming cash flow or email invoices early.
Interval: Choose the frequency (Daily, Weekly, Monthly, or Yearly) and the specific calendar days for the recurrence.
Start/End Date: Set a future date for the schedule to begin. For the end parameters, choose to run the template indefinitely, end it on a specific date, or stop it after a set number of occurrences.
Step 5: Fill in the Transaction Details
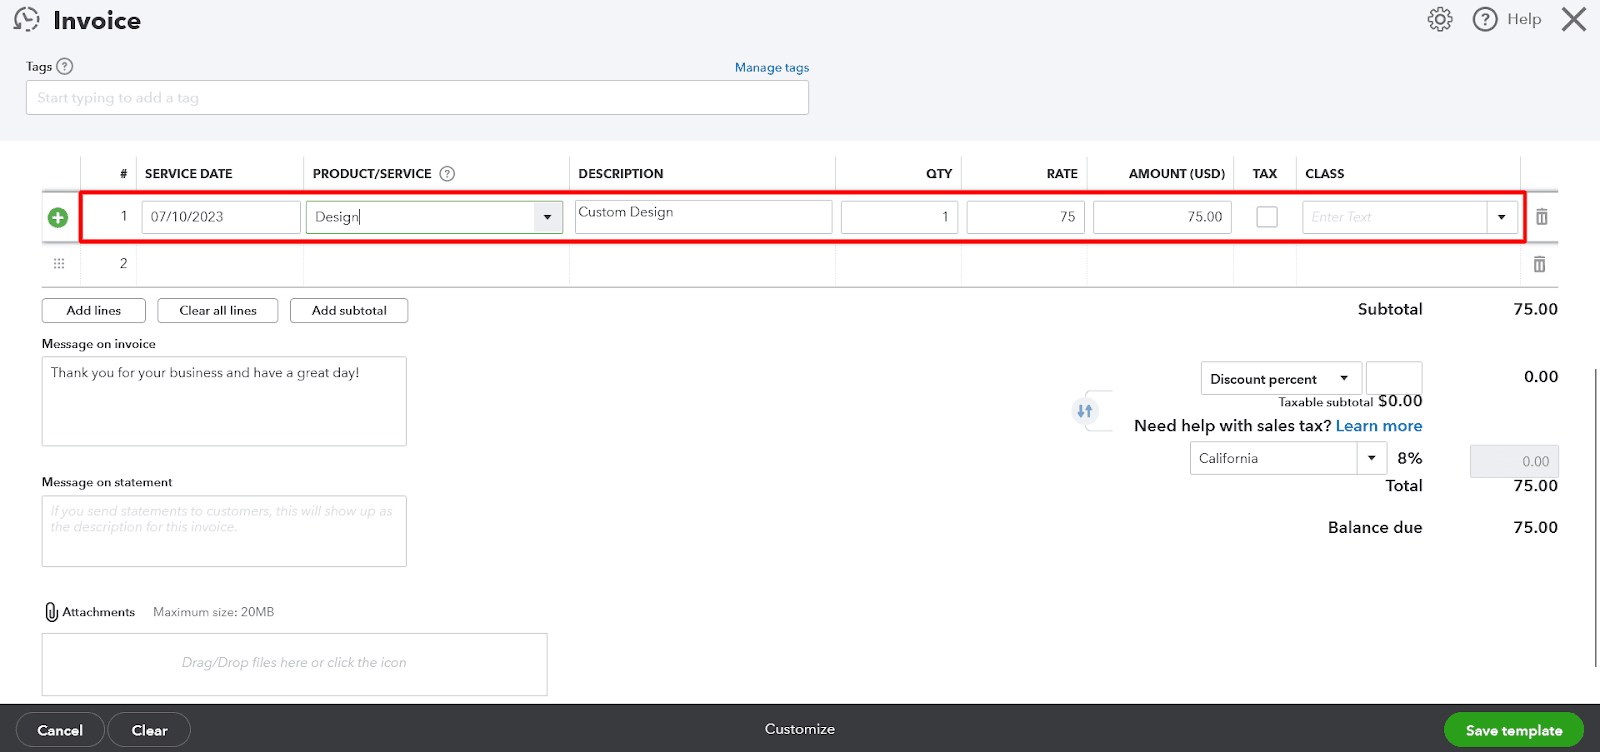
Complete the body of the form by entering the customer or vendor names, categories, products or services, quantities, rates, and tax configurations. These fields mirror the standard, non-recurring version of the form.
Step 6: Save the Template
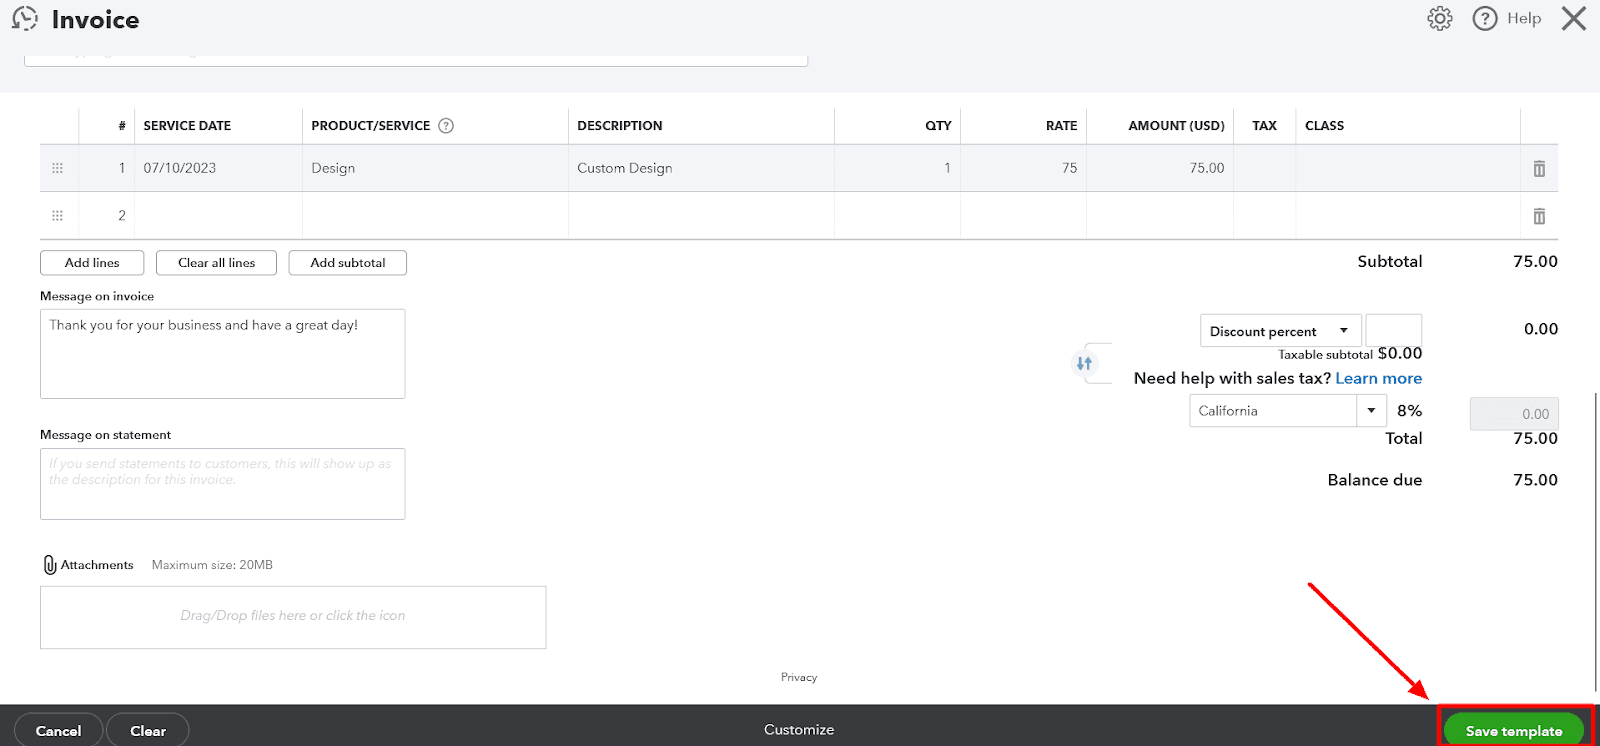
Review the details and click Save template in the bottom-right corner. The automation rule is now active.
Step 7: Managing Existing Templates
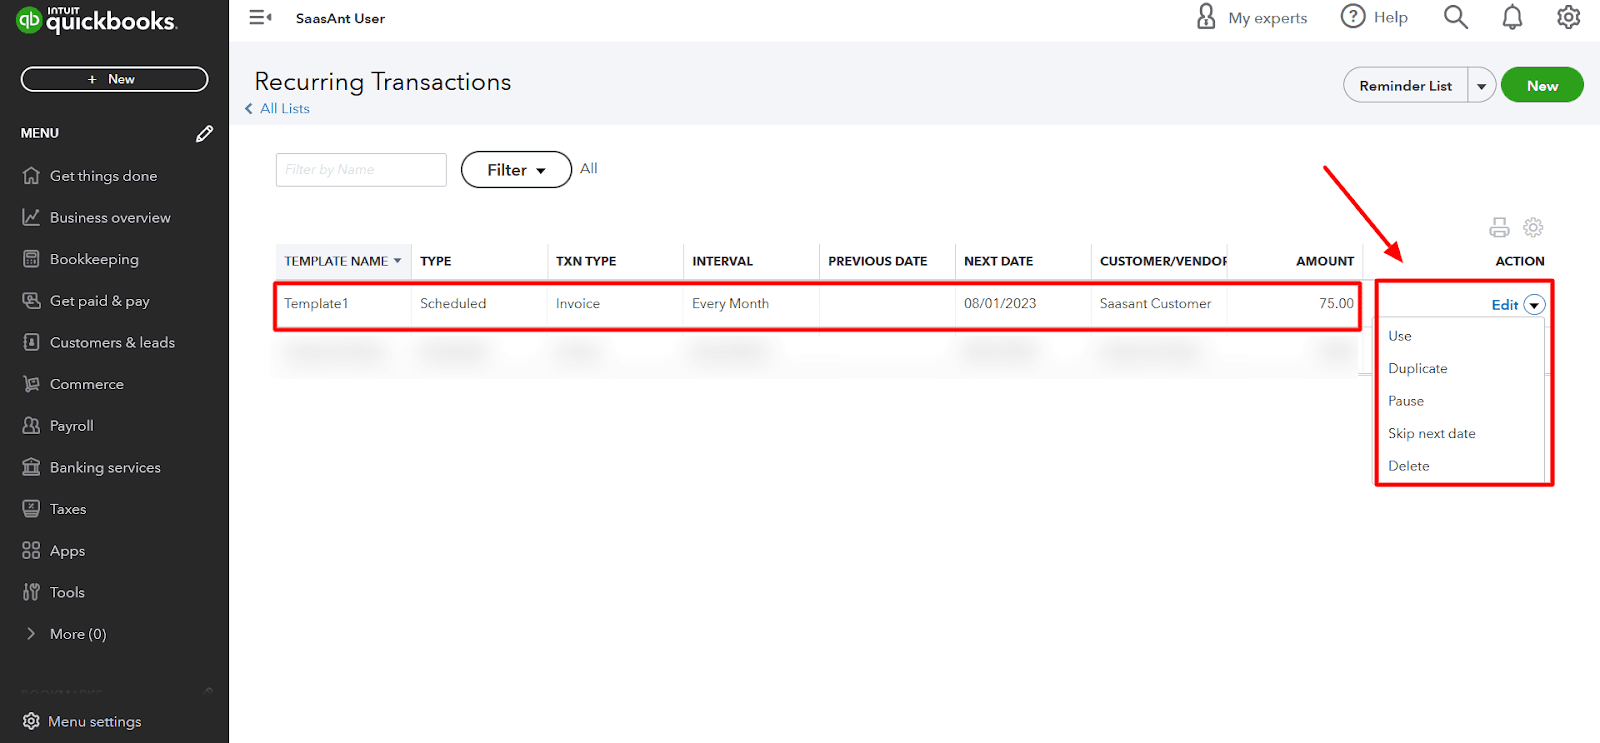
You can view, edit, or pause your schedules at any time by returning to the Recurring Transactions list.
Click the Edit dropdown arrow in the Action column next to any template to modify its line items, duplicate the template for a different client, pause the schedule, or delete it entirely.
Frequently Asked Questions
1. How do I set up recurring invoices?
Go to Gear icon > Recurring Transactions > New. Select Invoice as the transaction type, define your schedule and customer details, and save the template.
2. Can I automatically collect recurring ACH payments?
Yes, but you must use a recurring Sales Receipt template rather than a standard invoice. Ensure you have a signed ACH authorization form from your customer, select Bank Transfer / ACH as the payment method, and enter the customer's account and routing numbers into the template.
3. Can I set up automatic recurring vendor payments?
No. You can create a recurring Bill template to automatically record the liability in your ledger, but standard templates cannot execute the actual cash payment to a vendor. To automate the payment delivery, you must use a dedicated service like QuickBooks Bill Pay.
4. How do I charge a customer’s credit card automatically on a schedule?
Create a recurring Sales Receipt template. Select Credit Card as the payment method and enter the customer's payment details. QuickBooks will securely charge the card each time the template runs.
5. How does Autopay work with recurring invoices?
If you use QuickBooks Payments, you can enable online payment options (Cards or ACH) on a recurring Invoice template. When the customer receives their first automated invoice email, they can check a box to enroll in Autopay using their Intuit ID.
Important Autopay Restrictions: Autopay is unavailable for invoices set to a daily interval. Additionally, if you modify the template's Total Amount, Frequency, Payment Options, Terms, or Customer Name, the system automatically cancels the active Autopay agreement for security, requiring the customer to re-enroll.
6. Which transaction types support recurring templates?
QuickBooks Online allows recurring templates for Invoices, Bills, Expenses, Journal Entries, Checks, Sales Receipts, Credit Memos, Vendor Credits, Estimates, and Deposits.